How to Photograph the Moon? Complete Guide
Taking a good photograph of a moon can be a little tricky. If you don’t expose it properly, then you will end up in a bright circular white spot popularly known as the white blob. So, let us see how to photograph the moon correctly with all the details? I will explain everything about moon photography, which includes the camera, lens, camera settings, moon photography tips, and the post-processing part.
Equipment For Photographing the Moon
You should use the following equipment to capture good moon images.
1. Camera for Moon Photography
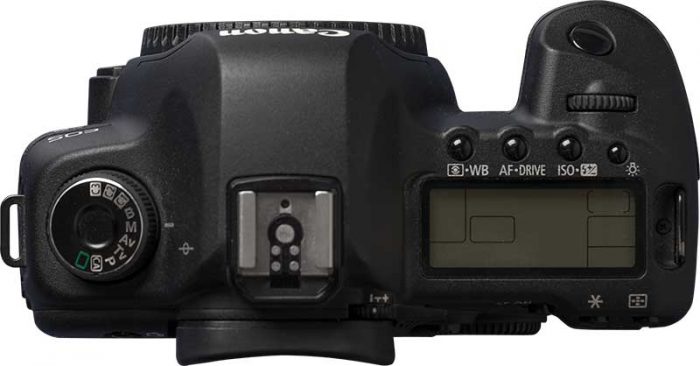
A DSLR or a mirrorless camera would be the best camera for moon photography.
You can still capture moon photos with a point-and-shoot camera or a Digital camera with a good optical zoom. But, it should support the Manual mode of operation.
If you go for the Interchangeable lens camera, then you can go for a full-frame camera or an APS-C camera body. The APS-C camera body has a crop factor advantage. So, you will get more reach with a half-frame camera body (DSLR or mirrorless camera).
You can capture good images with any entry-level DSLR camera like Canon EOS 1500D, Nikon D3500, Canon EOS 1300D, or Nikon D5300.
You can also use High-end full-frame cameras like Canon 1DX Mark II, Nikon D5, and Canon 5d Mark IV. You can even use the mirrorless cameras from Sony, Nikon, or Canon.
If you are using a bridge camera or a point-and-shoot camera, then it should have a good Optical zoom.
2. A Stable Tripod and Tripod Head
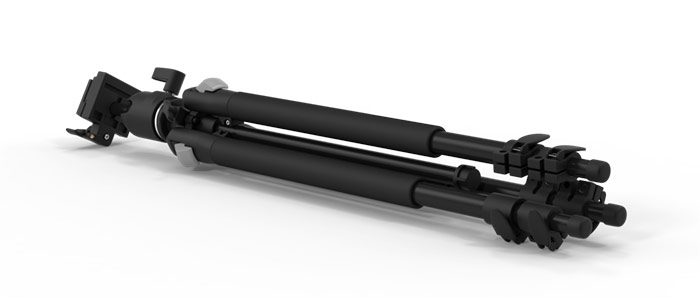
You should use a good tripod that can take your camera and lens weight. You can use any tripod head type. But you should be comfortable with it.
Some lower-end tripod comes with inbuilt heads. You can use them too. A stable tripod is a must since you will be using a telephoto lens to photograph the moon at night.
3. A Remote Trigger (If you have one)
I recommend using a remote trigger to do the shutter press. It can be a wired one or a wireless one.
You don’t have to worry if you don’t have one. You can use the timer mode capture in your camera. Most of the cameras will have 10-second and 2-second timers. Use the 2-second timer mode trigger.
If you are using a DSLR camera, then enable the Mirror Lockup feature in-camera to minimize the camera vibration.
4. Camera Lens to Photograph the Moon

You should at least have a camera lens with a focal length of 200mm to capture good moon photos. So, all telephoto lenses and super-telephoto lenses are good for moon photography. You should photograph the moon with the highest focal length available in your lens kit for maximum details. You can go for a prime lens or a zoom lens.
If you use the 200mm focal length with an APS-C DSLR camera, you will get more reach. For example, with a Canon APS-C DSLR camera, the effective focal length will be 320mm (1.6x crop factor). If you are using a Nikon APS-C DSLR camera, then you will get a 280mm focal length (1.4x crop factor).
You can even use an entry-level telephoto lens like the 55-250mm or 70-300mm to capture moon images.

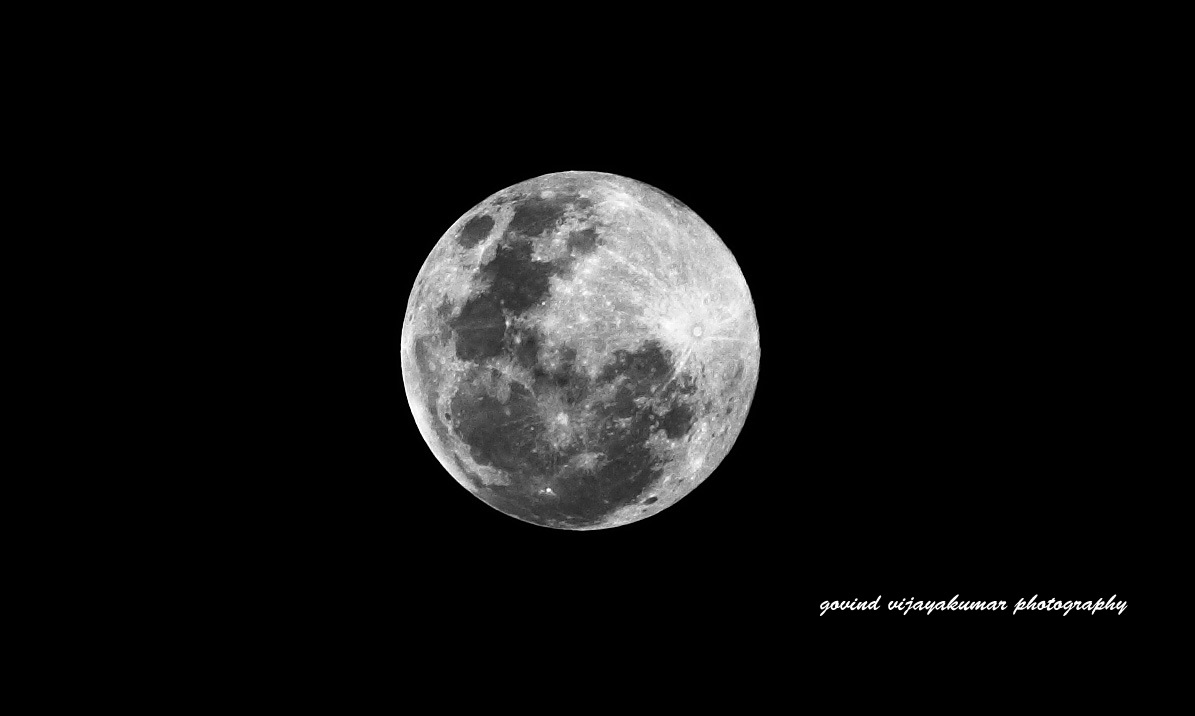
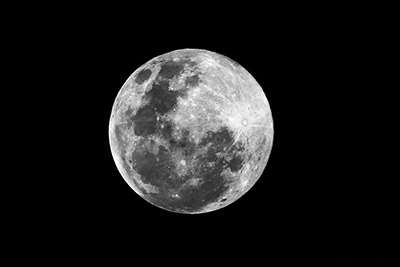
The above image of the moon is photographed using Canon 500D with Canon 70-200f4 L IS USM lens at 200mm focal length with Tungsten White Balance. If you have got an extender, then attach that too to your lens so that you get the maximum focal length.
If you are using a point-and-shoot camera then you must put into full zoom (optical zoom) and then go for the shot.
Camera Settings to Photograph the Moon

The above picture of the moon is taken using Canon EOS 500D with Canon EF 70-200 F4.0 L IS USM lens. So, I got an effective focal length of 320mm. The Orange tinge on this image is due to the Cloudy White Balance settings.
You can use the following camera settings to get a crisp image of the moon.
1. Camera Mode

You must use the Manual mode in the camera.
You can go for Aperture priority mode if the moon fills your frame. It will happen if you use a 500mm lens with a full-frame camera or a 400mm lens with an APS-C DSLR camera.
2. Focus Mode
Auto Focus won’t help you to get the perfect shot. You will have to go for manual focus. The focusing distance should be set to infinity.
If you have a focusing scale on your lens, then rotate the focusing ring until it shows infinity. Otherwise, turn it entirely to the right and have a look through the viewfinder to make sure that the moon is exposed correctly and the crests are visible.
3. Aperture Settings
Use an aperture value of f/11 in Manual mode/ Aperture mode. The use of f/11 aperture is used based on Looney 11 rule for lunar photography.
4. ISO
You can use any base ISO value. As a thumb rule set the ISO value to either 100 or 200.
Make sure that you are not using Auto ISO mode.
5. Shutter speed
Shutter speed should be the reciprocal of the ISO value, as per the Looney 11 rule.
Suppose, if you are using 200 ISO, then you can set a shutter speed of 1/200.
Moon will be moving all the time. So, don’t go for a shutter speed less than 1/100. You will not get crisp details of the moon with a slower shutter speed.
6. Camera Metering
Use the Spot metering option if you are using Aperture priority mode.
7. Shoot in RAW+JPEG
All DSLR cameras and mirrorless cameras allow you to record images in RAW format. So, you can go for a RAW+JPEG format. Thus, if you have any minor issues like exposure correction or white balance adjustment, you can tweak in the RAW file. Some HDR imaging software allows you to input RAW files for an HDR image. You can use the RAW files in this case for better details.
After photographing the moon with these settings preview the image. If you feel the image is slightly overexposed, then you can increase your shutter speed accordingly and capture it again.
There are no hard and fast rules. You can also try with your creative settings.
When to Photograph the Moon?
The best time to photograph the moon is during the full moon time. You should have a clear night sky to get a good photograph with lots of details.
The sky shouldn’t be a polluted one. So, if you are living in a populated city or town, then you can travel to some remote places for moon photography. Summer is the best time to take moon photos since the sky will not have many clouds.
You can also take a series of moon shots, once in two or three days until it becomes a gorgeous full moon. Then, you can stitch all the images together in Photoshop or any other photo editing software. It will show the different stages of the moon in a single image.
Post-Processing Moon Photos
To get the best images of the moon, I strongly recommend to post-process your moon images.
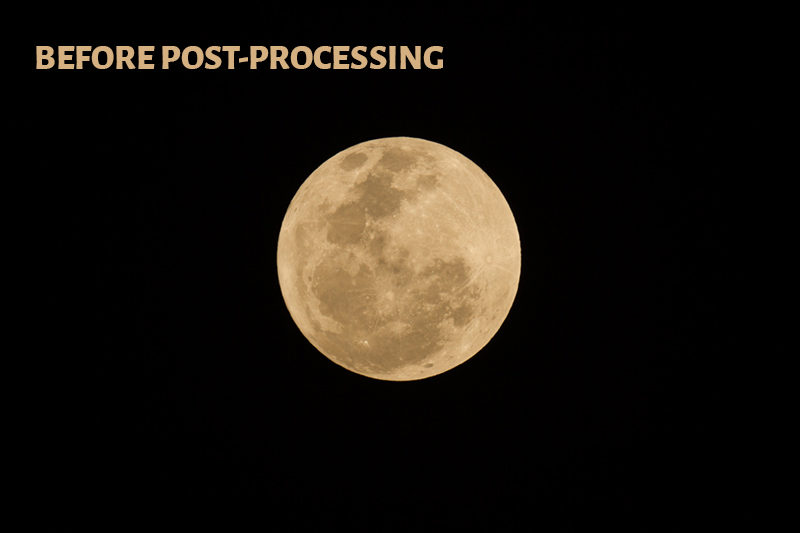
I recommend you to do the following photo edits to your moon photo.
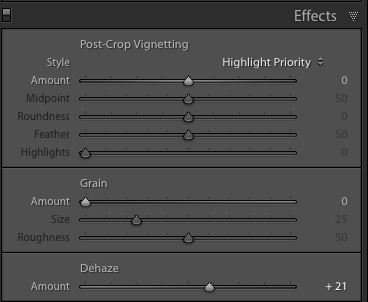
1. If you have captured the image in a polluted environment, then there will be a haze in the picture, which reduces the image clarity. So, Dehaze the image. I have captured the above image from Bellandur, Bangalore, where the sky is not so clean. So, I need to Dehaze the image.
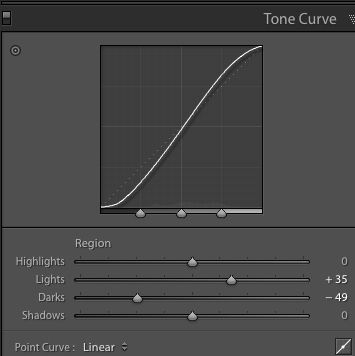
2. Increase the image contrast using the tone curve. You can draw a small S curve to pull down the darks and pull up the highlights a little.
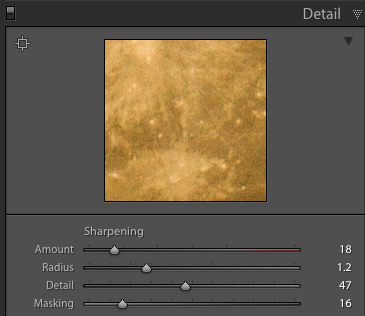
3. You will have to sharpen the image a bit. I have applied the basic sharpening in Lightroom to this image.
You can use any photo editing software like Adobe Lightroom, Photoshop, Skylum Luminar, or any others to do these basic edits.
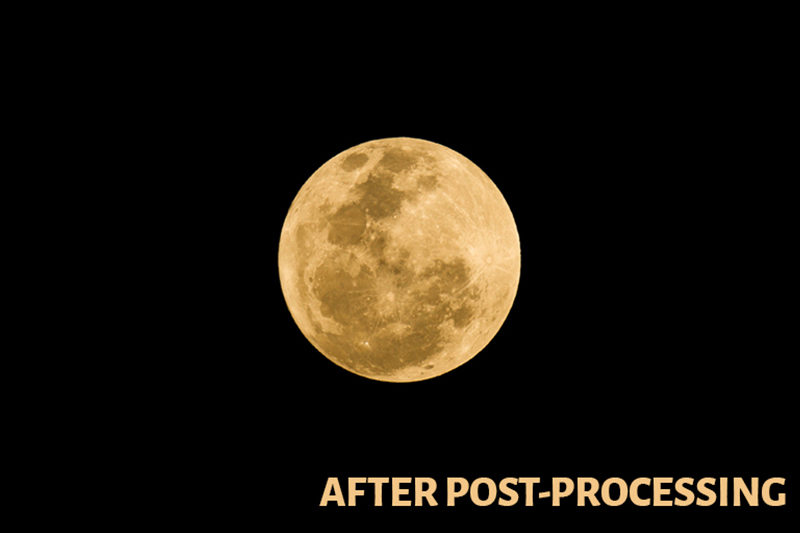
Now, you can see the clear difference in the Before After image above.

Moon Photography Tips
Now, let us have a look at some of the best moon photography tips.
1. Try Monochrome
I would recommend you try taking moon photos in Monochrome mode.
It will bring a better perspective of the crests and the other sections of the moon. There will be a good contrast.
But, you should not do Black and White Photography, if you are photographing any unique instances like a Blood moon or Super Blood moon.
2. Photograph Moon with Foreground
It may sound strange if I tell you to photograph the moon in the foreground. But you can still do it. But, not in a single image. You need to bracket your shots.
Compose your frame in the camera with the moon as one of the elements. Take an image exposing the details of the moon. Capture one more picture with the same composition, revealing the details in the foreground.
Now, you need to blend these two pictures in any photo editing software to get an image with a properly exposed moon and foreground.
Here, you need to choose the lens focal length in such a way that you can compose the image as well as the moon occupying some part of the frame. So, a super-telephoto focal length won’t be useful here.
3. Go for a Moon HDR Image
If you want to get more details of the moon, you should go for an HDR image of the moon.
Some DSLR cameras come with inbuilt HDR mode. Otherwise, you can use the Auto Exposure Bracketing (AEB) feature in your camera.
When you enable AEB, the camera takes 3 or more pictures simultaneously at different exposures, say -1, 0, and 1. You can set the number of shots and the exposure settings in the AEB settings.
Now, use these exposure bracketed images to create an HDR image using any HDR processing tools like Adobe Photoshop or Aurora HDR software. Your camera should be stable while capturing these images since you are using Auto Bracketing. So, use a steady tripod with a remote trigger.
4. Use Lunar Photography Apps to Plan your Shots

There are many lunar photography apps that you can download to your smartphone. Use such apps to plan your moon pictures.
Photographer’s Ephemeris is one such app that I found useful. You can use it to know the position and size of the moon. Thus, you will come to know when you can see the full moon in your location. You can use it on your android phone or an Apple iPhone. They also have a free web version.
Conclusion
Now, you know how to photograph the moon with details. So, start taking beautiful moon pictures by using these tips.
Here, I have explained about taking moon images using an interchangeable camera like a DSLR from my experience.
High-end images of the moon are captured using a telescope and camera setup. Such telescopes are usually used for astrophotography. So, I don’t recommend investing in one unless you want to take up astrophotography.
Thanks for the tips! This worked like a dream for my first ever moon shots with my new 70-200mm lens. 🙂
Thanks Tracy for letting me know that it worked for you 🙂