How to shoot Perfect Waterfalls?
Photographing good waterfall images can be tricky, especially if you are a newbie in photography. You can capture great waterfall images if you know the right camera settings.In this guide, I will share the technique and tips to capture beautiful waterfall images.
When you are going to shoot waterfalls then you should have some idea about the location. Do some research before you go for a photo-shoot. You can search on Google about the location to get more details or you can post in some photography forum. Check whether there are any photos of the place in Google images or on the Internet.
2.Shutter Speed

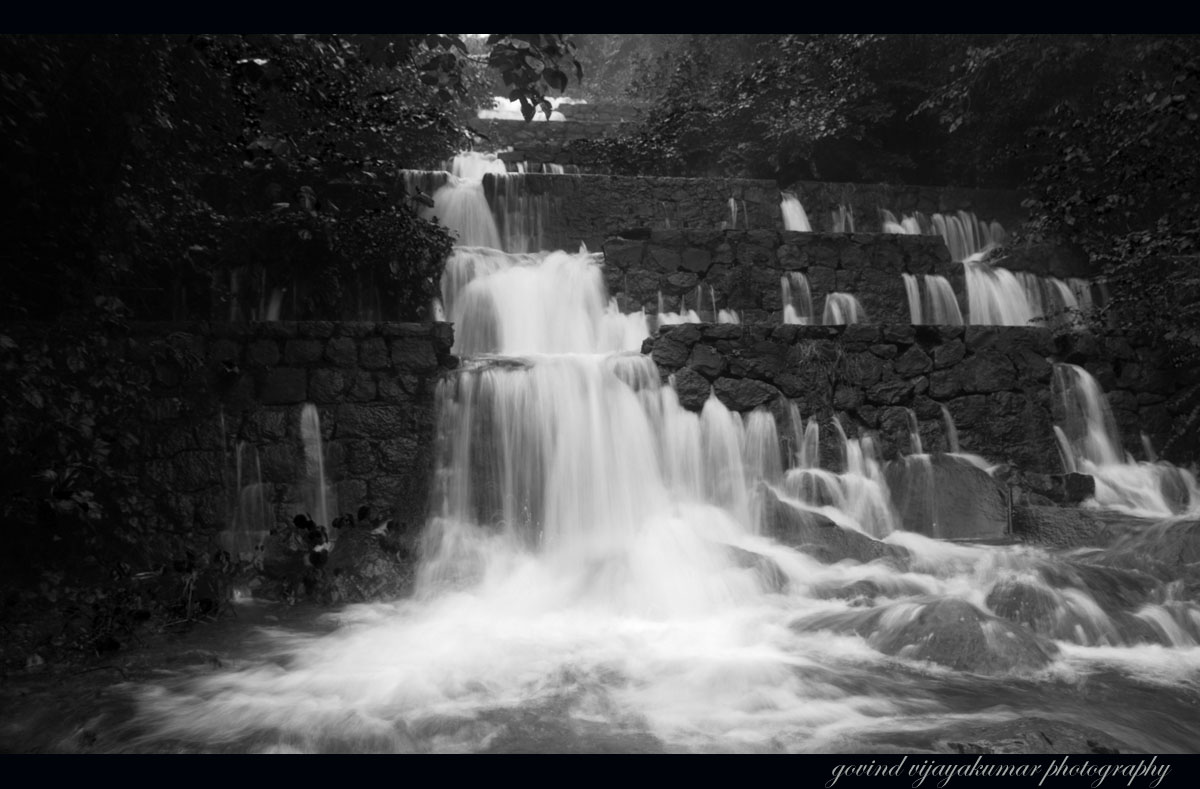
Shutter speed is the most important thing when it comes to shooting waterfalls. In order to create a silky dreamy effect, you will have to go for a shutter speed below 1/6thof a second. Shutter speed selection depends on the speed at which the water is falling. If it is coming at a good speed then you can go for higher shutter speeds in the range of 1/6th of a second to ½ a second.
For slow waterfalls, you can choose a shutter speed below ½ a second. It is better to try out different shutter speeds. This will give you an idea of how changing the value of shutter speeds affect the mood and feel of your pictures.
3. Camera Mode
You can either go for the Shutter priority mode or Aperture priority mode. I would recommend you to go for the shutter priority mode and take different snaps at different shutter speeds. If you are using Aperture priority mode then I would recommend you to use f-numbers in the range of f16 to f22.
4. Low ISO

Go for a low ISO value. Lower values of ISO means lower the noise in the image. Thus, you will be able to capture good grain free pictures. I recommend you to use any of the following ISO values, 50, 100 or 200. Always select the lowest ISO value supported by your SLR camera.
5. Sturdy tripod
A sturdy tripod is a must for “Waterfall Photography”. So, make sure that you carry a good tripod with you. Since you are shooting at lower shutter speeds, you won’t be able to shoot it handheld. Your camera has to be stabilized before going for a shot.
Sometimes, you may have to position your tripod in a wet and slippery surface. So, it should be able to handle these situations. Also, make sure that it is not too heavy as you will have to carry it along with you.
6. Bracket your Shots

Bracketing your shots is a good practice. Use the auto-bracketing feature in your SLR camera. In this way, you will be able to capture three or more images with different exposures. You can select the correctly or creatively exposed image from these. You can also use these images to create an HDR version of the image.
7. Motion Blur
By using slower shutter speeds you can create motion blur in the image. If the amount of incoming light is more then there is a chance that you may end up in a whitewashed image. In such a situation either increase the shutter speed or use an ND filter to cut out the extra light.
8. Use a Polariser
Using a polarizing filter is a good option. The polarizer helps to cut out the reflection from water and also helps in saturating the various colors in the image. Thus, a polarizer can help you in enhancing your shots. Also, make sure that you are using a good decent polarizing filter. Cheap quality ones will affect your final image.
9. Use a Self-timer or Remote Cable Release

We should try to reduce or avoid the camera shake. Since we are using slower shutter speeds or higher f-numbers, even the slightest camera shake can result in image blur. So, the best option is to use a remote cable release to trigger your shot. If you don’t have one, then use self-timer mode available in your camera. Set the self-timer to 5 seconds or 10 seconds.
10. Use a Wide Angle lens
Wide Angle lens is what I recommend to use when you shoot waterfalls. If you don’t have one, then shoot with the lowest available focal length in your lens.
So, take your Camera and try these tips. This will definitely help you to improve as a photographer.