What is ISO in Photography & How to Set It?
Aperture, Shutter speed, and ISO form the three basic building blocks of an image. If you want to capture beautiful pictures, you need to control these 3 parameters according to the available lighting. In this guide, we will see the role of ISO in photography in detail. How ISO impacts an image? I will also share the different ISO values that you can use in different situations. If you are a beginner in photography, you will find this guide very useful.
What does ISO Stand for?
The term ISO stands for “International Organization for Standardization.” Photography started using the ISO since 1974, during the film photography era. Later, it got transferred to digital photography also.
What is ISO in Photography?
In simple words, ISO in photography is the sensitivity of the camera to light. In other words, when you increase the ISO, the image will become brighter. Similarly, when you reduce the ISO, the picture will become darker. It is associated with the sensor of the digital camera.
But you cannot increase the ISO just like that to make the image brighter. Increasing the ISO levels do have some impact on the image. It increases noise in the image, which is undesirable. This noise degrades the overall image quality.
What is ISO in Film Photography?
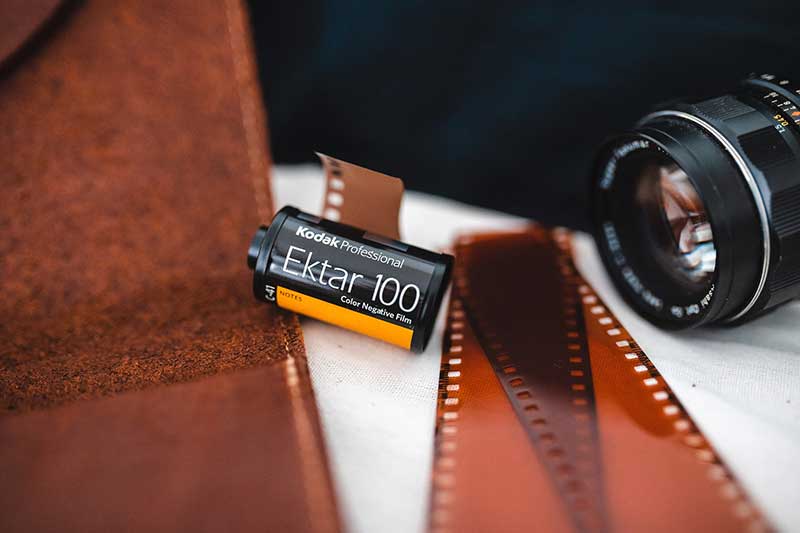
In the case of film cameras, the pictures will be recorded in the film roll. Here, the ISO value is associated with the film roll. So, if you want to change the ISO value in a film camera, you need to change the film roll itself.
How to Set ISO in Camera?
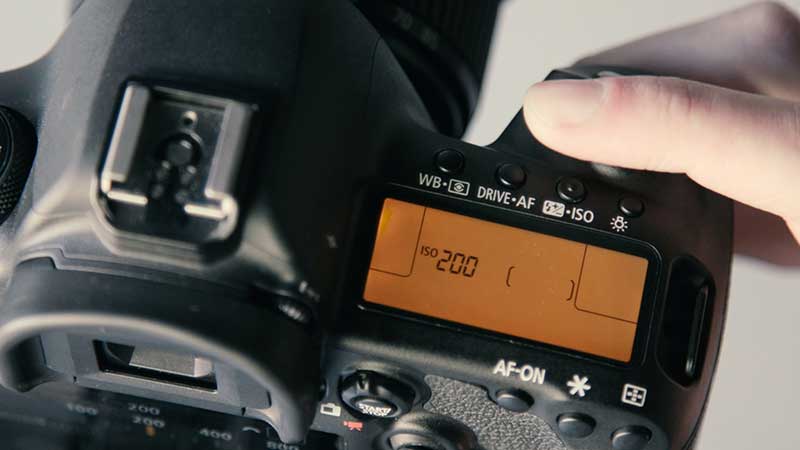
If you are a beginner, you will be interested to know how to set the ISO in a camera. There are different ways to set the ISO.
Most mirrorless/ DSLR cameras will have a dedicated ISO button in the camera which you can use to set the required value.
The other option is to go to the operating mode (Aperture priority, Shutter priority, Manual, etc.) and change the ISO value inside this menu.
You can even configure a custom button for changing the ISO value if needed. It is possible only if your camera model supports it.
Setting the ISO value will be more or less the same in Nikon, Canon, Sony, or other camera models.
What are the Common ISO Values?
Different types of cameras come with different ISO ranges. So, you need to check the camera specification to know the exact ISO values supported by a camera.
The common ISO values supported by most digital cameras are given below.
ISO 100
ISO 200
ISO 400
ISO 800
ISO 1600
ISO 3200
ISO 6400
Some cameras support ISO values as high as 102400. For example, the popular Sony A1 mirrorless camera offers an ISO range of 50 to 102400.
How Does ISO Affect a Photo?
Now, we will have a look at how the ISO affects different aspects of an image like image exposure, noise, and dynamic range.
ISO vs Image Exposure
Now, we will have a look at the impact of ISO on the exposure of the image. ISO, along with shutter speed, and Aperture together form the image exposure.
It is better to explain it with an example. Consider the case where you are photographing a scene with the manual mode in your camera. You have set the ISO value as 400 with an appropriate aperture and shutter speed value to get a properly exposed image.
Now, if you increase the ISO value by 800 and capture an image, keeping other settings the same, you will notice that the image is slightly overexposed. Here, an increase of the ISO by a stop has resulted in an overexposed image. It is because you have increased the camera sensor sensitivity by 1 stop. So, it will capture more light.
If you lower the ISO value from 400 to 200, you are reducing the sensitivity of the camera sensor. So, it will record less light. Thus, the image will be underexposed.
Now you know how changing the ISO values affect the exposure of the image.
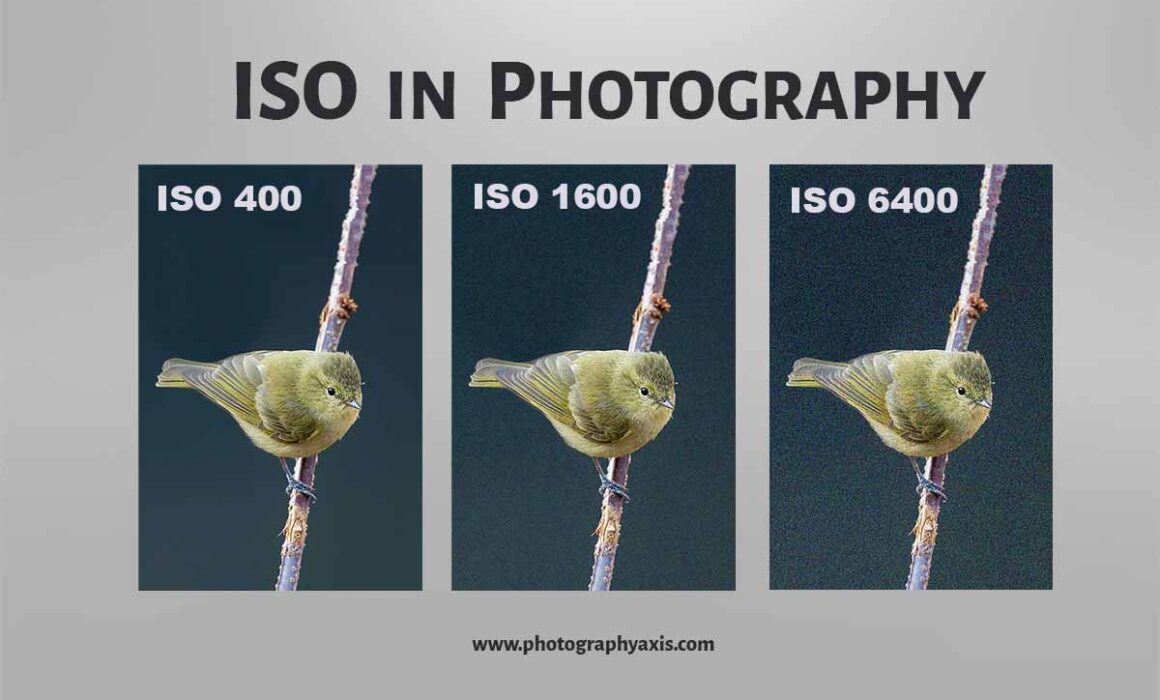
ISO Vs Noise
ISO and Image noise are very closely related. One of the main reasons why photographers are afraid to shoot at high ISOs is image noise.
The higher the ISO value, the higher will be the noise in the image. The noise will be visible in the form of grains.
An important factor that affects the amount of noise is the pixel size of the camera sensor. The larger the size of the pixel, the lesser the noise. The pixel size will be larger in a full-frame camera than in a crop camera.
It is the reason why the noise response of a full-frame camera is better than a crop body camera. When you select the same high ISO level, say 1600, you can notice very less noise in the image captured using the full-frame camera than the crop camera.
Consider reading this article about the noise performance of Canon 1DX Mark II and Canon 7D Mark II cameras. It will give you a better idea about the difference in noise in a full frame and APS-C camera body.
ISO Vs Dynamic Range of the Image
The dynamic range of the image also depends on the ISO value. The dynamic range is the ability of the camera sensor to capture the brightest to darkest tones. The higher the dynamic range better will be the tonal details in the image.
If you use a low ISO value for your image, you can get a more dynamic range in the picture.
If you go for higher ISO values, the dynamic range in the image also reduces.
Example – If your camera comes with 12 stops of dynamic range, you can get this full 12 stops when you capture pictures at low ISO values of 100 or 200. When you increase the ISO values to 6400 or any other higher values, the dynamic range will also get lowered by, say 10 stops. This drop in dynamic range with ISO value is also dependent on the camera model.
Auto Vs Manual ISO
There are two ways by which you can set the ISO in your camera. You can either go for Auto ISO or Manual ISO.
In the case of Manual ISO, you can set the appropriate ISO value according to the available lighting conditions.
Many photographers, especially beginners prefer to go with Auto ISO. When you set ISO as Auto, the camera will set the ISO value automatically based on the exposure, shutter speed, and aperture.
If you choose Auto, there is a chance that the camera may go with high ISO values resulting in a noisy image. So, it is better to set the ISO manually.
High Vs Low ISO – Which is Better?
Always, lower ISO values are better. It is because the lower values help to utilize the full dynamic range of the camera and help to eliminate the noise in the image.
But it is not practical to shoot always with lower ISO values. There are times when you need to go with higher ISO values.
When to Use Low ISO?
There are many situations where you can shoot with low ISO values. I will list some of the popular situations below.
1. Indoor Photoshoot with Artificial Lighting
When you do an indoor photoshoot with artificial lighting, you have got full control over the light falling on the subject. So, you don’t have to shoot at higher ISOs.
You can fine-tune the amount of light from your flash or strobes to ensure that you get the desired image exposure at lower ISO values of 100 or 200.
2. Outdoor Photoshoot during Daytime
If you are doing an outdoor photoshoot in the daytime, you can use low ISO settings. Here, you will have sufficient natural light coming from the soon. You can make use of it for the shoot.
You will get a properly exposed image with your choice of shutter speed and aperture at low ISO values because of the favorable lighting conditions.
If it is a portrait photoshoot, you can consider using appropriate light modifiers to soften the harsh sunlight falling on the subject.
When to Use High ISO?
Even though it is good to shoot at low ISO, it is not possible in all situations. I will share two situations where you need to go with high ISO values
1. Low Light Conditions
When you do photography at night, you won’t have sufficient light to capture a properly exposed image. In such situations, need to use a high ISO setting.
If you are doing astrophotography, you need to use high ISO values. If you are photographing nocturnal animals or birds, you need to bump up the ISO value.
2. To Freeze Motion
Whenever you want to freeze the movement of a fast-moving subject, you need to use high ISO. It includes photographing racing cars, flying birds, animals running, etc.
For example, when photographing birds in flight, you will be going with a high shutter speed to freeze the bird in the frame. So you will have to go for a high ISO value to get the correct image exposure.
3. Shooting Handheld with a Small Aperture Opening
If you shoot a handheld with a higher f-number (smaller aperture number), you will have to go for a higher ISO value.
It is because a smaller aperture opening demands a slower shutter speed. Slower shutter speeds are difficult to shoot handheld. So, you will have to increase the ISO value, which is essential to get a higher shutter speed.
ISO Chart
ISO chart is the image noise chart that gives you an idea about the amount of noise in an image with a change in ISO values.
You can refer to my in-depth article on the ISO chart to know more about it. Also, don’t forget to download the free ISO chart from this article. You can use it as an ISO cheat sheet.
ISO Settings for Portrait Photography
If you are interested in portrait photography, there will be two situations.
You will be using natural light for photography. In this condition, you may have to shoot at a higher ISO value.
When you capture portraits during the daytime, you can go for ISO values between 100 to 400, depending on the amount of available natural light.
If you are doing portrait photography at night, with only ambient lights, you will have to increase the ISO. You can go for ISO values between 400 to 1600.
If you use an artificial light source like a continuous light or a flash, you can set the ISO to lower values in the range of 200 to 800.
ISO Settings For Wildlife Photography
When it comes to wildlife photography, you will be relying on natural light for photographing wild animals.
When you photograph wildlife during the daytime, you can choose lower ISO values of 100 to 800.
Most of the wildlife actions and sightings happen either early morning or late evening, from my experience. The natural light will be less during this time of the day. So, you need to go for higher ISOs.
Here also, there are two situations. If you are photographing wildlife portraits, I recommend selecting an ISO between 400 to 3200. If you are photographing action, you can go for ISO in the range of 1600 to 6400.
ISO Settings for Landscape Photography
When it comes to landscape photography, you will be doing the photoshoot either during the daytime or the golden hour. When it comes to the golden hour, it can be before sunrise or after sunset.
You will be using a tripod for landscape photography if you are serious about your shots. During the daytime, you can go for the lowest possible ISO value. You can set it to 100 or 200.
When you do landscape photography during golden hours, you will have less natural light. So, you will have to go for a slightly higher ISO. You can set it between 200 and 400.
ISO Settings for Night Photography
When it comes to night photography you will be doing long exposure photography like milky way shots, star trails, or night landscapes.
You will have to use higher ISO settings here. It can be between 1600 to 6400. You can also go beyond 6400 if you can eliminate the noise later in post-production.
Conclusion
Now, you know what is ISO on a camera and how to set ISO for different types of photography and lighting conditions. I have covered only the theoretical part here. If you want to master the ISO settings, go out in the field and make use of these tips to capture beautiful images.
Consider reading this article to know the impact of ISO Invariance on photography.
I’d incessantly want to be update on new blog posts on this website, saved to favorites!
You got a very excellent website, Glad I detected it through yahoo.
I just want to tell you that I’m new to weblog and truly enjoyed your web-site. Likely I’m want to bookmark your website . You certainly come with incredible writings. Thank you for sharing your website.