14 Best Zoo Photography Tips + Camera Gear & Settings
Zoo photography can be a bit challenging when you are doing it for the first time. The zoo is one of the best places to start practicing wildlife photography. It will help you become fast with your camera settings, which is essential for a wildlife photographer.
Unlike wildlife photography, where you capture animals in their actual habitat, here you will be photographing them inside the enclosures. Now, most zoos try to replicate the natural habitat of the animals inside these enclosures. It will help you to create better pictures.
I will share the camera gear details you can use for zoo photography. I will also share the various camera settings and handy tips that will help you to capture beautiful images of the birds and animals in the zoo. Let’s get started.
Camera Gear For Zoo Photography
When you visit a zoo for photography, you need to ensure to have the right kind of camera gear. I will share the camera and lens that you can use for zoo photography.
👉🏻 Camera Body
You can capture pictures of animals and birds from the zoo using a digital camera or a prosumer camera.
But, if you seriously want to make good images, go for a DSLR or a Mirrorless camera. It will help you to capture better images.
👉🏻 Lens
In the zoo, the animals will not be that far. So, you will not need a very long telephoto lens. A medium telephoto lens will be good enough for your shots.
You can use the 70-300mm lens or the 70-200mm lens for zoo photography.
Try to carry multiple lenses like a prime and zoom lens and interchange them according to the situation.
If you are on a budget, you can also use the 55-250mm kit lens. You can use the telephoto focal range of this lens for your captures.
Camera Settings For Zoo Photography

The right camera settings will help you capture the best pictures from the zoo.
You can use the following settings for your shots.
👉🏻 Camera Mode
Whatever camera you use, make sure not to use the Auto mode in the camera.
When you shoot in Auto mode, there is a chance that the inbuilt camera flash may pop up and create unnecessary issues. It can cause disturbance to the animals in the zoo. They can attack you and thereby compromise your safety. So, never shoot in the auto mode of your camera for your own safety.
If your camera supports Aperture mode or Manual mode, you can use any of these modes.
I suggest going with the manual mode on the camera. It will help you learn photography.
👉🏻 Exposure Settings (Aperture, Shutter Speed & ISO)
Zoos generally will not allow the use of a tripod or monopod for shooting.
You need to capture all the images handheld. Use the thumb rule of shutter speed to get a shake-free image. Select a shutter speed that is at least the reciprocal of the focal length of your lens.
For example, If you are using a 200mm lens, the minimum shutter speed must be 1/200.
You can go for the maximum possible aperture supported by your lens. You will be shooting in the daytime. Thus, you will have sufficient light in the scene to get a good capture.
Use lower ISOs to capture a noise-free image. You can go for an ISO between 100 and 800.
You can underexpose or overexpose the image according to the lighting condition.
👉🏻 Metering & White Balance
You can set the camera metering to Evaluative metering if you are a Canon user and Matrix metering if you are a Nikon user.
You can set the white balance to Auto (AWB). The camera will pick the right white balance according to the situation. You can capture the image in RAW format. So, even if there is a white balance issue in the picture, you can easily fix it during the editing stage.
14 Best Zoo Photography Tips
I will share 14 tips that will help you improve your zoo photography.
1. Shoot Wide Open
When you photograph animal portraits in the zoo, try to shoot wide open.
The large aperture will help you get a nice background blur with a shallow depth of field. It will make the animal stand out from the rest of the surroundings. Thus, you can easily bring the viewer’s attention to the animal.
Go for the highest-possible aperture supported by your camera lens. It also helps to shoot at low ISO.
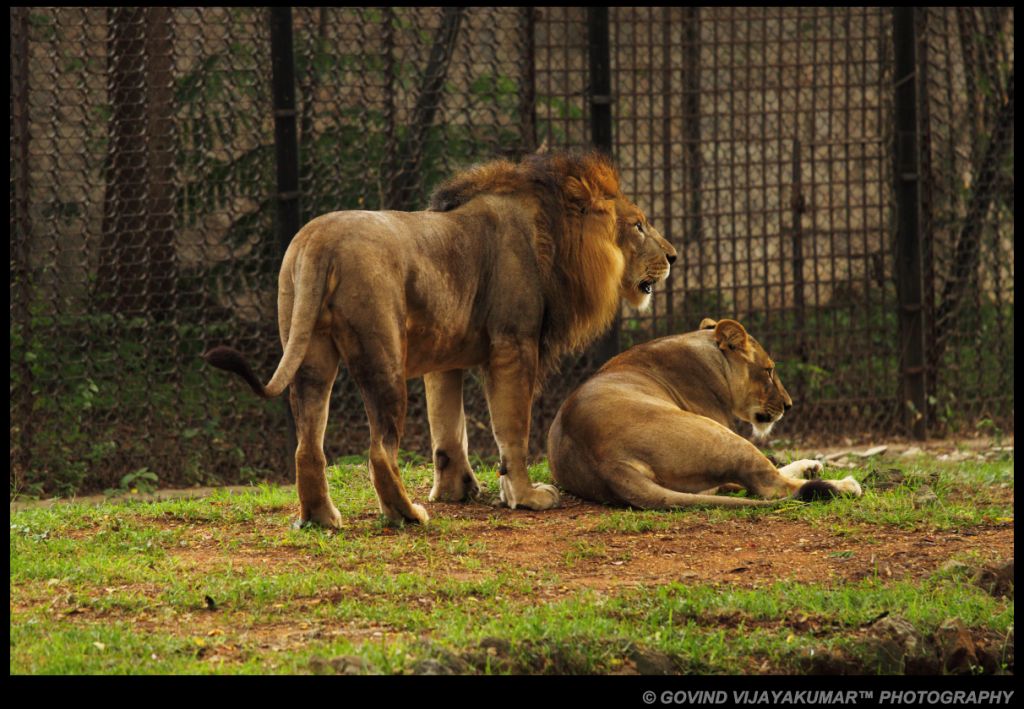
2. Shooting Through Cage Mesh
One of the main challenges in zoo photography is the enclosures/ cages in which animals are kept. These cages will differ in different zoos. In some zoos, animals like deers, bears, and monkeys are kept in cages made of strong wire meshes, and in other places, metal-barred enclosures.
The important thing to note here, as a photographer, is the size of the opening in the mesh. You will have a hard time doing photography if the opening is very small.
When you doo zoo photography, ensure that these grills and wire meshes are not captured in your photographs.
Here, the photography technique is the key thing. First, get the front end of your camera as close to the wire mesh as possible. Next, set maximum aperture opening in your camera. If you do these two things, you can avoid the wire mesh coming in your zoo photograph in most cases.
If you get the wire mesh in the image, you can still remove it using tools like Adobe Photoshop. You can watch this 30 seconds video from Piximperfect to remove the mesh quickly from the image.
3. Shooting Through Glass
You will find snakes inside the glass cages of the zoo. Shooting through glass can be really frustrating. Try to get your camera close to the glass.
If the glass surface has fingerprints or scratches, it will ruin the picture. Carry a cloth to wipe out the fingerprints and dirt on the glass if any.
Reflection or glare from the glass can also ruin your images. If you are using a DSLR / Mirrorless camera, use a lens hood. It will let you hold your camera against the glass and thereby reduce reflections.
You can also use a CPL filter (Circular Polarizer filter) to remove the reflections on the glass.
4. Shoot at Eye Level
Camera positioning can make or break a shot. When you photograph any animal in the zoo, a good rule of thumb is to maintain the camera at the same level as the eyes of the animal or below that.
Never shoot an animal in the zoo from the top. It will not come out great. Always go for the eye level capture.
5. Try Black and White
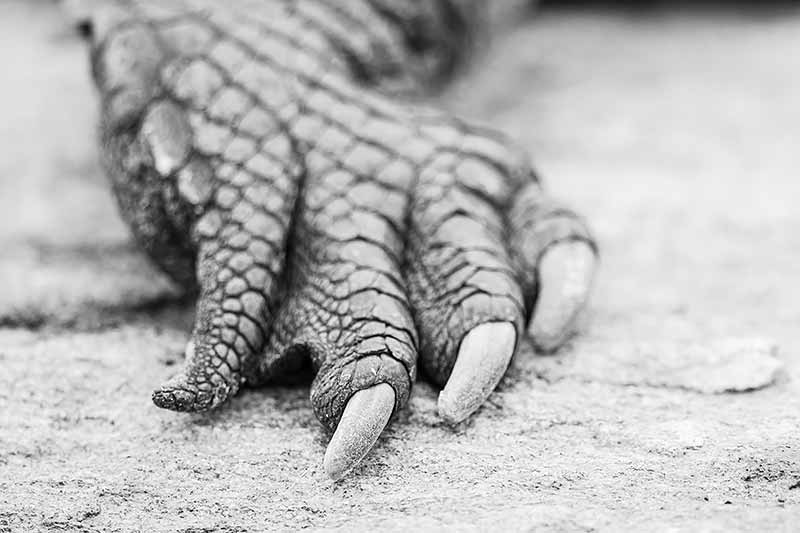
Some images from the zoo are good contenders for black and white. You can use shoot the photo in color and save your image in RAW format.
You can later try converting the picture to monochrome. It will not work for all images. If colors in the scene are a distraction, especially in the background, then the monochrome treatment will work well.
6. Try to Capture Images with Motion Blur
The animals can be resting or on the move. If they are moving around, it is an excellent opportunity to capture them with motion blur.
Here, you need to select a slow shutter speed in such a way that you can bring the motion blur in the image without blurring too much of the subject of interest.
Zoo photography will give you an excellent opportunity to try these captures multiple times until you master them. You will not get the same opportunity when you photograph in the wild. So, make good use of it.
7. Focus on the Eyes
Always try to focus on the eyes when you photograph an animal or bird in the zoo. There is no point in capturing the image if the eyes are not sharp.
After capturing the photo, zoom in the image to 100 percent in your camera’s display and ensure that the eyes are sharp.
Nowadays, Mirrorless/ DSLR cameras come with the eye-focus feature. If your camera supports this feature, use it to focus on the subject’s eye and capture image.
8. Try Capturing Headshot Portraits
The zoo is one place where the animals can come really come close to you. You must use this opportunity to capture good headshot portraits of the animals.
You will not get such opportunities when you go for wildlife photography in their habitat.
Use Fill the frame or other composition techniques to frame your headshot portrait shots.
9. Try to Get a Nice Background
The background is equally important as the subject in any photograph. You must also consider the background of the animal before photographing them.
Try photographing the same subject from multiple angles. The change in angle of view will have an impact on the background also. So, try to get the best possible background for the subject in the frame.
10. Never Disturb the Animals
You must never make any sounds or actions to draw the attention of the animals in the zoo. You are actually disturbing the animal by doing such things.
If you irritate the animal, then it may even try to attack you. Never put your safety at risk with such actions. Always give respect to the animals and birds in the zoo.
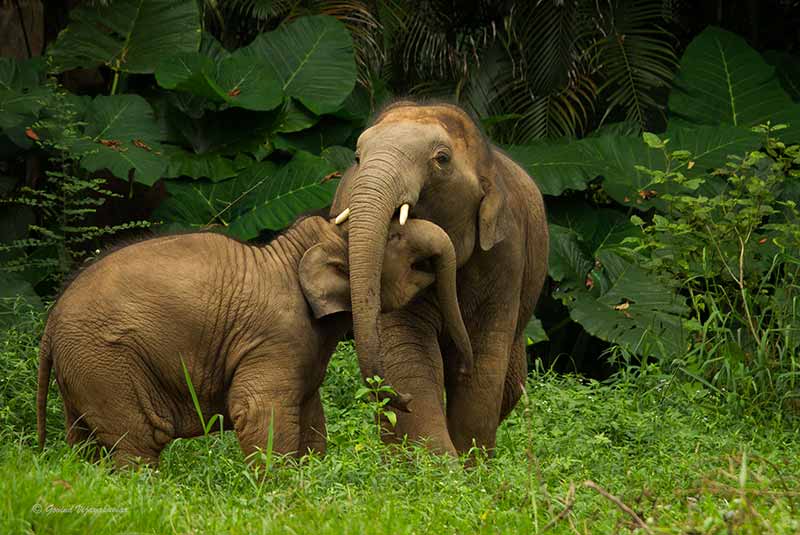
11. Spend some time with the Subject
Like in wildlife photography, in zoo photograpy also, you need to spend some time with the subject. The behavior of animals in the zoo will not be the same as in the wild. But still, you will be able to make some interesting observations that will help you capture better pictures.
The animals in the zoo will be used to the presence of humans. So, they won’t be camera shy. Spending time with the subject will help you to decide the type of shot you want to capture.
12. Try using Different Composition techniques
You might be photographing animals and birds for the first time when you do zoo photography. It is an excellent opportunity for you to try different photo composition techniques. It will help you to improve as a photographer.
Some of the image compositions that you can try as a beginner include the rule of thirds, use of negative space, and leading lines. You can also try other composition methods.
Your end-goal is to capture a pleasing image for the viewer through your composition.
13. Retouch your Zoo images
You will have to do some basic retouching to the zoo pictures. It includes exposure correction, white balance adjustments, sharpening, and denoising.
You can use any photo editing software like Adobe Lightroom or Photoshop to retouch pictures.
You can even use the free editing software that comes with your Canon/ Nikon camera.
14. Try Capturing Low Key Images
One way to remove the distracting backgrounds of the subject is to use the low key photography technique. You may not be able to use it all the time.
If the subject is in light and the background is in shadows, you can underexpose your image by a few stops to get a low keyframe.
Do not use the camera flash to capture such an image. Make use of natural light only.
Conclusion
If you are really interested in zoo photography, check out the zoo near you and plan a visit.
It is better to visit on a day when the crowd is less. It will help you to capture images peacefully. You can use the camera settings and tips that I have shared here to capture better images from zoo.