Lightroom Export Settings for Print – Guide
If you are a photographer who is really interested in printing photos then this article is for you. In my earlier days, I was not bothered much about photo printing since I was just posting photos on my website and social media websites like Facebook, Instagram, and Twitter. Later I started printing my photographs. I tried many photo printing shops both online as well as from photo printing shops near me. I was not at all happy with the print colors. It took me one year to realize that it was all because of the wrong Lightroom export settings for print. As a result of which I had to process photos later with the correct Lightroom export settings for print.
Later I tried printing photos by tweaking various Adobe Lightroom Settings and deriving the best possible photo printing settings for high-quality photo prints. More than 70 percent of photographers use Lightroom for post-processing photos. So, one needs to make sure that you have set the correct print settings in Lightroom. Let us have a look at the various Lightroom export settings for print and how to fine-tune each setting for the best photo print results. I will be sharing all the settings which need to be fine-tuned for high quality photo prints. I am using Adobe Lightroom CC2015 for photo processing. So, I will be showing the Adobe Lightroom export settings for print on CC2015. These settings are more or less the same in all versions. If you are looking for Lightroom to Instagram export settings, read Lightroom export settings for Instagram Guide
Lightroom Export Settings for Print
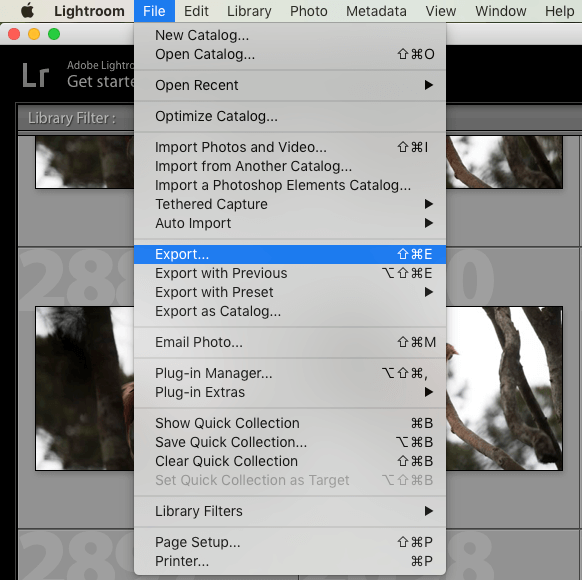
Let us start. Open Adobe Lightroom. Navigate to the “File” menu and click on the “Export” option from the dropdown menu (as shown below)
Now the following window will pop up, “Export One File” (as shown below). We need to make the settings change for photo printing over here. Set the “Export To” option as Hard Drive.
You will have 3 options in this drop-down menu, Email, Hard Drive & CD/DVD. Always set it to Hard Drive for storing the final processed image in the computer. Later you can send the image for printing via email or by burning the image onto a CD or DVD
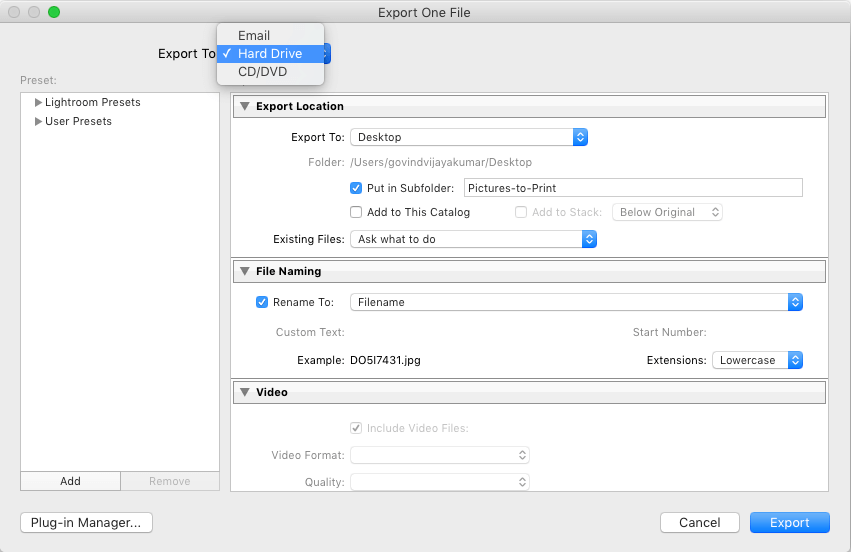
Export Location
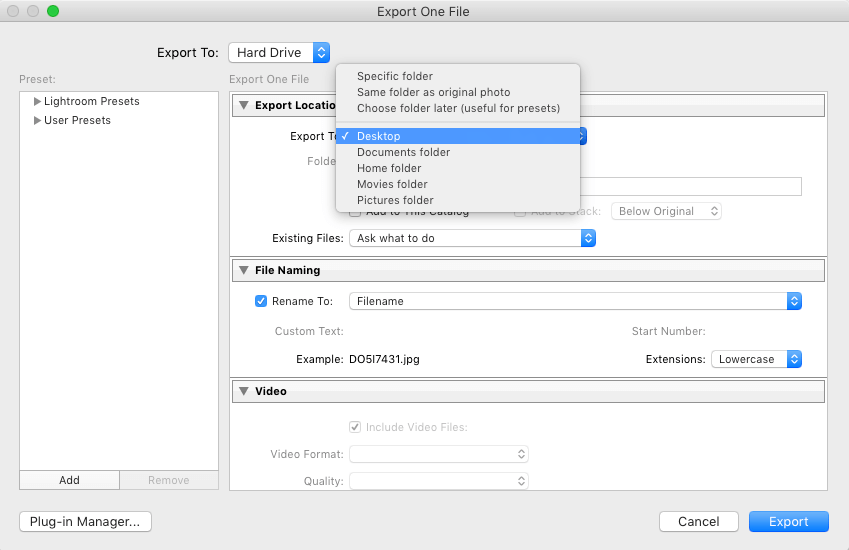
The first section is the “Export Location” section. In this section, you can set the location for exporting the photos on Adobe Lightroom. Here, I have set the Export location to Desktop.
You can also save the photo in a subfolder under the option “Put in Subfolder”. Select the “Put in Subfolder” option and create a subfolder here. I have created the subfolder name as Pictures-to-Print. You can save the process photo separately or you can overwrite the existing file under the option ”Existing Files”. It is better to choose the option for a new name. So, now we are done with the Export Location part.
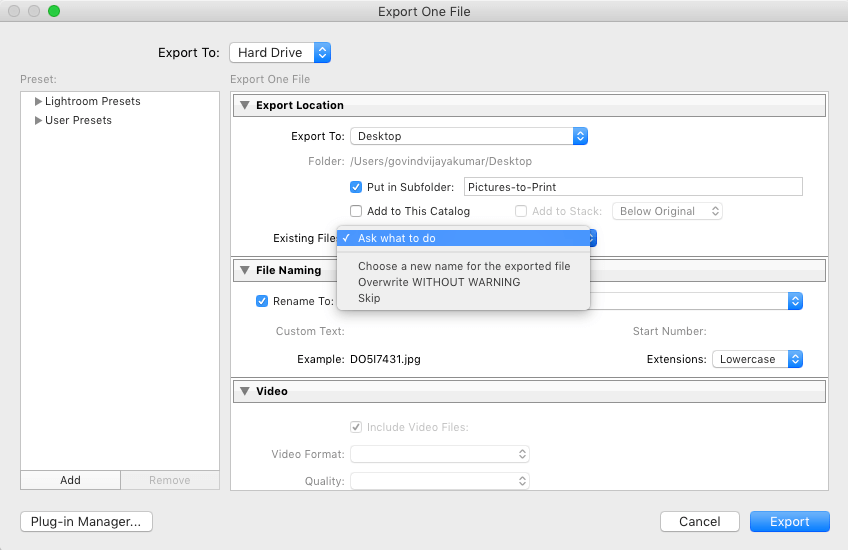
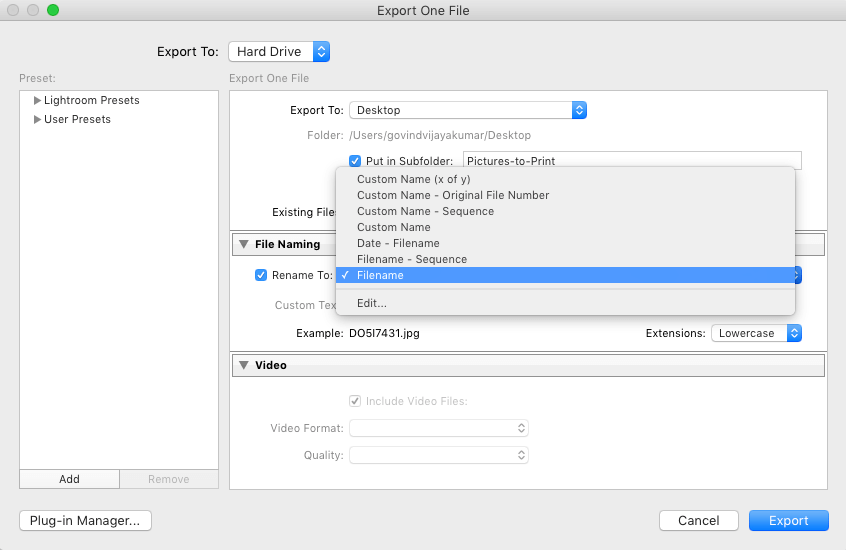
File Naming
Let us move to the next section, “File Naming”. In this section, we can set the filename. We can use “Rename to” to set Custom names according to our choice.
File Settings
Choose the Correct Image Format
Setting the correct Image file format is very critical. This is the most imp0rtant step in Adobe Lightroom export settings for print. You should always cross-check with your printing house for selecting the format for printing.
All photo printing shops accept JPEG file format. Some even accept the TIFF format. Since we are making the settings for print we will not be selecting other image formats. If you are selecting the TIFF format make sure that you are choosing the 16 bits/component as the Bit Depth

Set the Image Quality
This is an important step in getting good-quality prints. Always make sure that the “Quality” slider is set to 100. This ensures that you are sending the best quality of the image for printing.
I used to set the Image Quality to 50 when I am exporting Images for online publishing. So I have done the mistake of exporting the image for print without changing the quality to 100. So, Always make sure that the slider is set to 100 when giving for prints.
Choose the Correct Photo Colour Space
Most photographers, both amateurs, and professionals make a mistake in this setting. You will have 5 settings to choose from this menu. They are sRGB, Adobe RGB, ProPhoto RGB, Display, and Other. Only sRGB and AdobeRGB are generally used for photo printing.
From my experience, it is always better to check once with the photo printing shop on what color profile they support. All commercial photo printing stores support sRGB color space. Only a very few high-end commercial photo printing stores support AdobeRGB. So, select the color space as AdobeRGB only if your printing store supports it.
Photos printed using AdobeRGB as color space will have more rich color when compared to sRGB. If you send the softcopy of print with AdobeRGB as the color space to a printing store that only supports sRGB then it will ruin your entire print.
So, always double-check on the printing side. Select the correct Color space (one matching with the printer settings) for accurate Lightroom export settings for print.
Never tick the “Limit file size to option” whenever you are exporting photos for prints. Setting this option will result in a quality reduction. Leave it unchecked.
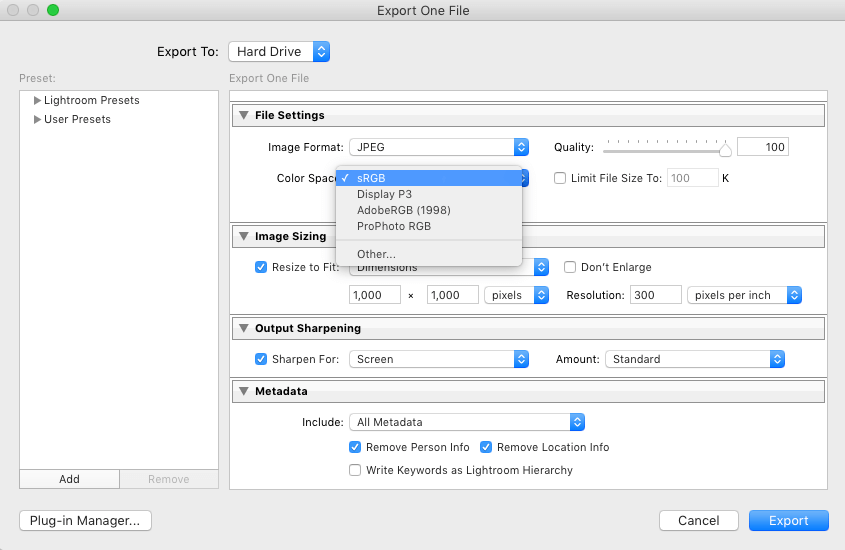
Image sizing
Choose the Correct Aspect Ratio
What is the aspect ratio? It is just the ratio of width and height of the image.
Don’t select the Resize to fit option under the Image sizing menu. Leave it unchecked. It is always better to use the “Aspect” option inside the “Crop and Straighten” module in the “Develop” section of Adobe Lightroom to set the aspect ratio or dimensions (as shown below). If you are printing an image of size 12×8 then the Image Aspect Ratio would be 3:2. You can select this aspect ratio in the settings and crop the image accordingly.

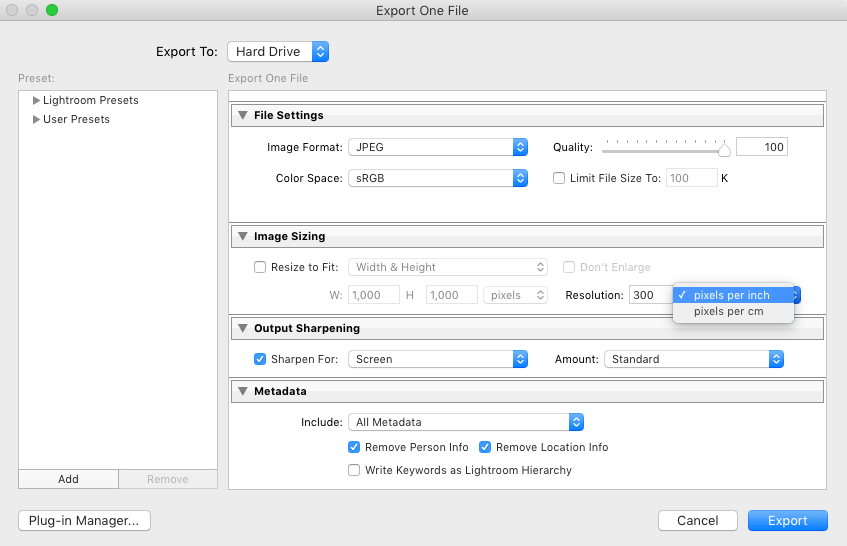
Choose the Correct Image Resolution
The image resolution comes into the picture when you are giving bigger prints. You can set the pixels per inch (ppi) as the unit. You can set the desired resolution in pixels per inch depending on how large you want to print.
As a thumb rule, you can set it at 300ppi for smaller prints (6×4 and 8×5 inches prints). For high-quality prints, choose higher photo printing resolutions. Always make sure that the image resolution in Adobe Lightroom export settings for print matches the print image size.
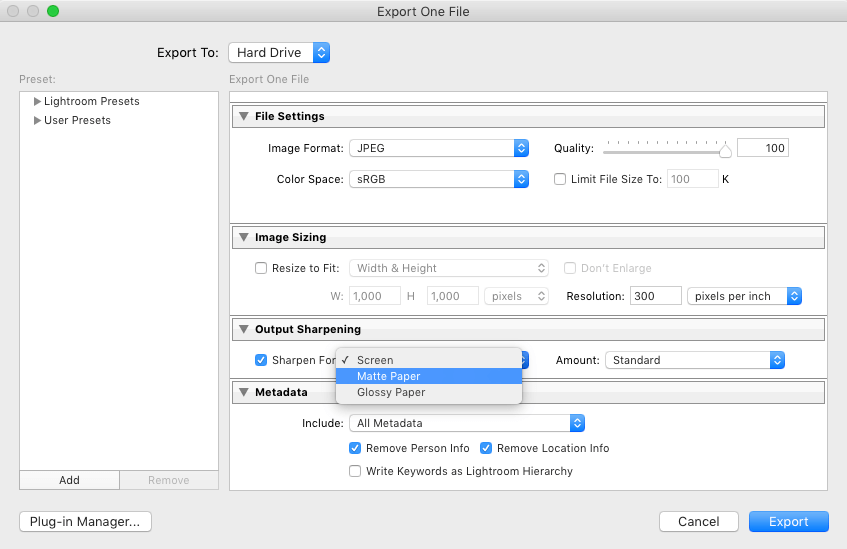
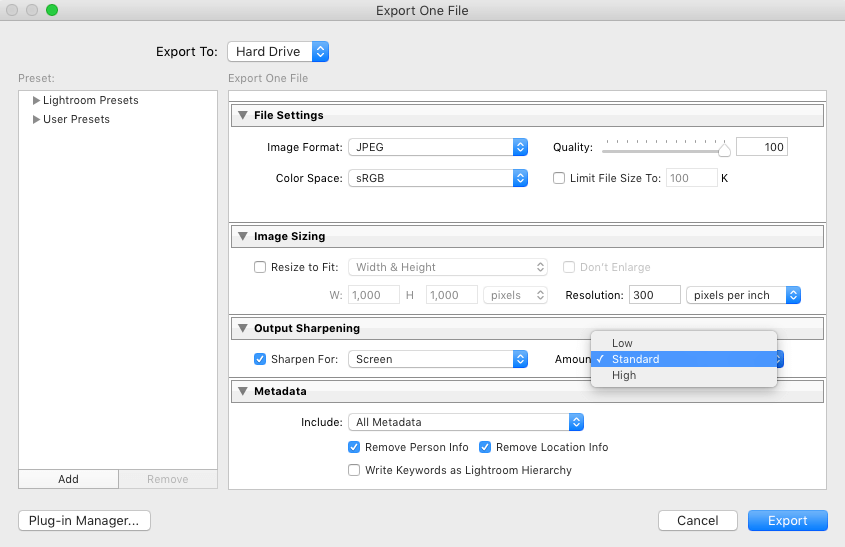
Output Sharpening
Output sharpening will have 3 options in “Sharpen For”. These are Screen, Matte & Glossy paper. We can set photo sharpening according to the photo paper quality in this setting. You will have Standard, Low & High options in the Amount of sharpening section. If you are printing on a Matte paper or Canvas paper then I would recommend you to select the matte paper option, followed by Standard in the amount of sharpening section. If you are printing photos in Glossy paper or Lustre paper then chose Glossy paper and set the amount of sharpening to Standard. You can set the amount of sharpening to “High” if you find that your final image is lacking sharpness.
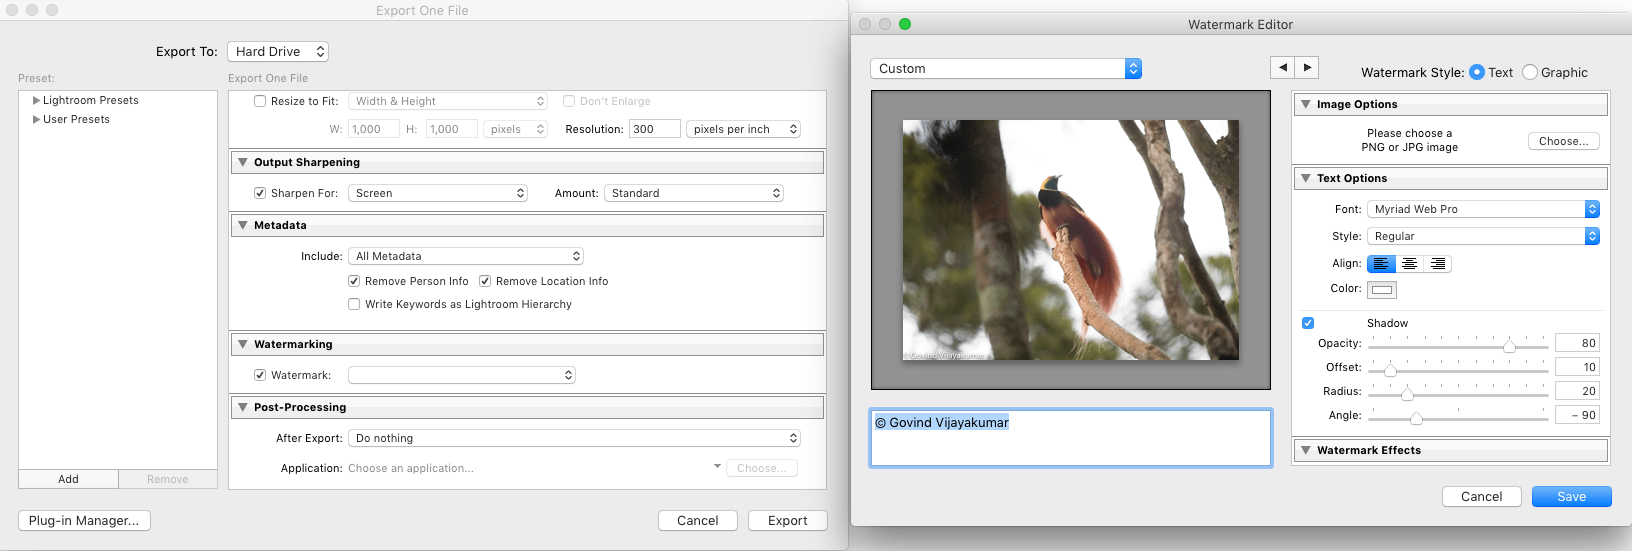
Watermarking
This option allows you to automatically set a watermark on your photos to be printed. You can either choose a simple watermark in the form of text or you can insert a custom watermark design with your name or logo in “PNG” or “JPG” format. You have the option to change the opacity, font size and add effects to your watermark. Some people don’t wish to watermark their photos with software. They wish to put the signature on top of the printed photo. You can leave this section in Lightroom export settings for print if you don’t wish to watermark through the software.
I always recommend storing the final processed image in “TIFF” format. The “TIFF” format is also referred to as the “Digital Negative” in this age of Digital Photography. Later you can convert the TIFF file into JPEG for printing. TIFF is a lossless format whereas JPEG is a lossy format. These are the best Adobe Lightroom export settings for print for printing photos in good quality. Don’t wait anymore, fine-tune your Adobe Lightroom settings for these values for high-quality photo prints.
📖 READ 👉🏻 : Best Lightroom Export Settings For Facebook
Do check out these Articles on 3 Basic Pillars Of Photography
Understanding Aperture, Shutter Speed & ISO
What a life saver you are! Thank you so much for this guide. I am in school right now and we are learning how to do processing of photos and I could not for the life of me figure out how to do a lightroom export on my mac book. I am new to using apple here and got this laptop for art purposes so it is best I learn now! I have this page bookmarked and will be coming back to take some notes.
Thanks for letting me know that this Lightroom photo export setting guide has helped you. You can get quality prints once you have the right print settings in the Lightroom.
Thank you!!!! This was a huge help and super quick adjustment!