
10 Photo Retouching Tips – Take Your Pictures to the Next Level
Taking a great photograph is only part of the creative process. In many cases, the final image can be improved through careful photo retouching and editing.
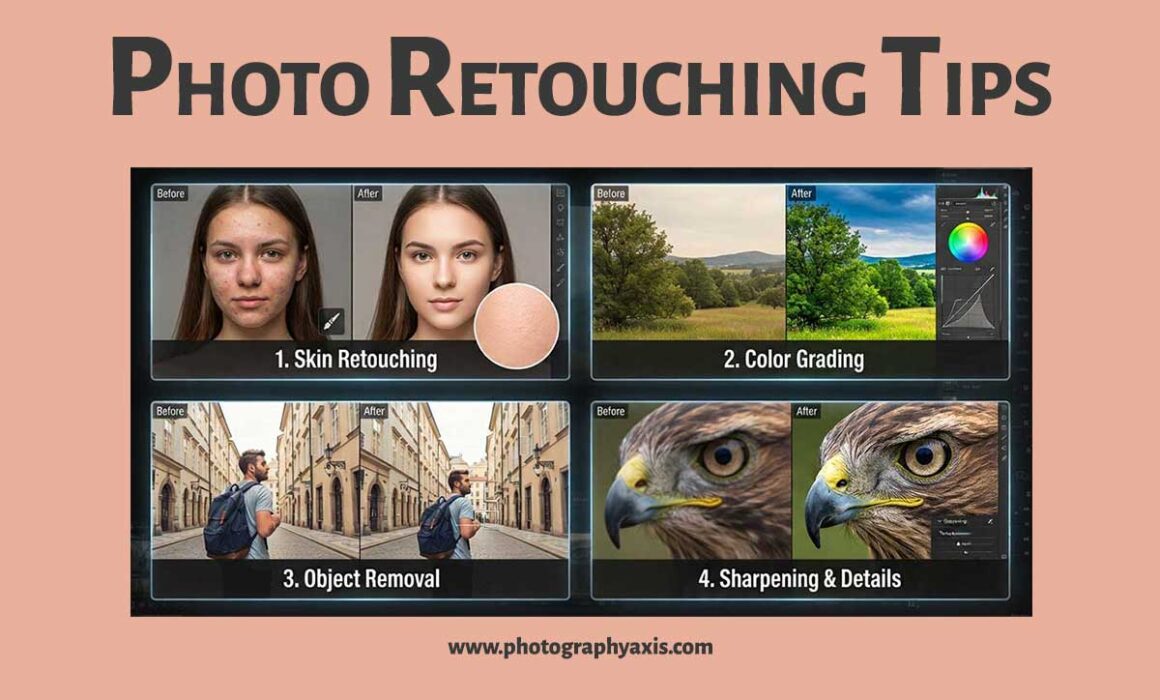
Photo retouching involves making targeted adjustments to an image to correct imperfections, remove distractions, enhance details, improve colors, and create a more polished result. Depending on the photograph, retouching can be as simple as removing a small blemish or as advanced as carefully adjusting skin tones, lighting, textures, and background elements.
The goal isn’t necessarily to make dramatic changes. Good retouching should enhance the strengths of an image while preserving its natural appearance.
Whether you’re working with portraits, landscapes, product photography, travel photographs, or social media images, understanding basic photo retouching techniques can help you create better-looking photographs.
Here are 10 practical photo retouching tips to help take your pictures to the next level.
1. Start With a High-Quality Photograph
The quality of your original photograph has a major impact on the final result.
Although modern photo editing software can fix many problems, it cannot completely repair an image that is severely out of focus, extremely underexposed, or affected by significant motion blur.
Whenever possible, capture photographs at the highest practical quality your camera provides. If your camera supports RAW files, consider shooting in RAW when you plan to do extensive editing. RAW files generally provide greater flexibility for adjusting exposure, white balance, highlights, shadows, and other image properties.
Before beginning the retouching process, carefully examine your original photograph. Look at the composition, focus, lighting, exposure, colors, and overall quality.
Starting with a strong image makes the editing process easier and usually produces a more natural final result.
Even if you don’t have a high-quality photo, you can easily transform your existing image into a higher-quality one using online tools such as a photo enhancer tool to improve its overall quality.
2. Correct Exposure and White Balance First
One of the most important photo editing tips is to fix the basic image characteristics before performing detailed retouching.
Start by checking exposure. If the photograph is too dark or too bright, make a suitable adjustment. Then examine the highlights and shadows to determine whether important details can be recovered.
Next, check the white balance. An incorrect white balance can give an image an unwanted blue, yellow, or orange color cast.
Try to establish natural-looking brightness and color before applying creative effects.
Making these corrections first creates a better foundation for all subsequent retouching work.
3. Remove Unwanted Distractions
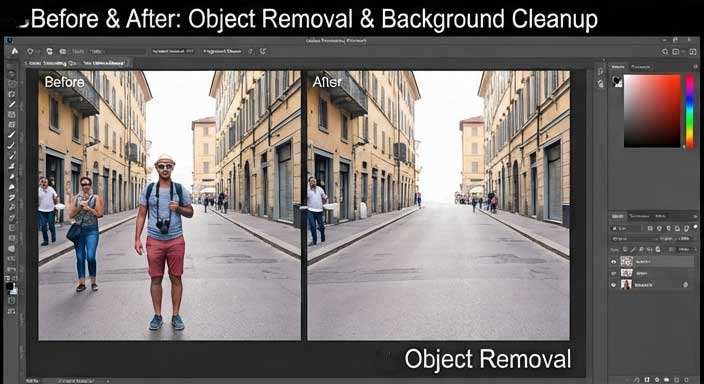
Small distractions can have a surprisingly large effect on a photograph.
Objects such as dust spots, sensor marks, stray branches, wires, signs, or unwanted background elements may draw the viewer’s attention away from the main subject.
Most modern photo editing programs provide tools such as healing brushes, clone tools, and object-removal features that can help clean up these distractions.
When removing an object, carefully examine the surrounding texture and patterns. The corrected area should blend naturally with its surroundings.
However, don’t remove objects simply because they’re present. Some elements contribute to the story of the photograph. Retouching should improve the image rather than erase its character.
4. Retouch Portraits With a Light Touch
Portrait retouching is one of the most common applications of professional photo retouching.
It can be tempting to remove every line, wrinkle, blemish, or variation in skin texture. However, excessive smoothing can make a person’s face look artificial.
Instead, focus on temporary blemishes and distractions while preserving natural skin texture.
Healing and cloning tools can be useful for targeted corrections. Work carefully and regularly zoom out to see how the photograph looks as a whole.
A good portrait retouch should enhance the photograph while maintaining the person’s natural appearance and individuality.
5. Improve Skin Tone and Color Consistency
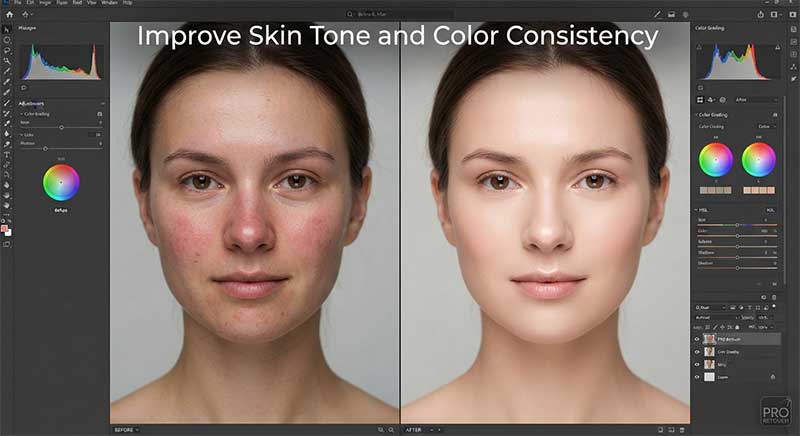
Skin color can vary across a portrait because of lighting, shadows, reflections, and different light sources.
For example, a photograph taken indoors may contain a mixture of natural window light and artificial lighting. This can create noticeable differences in color across the subject’s face or clothing.
Use selective color and exposure adjustments to gently improve consistency.
Avoid excessive saturation or strong color changes. Overly intense adjustments can make skin appear unnatural.
Instead, aim for balanced, believable tones that work with the overall lighting of the photograph.
6. Enhance Eyes and Important Details
An effective retoucher knows where the viewer’s attention should go.
In portrait photography, the eyes are often an important focal point. Small adjustments to brightness, contrast, or sharpness can help them stand out without making them look unnatural.
The same principle applies to other types of photography.
In a landscape, you might subtly enhance a mountain, building, or foreground subject. In product photography, you may want to emphasize textures or details that help communicate the product’s appearance.
Avoid sharpening or brightening every part of an image equally. Selective enhancement usually produces a more natural and visually effective result.
7. Use Dodge and Burn to Add Depth
Dodge and burn are classic photo retouching techniques used to control brightness in specific areas of an image.
Dodging brightens selected areas, while burning darkens them.
These techniques can help emphasize a subject, improve separation between the foreground and background, and create a greater sense of depth.
For example, you might subtly brighten the face of a portrait subject while reducing attention on a distracting background.
The key is to make gradual adjustments. Strong dodge and burn effects can quickly make an image look unnatural.
When used carefully, however, they can provide a refined level of control that global brightness and contrast adjustments cannot achieve.
8. Sharpen Your Photos Carefully
Sharpening can make photographs appear clearer and more detailed, but excessive sharpening can reduce image quality.
Too much sharpening may create halos around objects, emphasize digital noise, and produce an unnatural appearance.
The appropriate amount of sharpening depends on the original photograph and how the final image will be displayed.
An image prepared for a large print may require a different sharpening approach from an image intended for a website or social media platform.
When sharpening, examine the photograph at an appropriate viewing size. Don’t judge the entire result only while zoomed in extremely close.
Remember that sharpening enhances existing detail; it cannot recreate detail that the camera failed to capture.
9. Use Color Grading to Create a Consistent Look
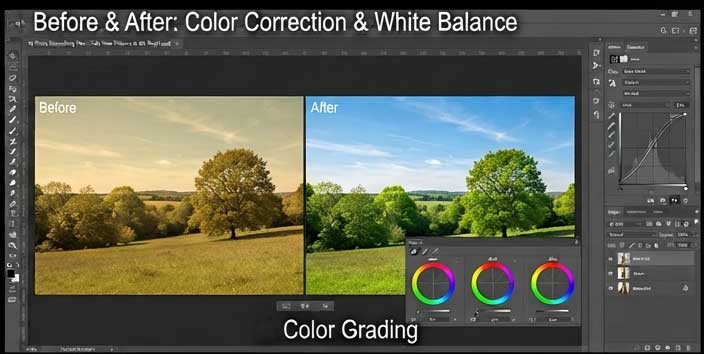
Once you’ve completed technical corrections and detailed retouching, you can experiment with color grading.
Color grading allows you to influence the mood and visual style of a photograph. Warmer tones can create a different atmosphere from cooler tones, while selective color adjustments can help emphasize particular elements.
However, creative color grading should complement the photograph rather than overwhelm it.
If you’re editing several photographs from the same shoot, consistency becomes particularly important. Try to maintain a similar visual treatment across the collection.
Avoid applying strong presets simply because they’re popular. Consider whether the colors actually suit the subject, lighting, and intended mood.
10. Compare the Retouched Image With the Original
One of the most valuable photo retouching tips is also one of the simplest: always compare your edited photograph with the original.
After working on an image for a long time, it becomes easy to lose perspective. An adjustment that initially seemed subtle may eventually become much stronger than intended.
Use your editing software’s before-and-after preview or temporarily disable adjustment layers to compare the two versions.
Ask yourself:
- Does the image still look natural?
- Is the main subject receiving enough attention?
- Have I removed too much texture or detail?
- Are the colors believable?
- Does the retouching actually improve the photograph?
If an adjustment looks excessive, reduce its intensity.
In many cases, the best retouching is subtle enough that viewers notice the photograph rather than the editing.
Bonus Tip: Use a Non-Destructive Editing Workflow
A non-destructive workflow can make photo retouching much easier and safer.
Whenever possible, use adjustment layers, masks, duplicate layers, or other features that allow you to modify an image without permanently changing the original.
This gives you the freedom to experiment with different techniques and return to an earlier version if necessary.
Always keep an untouched copy of your original photograph. This is particularly important when working on professional projects or important personal photographs.
Common Photo Retouching Mistakes to Avoid
Even experienced photographers can sometimes go too far with editing.
One of the most common mistakes is excessive skin smoothing. Removing too much natural texture can make portraits look unrealistic.
Overusing saturation, contrast, clarity, and sharpening can also create an artificial appearance.
Another mistake is editing while viewing the photograph at an extremely high magnification. You may spend considerable time correcting details that viewers will never notice at normal viewing size.
Finally, avoid using exactly the same editing settings for every photograph. Different images require different approaches depending on lighting, subject, composition, and intended use.
Photo Retouching vs. Photo Editing: What’s the Difference?
Although the terms are often used interchangeably, photo editing and photo retouching can refer to different stages of the workflow.
Photo editing generally includes broad adjustments such as exposure, contrast, white balance, cropping, and color correction.
Photo retouching is often more targeted. It can involve removing unwanted elements, correcting specific areas, improving skin texture, enhancing details, or making localized adjustments.
In practice, photographers often use both editing and retouching techniques together to create the final image.
Take Your Photo Retouching to the Next Level
Photo retouching is a combination of technical skill, creativity, and restraint.
The most effective workflow begins with a high-quality original photograph. Correct exposure and white balance first, remove distracting elements, retouch portraits carefully, enhance important details, and use techniques such as dodge and burn to create depth.
Once the technical work is complete, controlled sharpening and color grading can help give the photograph a polished finish.
Most importantly, don’t assume that more editing produces a better photograph. Effective retouching is about making the right changes, not making the most changes.
Whether you’re a beginner learning photo editing or an experienced photographer developing a professional workflow, these photo retouching tips can help you create cleaner, more balanced, and more visually compelling images.
With practice, patience, and careful attention to detail, you can transform a good photograph into a polished final image while still preserving what made the original photograph special.
