How to Sharpen Images in Lightroom
There is no doubt that Adobe Lightroom is one of the best post-processing software out there, especially for photographers. Lightroom’s non-destructive workflow and ease of use make it a popular photo editing tool among photographers. In this article, we will learn how to sharpen images in Lightroom.
Many of us are using Lightroom for post-processing and using some other plugins or software to sharpen the image. Why do you have to do so, when you have a powerful and efficient tool like Adobe Lightroom with you.
It would be because you are not doing it correctly or you don’t know how to sharpen properly in Lightroom.
Don’t worry; I will teach you the proper Image sharpening technique using Lightroom.
How to Sharpen Image in Lightroom?
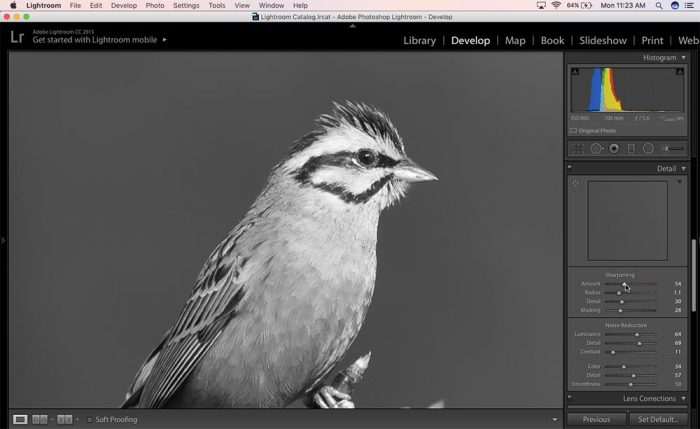
1. Open the Image to sharpen in Lightroom. Go to the Develop Module.
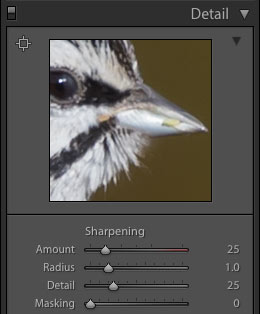
2. The settings for image sharpening is under the “Detail” section in Lightroom Develop module panel. Select this option.
I recommend to remove the noise from the image before starting the sharpening process. Otherwise, the image noise will become more visible due to the sharpening.
3. You can see a square box, which shows the 100% crop of a part of the image. If you want to look at some other section of the picture, you can either move it inside this box or select the small square box with four tentacles on the top left corner of the Detail box.
Click on the main image section where you want to see the 100% view.

I recommend to zoom the actual image on the main panel to 100% before starting the image sharpening process. You can make use of the 1:1 ratio slider in the zoom section.
Slider Adjustments
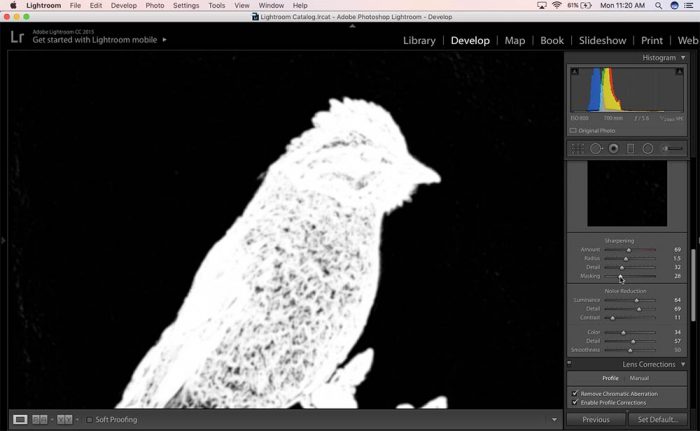
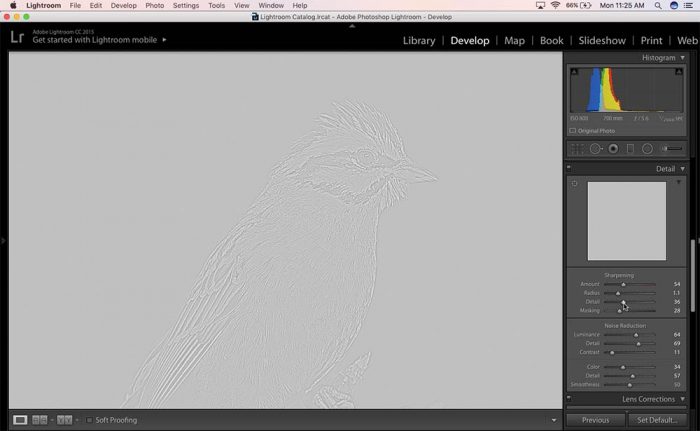
4. The first thing to do is Image Masking. You won’t be interested to sharpen the out of focus part of the image. So, you need to apply a mask so that the sharpening gets affected only on the subject in focus.
In order to do it effectively, you need to hold the Option key if you are using a Windows OS or Alt key if you are a Mac user. Hold Alt/Option key and move the Masking slider to start the masking process.
The parts highlighted in black will be masked, and whites will be the non-masked section. So, whatever sharpening settings you apply after this will get reflected on the white section only.
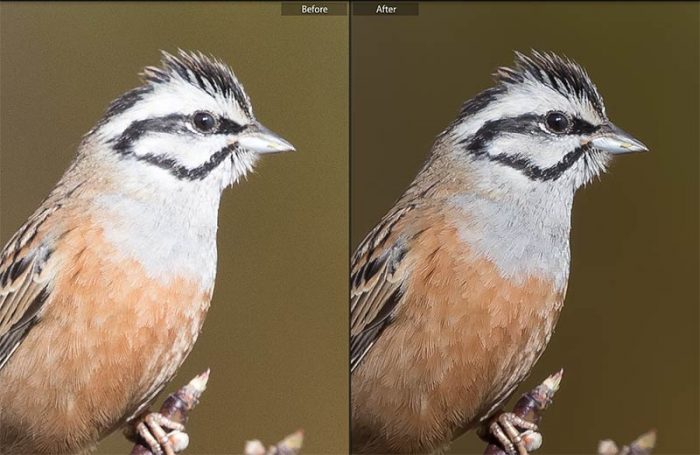
5. Now, we need to set the “Amount” of sharpening to be applied. I generally use a value between 50 and 70 for this setting. Again, it depends on the image. So, move the Amount slider and hold the ALT key to see how much the image is getting sharpened. You can stop pulling the slider after getting a decent sharpening.
6. “Radius” of sharpening is something which you should be careful while setting. If you increase the radius by too much, then you will end up in over sharpening the image. It will be visible in the form of grains.

7. Now, you need to set the “Detail” slider. It brings out the details in the white section of the masked image. You can hold the Option/Alt key to see the effect of increasing this slider value. It will give you an idea of how much to raise.
8. Now, we are done with the sharpening process in Lightroom.
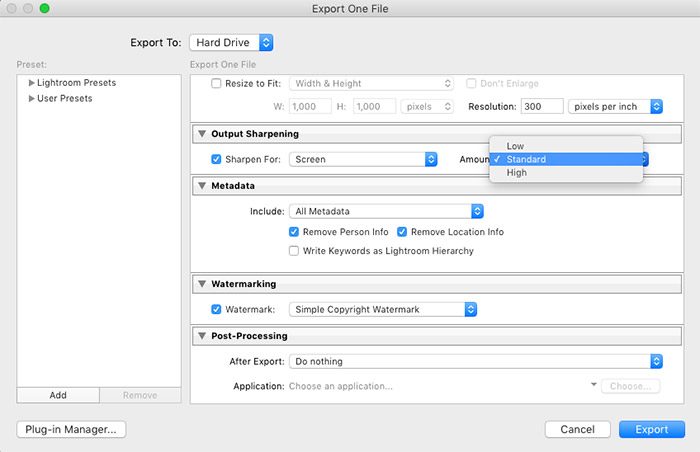
9. When you export this image, you may find another “Output Sharpen settings” option. I recommend to untick this option if you are not planning to change the picture resolution. If you are reducing the image resolution, then better to apply the output sharpening settings while exporting. You can go for the “Standard” option in the Amounts section and “Screen” option in “Sharpen For” section, if the image is to be uploaded in web.
Conclusion
Now, you know how to sharpen an image in Lightroom. So, start using it.
Consider reading, Lightroom Export Settings for Print, to know the right export settings in Lightroom for printing images.
If you are lazy and want to Sharpen and Remove Noise in your image with a single click, then I recommend reading, Topaz AI Clear for Sharpening & Noise Removal.