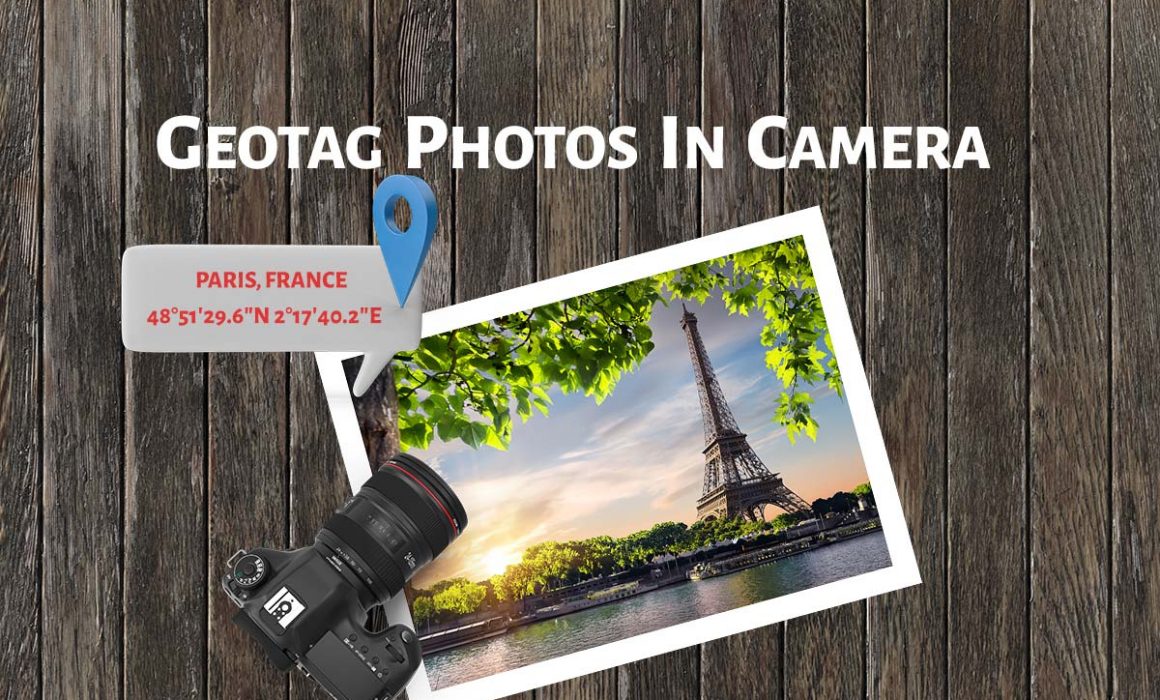
How to GeoTag Photos in Camera
Many of my friends have gone through the situation where they have forgot the location from which they have captured the image. It occurred to me many times when I browse through my old pictures. During the early days of digital photography, there was no method to embed the photo location into the photo.So, if the photographer wants to record the location, he needs to note it down somewhere, which is not a good process to follow.Things have changed a lot now. Higher end cameras and even some mid-range cameras are coming with Geotagging feature, a handy feature for many photographers. Let us see What is Geotagging? How to enable Geotagging in Camera and the various advantages of Geotagging photos.
What is Geotagging in Photography?
Geotagging is the process by which camera records the GPS coordinates of the photo location with the help of an external or an inbuilt GPS. Earlier, High-end cameras come with the option of connecting an external GPS module to the camera.
It allows to capture and embed the GPS coordinates automatically. Now, all the high-end cameras come with inbuilt geotagging by default. The user can disable this feature if you don’t want to use the geotagging feature.
Advantages of Geotagging
There are many advantages of geotagging photos. I will list out some which I found very useful.
1. To Know the Photo Location
This feature is useful to wildlife and nature photographers. So,when you are on a wildlife photography trip, you would be inside some forest looking for wild animals.
So, when you photograph an animal with a geotagging enabled camera, you can easily make out the exact location from where you have filmed the animal.
2. For Blog Writing/Trip Report
When you are writing a trip report, you want to include the location from where you have photographed that particular species.
If you have enabled the geotagging feature in the camera, then you don’t have to recollect the place from your memory. You will get the exact location from the geotagged photo itself.
If you are a blogger who writes travelogues, then you would want this feature in your camera. It will make your writing easy. You can quickly get the photo location with the time stamp.
3. To Track Route
You can make use of the in-camera GPS file to track the route, which you have traveled. You cannot find some ways even in google maps.
So, later if you want to go the same route, then you can extract the GPS file from your camera and use it to get your earlier route of travel.
You can even share it with your friends if they are interested to take the same path.
Cameras with Inbuilt Geotagging Feature
Let us have a look at some of the cameras that come with inbuilt geotagging feature.
Canon 1DX Mark II, Canon 7D Mark II, Canon 6D Mark II, Canon 5d Mark IV are some of the Canon cameras which come with Geotagging feature.
Nikon D5300, Nikon 1 AW1 are some of the Nikon Cameras which comes with inbuilt GPS for geotagging.
In-Camera Geotagging with External GPS
Certain cameras allow you to connect an external recommended GPS module to bring the geotagging capability to the cameras.
For such cameras, you need to invest in an external recommended GPS module, which you can connect it to the dedicated GPS port in the camera directly or through a cable.
Canon EOS 800D and Canon 77D are some of the GPS enabled cameras from Canon that requires an external GPS module
Nikon D5, Nikon D500, and Nikon D5600 are some of the Nikon cameras with this feature.
How to Enable Geotagging in Camera?
I will be showing this on a Canon 7D Mark II camera. So, it will be more or less the same in all Canon Cameras.
1. Switch ON your Camera. Press the Menu function to go to the Menu Set up Section.
2. Navigate to GPS/digital compass settings. Select this option to enter the camera settings for geotagging photos using GPS and inbuilt camera compass.
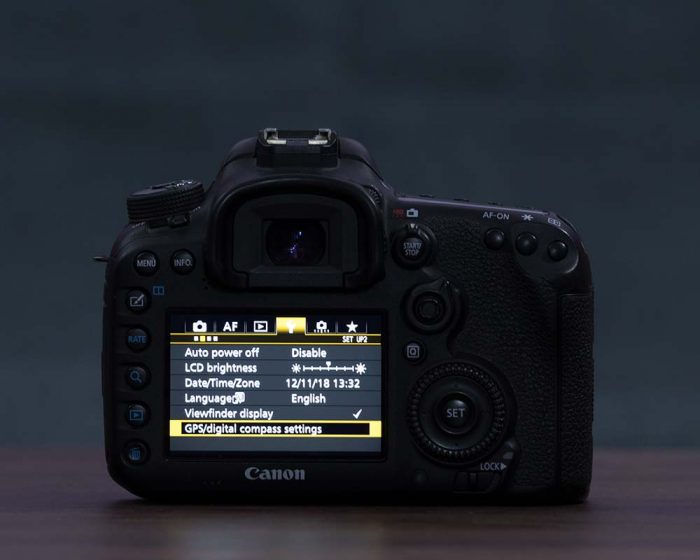
3. Now, you are entering the GPS and Digital compass settings menu. Here, you will have two options inside this menu. One is the GPS Enable/Disable option, and the other one is the “Set up” option for configuring the GPS and compass. You need to set the GPS to Enable to view the “Set up.”
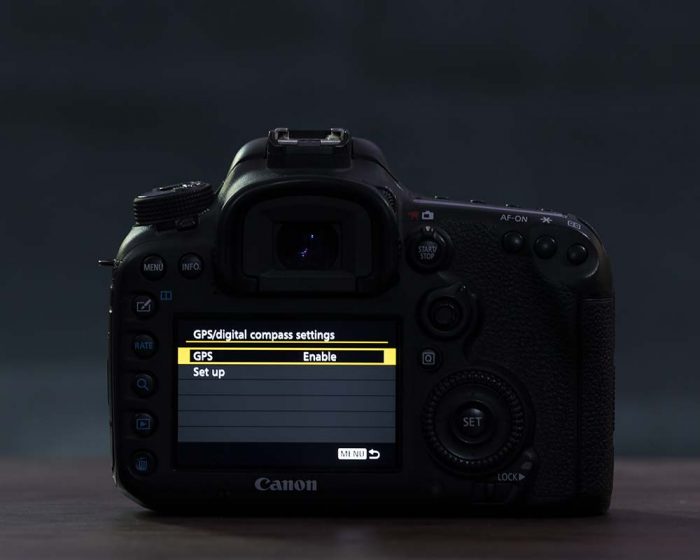
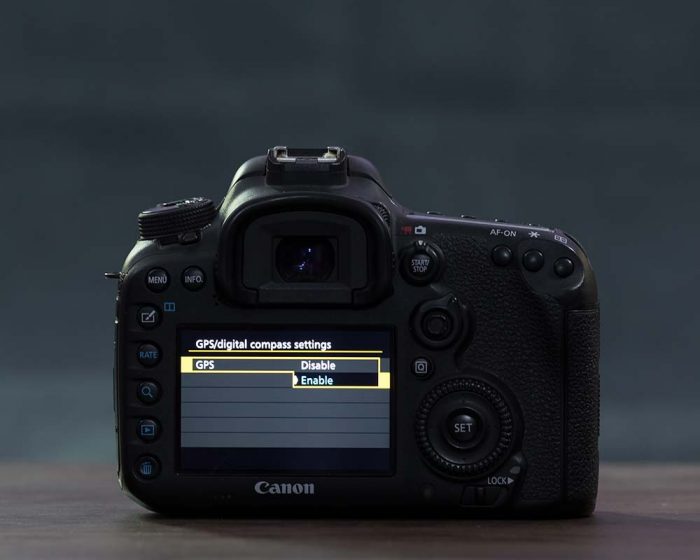
4. Once you select the “Set up” option, you will have the configuration screen with different options. The first option is the Auto time settings. If you want to auto-update your time based on the GPS location, you can enable this feature.
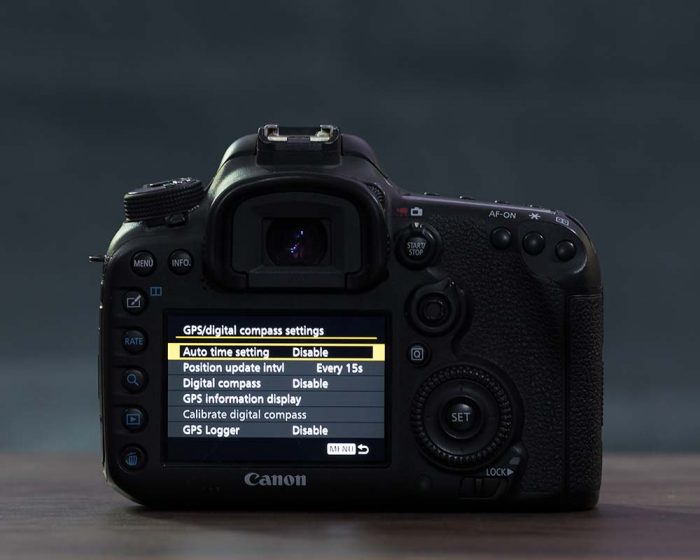
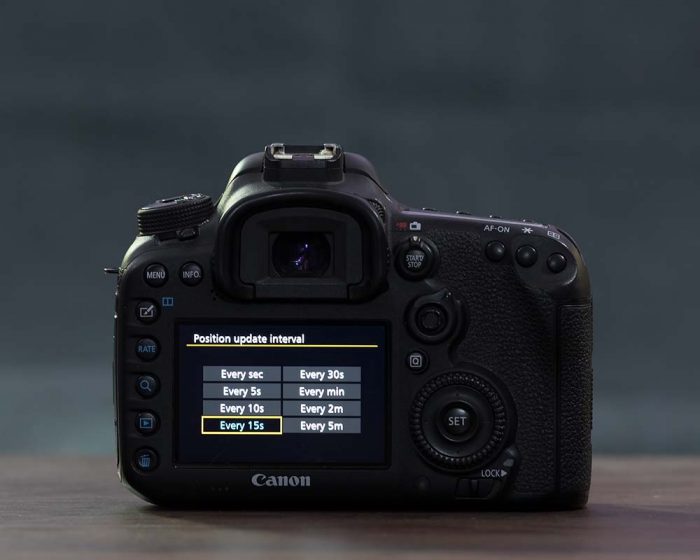
5. You will also have a setting called “Position Update interval.” It is the time duration between which camera will look for GPS information. So, if you set it to 1 second, then the camera will check and update co-ordinates every second. It will have some impact on your battery life. So, I recommend using a higher interval value for better battery life.
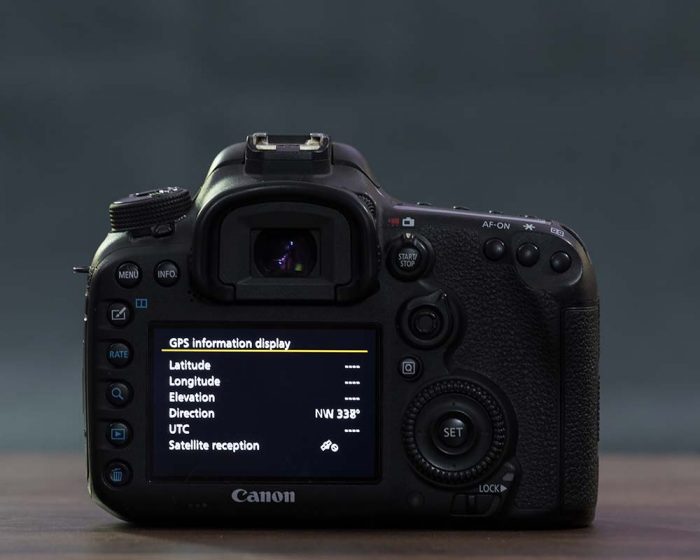
6. Digital compass option will give you the direction where your camera is pointing towards like North, South or Southeast. Once you click the GPS Information display option, you can see all the GPS and compass parameters like Latitude, Longitude, Elevation, Direction, UTC and Satellite reception Status. Except for the Direction which is dependant on the inbuilt compass, the rest of the parameters will be displayed only when the camera gets a connection the Satellite.
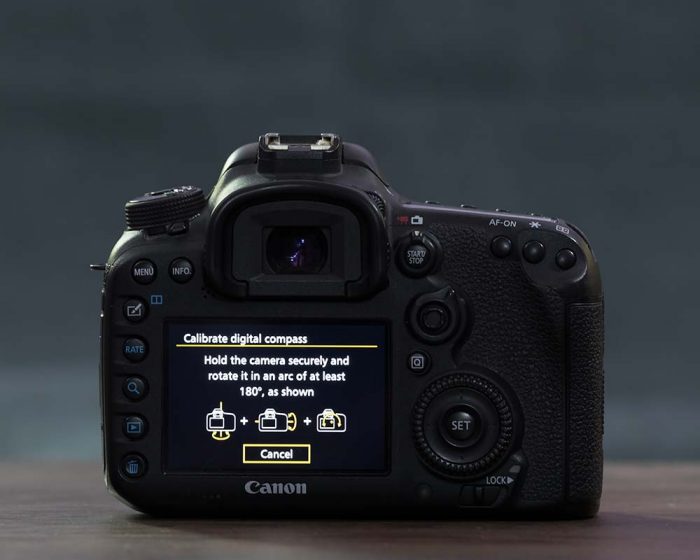
7.Initially, I recommend you to calibrate the digital compass for accurate readings.
8. You can also convert your DSLR camera into a GPS logger by using the “GPS Logger” feature. Here camera will record the GPS coordinates as per the interval timer frequency. It will get stored in the camera. You can also transfer it to your memory card if you want to capture and use this data.
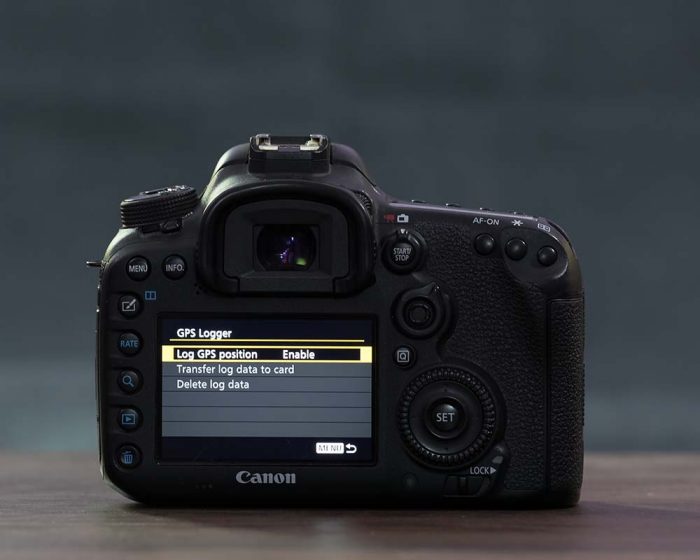
9. From now onwards, whenever you click pictures, GPS coordinates would get embedded on the image.
If you are using Adobe Lightroom for post-processing, then you can view the location of images in Map. Thus, you will get a good visualisation of your travel route with photo shoot locations.
Conclusion
Now, you know What is geotagging all about and its use. So, if you want to buy a camera with a geotagging feature, then I recommend going for an inbuilt GPS module one rather than an external one.
The external one may have communication issues if you have not connected it correctly and that extra protruding module can be distracting at times. So, better avoid it.

