How to Recover Deleted Photos from Memory Card?
Have you accidentally erased some photos from your memory card? If yes, then you would want to recover those deleted photos badly. So, Is it possible or not? Don’t worry, it is possible.
The memory card can be of any type. It can be an SD card, Compact Flash card, XQD card, or a micro SD card.
These are the commonly used storage medium in a Digital camera/ DSLR camera/ Mirrorless camera.
Before getting into SD card recovery, you need to ensure the following things.
1. No Further Data Writing

If you have accidentally deleted photos or if you have formatted the memory card then you shouldn’t do any further writing on to the SD card.
In other words, you must not use this memory card for anymore recording purpose.
The immediate step which you must take should be to recover deleted pictures from SD card. Only after performing the SD card recovery, you should use the same memory card for further recording purpose.
Otherwise, the new image recorded on the memory card may overwrite the accidentally deleted images. It will reduce your chance of image recovery from SD card.
For example, if you are using a 32 GB SD card in your camera and you have used half of the storage space for image recording, which comes to around 16 GB.
Suppose, you have accidentally erased four images from the SD card. But unfortunately, you captured a few more pictures with the same SD card, making use of 75% of the storage space, which comes to around 24 GB.
In this case, when you try to recover the deleted images, then you may or may not be able to recover all the four deleted images. If you are not able to recover any or few of the pictures, then it will be due to the reason that the accidentally deleted images got overwritten by the new image files.
Even though I have mentioned image recovery from SD card as the memory storage medium. It is the same for all other types of photo storage memory.
How to Recover Deleted Photos from Memory card?
There are many photo rescue software applications available online. I will be using Disk Drill from Cleverfiles for the image recovery from the memory card.
It is available for both Mac and Windows Operating System. I will be using the Disk Drill for Mac since I am using my 13” MacBook Air for the recovery.
Both Free version and Paid versions are available for this software. The free version will only allow you to view the recovered files; you cannot save the images. To save images, you need to upgrade it to Pro.
There are two paid versions. Pro version comes for $89 and the Enterprise version at $399. Pro version is for a single user, and the Enterprise version supports up to 10 users.

1. Download and install Disk Drill image rescue software.
2. Let me take some pictures using my camera. I will use my Canon 7D Mark II camera for capturing the images in a 16 GB SanDisk SD Card .
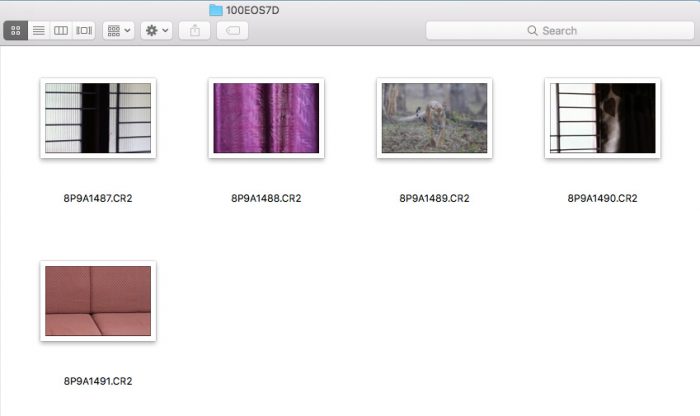
3. I have captured 5 five random pictures in RAW format.
4. Now, I will delete three image files out of these five pictures (in-camera).

Memory Card to Computer for Image Recovery
5. Let me take out the SD card from the camera and connect it to my computer. MacBook Air comes with an inbuilt SD card slot. So, I will insert the SD card into it. If your computer doesn’t come with an SD card reader, then you can use an external memory card reader. If you are using any other types of memory card, then you need to use the respective card readers.
6. Now, I will open the Disk Drill application.
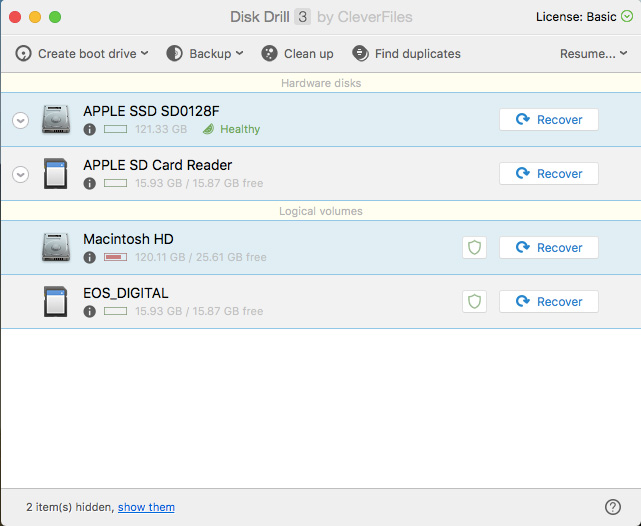
7. Disk Drill will show the different Hard Drives and storage mediums connected to the computer. I will select the “EOS_DIGITAL” Drive option from the Menu (I have formatted the SD card in Canon camera) and Click the “Recover” button.
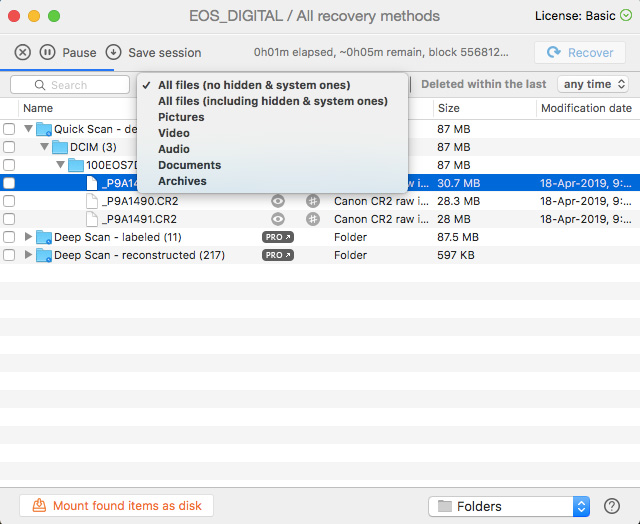
8. Now, you will be taken to the scanning window, where the Disk Drill application will start scanning for files. It gives you the option to set the particular type of files, file size limit and the date of creation for scanning. Setting these parameters will help you to save your scan time. If you don’t wish to set any of these fields, then the software will scan for all possible files which it can recover.
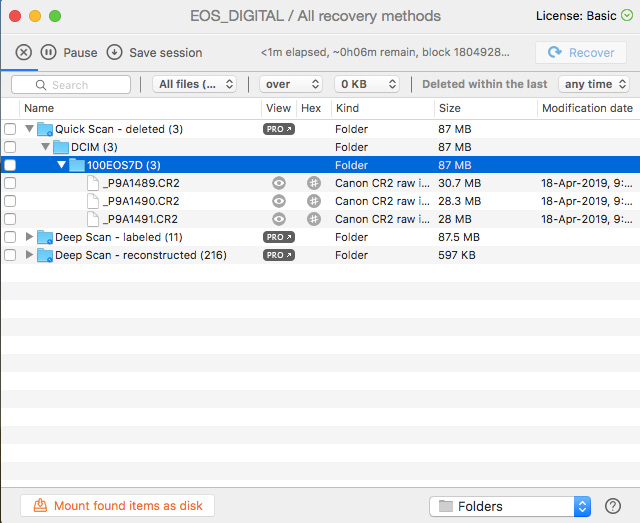
9. For me, it took around 6 minutes to scan the SD card memory for deleted images. I can see the file names of three deleted images on the Disk Drill software, once the scan gets completed. We can set the Target recovery folder to store the recovered photos.
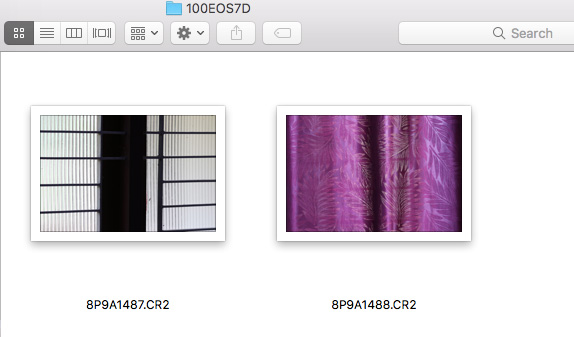
10. I will select the folder containing the three images and click the “Recover” button on the top right corner to recover deleted pictures.
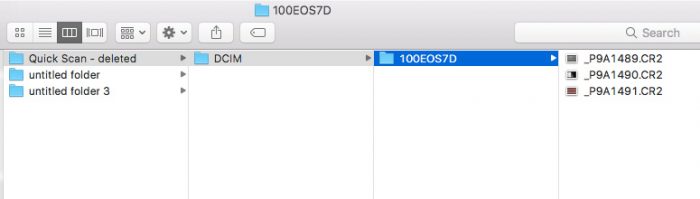
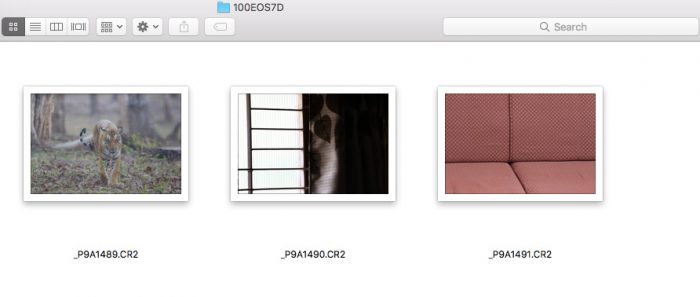
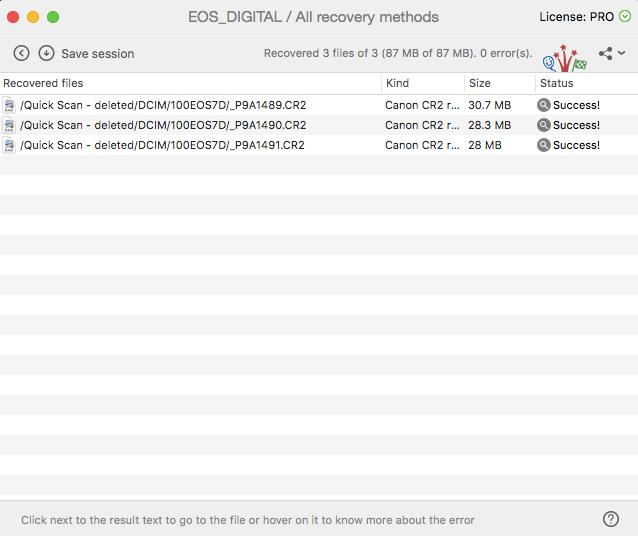
11. You can see the three recovered deleted photos from SD card in the Target recovery folder.
Conclusion
So, make use of Disk Drill software like in this tutorial if you are looking to recover deleted photos from SD card or any other types of memory.
Recover the images immediately before you start using the same memory card again for recording.
Consider reading, Digital Photo Protection Tips to know more about safeguarding your pictures.