Stellar Mac Photo Recovery Software Review – Is It For You?
As a photographer, you will be storing your photos and videos in HDD, SDD, memory cards, and other storage media. Many a time you may end up losing images due to accidental formatting, corrupt drive, or deletion. In such a situation you will be looking for a good data recovery software to restore your pictures and videos.
Stellar photo recovery software is one such software that claims to recover videos, photos, and other media files from the storage medium. In this article, I will review the Stellar photo recovery software for Mac and see if it is a good option for you or not.
Test Environment
I will be testing the Stellar photo recovery software to recover data from the following devices:
1. External Portable HDD: Seagate 5TB External Portable Hard Drive
2. Solid State Drive: SanDisk 1TB Portable SSD
3. SD Card Memory: 16 GB SanDisk Memory Card
The above three types of storage mediums are the popular storage options for storing photos and videos.
I will install the Stellar photo recovery software on my M1 Pro MacBook Pro machine running Mac OS Monterey
1. Recovery from Hard Disk Drive [HDD]
I have connected my Seagate 5TB External Portable HDD to my MacBook Pro.
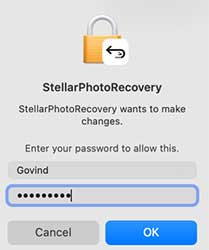
After installation, when I tried to open the application, it asked for my computer login credentials.
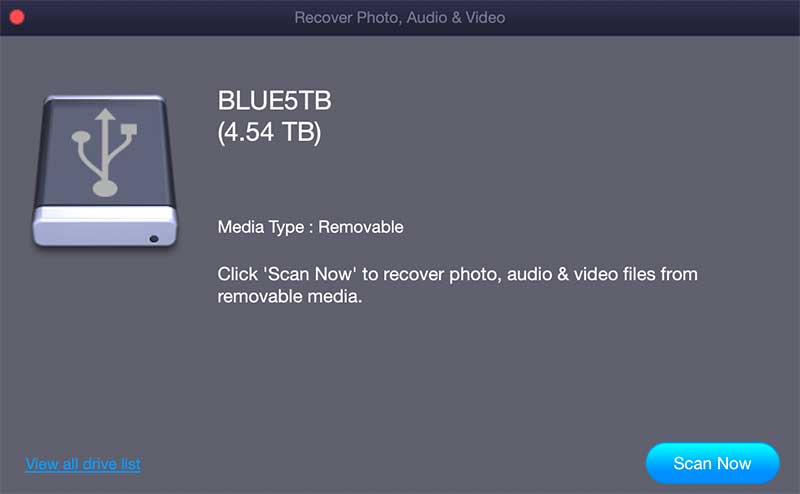
Once the application is open, it automatically detects the external HDD. You can start scanning directly from here.
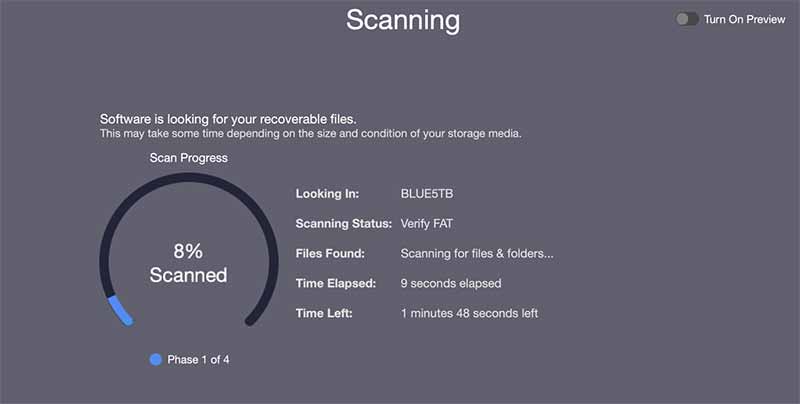
The scanning happens in 4 phases. The first two phases took around 3 minutes each and the last phases took around another 5 minutes. So, the entire scanning process is complete in around 11 minutes for the 5TB HDD.
This time duration of 11 minutes for scanning a 5TB HDD is quite impressive. I have tested many other data recovery software. All those applications take more than an hour to fully scan the entire drive of this capacity.

The recovery software could find around 2.53 TB of recoverable data. Now, the thing is whether this software is able to recover and save the files properly.
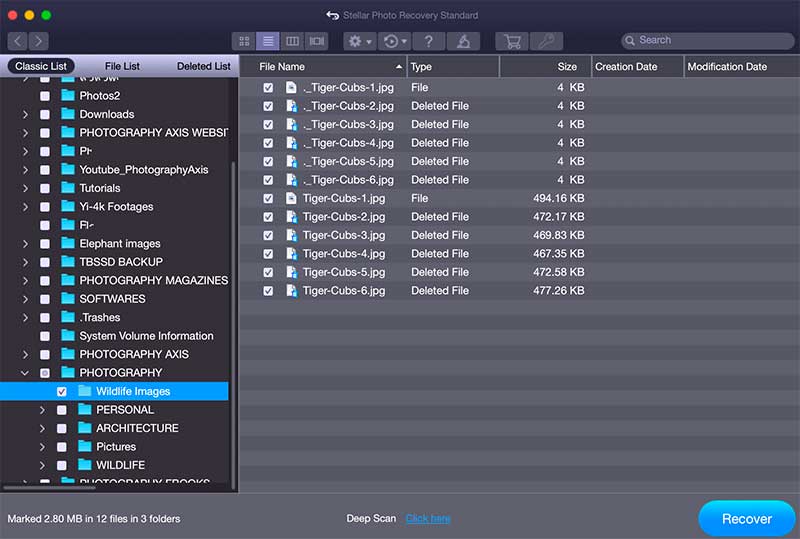
Now, I will try to save some of the recovered data. I can see the deleted file information against some of the pictures on the Wildlife Images folder in the HDD. I will select and recover these images.
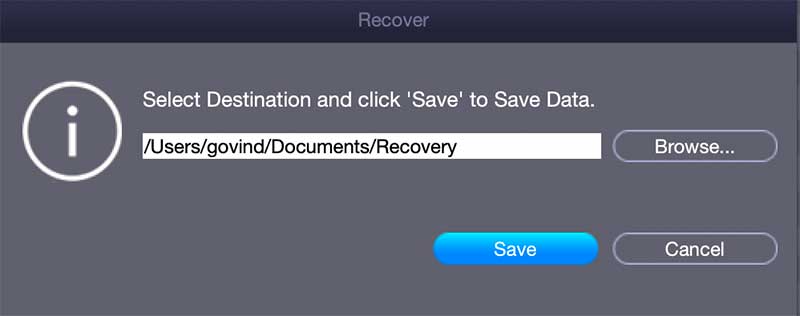
The software will ask you to set the location to save the recovered data. You cannot use the same HDD storage space for saving these files. I will use the laptop storage space for saving these files.
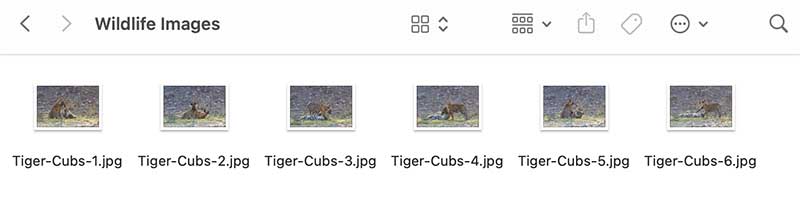
I am able to see and open the recovered deleted images from the saved location.

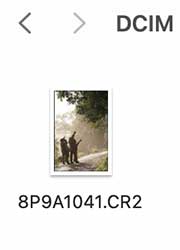
When I checked in the 5TB HDD, only one picture was present. The rest of the images were deleted. Thus, the software successfully restored the deleted 5 pictures.
2. Recovery from SSD [Solid State Drive]
Now, I will try to recover deleted images from my SSD using the Stellar Photo Recovery software.
I will connect my 1 TB SSD to the MacBook for this test.
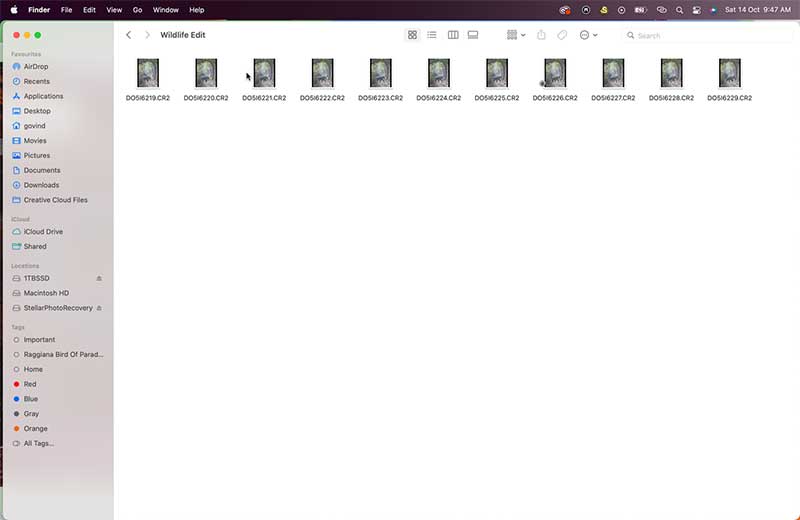
First, I will delete some of the images inside the “Wildlife Edit” folder.
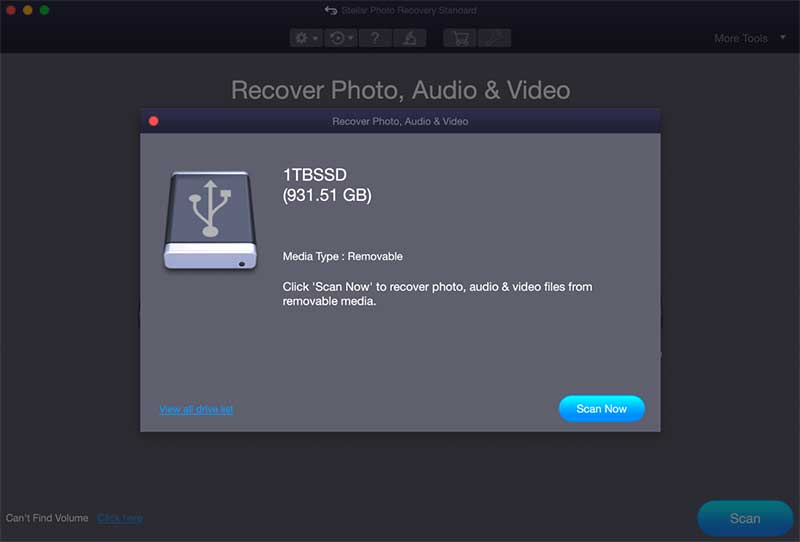 I will open the Stellar software. The software automatically detects the SSD drive. The next thing to do is scan.
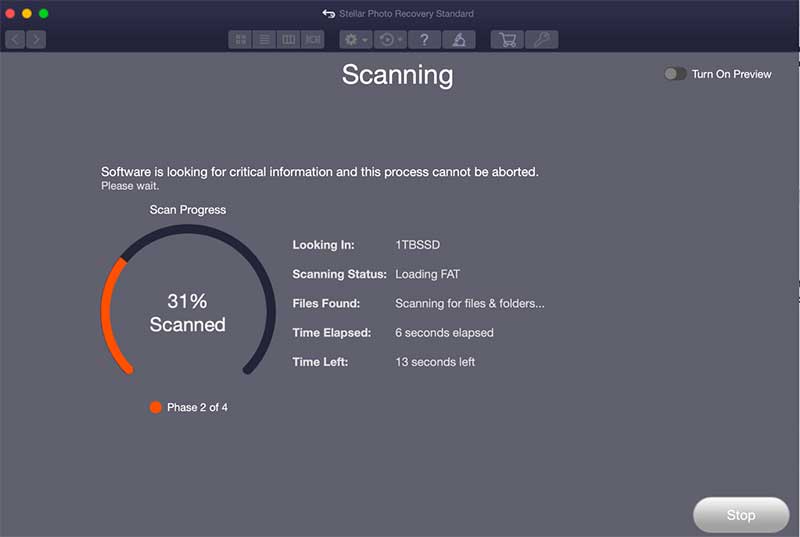
The scanning process shows 4 phases. The first phase took 4 seconds and the second phase took another 4 seconds. The third and fourth phase took 12 seconds and 2 seconds respectively. Thus, the scanning of 1TB SSD was completed in 22 seconds.
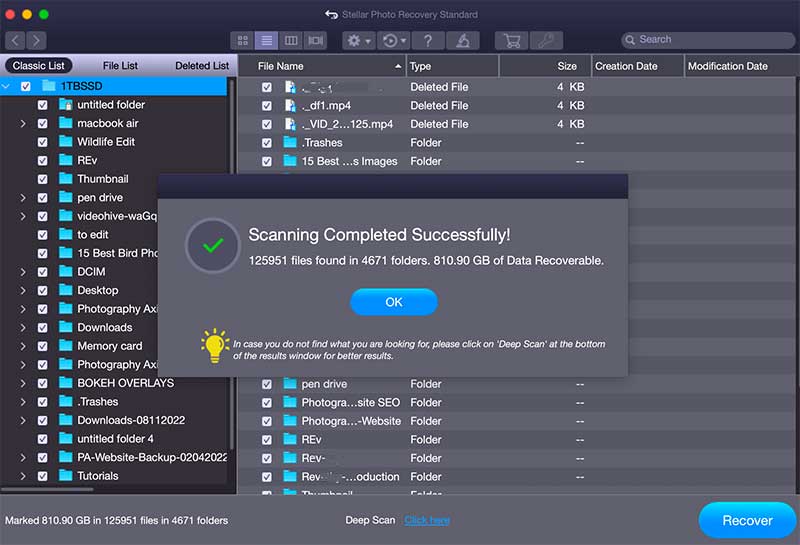
The pop-up message shows it could find 810.90 GB of data.
Now, I will try to recover the deleted files inside the “Wildlife Edit” folder.
I will create a new folder on my laptop hard drive to store the recovered images.

The recovery time for 1.89 GB of data from the SSD is around 24 seconds, which is pretty good.
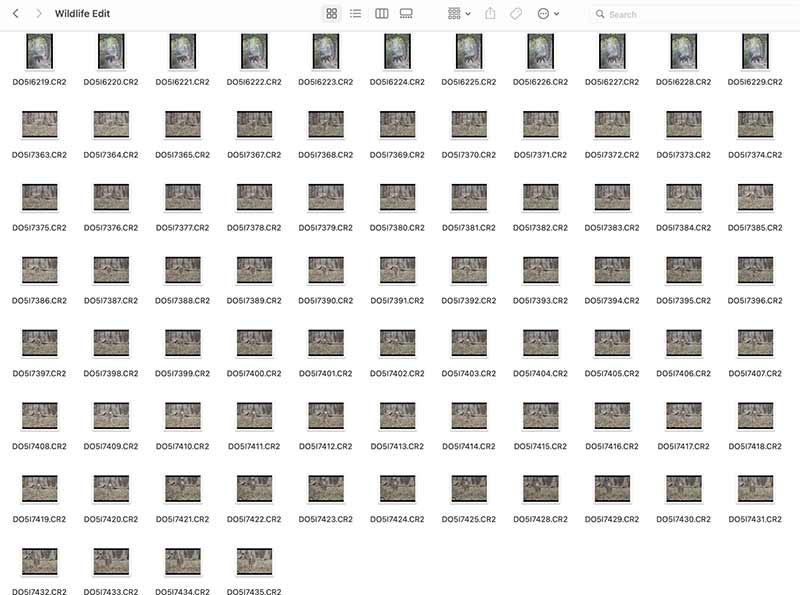
I am able to view the deleted files in the saved location. I tried opening these files and all the files are intact.
3. Recovery from SD Card Memory [SanDisk SD Card]
Next, we will test the data recovery on an SD card. The SD card is inserted into the card slot of the MacBook Pro.
I will delete all images except one from the SD card.
Next, we will open the Stellar photo recovery application.
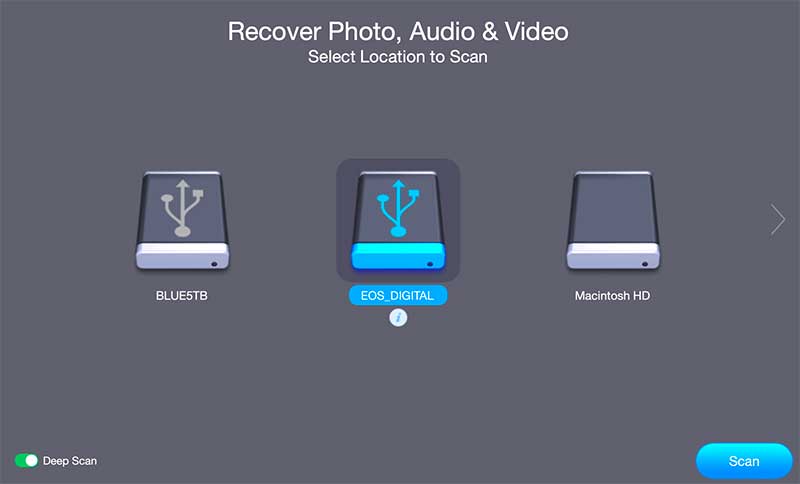
You can see all the connected drives listed in the application. We will select the SD card [EOS_DIGITAL] and scan it.
The scanning was completed in almost 2 seconds since the data was less.
I can see the deleted files in the scan results. We will recover it now.
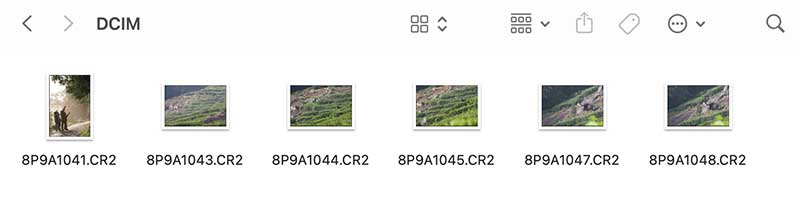 I can view and open all the deleted files now. The recovery is complete.
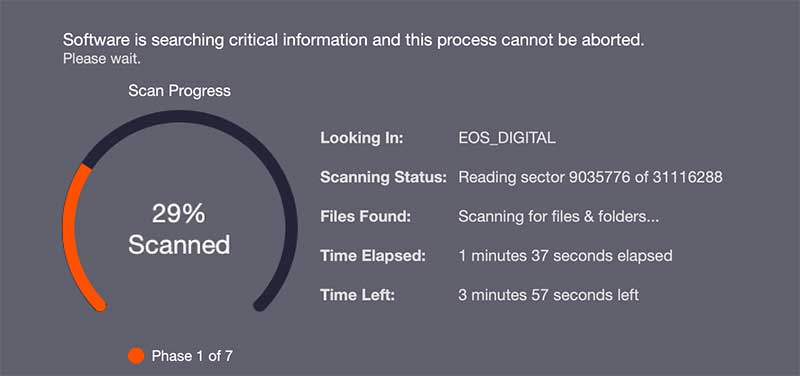
Now, I will do a deep scan with this software on the SD card to test this feature. The application shows 7 phases once the deep scanning is started. It is doing a sector-by-sector scanning.
It took 5 minutes and 10 seconds to complete the deep scan on the 16GB SD card memory.
You can go for deep scanning if you are not able to retrieve your data with the normal scan. But the deep scan is going to take more time. So, you need to ensure that there is sufficient battery in your laptop.
Here, the result of the deep scanning was the same as the normal scan.
Pros
1.Fast scanning time in the normal mode is pretty impressive.
2.The Deep scan feature is very useful.
3.It is available on both Mac and Windows OS.
Cons
1.Every time you open the application, you need to enter the computer login password.
Final Thoughts
If you have accidentally deleted pictures/ videos or formatted your storage medium, Stellar photo recovery software is a good choice to recover the deleted files.
You can also get Stellar photo recovery software for Windows machines.