
UGEE S640 Pen Tablet Review- Is It for Photographers?
Many photographers use pen tablets instead of a mouse for editing their images. In this article, I will review the UGEE S640 pen tablet and see if it is a good choice for photographers. Thanks to UGEE for sending this tablet for review.
UGEE S640 Pen Tablet – What is in the Box?

The UGEE S640 pen tablet and the accessories come inside a simple cardboard box. There is a thin polyethylene protective cover around the pen tablet.
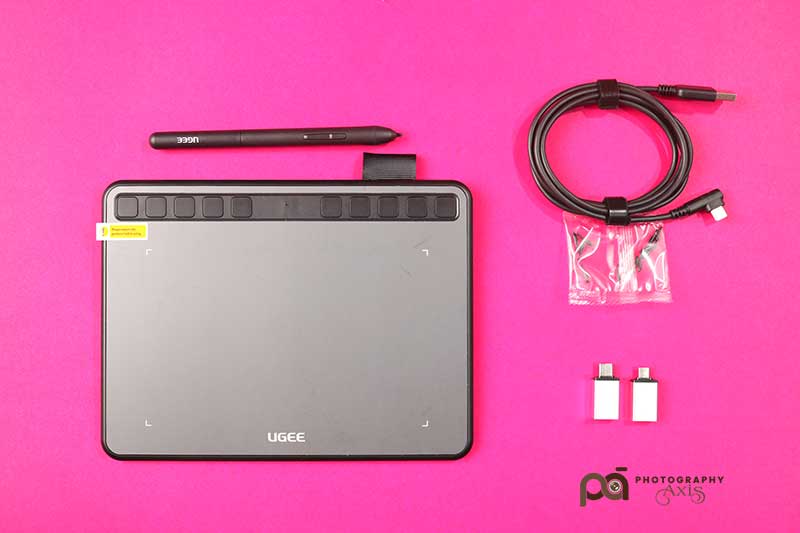
The list of items inside the box is given below.
1. UGEE S640 Pen Tablet
2. UGEE Pen
3. A Pack of 11 Extra Nibs
4. Nib remover Clip
5. USB Type A to Micro USB Converter
6. USB Type A to Type C Converter
7. Quick Reference Guides
UGEE S640 Pen Tablet Review
Now, we will start the in-depth review of the UGEE S640 Pen Tablet. First, we will look at the interface and the appearance of the tablet.
Weight & Dimension
The dimension of this tablet is 21.53 x 16.25 x 1.20 cm. It weighs around 480 gm. So, this pen tablet is a small-sized one.
Cost
The S640 drawing tablet costs around $39. Thus, it will not cost you much. You can check the latest price over here.
The Pen
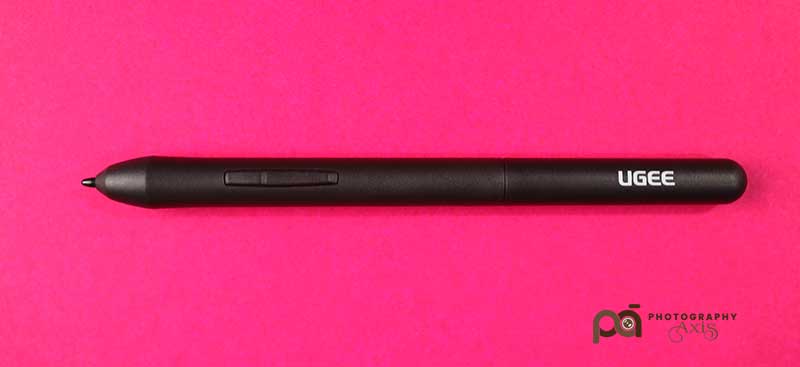
The pen that comes with the tablet is not too thin or thick. It ensures that everyone can easily hold and use it. You will also get two customizable buttons with the drawing pen. It really helps to improve your workflow.
They also provide 11 extra nibs for the pen. When you use the pen for a long time, you can replace the nib with the help of the nib remover clip. You don’t have to worry about spending extra money on buying the nibs.
The Tablet
Now, we will see the drawing tablet part.
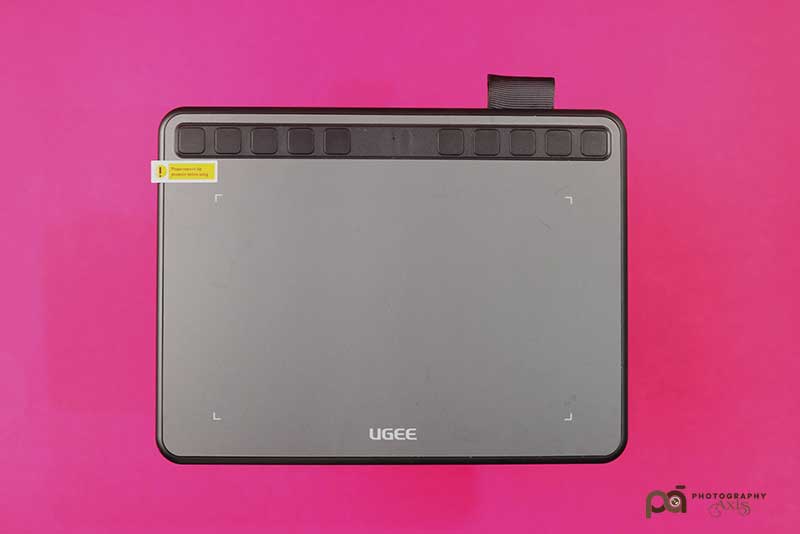
There will be a thin layer of protective sticker on top of the tablet. You need to remove it first by pulling the yellow label.
You can see 10 buttons on the top-side of the tablet. Configure these buttons according to your editing workflow.
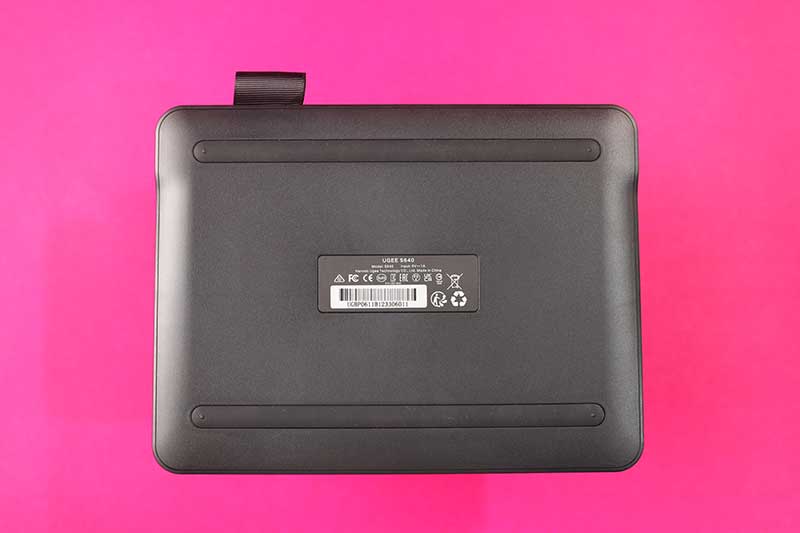
If you look at the backside of the tablet, you can see 2 long horizontal rubber grips. These sturdy grips ensure that the tablet does not move around when you use it.
The Type-C USB connector is located at the top side for connecting the cable.
You can also find a pen-holding cover on the top right side. You can keep the pen inside it after use. I really liked this feature. It will ensure you don’t lose the pen after use.
Writing Area
The active writing/ drawing area on the UGEE S640 Pen Tablet is 6.3 x 4 inches. So, it is a small-sized pen tablet. If you are looking for a bigger drawing area, then this tablet is not for you.
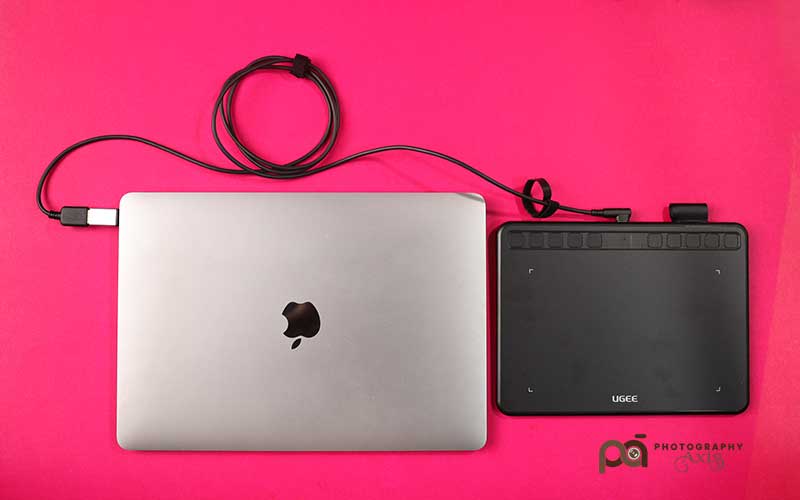
Cables & Accessories
The tablet comes with a USB Type-C to USB Type-A plug. The Type-C side goes to the tablet. The other end of the cable needs to be connected to the laptop.
If you use a MacBook or laptop that supports only type C plugs, you need to use the extra adapter supplied along with this tablet for the connection.
You can use the same adapter if you want to connect the tablet to a smartphone that comes with a USB Type-C connector.
They also provide a Micro USB to Type-A adapter. If your Android smartphone come with a Micro USB connector, you can use this adapter.
Connecting with the Laptop
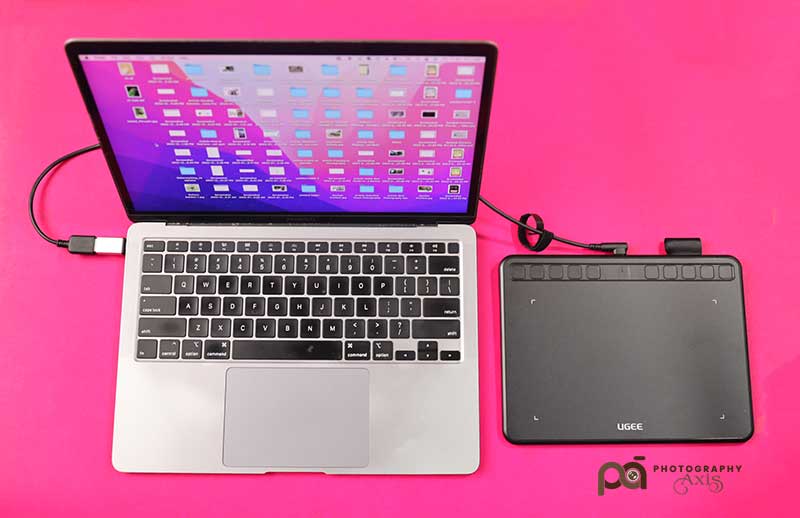
You need to connect the tablet to the computer using the cable first.
When you connect the tablet to the computer, the blue led on the top will blink and turn off. It will help the user to know that the tablet is connected.
I am using MacBook Air that comes with Type-C USB connectors. So, I need to use the converter adapter provided by UGEE to connect the tablet.
It is good that they are providing these connectors. Otherwise, I will have to spend on these converters too.
After connecting, I tried using the pen on the tablet. It is able to move the cursor.
Now, I need to download the driver for the UGEE S640 pen tablet to fine-tune the tablet’s working area and the pen settings. You can download the driver from here.
You will be able to see both Windows, Mac, and Android drivers here. Download the application according to your operating system. Also, make sure to download the latest one.

After installing the driver, you can see the UGEE application. Open this application. You can configure the stylus pen and the tablet using this application. You need to do this first before starting to use the tablet in other applications.
Configuring the Tablet
Now, we will configure the tablet using the UGEE application. You can see two options for the Digital Drawing Tablet in the application. – Work Area and Shortcut Keys
Work Area
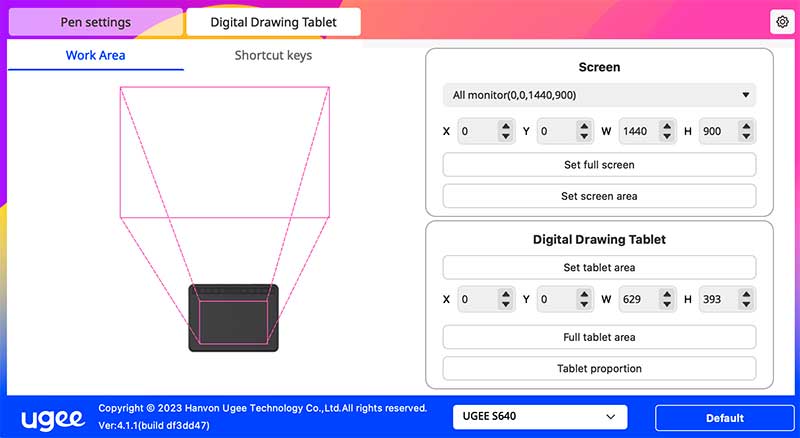
First, you can set the working area on the tablet. You can either go for full screen or set a particular area. I prefer to go with a full-screen working area.
They have provided X&Y adjustments along with the width and height adjustments for both the screen and tablet. Thus, you can precisely configure the drawing area.
Shortcut Keys
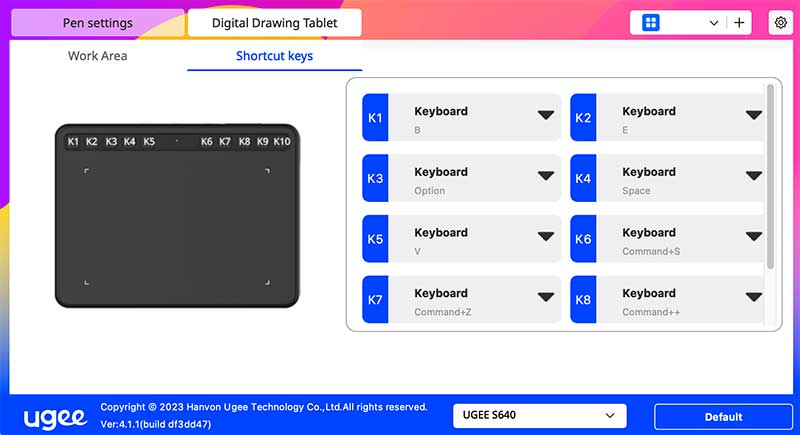
I really loved the 10 shortcut keys in this tablet.
You can configure these shortcut keys for the mouse and keyboard buttons. It definitely helps to improve your editing workflow. Many drawing tablets miss this feature.
Configuring the Pen
Now, we will configure the pen settings.
Pen Shortcuts
Click on the Pen Settings option. You can see two options here. First, we will configure the Pen Shortcuts.

If you want to vary the sensitivity of the pen as a mouse, select the Mouse mode option. Vary the slider to optimize the movement.
You can configure the two buttons on the pen here. They are the Up and Down keys.
I configured the Up button to toggle between the pen and the eraser mode. I configured the down key as a right click. These two configurations will help to speed up my editing process.
Pen Pressure Settings
Different people prefer different pressure settings on their pen. So, it is essential to configure these settings for your style of use.
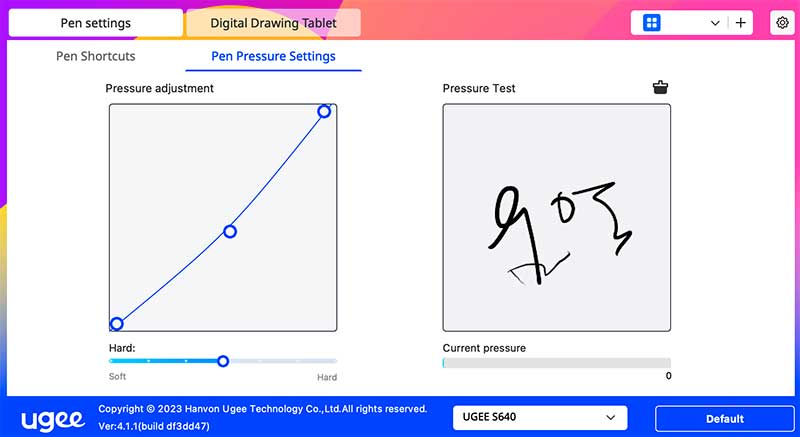
Some prefer to go toward the hard side whereas others prefer the soft side. I prefer something in between these two.
Just fine-tune the curve to get the right settings for you. Try writing on the tablet to see if you are getting it right. It is quite easy to configure the pen pressure settings.
I tried using this drawing tablet in Adobe Lightroom and Photoshop for post-processing my images. So far, the performance is good. There is no lag or delay.
Connecting with Android Smartphone
You can also connect the UGEE S640 tablet to your Android smartphone.
You need to download and install the Android firmware for the tablet from their site. It is necessary for the smooth functioning of the tablet with the phone.
After that, you can connect the tablet.
Pros
1. Value for Money
2. Good Responsiveness
3. Very Useful 10 Customizable Buttons
4. Easy-to-Hold Pen
5. The pen-holding cover in the tablet is very useful. It ensures that the pen always stays with the tablet.
Cons
1. It would be good if they could provide a height-adjusting option for the tablet to keep it in a slanting position.
Final Thoughts
The UGEE S640 is a good option if you are looking for a small size pen tablet with customizable buttons. But if you are looking for a larger drawing area, this tablet is not for you.