How to Batch Edit in Lightroom?
Most of the photographers out there would be using Adobe Lightroom for editing photos. If you have lots of images to edit, then it will be a tedious job to edit one by one. So, you can make this process easy by using the batch edit feature in Lightroom. In this tutorial, I will teach you how to batch edit in Lightroom.
What is Batch Edit in Lightroom?
Batch edit in Lightroom is the process of applying the same edit settings to all the images in a single batch. Thus, you can process more pictures in a short time.
Use of Batch Editing
Batching editing your photos in Lightroom will help you to save photo editing time.
If you have taken a series of images in the same lighting and same camera settings, then use batch editing to simplify your editing process. If you are into wedding photography or event photography, then you would be dealing with lots of photos. So, make use of this feature in Lightroom.
If you are applying a preset to the image, then you can use the batch edit option to apply it to all photos at a time.
How to Batch Edit in Lightroom?
1. Import Images
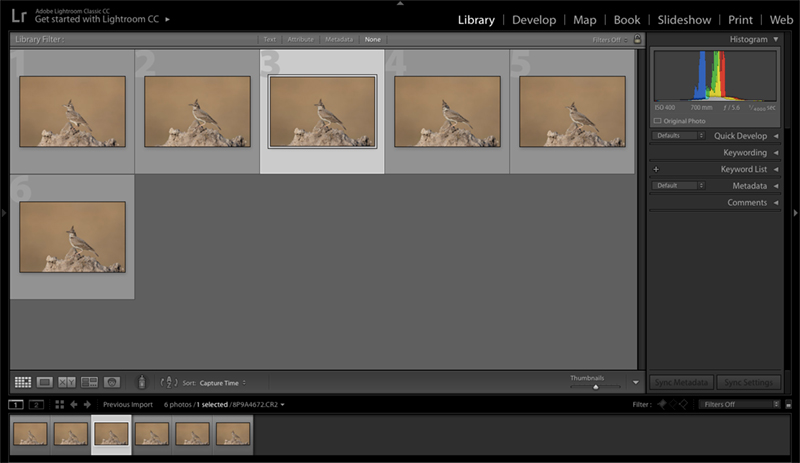
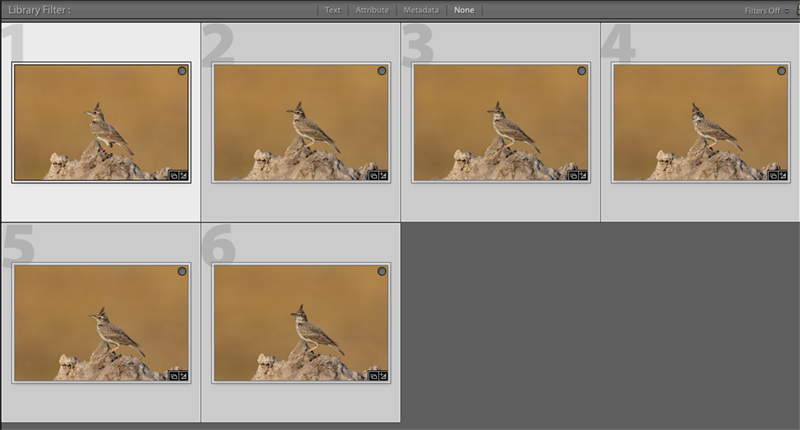
Open Adobe Lightroom. Import images for editing. I will be importing my pictures of the Crested lark with different poses photographed from the same mount. All the photos in this series are taken with identical camera settings and angle. So, I can replicate the edits in one of the images to the others also.
2. Single Image Edit
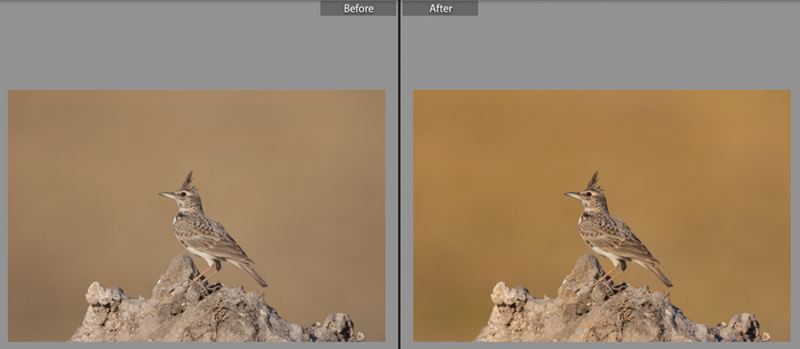
I will start editing one of the pictures in the Develop module. Now, I am done with editing in Lightroom.
But, I have few more images in the same series, captured with identical camera settings. So, I will batch edit these images.
3. Batch Selection
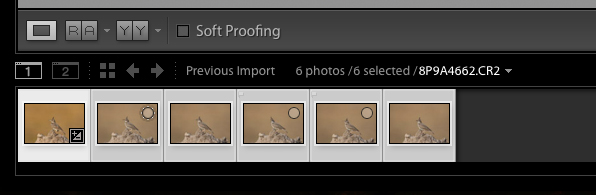
In the Develop module, go to the bottom window, which has image thumbnail previews. If it is not visible, click on the arrow in the bottom toolbar.
Click on the image thumbnail which you have edited right now. Hold “Shift” key and click on the last thumbnail of the series to include all the photos for batch editing. The selected images will get highlighted.
Here, I have only imported images into a single catalog for explaining the batch editing process. If you want to batch edit only a few pictures from the catalog, you can do that also.
4. Sync Edits
![]()
Now, click on the “Sync” button on the bottom right of the image adjustment panel. Now, the “Synchronize Settings” window will pop up.
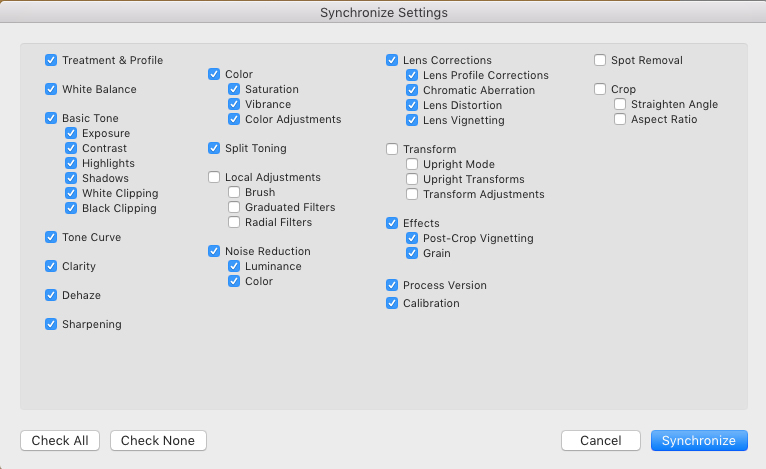
It will have all the settings selected which you did for the first image while editing, except for the crop settings.
Here, you can select/deselect which all settings you want to apply to all the images. Click on the “Synchronize” button to confirm.
Now, you can see that all the selected settings are applied to all the photos in the batch. Thus, batch editing helps to save a good amount of photo editing time.
5. Auto Sync Feature

Now, You can see a slider button in the “Sync” button. If you push it upwards, it will enable the Auto Sync Feature.
So, from now onwards, whatever edit you do to any 1 of the images in the batch, same will be applied to all the photos.
If you enable this option all the time, it may slow down your editing process if there are too many images in the batch. So, use it wisely.
6. Export Images
So, once you have completed the batch editing in Lightroom, you can export the final images.