Topaz Studio 2 Review- Is It Useful?
Topaz Labs has released Topaz Studio 2. In this article, I will review Topaz Studio 2. Before getting into the review, I have got good news and bad news. So, which one do you want first? I will break the good news first. Good news is that if you already own Studio adjustments worth $100 or more, then you will get Topaz Studio 2 for free.
As you all know, the old version of Topaz Studio is completely free. So, the bad news is that the new version is no longer free. It comes at $99. It is available for $79 for a limited time. You are eligible for a free upgrade only if you have purchased Pro Adjustments earlier.
You can check your free Topaz Studio 2 upgrade eligibility here
The old studio 1 format (.tsp) will not be compatible with the 2nd version. Initially, Studio 1 presets are not going to be compatible with the 2nd version. But, Topaz labs plans to launch a utility to make it compatible with the Studio 2 version.
I will do an in-depth review of Topaz Labs Studio 2.
😍 UPDATE [28 DEC 2020]: Click here to claim a 30% discount + use code “holiday15” and receive an additional 15% additional discount for Topaz Studio 2 for a limited time, this holiday season.
Computer Specifications for Topaz Studio 2 Review
Topaz Studio 2 is compatible with both Windows and Mac OS.
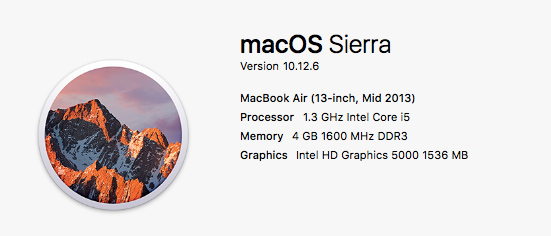
I will use my 13” MacBook Air and iMac to review Topaz Studio 2 photo editing software.
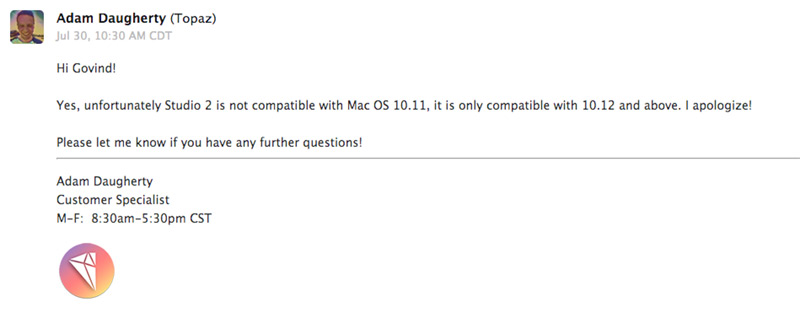
But, unfortunately, I couldn’t install Topaz Studio 2 on my iMac. When I contacted the customer support, I got a reply that Studio 2 is not compatible with Mac OS X El Captain.
How to use Topaz Studio 2?
1. I will open Topaz Studio 2 on my MacBook Air.
2. Now, I will import my image for editing. You can either Drag and drop the image or use the Open icon on the top. Topaz Studio 2 doesn’t have a library feature. So, you will not get the option to browse multiple pictures in it. So, it is a quick edit tool. You will not get the option to rate and organize your images. I tried importing JPEG, RAW, and TIFF image formats. TIFF and JPG format works fine.
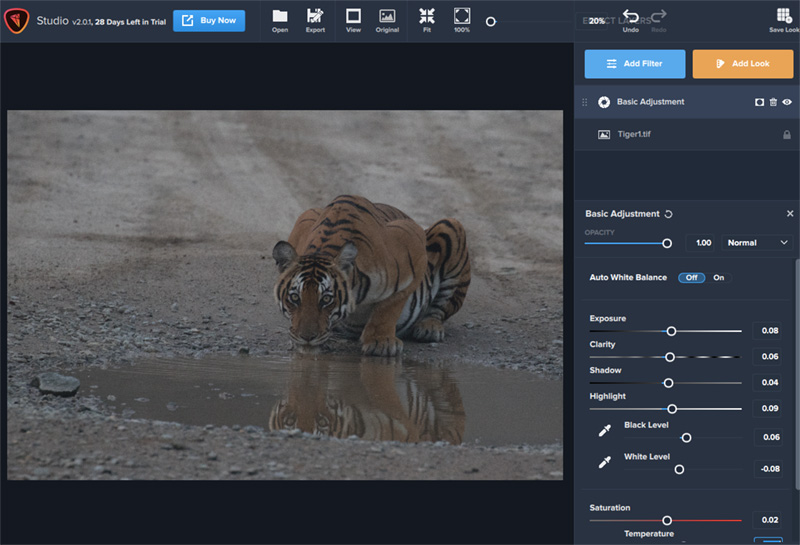
3. Now, We have imported the image. So, let us make the necessary adjustment by selecting the “Basic Adjustment” option from the Filters menu. In this Filter, you can make the exposure and colour temperature adjustments. Separate sliders are provided for Shadows, Highlights, Whites and Darks, just like any other photo editing tool. The only thing which I found missing is the Crop feature. It is a must-have option for any photo editing software.
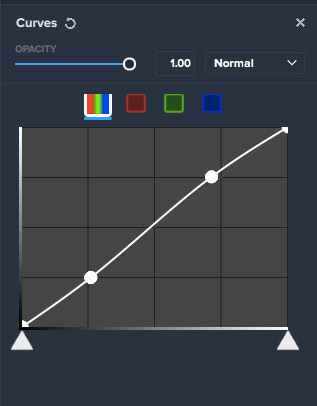
4. I will add the Curves filter to add some basic image contrast.
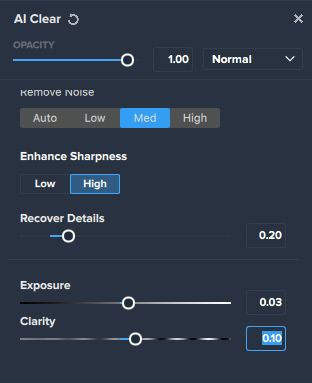
5. I need to remove the noise in the image. So, I will add the Filter “AI Clear”. I recommend zooming in the image to 100% when you are doing the noise removal. They have provided four options to remove noise: Auto, Low, Medium, and High. For my Tiger image, Medium works well since the picture was taken the early morning at high ISO. I have applied the “enhance Sharpness” option as “High”. The denoising has resulted in some details removal. So, I will pull up the “Recover Details” slider to 0.20 from the default value of 0.10.
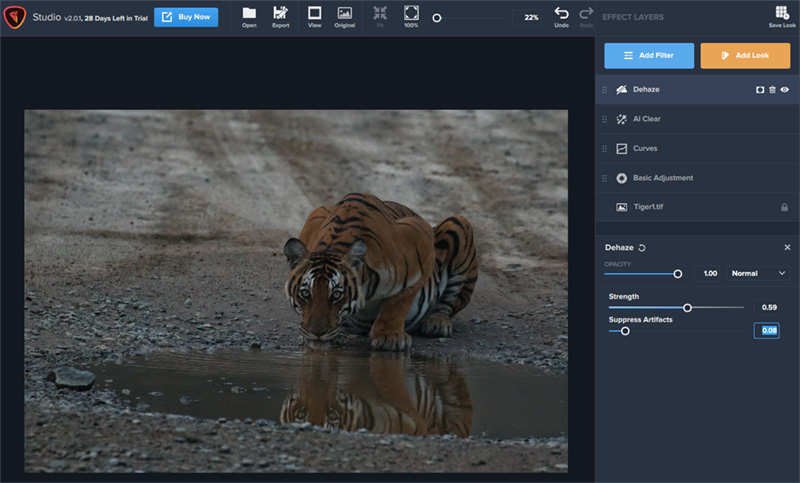
6. This Tiger was photographed during early morning Hazy condition. So, I need to Dehaze the image. I will add the Dehaze filter and play with the Strength and “Suppress Artifacts” slider to get a good result.
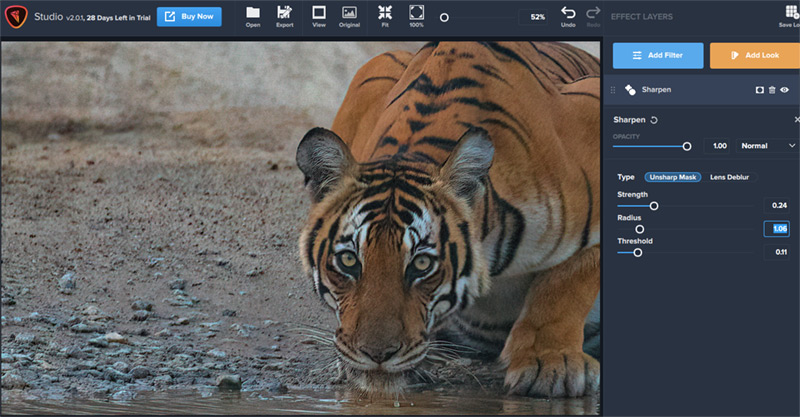
7. Now, I will Sharpen the image using the “Sharpen” filter module. I always recommend doing the image sharpening after denoising. So, you have two types of sharpening option in this filter, one is the Unsharp Mask, and the other one is Lens Deblur. You can vary the strength, Radius, and Threshold in Unsharp Mask. Lens Deblur allows you to change the strength and Threshold.
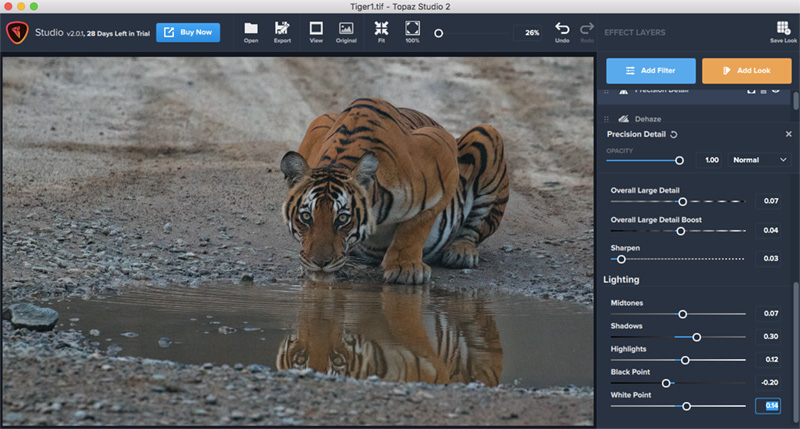
8. I will add more details to the image by using the “Detail” filter. There are different slider options to fine control the details at various levels. You can either go for the “Overall” control or vary the details in “Shadows” and “Highlight separately”. So, let me fine-tune these detail settings for this image. It also comes with a Lighting option for exposure adjustment. You can use it to fix any lighting issues due to detail adjustments.
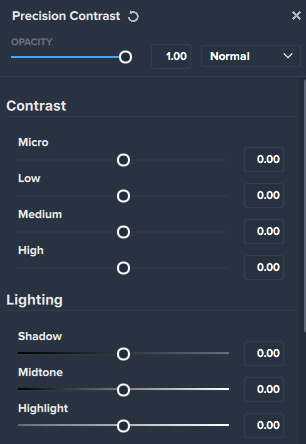
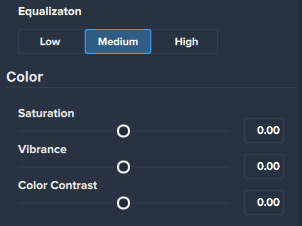
9. I will fine-tune the image contrast using the “Precision Contrast” filter. There are Micro, Low, Medium, and High contrast sliders for fine-tuning. This filter module also contains the Lighting Adjustments. It also has a colour section to set the Saturation, Vibrance, and Color contrast.
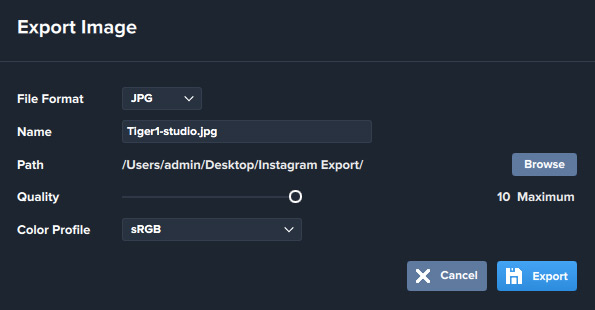
10. If you are interested in colour grading, use the HSL colour tuning option. Now, I have completed the necessary image edits. So, I will export the final image using the “Export” options in the File menu. You can set the file format, export location, quality and colour profile in the export option.
11. If you want to resize your image before exporting, then you need to choose “Resize” option from the “Edit” menu. Tick the “Aspect ratio box” or else the image will look bad if you have set the wrong width and height. Enter either the Width or Height column to set the final image resolution before exporting.
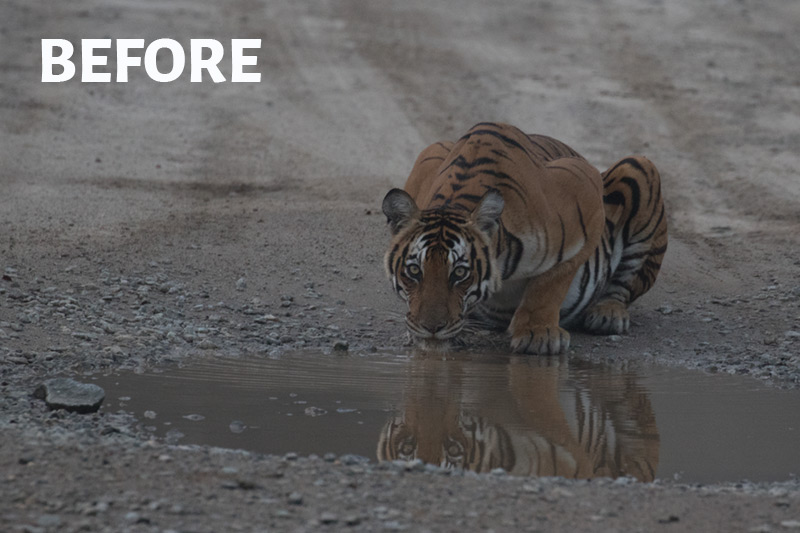
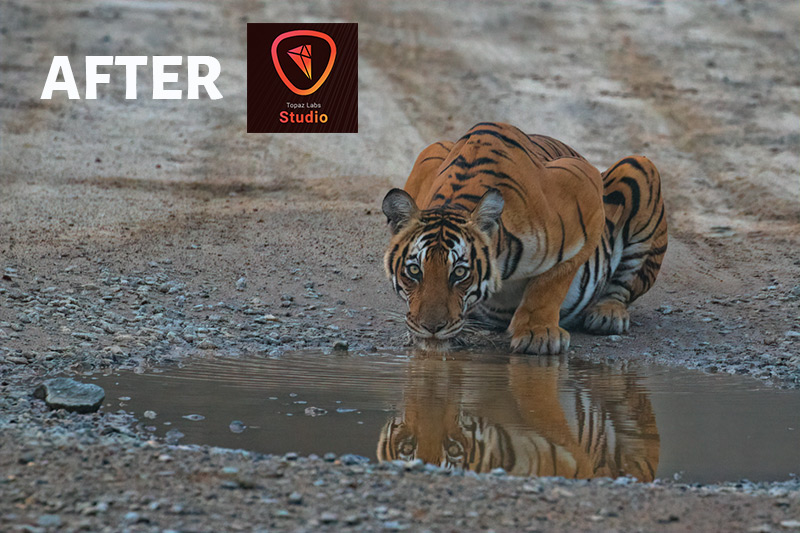
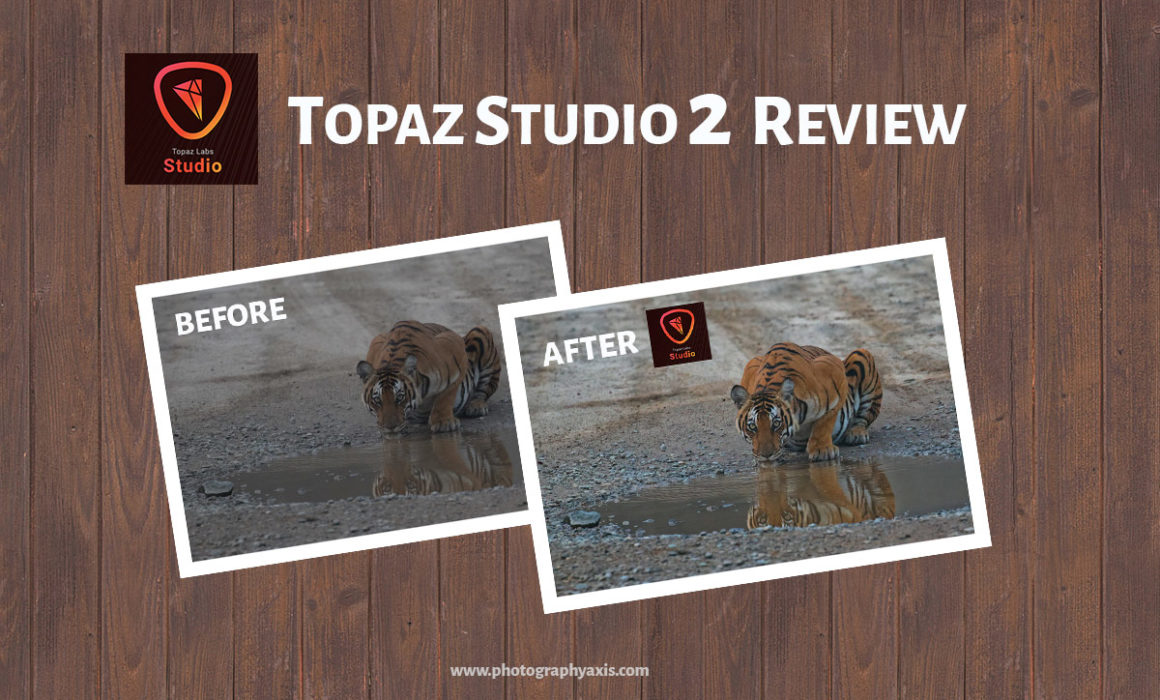
12.So, let us have a look at the Topaz Studio 2 Before After image.
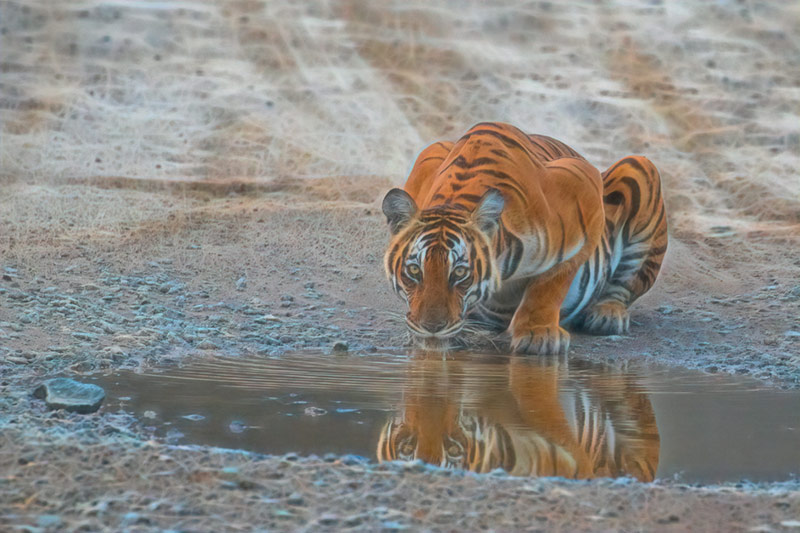
Radiate Look
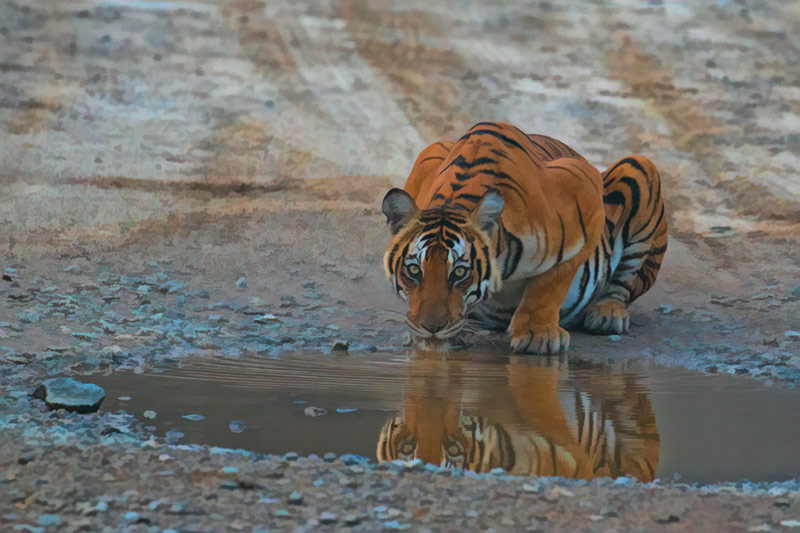
Soft Look
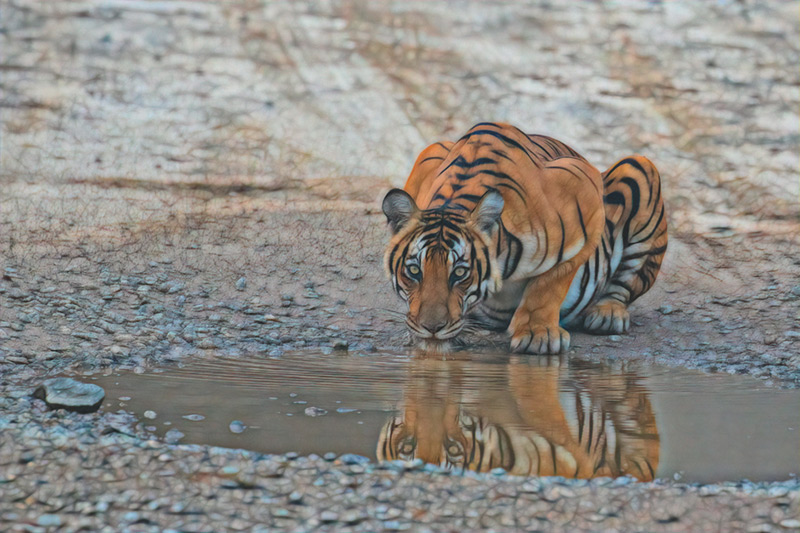
Dream Looks
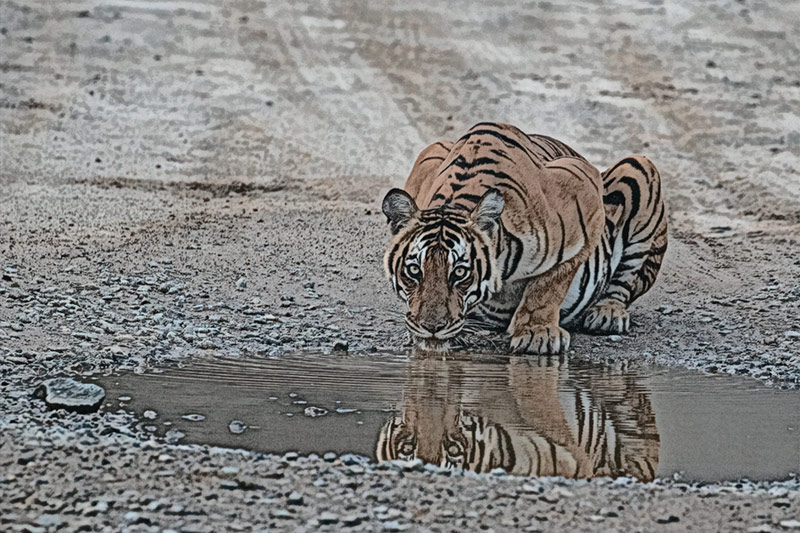
Wood Carving Look
13. I will add a few Looks to the final edited image.
Things I Liked
1. Looks Feature: Looks feature allows to apply different filter effects to the image.
2. Filter Options: Studio 2 comes with lots of photo editing modules called “Filters”, which are customizable with the Workflow.
3. Non-destructive Layers Editing Feature: The ability to work in layers makes it very useful.
Things to Improve
I feel that certain things are missing from the Topaz Studio 2. If they can bring these features, then it would make it one of the best photo editing software.
1. Image Crop: Currently, there is no option to crop the image. It is one essential feature which all users want.
2. Straighten: They could have added the image straighten option, which is required for proper image alignment.
3. Histogram: Many photographers use Histogram in their workflow. It gives feedback on what tone of the image needs a fix.
4. The option of Adding Multiple Images: It would be good to see an option to drag and drop multiple photos at a time. It allows the user to work edit and save one by one when he has various images to edit.
5. Improve Preview Time: When I apply different looks to the pictures then it takes some time to show it in the preview image.
6. Backward Compatibility: Older version files are not compatible with Studio 2.
Topaz Studio 2 Vs Studio 1
If we compare the new version with the older version 1 software, there are lots of changes.
1. Multiple Image Support
Topaz Studio 1 allows importing multiple images at a time to the window. But, this feature is missing in the Studio 2 software. It is very useful when working with multiple images.
2. Filter Options
In topaz Studio 1 version, only basic 10 filters(called as Adjustments) are available for free. You need to buy the rest of the adjustments separately. But, In Studio 2, you are getting all the filters. So, you don’t have to buy any filters separately.
3. Crop and Heal Feature
Studio 1 has Crop and Heal option. But these features are missing in Studio 2.
Topaz Studio 2 Roadmap
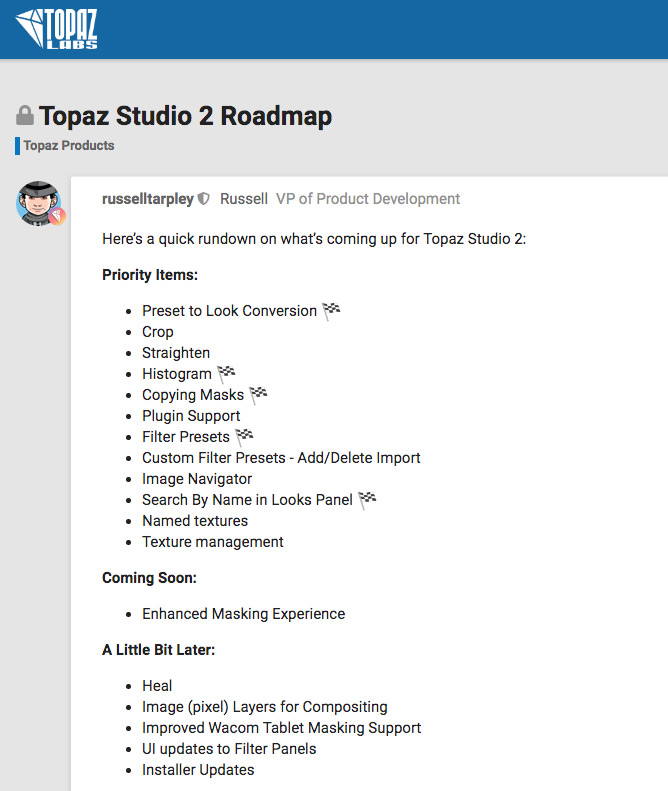
In the Topaz Studio 2 Roadmap, shared in the Topaz community, they are planning to add the following additional features. I hope they implement it soon.
Conclusion
So, after doing the Topaz Studio 2 review, I feel that it looks good as a creative photo editor to add special effects to your images. So, if you are interested in creating artistic images from your captured images, Topaz Studio 2 is a right choice. Features like Precise Detail control, Precise contrast, Detail Enhancer and AI Clear filters makes it a powerful photo editing software.
If interested, you can download the 30-day free trial version of Topaz Studio 2 and give a try.

Thanks for your review, it is most helpful and very well written. I have a few followup questions if you might answer for me.
Using Topaz Studio 2 questions: October 27 2019
I am currently using Affinity 1.7.3.481
Can I import/open image files on Windows 10 (Version 10.0.18362 Build 18362) from my File Explorer/external or internal HDD?
Can I import/open Canon RAW CR2 image files?
Can I import/open Affinity (Version 1.7.3.481) afphoto image files?
If Topaz Studio 2 doesn’t have a library feature where will I find myself when clicking on Open? In my File Explorer, or in a search box trying to remember the date or file name?
When I find the need to Crop or Straighten, will I after adding Topaz Studio 2 to my Affinity Preferences>Plug Ins, not be able to crop from within the plugin? If not would I be able to Crop and Straghten using Topaz Studio 2 as a stand-alone image editor? If this requires work in Affinity prior to the use of Topaz Studio 2, just answer with a simple No.
When resizing an image file, do I have to click on Aspect Ratio, or is this automatically assumed? I don’t want to find that because of a deadline I have missed this and add another step to exporting.
Does Topaz Studio 2 now have the following features/tools?
Enhanced Masking (not yet sure what this is)
Heal
Image (Pixel) Layers for Coompositing
Improved Wacom Tablet Masking Support
UI updates to Filter Panels
Installer Updates
So, your question is related to Topaz Studio 2 and you are an Affinity user, right?
1. Can I import/open image files on Windows 10 (Version 10.0.18362 Build 18362) from my File Explorer/external or internal HDD?
RE: Topaz Studio 2 is Compatible with both Windows and Mac OS. So, it should work in Windows 10. I have tested it on Mac. You can import images from both Internal and External hard drives.
2. Can I import/open Canon RAW CR2 image files?
RE: I have imported Canon CR2 RAW files from my Canon 7D Mark II and Canon 1DX Mar II without any issues. So, it works.
Can I import/open Affinity (Version 1.7.3.481) afphoto image files?
RE: I don’t think Studio 2 support affinity image files for the time being
If Topaz Studio 2 doesn’t have a library feature where will I find myself when clicking on Open? In my File Explorer, or in a search box trying to remember the date or file name?
RE: After opening the Studio 2, you can drag and drop your image or click on the “Open” icon and it will open the File browser. You need to browse and locate your image.
When I find the need to Crop or Straighten, will I after adding Topaz Studio 2 to my Affinity Preferences>Plug Ins, not be able to crop from within the plugin? If not would I be able to Crop and Straghten using Topaz Studio 2 as a stand-alone image editor? If this requires work in Affinity prior to the use of Topaz Studio 2, just answer with a simple No.
RE: With their recent update, Crop and Straighten are added. So, it should work. I have shared the link of their recent addition at last.
When resizing an image file, do I have to click on Aspect Ratio, or is this automatically assumed? I don’t want to find that because of a deadline I have missed this and add another step to exporting.
RE: Aspect Ratio: By Default, the “Keep Aspect Ratio” option will be ticked, unless you go and untick it.
Does Topaz Studio 2 now have the following features/tools?
Enhanced Masking (not yet sure what this is) Heal Image (Pixel) Layers for Coompositing Improved Wacom Tablet Masking Support UI updates to Filter Panels Installer Updates
RE: In the Last Update, they have added the following features
Crop/Rotate/Straighten Option
Resize option
Image Histogram
Image Navigator
Texture Management
Copy Paste Masks between Layers
Refer this for all the additions and improvements: https://topazlabs.com/whats-new-in-topaz-studio-2/
Would Topaz Studio be useful in creating the painterly studio look? I can’t really find much info on the subject.
Hi Amanda,
Yes, Topaz Studio 2 can create Painterly like look. You can use the Impression Filters in Studio 2 to do this.