
Exposure Bracketing – What is It & How to Use It?
Are you hearing the term “Exposure Bracketing” for the first time? If yes, then this guide is for you. I will explain everything about exposure bracketing in detail through this guide.
What is Exposure Bracketing?
Exposure bracketing is the technique to capture a single scene in multiple exposures. It is also known by the name AEB (Auto Exposure Bracketing).
Normally, a digital camera will have the Auto exposure bracketing (AEB) setting. Once you enable it, it will take 3 images continuously in 3 different exposures.
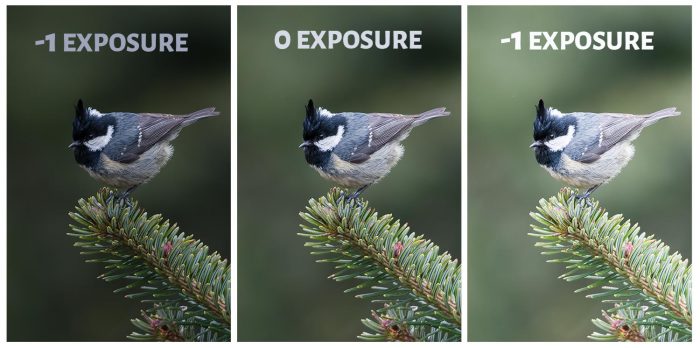
By default, all cameras take 3 shots in AEB Mode. One will be darker, one lighter, and one in 0 exposure.
In certain cameras, you can increase the number of shots to 5 or 7. You can even set by how many stops you want it to be darker or lighter.
For example, you can take 3 shots at +1,0,-1 exposures and another 3 at +2,0,-2 exposures.
If you set for 5 shots then you can take 2 shots darker, 2 lighter, and one in 0 exposure, -2,-1,0,+1,+2 (example).
Why Use Exposure Bracketing?
There are 2 situations where you can use AEB.
1. For HDR Image
If you want to create an HDR image, you should have 3 images in 3 exposures to create the HDR.
A HDR image demands a more dynamic range. So, you need to capture images that have all the details for Shadows, Highlights, and Midtones.
You can make use of Auto Exposure Bracketing to get the 3 or more shots in multiple exposures. Combine the images to HDR in Photoshop or other photo editing software.
2. In Tricky Lighting
Certain light conditions can be tricky. If you shoot at the normal exposure you may end up burning the highlights or you may lose details in Shadows.
In such situations, use the Exposure bracketing technique to capture the scene in multiple exposures. Later you can select the image with the correct exposure during post-processing.
Camera Settings for Auto Exposure Bracketing
Now, you know what this feature will do and when to use it. Let us see, How to use it?
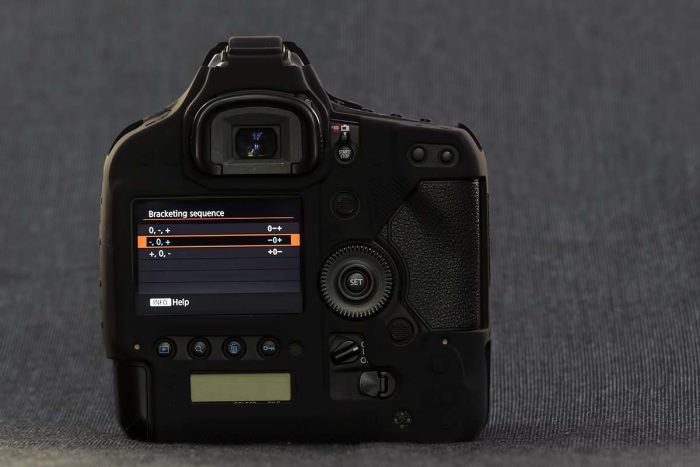
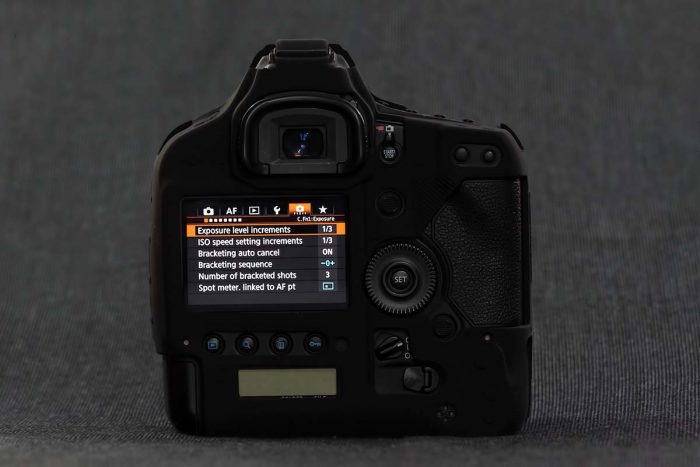
You need to go to the settings in your camera that has got the “Bracketing sequence” option. You can always refer to your camera manual to know the exact place to change these settings.
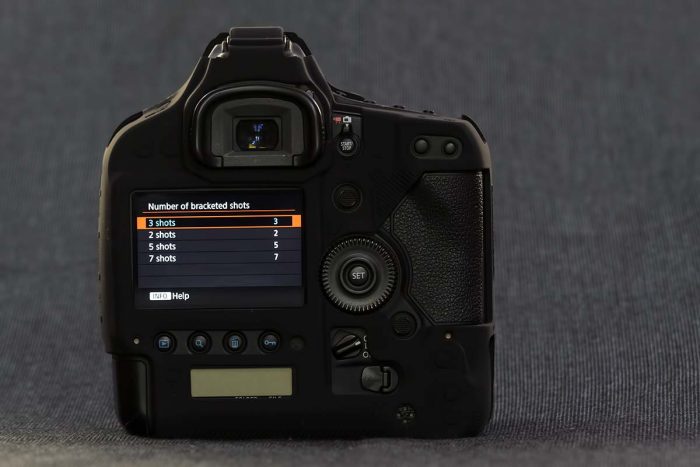
- The below image shows the bracket sequence settings for a Canon camera (Canon 1DX Mark II).
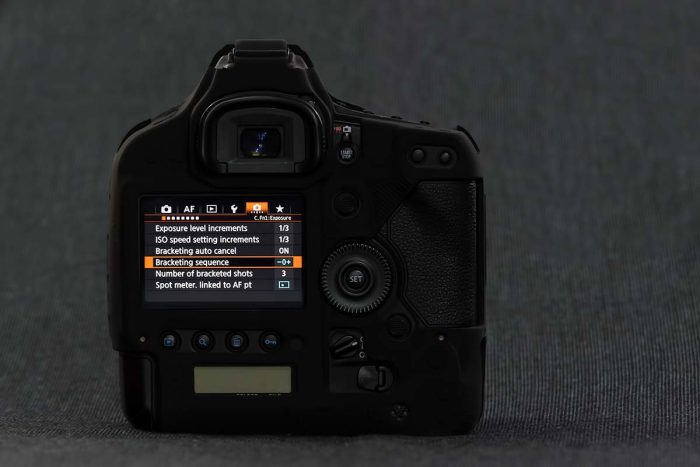
- By default, it will be -0+. When you hold down the shutter button continuously then it will record 3 images in the following order: -1 Exposure, 0 Exposure, and +1 Exposure. If you want to alter this sequence, you can use the other 2 options.
- Select the”Number of Bracketed Shots” menu option if you want to increase the number of bracketed shots
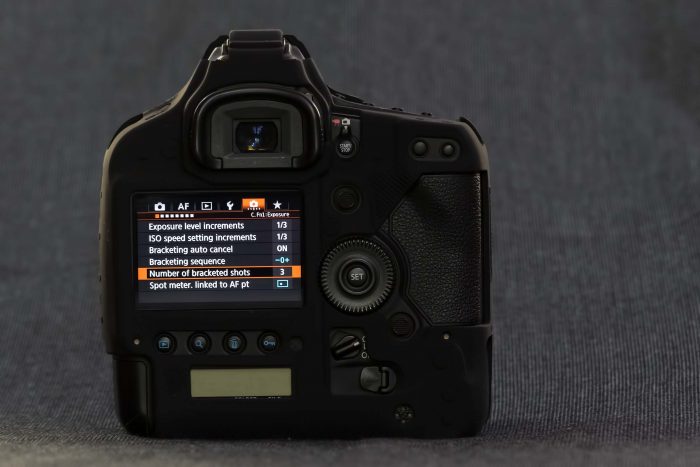
- The number of shots varies with camera models. In Canon 1DX Mark ii, they have given options for 2,3,5, and 7. It would be in 3 (Recommended settings) by default. You can increase the count if you want more details in the final HDR image.
- If you want to Bracket all your shots from now onwards then disable the Bracketing auto cancel option from the Main Menu.
How to Shoot in AEB?
You are done with the settings. Now, we will see, How to capture it?
Go to any mode in the camera that supports varying Exposure compensation.
Select the Exposure section. Move the rotating dial on the top (one which you use to change the values in different modes). Slide it to the right side, you can see that the bar under the exposure slider got split into 3 sections. These 3 will be equispaced.
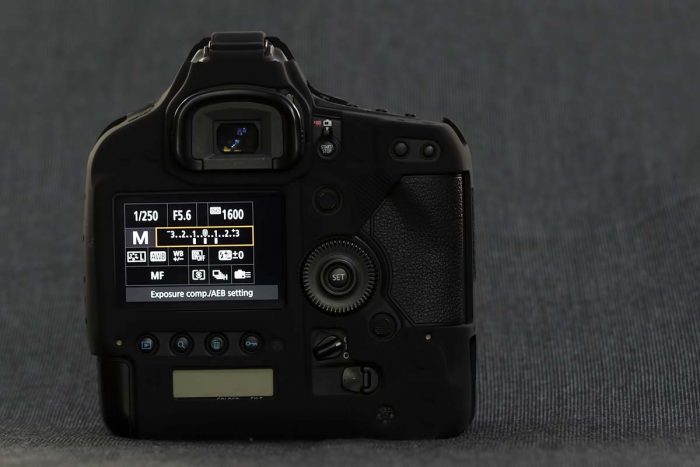
I have set the Exposure stop increment factor to 1/3. So, the exposure compensation dials will get shifted by 1/3rd on both sides, every time I turn the dial, w.r.t the center. I need to turn the dial 3 times to the right to set -1,0,1 Exposure settings for 3 shots.
Final Thoughts
Now you know how to set exposure bracketing in your camera and when to use it. So, start using this feature and turn your images into HDR.
Consider reading this in-depth HDR photography guide for creating stunning HDR images from your bracketed shots.
You cannot use the bracketing technique to create HDR images of subjects in motion. It is only applicable to still subjects.