HDR Photography Guide-How To and Examples
If you are a beginner in photography, then you will be interested to know about HDR photography. You might have already seen many beautiful HDR pictures. So, in this guide, I will show you how to create HDR images.
What is HDR Photography?
HDR stands for High Dynamic Range photography. As you know, the dynamic range of the camera is less when compared to Human Eye. A Human eye can see all the details in the scene, whereas a camera can capture only a certain amount of details for a fixed value of Exposure.
But, it is possible to capture/create HDR images. It is by combining three or more images captured at multiple exposures to increase the dynamic range of the overall picture.
Let me make it clear. Here, the camera or the photo processing software takes three or more shots and combines the details in each of the images to get the final HDR image.
How to do HDR Photography?
You can do HDR Photography in multiple ways.
1. In-Camera HDR Photography
Most digital cameras come with inbuilt HDR mode.
You can enable this mode in your camera to shoot HDR images. In this way, you can avoid the software part for creating HDR photos.
Canon 5D Mark III, Canon 5D Mark IV, Canon 5DS, Canon 5DSR, and Canon 7D Mark II are some of the Canon DSLR cameras that come with HDR shooting mode.
You need to check the camera specification or the user manual to see whether it supports HDR mode if you are looking to buy one.
2. Creating HDR Photos using Software
Nowadays, there are many photo-processing software that is capable of creating HDR pictures. Some can even generate an HDR image from a single photo, like the Aurora HDR 2019 from Skylum.
Typically, you need three images to generate an HDR image from the software. If you use Adobe Photoshop, you can use the “HDR merge” option to create HDR images.
You need an underexposed image, an overexposed image, and a correctly exposed image to create one.
3. HDR with Smartphone Camera
Nowadays, smartphones are coming with HDR mode. When you enable this mode in your smartphone camera, you can capture HDR images of the scene.
Here, the camera captures multiple photos at multiple exposures and combines them through the internal camera software to generate the High Dynamic Range Image.
You will have to hold the camera for some time (around 1 second or less) to get the final processed HDR image from the smartphone camera.
Camera Gear for HDR Photography
If you want good HDR images, you need to have the right camera gear. HDR photos are generally done for Landscape and Architecture photography.
1. Camera Body
Any camera body is good enough. You can go for a DSLR or a Mirrorless camera body, a full-frame, or an APS-C body. It depends on your budget.
If you have more money to invest, go for a full-frame camera body. You will get a good-quality image.
You can even do HDR photography with a point-and-shoot camera if it allows you to control the exposure manually.
2. Camera Lens
A good wide-angle lens like a 10-20mm lens or the basic kit lens, 18-55mm can do the job.
You can even use a short telephoto lens like 70-200mm if you are looking for a slightly narrow-angle of view.
The type of photography will decide the type of camera lens that you need to use.
3. Good Tripod and Head
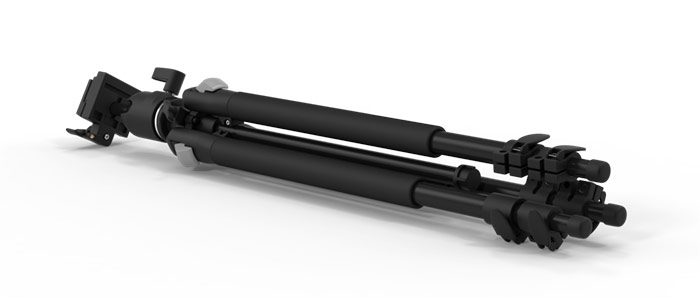
A good tripod is a must when it comes to HDR photography. It doesn’t mean that you should buy an expensive tripod.
Invest in a tripod and head that can handle your camera weight and the wind factor.
Consider reading this guide, How to Choose a Tripod?, if you are looking to buy one. It will help you pick the right one for your needs.
4. Remote Shutter Release
I recommend using a Remote Shutter Release or Intervalometer when you do HDR Photography, even though you can capture HDR without it.
You can use a wired or a wireless one.
Camera Settings for HDR Photos
Now, let us see the different camera settings that you need to use to capture an HDR image.
These settings are for cameras that do not come with an inbuilt HDR mode.
1. Mount the camera with the wide-angle lens on the tripod.
2. You can either use the semi-automatic Aperture Priority mode or the Manual mode. I will explain it with Manual mode so that you can shoot in any lighting conditions.
3. Position your camera towards the scene you want to capture. Go for an Aperture value between f8 and f16. If you go for a higher f-number then the diffraction phenomenon may kick in, which will affect the image quality. Make sure to get everything in focus since you are doing Landscape photography. You can use the Hyperfocal Distance Technique to get the maximum area in acceptable focus.
4. After setting the Aperture value, choose an appropriate shutter speed and ISO value so that you get the right “0” exposure.
5. Take a test shot to ensure that everything is in focus.
6. Most of the cameras come with Auto Exposure Bracketing Feature. So, go to the settings and enable it. This feature allows you to take three or more shots at different exposure levels.
7. So, you can set the desired exposure levels to -1,0, and+1. You can even go for five or seven photos if you want to capture more details.
8. If your camera does not support the AEB feature, you can set the exposure manually to -1,0, and +1 and capture the images.
9. Connect your remote shutter release to the camera for triggering the shot. I recommend using the remote shutter release to minimize the camera shake.
10. Once you are ready, press the remote to activate the AEB, and the camera will capture multiple images at different exposures. Now take these images to your computer and use any HDR software to create the final HDR image.
Issues with HDR Photography
Let us have a look at the common problems that one has to face while creating HDR images and how to avoid the same.
1. Noise
Like in any photography, Noise can be a big issue in HDR photography too. You can try to shoot at the lowest possible ISOs.
Another issue is when using a single file captured in RAW format for HDR. You can always generate three images at three exposures from a RAW image and combine them later to get the HDR image.
But, here the disadvantage is that you will end up opening up the shadows in one image and brightening the highlights. It will increase the Noise in the picture.
So, it is always better to capture the three images at different exposures in-camera, rather than using a single RAW file to generate three. It will ensure that the noise levels are kept low. Always make sure that the image is captured at Low ISO levels.
2. Camera Position
It is always recommended to use a tripod for HDR photography. If you try to keep your camera on a stable surface and shoot an HDR, then you may end up with a misalignment of images.
Some photo editing software will have the option for auto-alignment. But this may result in cropping of the image, and you will lose your image composition.
Otherwise, it will result in ghosting and greying out at the edges of the objects in the scene.
3. HDR & Moving Subjects
HDR Photography is not recommended for moving subjects or action photography.
If there is a wind factor in the scene, you should wait for the wind to settle to take your shots.
Otherwise, you can see the Ghosting effect or a shaky image due to the movement of leaves or water, or other objects in the scene.
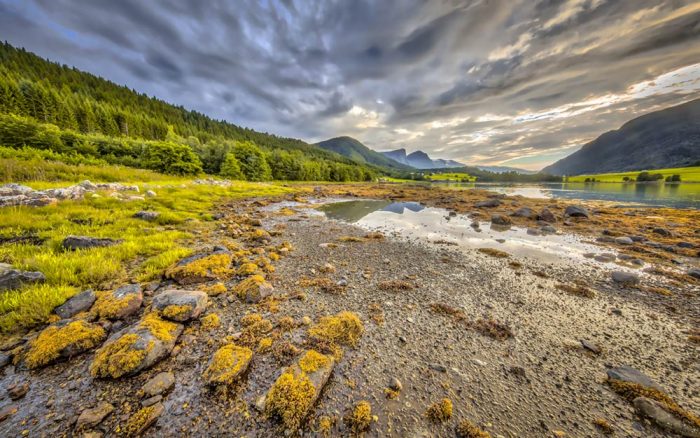
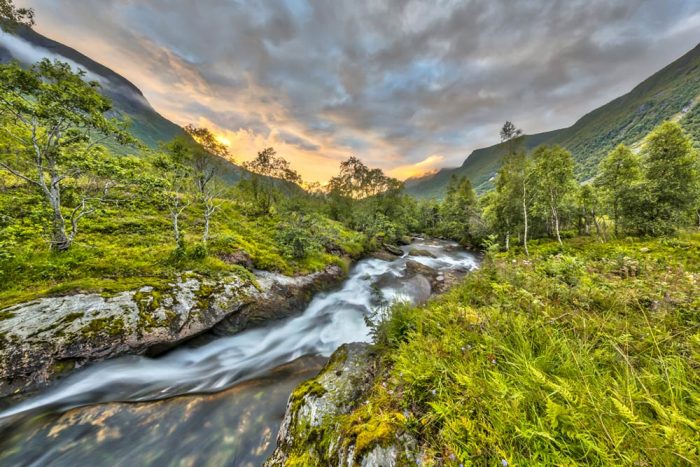
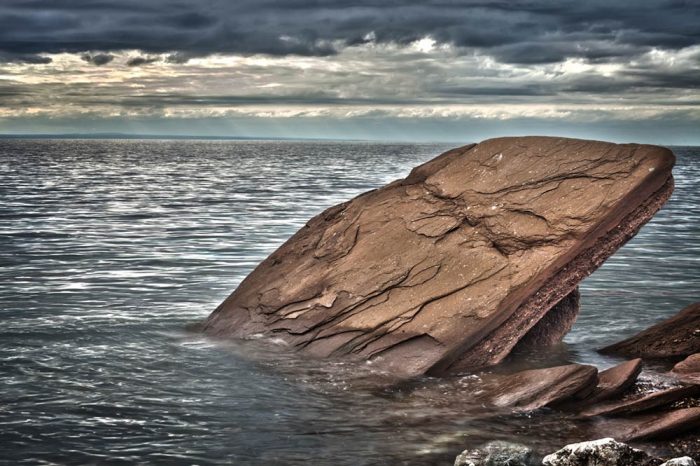
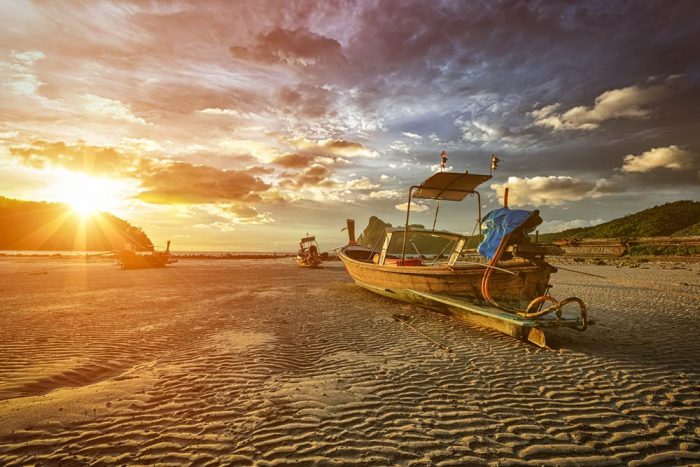
HDR Photography Examples
Let us have a look at some HDR images.
Final Thoughts
Now you know the different ways to create an HDR image. So, start doing HDR photography and create some unique and eye-catchy images.