11 Types of Natural Light in Photography
As nature and travel photographer, you would be more dependent on natural light photography than on artificial light. So, let us see the different types of natural light which you can make use of as a photographer. After reading this article, you would have a clear understanding of natural light photography, and you will be able to predict the light conditions during different times of day and night.
Natural Light Classification Based on Direction
We can classify the types of natural light into four categories, based on the direction from which the light is falling on the subject.
1. Front Light
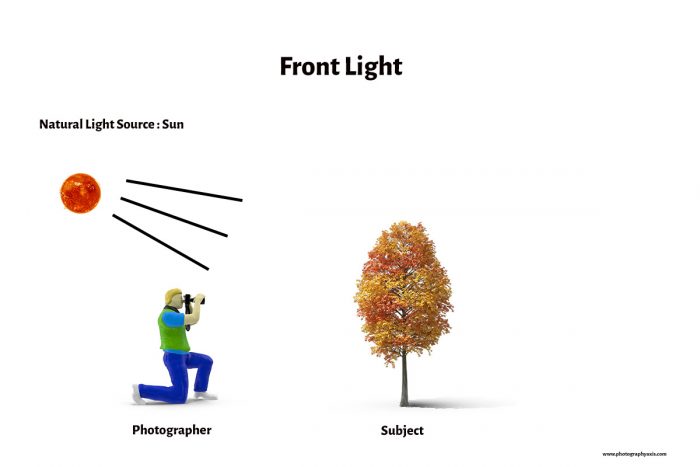
As a photographer, you always want the natural light to fall on the subject’s body. This is the case with the front light. Here, the natural light source, the sun would be behind the photographer, and the light falls on the subject.
There can be two situations here. Either a soft front light would be falling on the subject, or a harsh light would be falling. Soft light is the best lighting you can get as a photographer.
2. Side Light

When the natural light falls on the side of the subject, it creates sidelight. It creates a shadow of the subject on the opposite side of the light source.
The length of the shadow depends on the position of the Sun. Shadow intensity increases with the decrease in shadow length.
3. Top Light
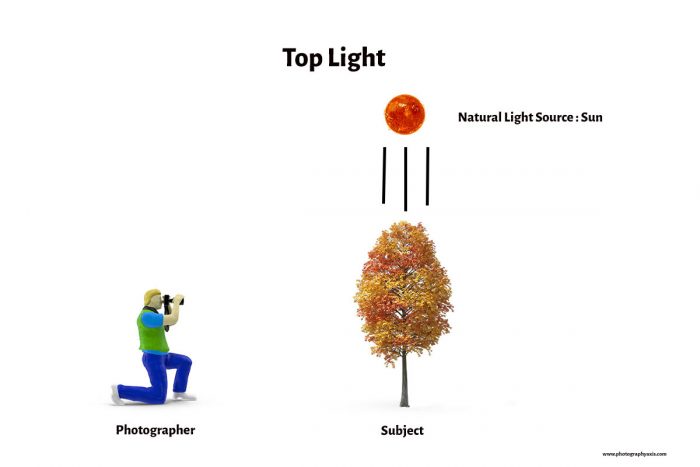
When natural light is on the top of the subject, then it is referred to as top light. Most nature photographers don’t prefer top light since it creates an unnecessary shadow of the subject. It will be a harsh light too as the sun is above the subject.
4. Backlight
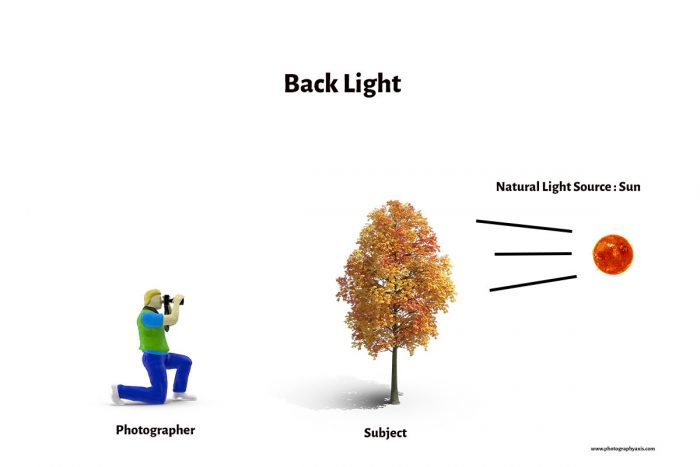
When the natural light source, the Sun is behind the subject, then the subject is said to be backlit. You can utilize such light in two ways. You can capture a silhouette image with only the shape of the subject, or you can go for a rim lighting effect by adjusting your angle of photography.
Getting the details of the subject or not is also dependent on the type of subject. If the subject is transparent or translucent, then you can get the details of the subject as the light passes through the subject.
If the subject is opaque, then you will have to go with a silhouette picture or a rim light shot since the subject blocks the light. The choice is yours.
Natural Light Classification based on Quality of Light
We can divide the light into seven types based on its quality
5. Diffused Light

Diffused light is one of the best lights to create a mood and feel for the photos. Now, you would be thinking at what time of the day, you would get such a light? When the sky is filled with clouds, these clouds act as the natural diffuser, diffusing the harsh light from the Sun. So, you don’t need to use an external diffuser for photography.
It doesn’t mean that you will get a diffused natural light during cloudy time alone. If you have shade in the scene, then you get the diffused light over there. If you are inside an evergreen forest, then the chances of getting such a natural light on your subject are more. Diffused light results in a low contrast scene.
6. Harsh Light
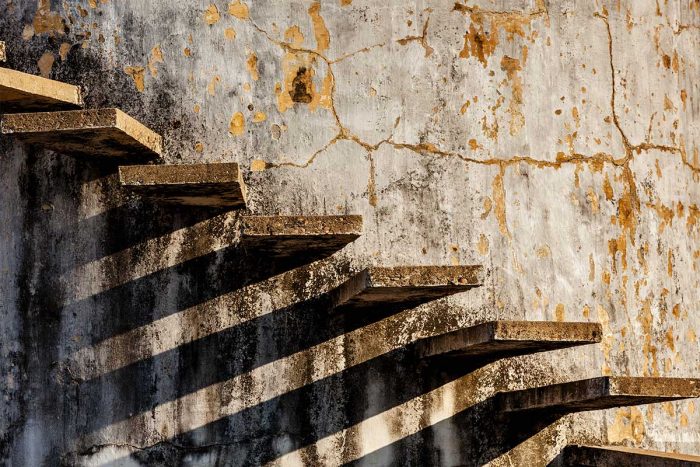
There is a myth that harsh light is something that every photographer will try to avoid to an extent. Do, you know why? It is because it creates unwanted shadows in the scene.
But believe me, there are many photographers, who look for harsh light to create pictures using the shapes and details in shadows. It is mostly used by photographers who deal with black and white photography, where shadows and patterns matter.
Light can be harsh when the natural light source, Sun is above the subject. This light is not good for shooting landscapes as it brings lots of heat haze to the picture, thereby reducing the image quality.
7. Dramatic Light
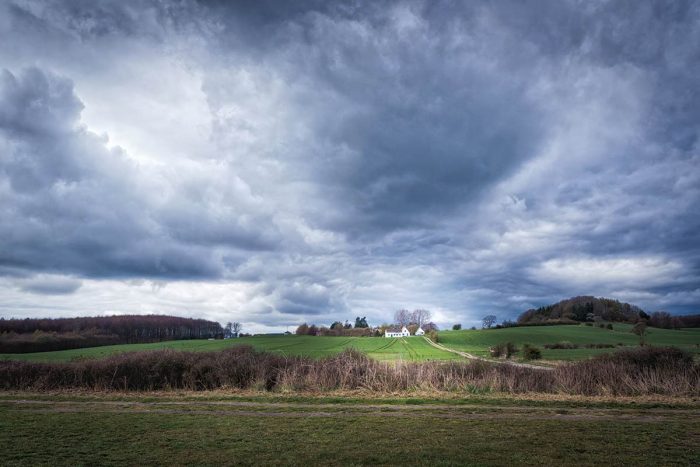
How can natural light be dramatic? Yes, it can become dramatic. It happens due to bad weather conditions. When there is a storm or thunder, there will be a total change in the atmosphere. It is this change that creates the dramatic light.
You can go out and shoot once the storm is over to utilize this light to create dramatic images. You can create unique landscape frames with dramatic natural light.
8. Reflected Light
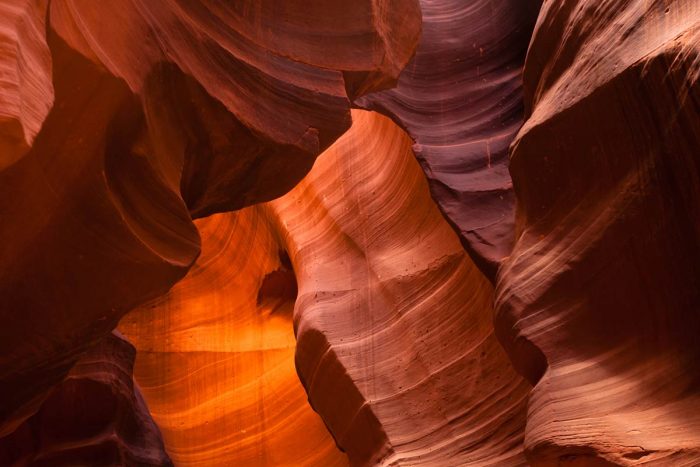
It is an indirect natural light source. When the light falls on the scene after reflecting from some surface, then it is referred to as reflected light. Reflection can happen from any surface like tall skyscrapers, walls of mountains, or from glass or any other shiny surface.
They are soft light, and the light falling will have some characteristic color from the reflecting surface. So, use reflected lights creatively and carefully for your shots.
9. Golden Light
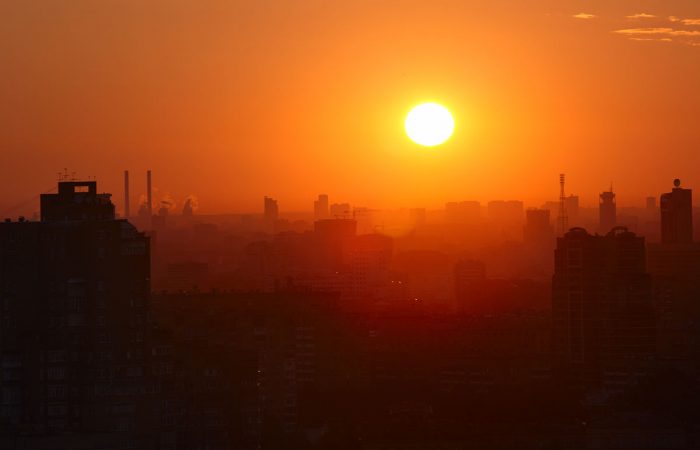
If your question is, which is the best light for photography? My answer would be the light during the golden hours. It can create some extraordinary images with the shades of Orange, Red, and Pink. It is the reason why it is also referred to as “Golden hours of Photography.”
You can make use of this light one hour after sunrise and one hour before sunset. So, next time when you are shooting outdoors, try to capture some images during the golden hours. It is the best light to do silhouette photography.
Read this article, Sunset Photography Tips, to get more sunset photography ideas.
10. Twilight
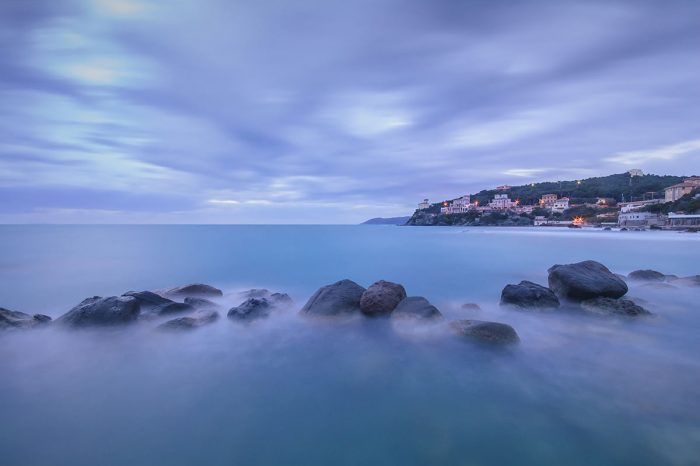
Twilight is something that is more visible for the camera sensor than the human eyes. It is available twice a day and doesn’t last long.
It is available half an hour before sunrise and half an hour after the sun goes down the horizon after sunset. So, you need to be fast with your camera to capture images in Twilight. Pinks and the Blues are the two most prominent colors during this time.
If you are into night photography or long exposure photography, then don’t miss this natural light source to create some beautiful images.
11. Night Light
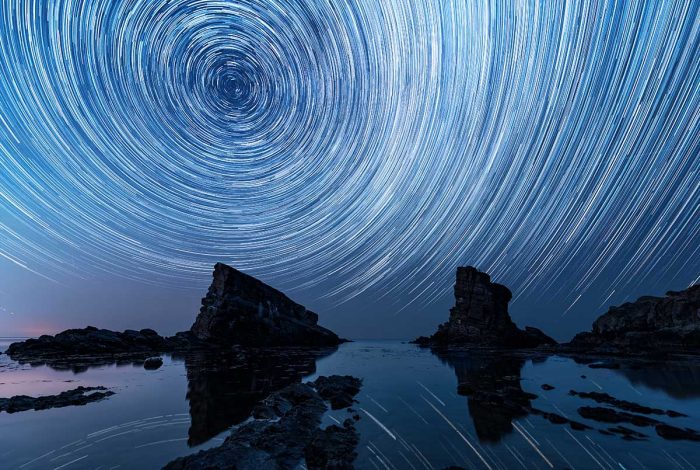
You would be thinking, Is there a good source of light at Night? Yes, there is. The Moon and the Stars are good sources of light at night. During the nighttime, you should try doing Long Exposure photography using these light sources. You would need a good tripod for this.
Most people tend to pack their camera gear, immediately after sunset. Don’t do this next time. Make use of the Bulb mode in your camera with an interval timer to keep your camera shutter open for a long time to create some breath-taking night shots. Give it a try. I am 100 percent sure that you are going to love this.
Conclusion
So, now you know the different natural light sources available to you and how to use them effectively in your photos. Next time, when you are doing natural light photography, try to capture one image each with these different forms of natural light in the scene to get a feel of each light.