Understanding Neutral Density Filter
This article will help you to understand what a Neutral Density (ND) filter is all about, how to use it, and when to use it. This guide will help you to choose the right Neutral Density filter.
What is a Neutral Density Filter?
An ND Filter is a camera filter that helps to reduce the amount of light reaching the camera sensor. Most of the landscape photographers make use of ND filters. It creates a surreal effect to an image. It will help you to exaggerate motion.
Types of Neutral Density Filters
There are two types of Neutral Density filters based on how we attach it to the camera lens.
1. Slot-In ND Filters
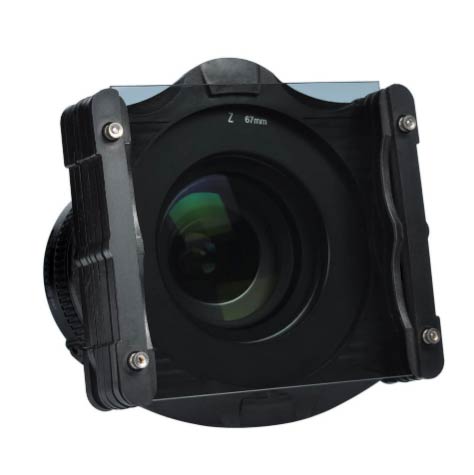
Slot-in type Neutral Density filter is the most commonly used one. It comes in a rectangular shape and is easy to use. You need to slide it in through the guide attached to the camera lens. This guide is capable of inserting more than one camera filters.
So, you can stack your Graduated Neutral Density filters or any other filters along with your ND filter. It is little costlier when compared to the next option.
2. Screw-In ND Filters
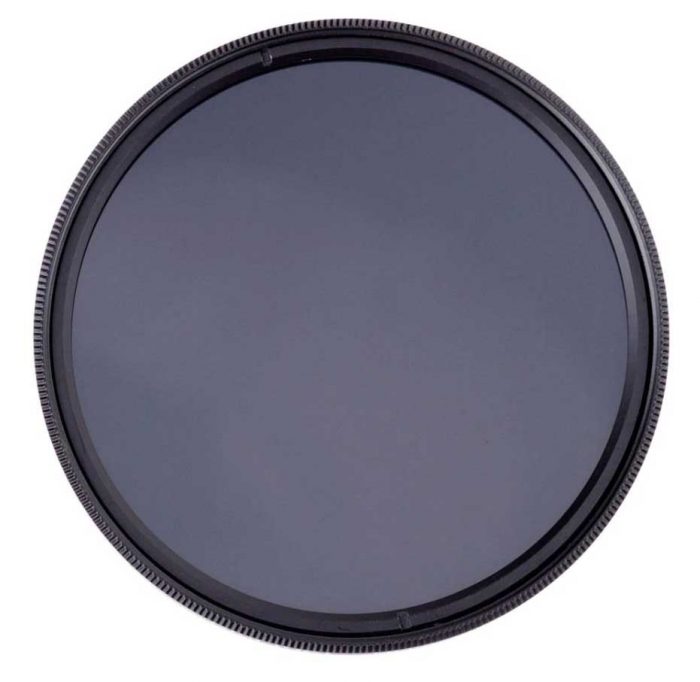
Here, you need to screw in your filter into your front part of the camera lens.
It comes in a circular shape, with thread size matching to that of the camera lens. So, you won’t be able to use the same filter on another lens with a different thread size, unless you have a step-down or step up converter ring.
It is a cheaper option when compared to Slot-in type. If you want to stack filters, then you need to screw in one on top of the other. It can be irritating at times.
Neutral Density Filters based on Optical Density
Based on Optical density, there are different types of ND Filters. They are 0.3ND, 0.6ND, 1.2ND, 1.8ND, 2.4ND, and 3.0ND.
If you make use of a 0.3ND filter, you can reduce the light by 1 stop.
So, a 3.0ND filter is capable of stopping 10 stops of light. You can choose your Neutral Density filter accordingly.
There are Extreme Neutral Density filters which can block more than 10 stops of light. You can try it out if you are interested.
How to use a Neutral Density Filter?
Let us see how to use an ND filter to capture the image.
- Mount your camera and lens set up on a tripod. Position it towards the frame you want to capture.
- Attach the ND filter in front of the lens.
- You can put the camera to “Manual Mode” or “Aperture Priority Mode”.
- Make sure that you have set the lowest possible ISO value.
- Set the Aperture value to a higher value of f8 and above.
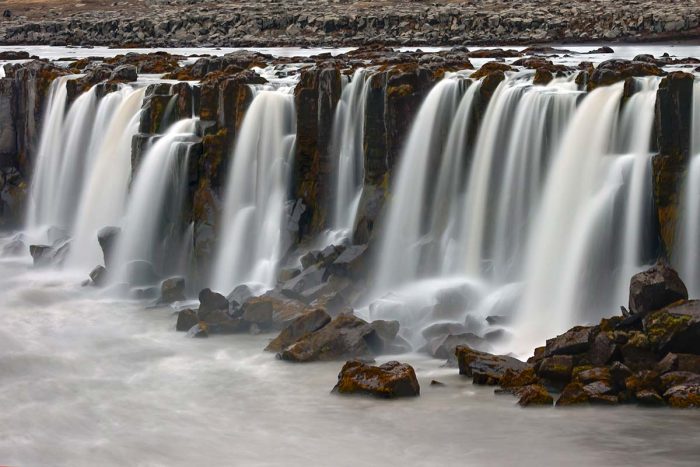
- Use the viewfinder and check what shutter speed you are getting. If you have water bodies in the scene, then you can get that silky smooth effect by choosing a shutter speed of 1/10 seconds or slower. It will give a nice feel to the image.
- Use the 2 second or 10 seconds in-camera timer to trigger the shot. You can also make use of the remote trigger if you have one. Make sure that you have enabled the mirror lockup. It will help to reduce the camera shake.
- You can make the water flow more smooth if you have multiple ND filters with you. Either stack up your ND filters to get a lower shutter speed or use a high stop ND filter to get the same effect. Stacking up filters may reduce the picture quality if you are using low-quality ND filters.
When to Use Neutral Density Filters?

You can use an ND Filter in bright lighting conditions. When the light is strong and bright, there is a chance that you may lose details in highlights of your image when you do long exposure photography.
If you are shooting waterfalls or any flowing stream then, then an ND filter is an excellent option to get the silky smooth effect. It will help you get lower shutter speeds for the same exposure value. If the water is falling at a fast rate, then you may have to go for a higher ND filter to get the same effect.
You need to take the wind factor also into account while using an ND filter. If you have plants or trees in the frame, then you need to make sure that there is no wind when you trigger the shot. Otherwise, it can result in unwanted image blur because of the plant movement.
If you have not used a Neutral Density filter yet, I recommend trying one next time when you are photographing landscapes. Many landscape photographers are addicted to the surreal effect or the dramatic effect created by the ND filters. Lee, Cokin, and Hoya filters are some of the well-known brands in Neutral Density filters.