How to Shoot Panoramic Pictures
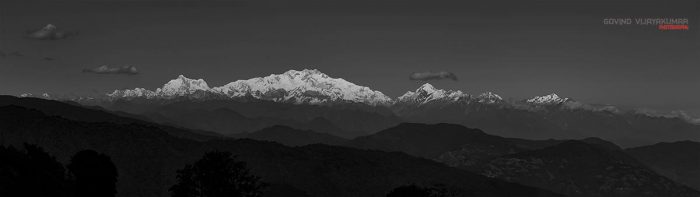
Most of the Landscape photographers would be shooting Panoramic Pictures also. It is like you are getting to the next level of landscape photography. A photographer decides to go for a panorama shot if he wants to capture a scene which can not be fitted into his camera even with his widest possible focal lengths.
I have been in situations where I had only a medium telephoto lens and the scene was so beautiful that I badly want to photograph it with a wide angle. I used my medium telephoto lens to create the Panoramic Picture.
What are Panoramic Pictures?
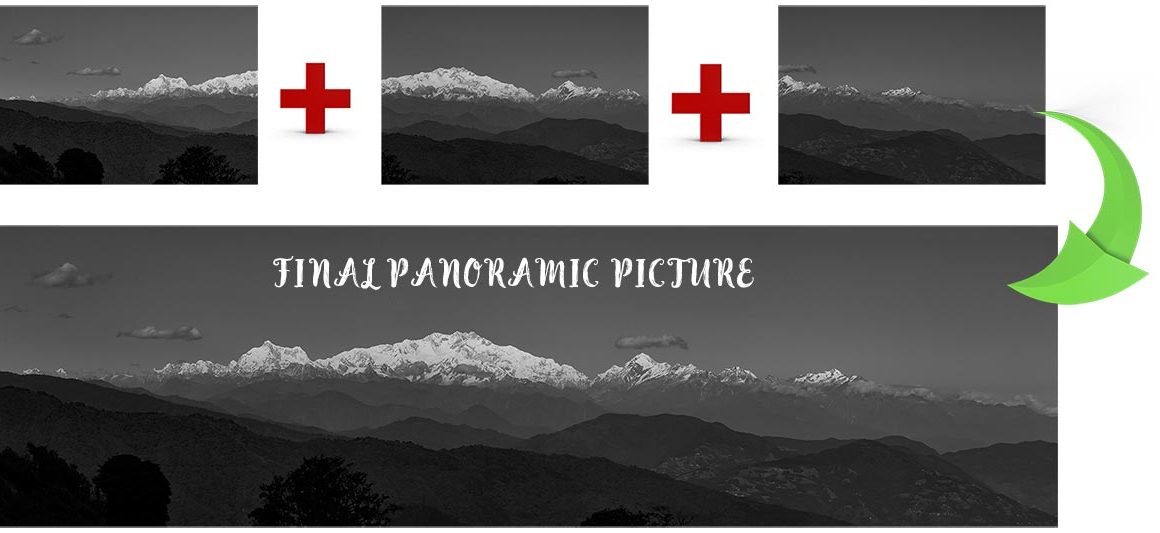
It is an ultra-wide picture which is made by capturing multiple frames of a wide scene and joining them later in a photo editing software. Certain cameras and smartphones support Panorama mode. If you enable this mode then you can take the panorama picture in a single shot. Here, the internal algorithm inside the smartphone or camera is capable of stitching different frames while the user is moving the phone or camera in the horizontal direction (generally).
Equipments to shoot Panoramic Pictures
You don’t need an expensive camera equipment to shoot panorama images. By making use of the equipments given below you can shoot it.
-
A Good Camera Tripod
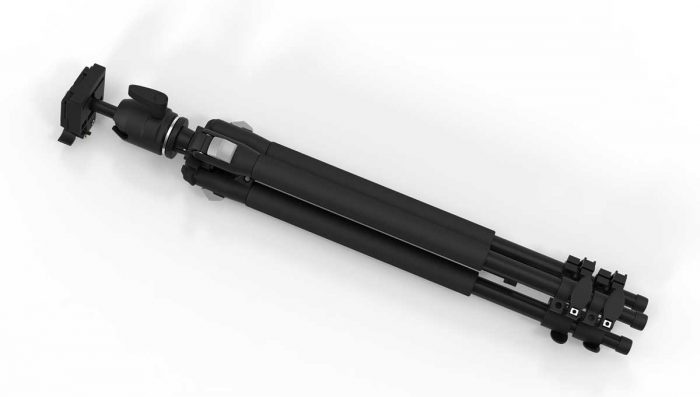
You should have a good camera Tripod. If you are into Landscape photography then you will definitely have one. Now, your question would be, What kind of tripod head should I use? The best one would be a pan type head. But, any head will do.
-
A Digital Camera
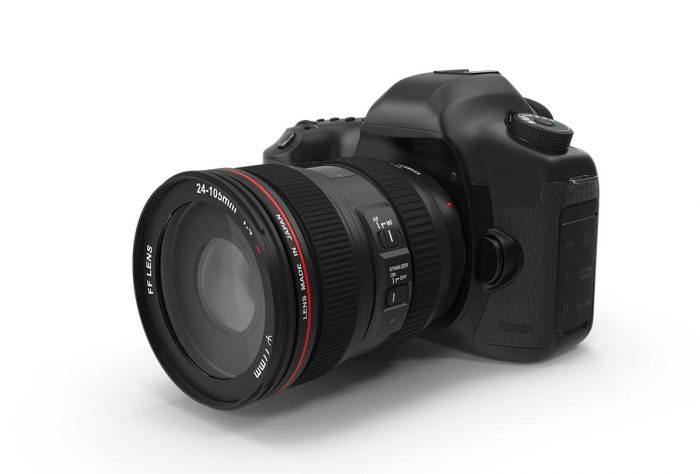
Any Digital camera can be used for Panorama photography. A point and shoot camera or a bridge camera or a DSLR camera or a mirrorless camera would be sufficient. If you have a camera capable of shooting in RAW that would be a better choice. It will help you to fine tune your image while post processing.
Camera Settings For Panorama Photography
- There are no complex camera settings for Panorama pictures. It is quite simple and straightforward.
- Fix the camera on your tripod. Position it in such a way that the initial image which you are going to capture starts from the leftmost side.
- Set the Image Exposure using Camera Manual Mode. You can go for Aperture priority mode if you are not used to Manual Mode. Let us assume you are getting the correct exposure with a camera setting of f16 Aperture, 1/50 Shutter Speed and at ISO 200. I am quoting this setting just for reference. It will vary according to the lighting conditions.
- Make sure that you use the same setting for all the frames. Otherwise, you may end up in images with multiple exposures. A higher Aperture value of f16 is chosen so that more area will be in focus. A lower value of ISO 200 will ensure that there is no noise in the final image. Shutter speed of 1/50 will ensure that there is no Image blur due to camera shake.
- You will have to take wind factor also into account. If there is some wind then you will have to bump the shutter speed and adjust the other 2 parameters accordingly. Otherwise, there may be some blurry part in the image because of the wind affecting the trees or other subjects in the scene.
- If your camera comes with an inbuilt Panorama mode then just enable this mode and pan the camera from left to right to capture the image.
- If your camera doesn’t support inbuilt Panorama pictures mode then you need to do it with help of a post processing software.
- Start from the extreme left side of the scene. Once your settings are ready, take the first click. Move the camera horizontally to capture the next frame adjacent to the first frame. Capture it.
- Then repeat for the coming frames until you are done with the full scene. While moving the camera horizontally make sure that your tripod doesn’t slip. While setting up it is good to ensure that tripod is on a stable surface. There are two techniques which you can use for horizontal panning.
- If you are having a good camera tripod head which is capable of moving horizontally without any vertical movement. I recommend you to use this feature for the panning, keeping the tripod legs stationary.
- If you are having a ball head or a head which moves vertically also then you can move the whole set up along with tripod in a circular manner for taking each shot. Certain cameras come with an inbuilt accelerometer which will tell you whether your camera is aligned properly or not. Make use of this feature to get a proper alignment amongst all the images.
- You can even enable the grid feature in the camera. Keep the Grids as the reference while shooting.
- Once you are done with the captures, you can take it to any photo editing software which is capable of stitching panoramic pictures. I will be using Adobe Photoshop for explaining.
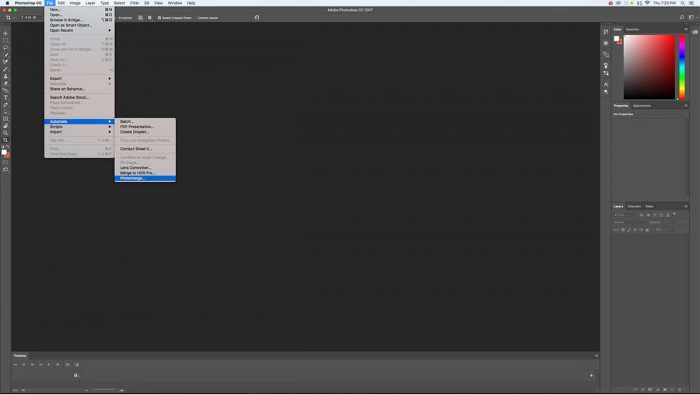
How to Stitch panoramic pictures?
#1. Open Adobe Photoshop.

#2. Go to the File Menu. Click on the “Automate” option. Select the “Photomerge” option from this.
#3. A new window will pop up. It will have options like Auto, Perspective, Cylindrical, Spherical, Collage and Reposition. Select “Auto” from Layout.
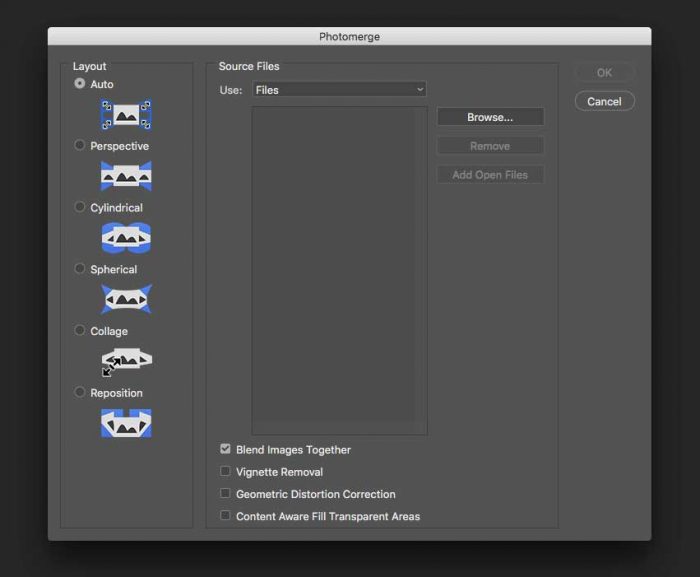
#4. Click on Browse to select the files which you want to merge.
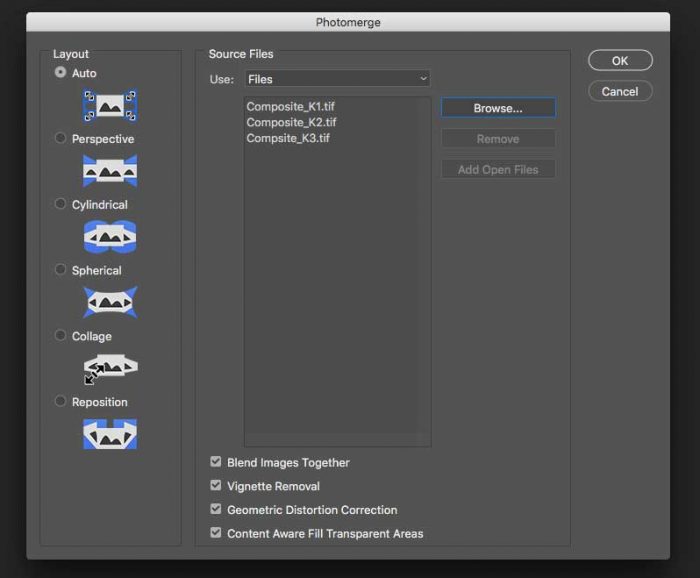
#5. Tick the Blend Images Together, Vignette Removal option and Geometric Distortion Correction option. You can tick the Content Aware Fill Transparent Areas if you want to fill out the transparent area which will be visible otherwise on the final image. If you have not selected this option then you will have to crop the image after stitching. In this way, you can remove the transparent areas on the side.
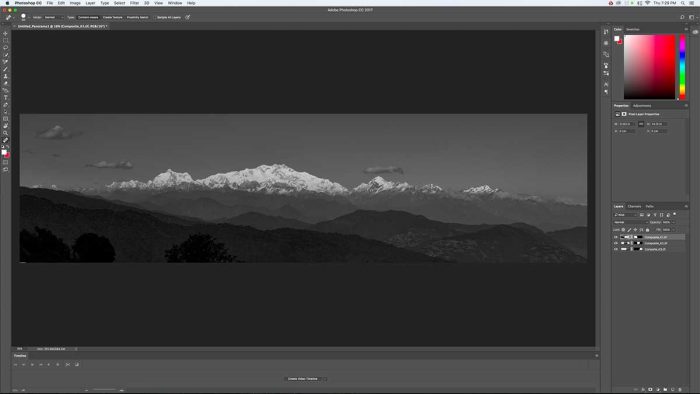
#6. Save the final image in TIFF format. If you are planning to use it for prints or to share in social media then save in JPEG with appropriate resolution.
There are high end motorized camera sliders available in the market. They are capable of panning the camera from 180 degrees to 360 degrees from an axis. You can even make use of that to generate the multiple images required for panoramic pictures. It can be quite expensive. So, consider this option only if you are going to shoot panoramic pictures regularly.