LEARN to Master Camera Manual Mode
It took me almost one year after buying my first DSLR camera to switch to Manual Mode. I still feel that I should have switched to Manual Mode long before that. I have lost many good photo opportunities due to this late switch over.
Earlier, I was shooting in the semi automatic model like the “Aperture Priority Mode” and “Shutter Priority Mode”. It took me around 3 months to get a good grip on Manual Mode. Believe me, if you master this shooting mode, you can shoot in any lighting conditions.
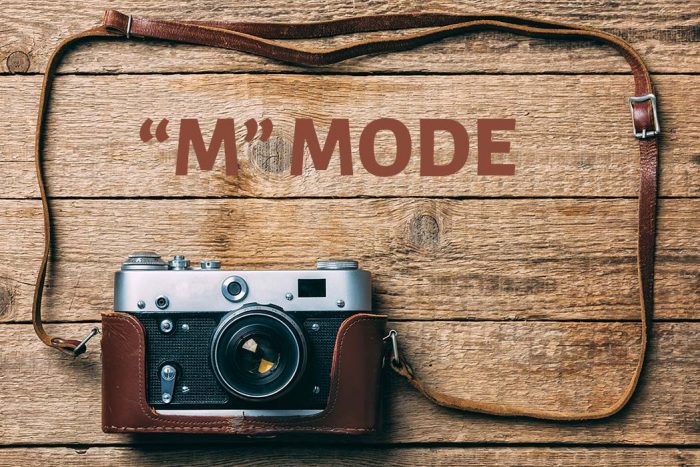
What is Manual Mode?
The Mode denoted by “M” in the camera is the Manual mode.
What speciality does it have? It allows you to set the 3 basic camera parameters- Aperture, Shutter Speed and ISO along with few other camera settings. These 3 parameters control the exposure of the image.
Camera Settings for Manual Mode
Turn the camera dial to letter “M” to select the Manual Mode.
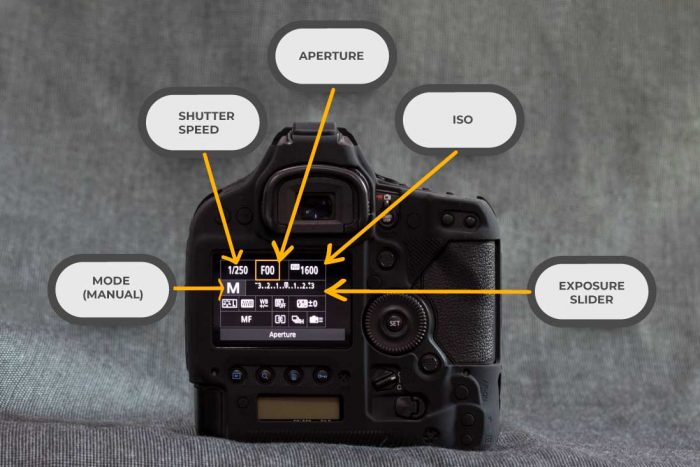
You can see the 3 basic parameters in the first row, Shutter Speed, Aperture and ISO. You can set the values.
Exposure slider is given below this row. Based on the 3 values, the camera will give you the exposure reading after metering.
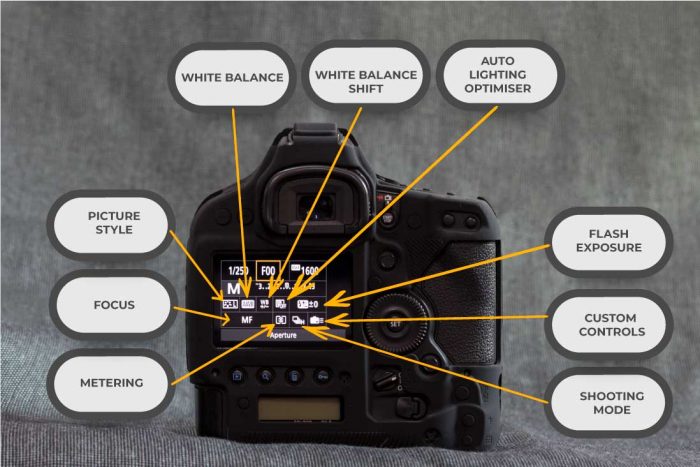
There are other settings like White Balance and Picture Style. You can set the White Balance to Auto or set any white balance. If you are shooting outdoors in the daytime you can choose daylight white balance.
Camera metering can be set according to the lighting conditions. I use Evaluative metering, 90 per cent of the time.
Imagine you are photographing a wild animal in daylight condition. You can set the aperture to f/8 so that the full body of the animal would come in focus.
If possible, focus on the eyes of the animal. It is the best way to focus. Select an ISO of 200 since you are shooting at daytime. Always try to keep the minimum possible ISO. Higher ISO will result in a noisy image.
Choose the shutter speed in such a way that you get the correct exposure. Set the White balance to Daylight.
Take a shot and check the histogram to see if the image is getting properly exposed.If not, adjust the shutter speed accordingly.
If you want to control the depth of field you can adjust the aperture accordingly.
I recommend not to use Auto ISO settings. Always start from a lower ISO, say 100 or 200 and set the aperture and shutter values. If you are not getting the desired values for these two parameters then bump the ISO.
Always make sure that whatever ISO you set, it is well within the limit. The limit I refer to here is the maximum noise level which you can remove using any noise removal software without losing many details.
Manual mode doesn’t mean that focusing is done manually. Always go for Autofocus. Use Manual focus only when you find it difficult to focus with Autofocusing feature.
I recommend using Live View for Manual focus. Zoom in the scene to 100 per cent and focus manually on the subject by rotating the focusing ring. In this way, you can ensure that the perfect focus achieved.
Once you get the correct exposure, you can even recompose the shot with the same subject.
Why Shoot in Manual Mode?
Imagine you are photographing a bird in flight with the sky as the background. If you shoot in Shutter priority mode, you will have set the shutter to 1/1000 of a second to freeze the action.
The camera will give you the Aperture and ISO values based on the exposure. You will have set the exposure to 1 since you are photographing a dark subject against a bright background with the Evaluative metering mode.
Since the bird is in flight there is a chance that the background may change to dark. You will have to adjust exposure slider again to get the correct exposure.
But, this is not practical to do when the bird is in flight as it moves to and fro. So, we need to go with Manual exposure settings.
So, Dial in “M” mode and set the Aperture value to say f5.6 and set a shutter value to correctly expose the bird. In this way even when the bird moves from a light background to a dark background you will get a correctly exposed image.
Thus, you can put your effort on locking the focus on the bird rather adjusting the exposure slider again and again. Thus you will never miss the shot.
When to use Manual Mode?
I recommend using camera manual mode whenever you are doing photography. There is a well known saying, “Practice makes Man perfect”. So practice regularly.
Manual mode is very useful for shooting in tough weather conditions and in tricky lighting. If you photograph a dark subject against a light background or light subject against dark background go for Manual mode.
So, start shooting in manual mode. You may miss some opportunities initially. But once you master this camera mode, you can take photos in any lighting conditions. You will get full control over your camera when you use Manual mode.