Aurora HDR 2019 Review: Is this for you?
This time, I am reviewing the awarding-winning HDR software, Aurora HDR 2019 from Skylum. There are many good HDR software programs in the market. So, it is really tough to pick the right one.
You can even use Adobe Photoshop to create an HDR image. So, let us see, what makes Skylum Aurora HDR 2019 different from the rest of the tools. Is it really good? If you are interested to learn more about HDR photography, consider reading, HDR Photography Guide.
How to use Aurora HDR 2019?
If you want to give a try, then you can download the 14-day free trial version through this link: Download Trial Version of Aurora HDR 2019
I will be running this software on my 13” MacBook Air with the following specifications:
1.3 GHz Intel Core i5 Processor
4GB 1600 MHz DDR3 Memory
Intel HD Graphics 5000 1536 MB Graphics
Aurora HDR 2019 is also available in the Windows platform, and the Workflow is the same as that of Mac OS software.
1. Open Aurora HDR 2019 software.
2. You will have the option to do a single HDR conversion or Batch Conversion. Aurora HDR 2019 is capable of generating an HDR image from a single picture as well as multi-exposure photos of the same frame.
3. Click the “Open Image” to generate a single HDR image. You can select multiple photos taken at different exposures or a single image. All the required images need to be under a single folder for selection.
4. Now, you can see the thumbnail preview of the three images with their Exposure values mention below. There is a settings button on the bottom left corner of this window. Click on this button, and you will see the different options: “Ghost Reduction, “Color Denoise,” and “Chromatic Aberration Reduction” options.
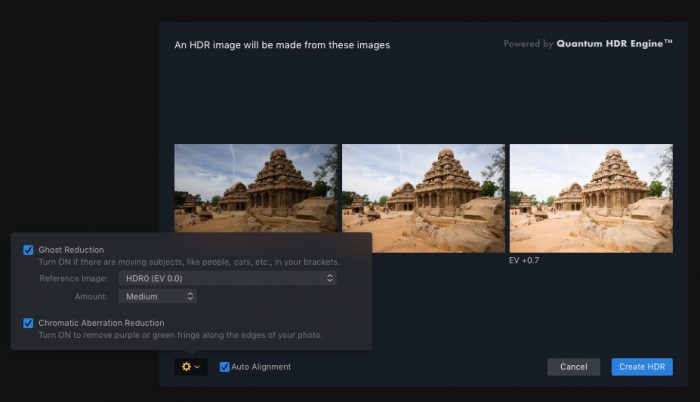
- Ghost reduction is only available if multiple images are used for generating the HDR. It is for removing the Ghosting effect at the edges of objects due to the overlap of multiple pictures. You can set the reference image as the one with zero exposure value.
- Color Denoise is to remove the color noise that will occur when you combine your bracketed shots. This option is only available when you use RAW files as input to Aurora HDR 2019. In the above screenshot, Color Denoise option is not visible since the three images are in JPEG format.
- Chromatic Aberration Reduction is to remove the purple and green fringing in your photos. I recommend checking all these three checkboxes for the HDR creation. Once this is done, click the “Create HDR” option.
5. You will be moved on to the next main window, and it will take some time to load the HDR preview image. The time depends on the number of input images, their size and the CPU speed. A basic HDR image will be generated.
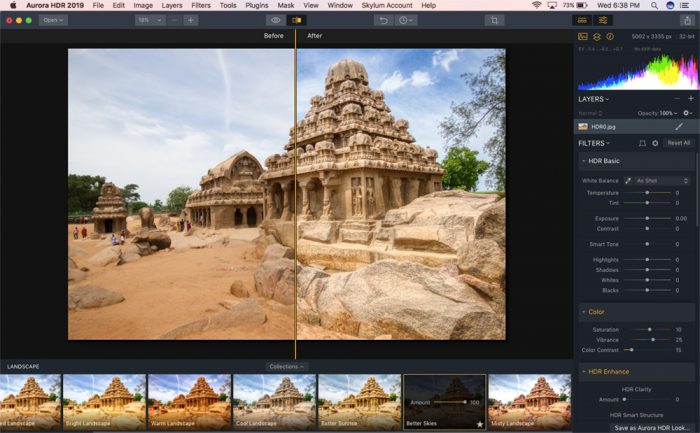
6. Before getting into more settings, let us just get familiarized with the Aurora HDR 2019 toolbars and different settings.
7. We have a toolbar at the top. It comes with the option to zoom in/zoom out the image, Before/After preview and Crop options. The two squares separated by a line button can be used to view the Before/After effect. If you press and hold the eye button next to it, you can see the Before image. You can click the “Crop” option if you want to crop and resize the image.
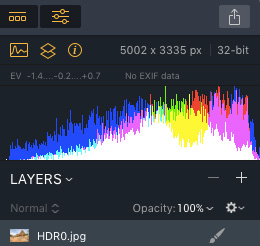
8. On the right-side panel, we have the settings for tweaking. Skylum has named this panel as the Filter panel. The image Histogram and the EXIF data can be viewed on the top of this panel. There is an option to add layers in between the Filter panel and the Histogram. You can make use of it to work with layers.
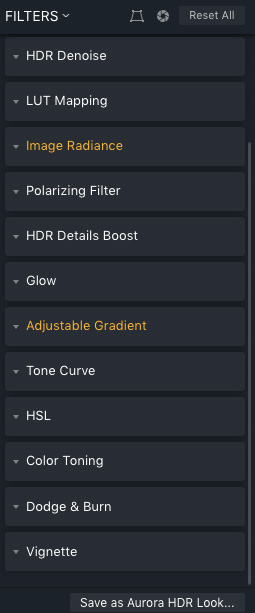
9. The different submodules in the Filter Panel are HDR Basic, Color, HDR Enhance, HDR Denoise, LUT Mapping, Image Radiance, Polarizing Filter, HDR Details Boost, Glow, Adjustable Gradient, Tone Curve, HSL, Color Toning, Dodge & Burn, and Vignette.
HDR Basic module is for setting the White Balance and the Exposure Settings.
Another exciting aspect of Aurora HDR 2019 is the LUT Mapping. It allows you to load Custom LUT File to your image for Color Grading. I liked this feature.
10. Skylum has provided an interesting Bottom Panel which shows the thumbnail previews of different Aurora HDR Looks Collection. It comes with multiple options in different modes like Essential, Landscape, Architecture, Dramatic, Artistic and many more Looks from well-known photographers in the industry. You can select any of these looks if you want to give it a different tone and feel. The intensity of each of the looks will be 100 per cent by default. We can reduce the intensity if needed.
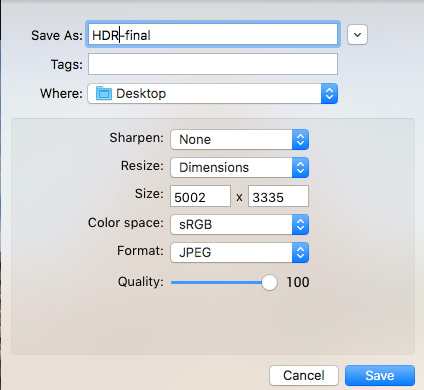
11. Once you are done with all the settings, you have the option to save the final file in the native Aurora HDR file or the regular image formats like JPEG, PNG, TIFF, PSD, and PDF. The advantage of saving in native Aurora format is that all the history details and the setting will be saved along with the file. So, at a later point of time, we can open this file and modify the settings if required. You can click the bottom right corner button to save the file in native Aurora format, or you can select the same option from the File dropdown menu. If you want to keep it in any of the regular image formats, you need to choose the Export option from the File drop-down menu. Here you can set the color profile, image dimensions, and picture quality.
Aurora HDR 2019 Before After Images
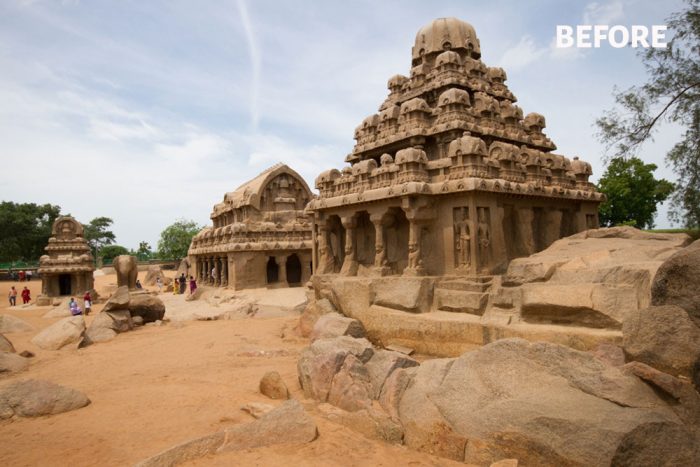
Now, let us have a look at the Before/After images with Aurora HDR 2019.
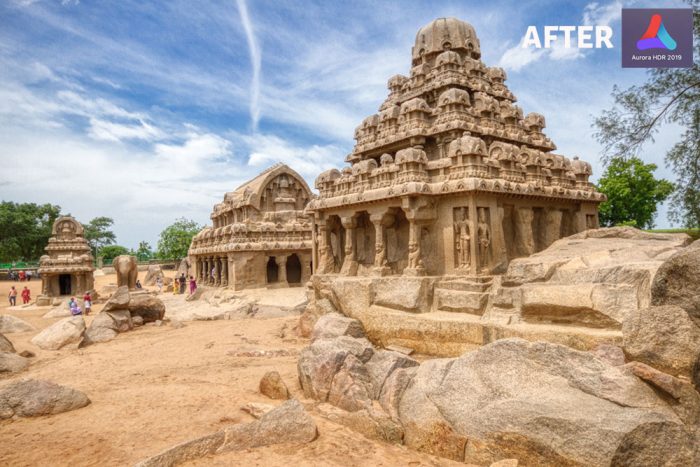
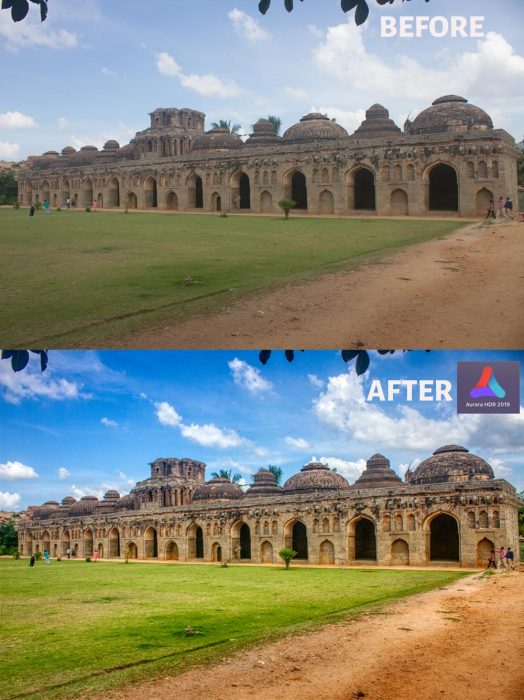
Let us try with a single Architecture image and see how the final HDR is.
The result is really good because the software has used only a single image to generate the HDR image.
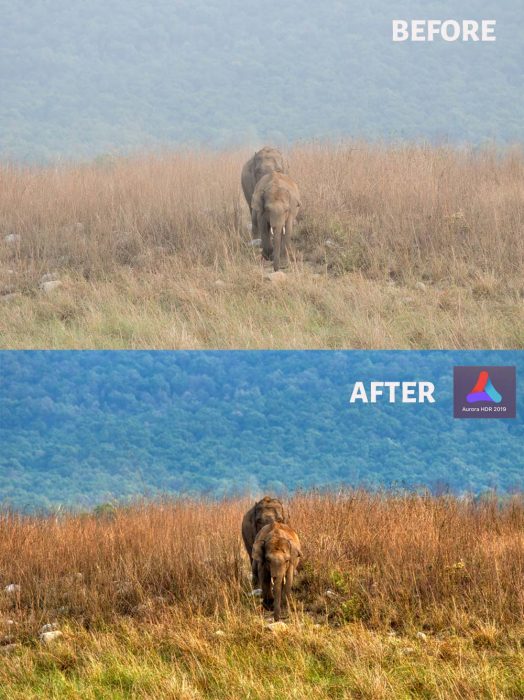
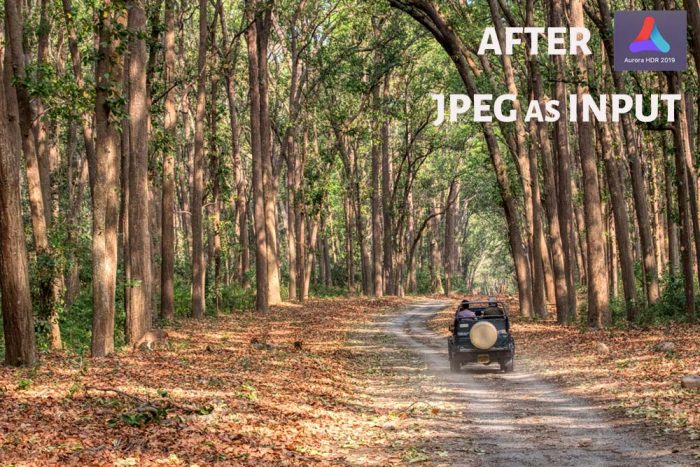
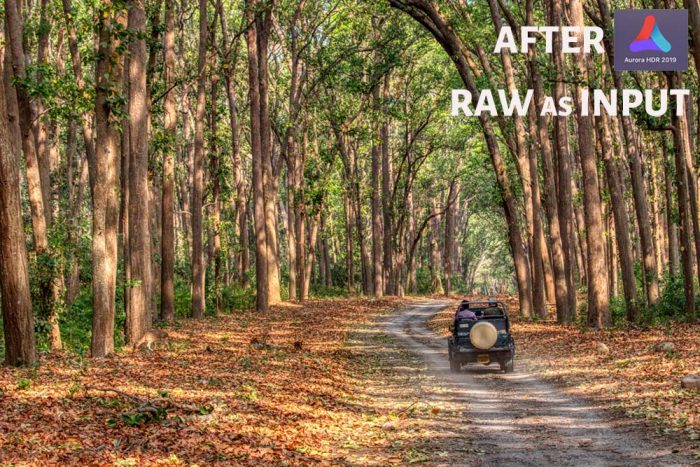
Now, we will see how a Wildlife image looks with an HDR effect added to it.
I did an experiment to see the performance of RAW Vs JPEG image, as input to Aurora HDR 2019. I converted a RAW image directly to JPEG without any post-processing and converted the images to HDR with the same settings using this software. From the final HDR image it is quite clear that RAW as input produces an image with a better dynamic range than a JPEG one. So, I recommend using your RAW images to generate good HDR shots.
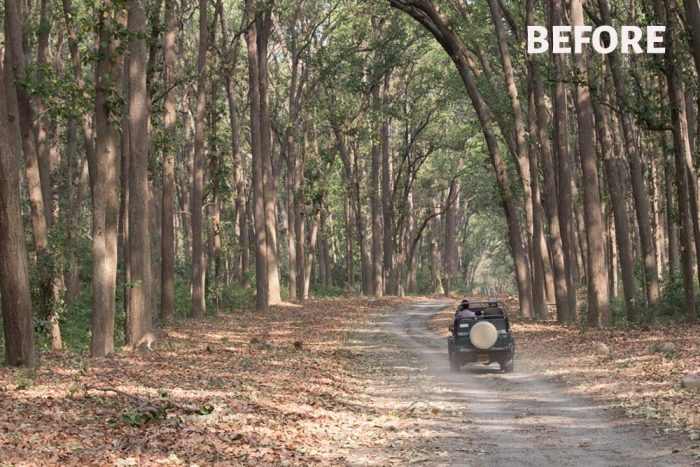
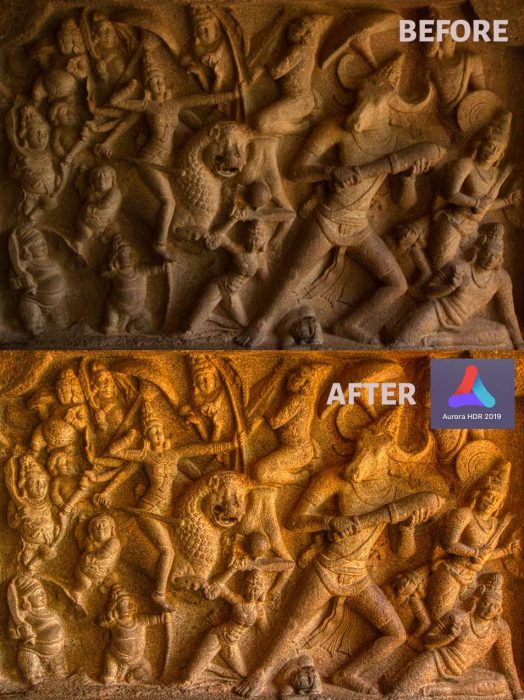
Let us have more Aurora HDR 2019 Before/After Images to see the effect.
Conclusion
I was not a big fan of HDR photography before I started to use this software. I used to feel that most of the HDR photos are unrealistic or too much dreamy.
Aurora HDR 2019 gives better control over the final HDR photo with multiple looks and settings to control. So, it is capable of controlling the level of HDR to a picture, and you can give a subtle effect as well as high-end effect. There is no limit to your creativity.
Now, the question is whether to go for it or not? If you are into HDR photography or is interested in creating some excellent HDR images, then Aurora HDR 2019 is a good choice.
If you have decided to buy it then you can buy it through my link, Buy Aurora HDR 2019. Don’t forget to use my exclusive coupon code “PHOTOGRAPHYAXIS10” to avail a 10$ additional discount.