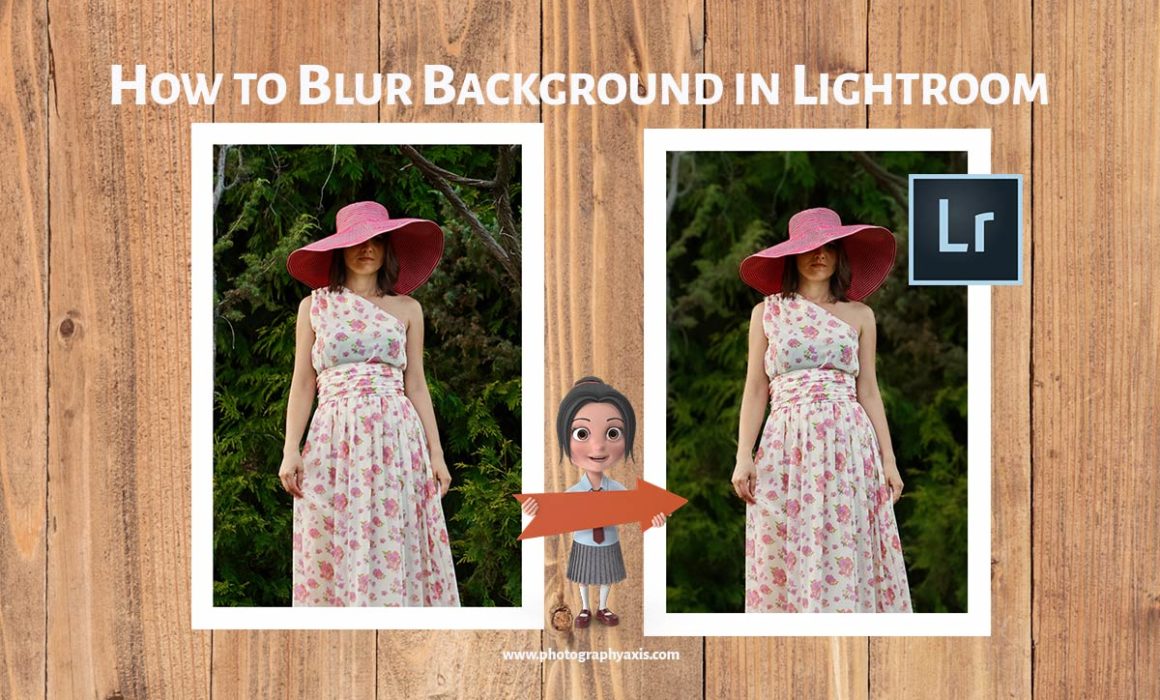
How to Blur Background in Lightroom Realistically?
You may not be having a fast lens with a wide aperture to get a good shallow Depth of field for a blurred background. Otherwise, the distance from the subject and the background is less, and it didn’t give you a nicely blurred background. So, you will be looking to blur background of your image. In this tutorial, I will teach you how to blur background in Lightroom. It will help you add a realistic blur to the photo.
How to Blur Background in Lightroom?
So, I will break down the whole procedure into simple steps for easy understanding. I will be using Adobe Lightroom Classic in this tutorial.
1. Image Import

Open Adobe Lightroom. Import the picture to Lightroom for editing.
Your image will be in the Library folder after import. So, click “D” or select the “Develop” module in Lightroom to take the picture for editing.
2. Brush Selection & Image Masking
![]()
Select the Brush option. You can use a bigger brush initially to mask more areas.
It is better to make the mask visible so that you will know where you are masking. So. Hit the “O” button or select the “Show Selected Mask Overlay” option in the bottom.
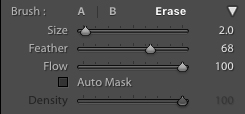
Now, zoom in the photo to the maximum. Start masking near the subject edge. Play with the Size, Feather and Flow sliders for best results. You can use the “[” button to increase the size and “]” button to decrease the size.
Your mask may be overlapping with the actual subject. But, leave it as it is, we will correct it later.
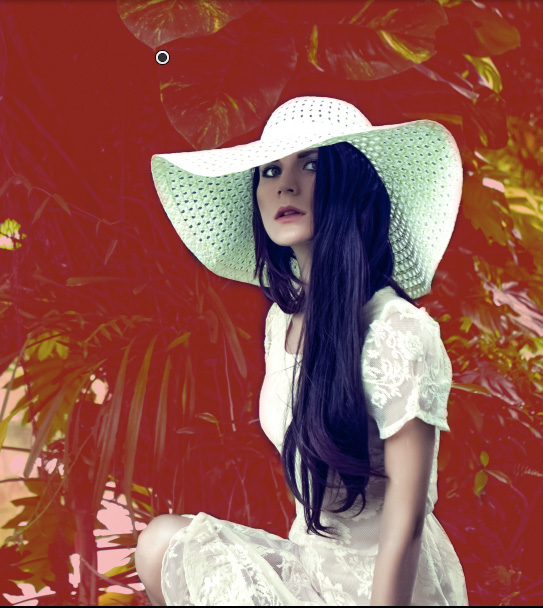
Once the rough masking is done, select the “Erase” brush option. Use it to remove the unnecessary mask applied on the edge of the subject.
Vary the brush size for best results. Once you have completed the erasing, the masking process is completed.
3. Reduce Sharpness, Texture, and Clarity
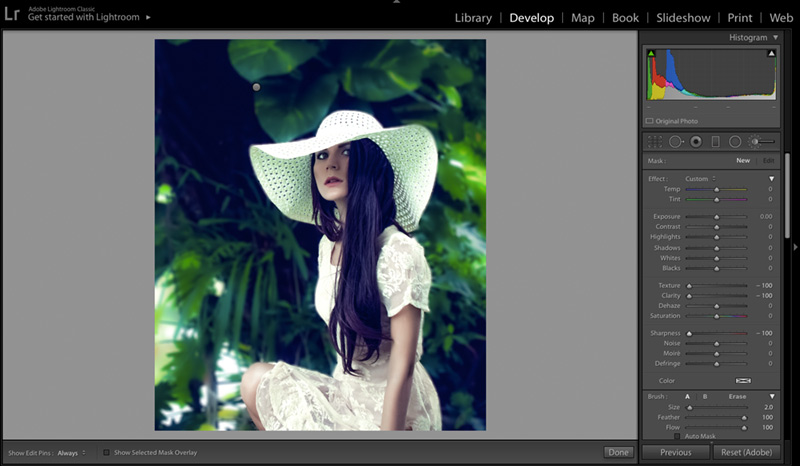
Earlier Lightroom versions only offered Sharpness sliders, which helps to create the background blur effect.
But, now they also have Texture and Clarity sliders in Lightroom to make the blur effect look more realistic and for better controls.
Texture slider comes with Adobe Lightroom Classic v8.3 in the May 2019 release. If you don’t have this version, you can still play with the Sharpness and Clarity slider in the older version of Lightroom to get similar results.
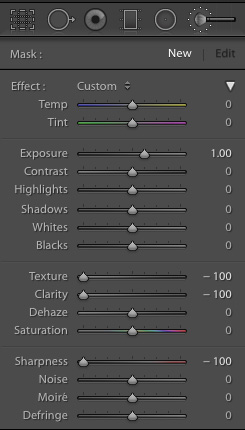
Hit the “O” button again to make the mask invisible. Pull the Sharpness, Texture, and Clarity sliders to -100. If you feel that the edges are not masked properly, then you can take the brush and erase option to adjust these imperfections.
Now, you will notice that the background of the image has gone very soft. It looks very unnatural and realistic.
So, I will increase the slider levels. I will increase the clarity slider first from -100, followed by Sharpness and texture slider for best results.
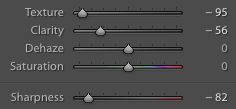
The above values of Sharpness, Texture and Clarity looks realistic for this image. So, don’t push all the sliders to -100 for a photograph. It will make the image look ugly and artificial.
4. Duplicate Mask for More Background Blur
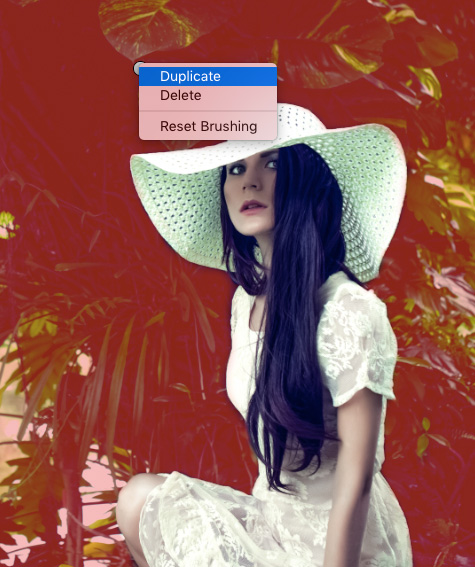
If you want more blur to be added, then you can right-click on the circular brush icon the picture and select the “Duplicate” option.
It will add one more layer of the mask with the same settings to the image, further blurring the background. So, use it accordingly. Don’t overdo it.
5. Export
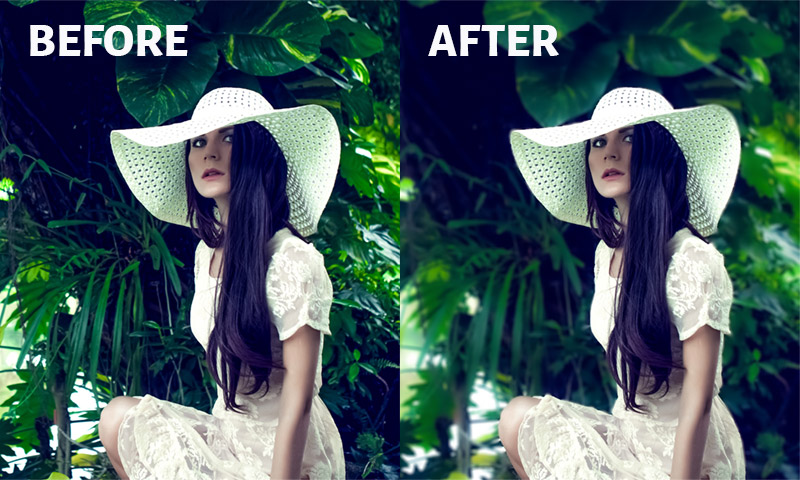
Once you are done, click on the Export option to export the final image.
The Before/After image after applying the Background blur effect in Lightroom is shown above. See, how the background blur helped to make the subject stand out from rest of the surroundings.
Background Blur in Lightroom-Before and After Images
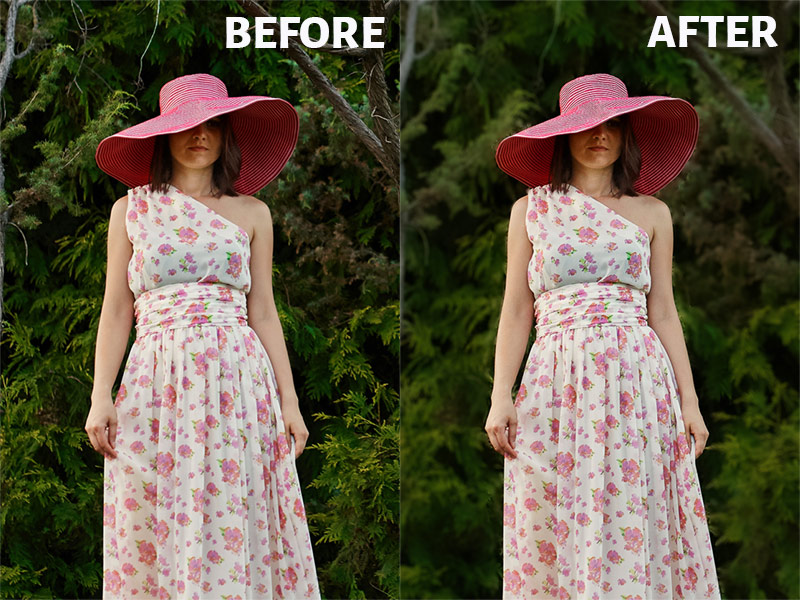
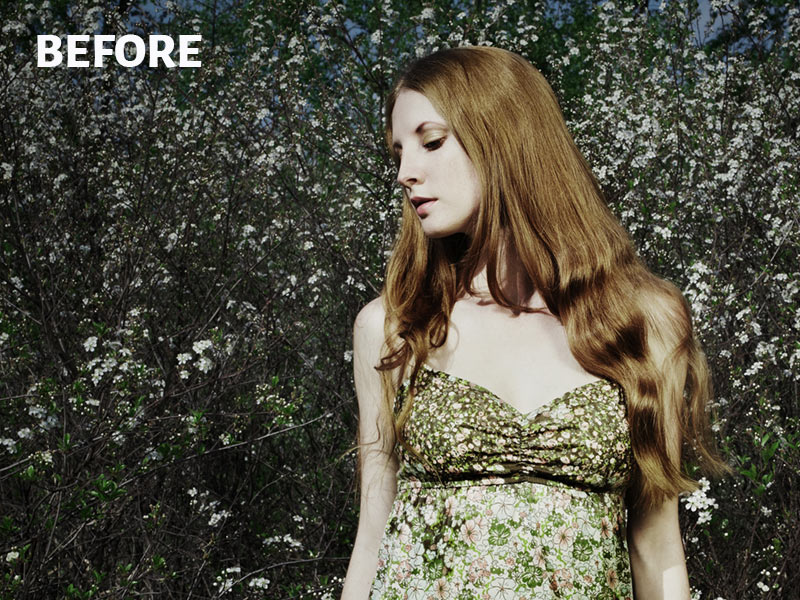
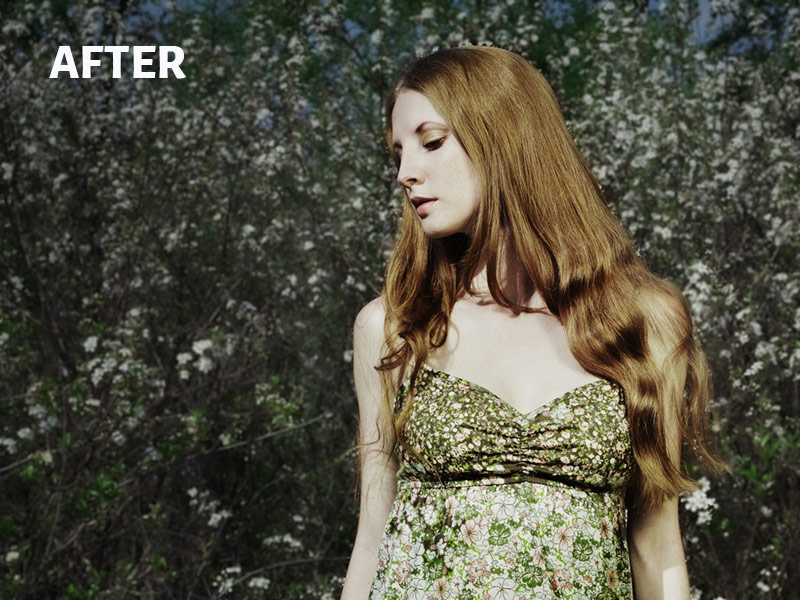
Let us have a look at some more Before/After images with this background blur effect. You can always see the Before and After image in Lightroom while editing.
Conclusion
So, now you know, how to add a realistic blur to your image background in Lightroom.
You can even use this technique to increase the level of background blur in the picture. Thus, you can recreate the effect created by a costly camera lens.
So, Try it out and feel free to share your feedback in the comments section below.

