
How to Install Lightroom Presets
As you all know, Lightroom is one of the best post-processing tools for photographers. You can get lots of Lightroom presets online, both free and paid. You can make use of these presets to transform your photos. But you need to know how to install the Lightroom presets.If you don’t know, you can go through this detailed guide and learn how to install Lightroom presets.
What are Lightroom Presets?
If you are new to Adobe Lightroom, before getting into the installation procedure, let us see what exactly is a Lightroom Preset.
A Lightroom preset is a predefined set of values for all the parameters that can be fine-tuned in Lightroom for an image. It will help you apply the same settings to all the photos of your choice with a click of a button.
You don’t have to change each setting manually to get the effect. Thus, it will help in saving a good amount of post-processing time.
You can use the presets to develop your own editing style and apply it to all of your images. You can use Lightroom presets for portraits, landscapes, weddings, nature, or any other type of photography.
How to Install Lightroom Presets?😎
1. Open Lightroom on your computer (Mac or Windows). I am showing this on Adobe Lightroom CC. You can try it on a different version of Adobe Lightroom also.

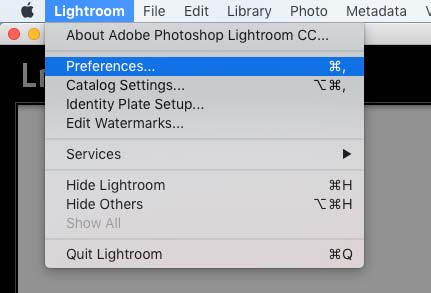
2. Click on “Lightroom” from the Top Menu. Select the “Preferences” option from the Drop Down Menu.
3. A new “Preferences” window will pop up. Select the “Presets” option from this Preferences panel. It is the second option in the top section.
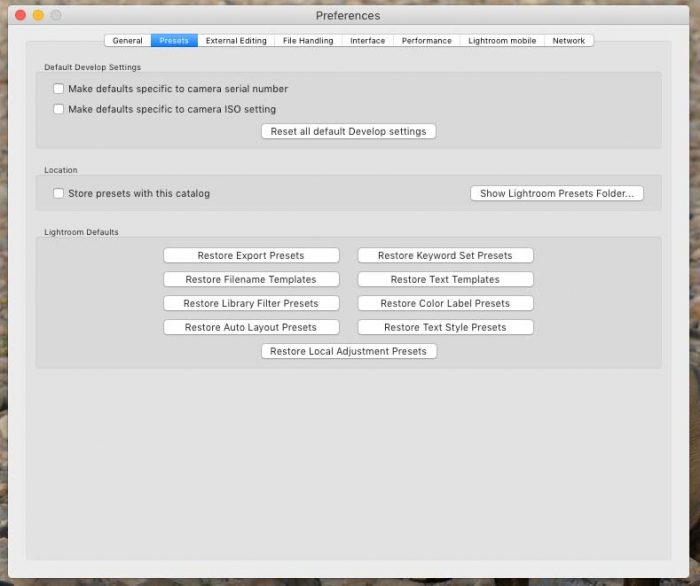
4. Click on the “Show Lightroom Presets Folder …” option.
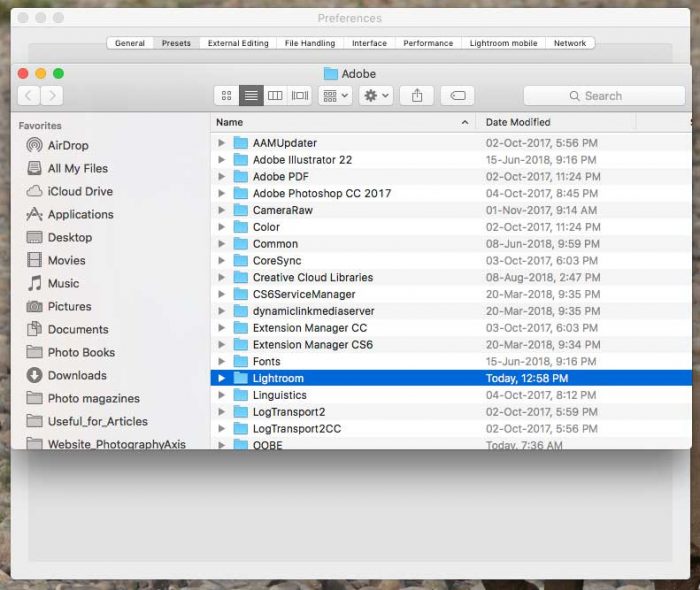
5. Click and open the “Lightroom” folder
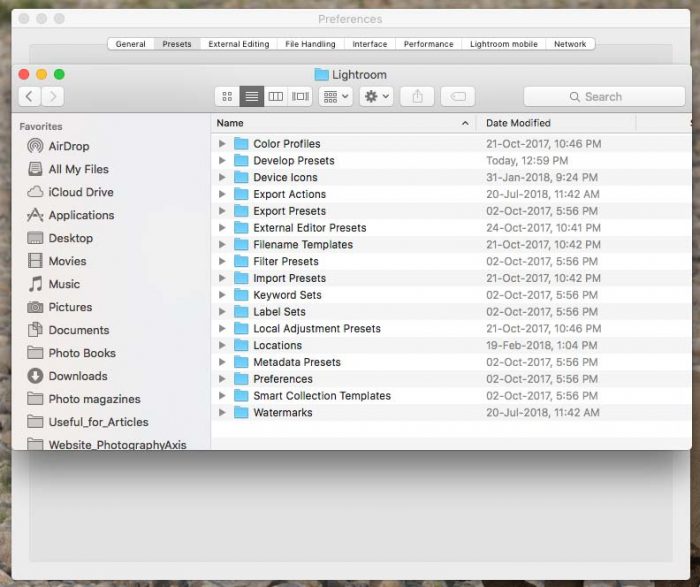
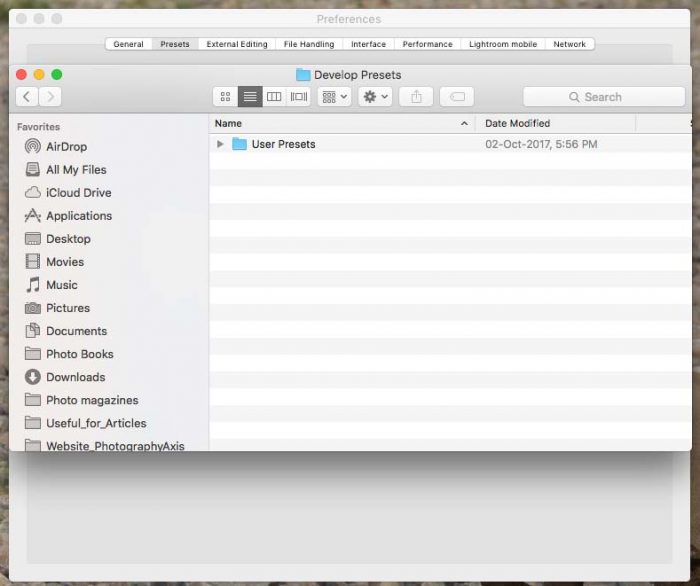
6. Now, click and open the “Develop Presets” folder.
7. Copy the “New Preset folder” which contains the new presets that you want to install on Lightroom. Paste it inside the “Develop Presets” folder. So, this is the location where you should place all the preset files. It would be good if you can name your preset collection separately and paste it over here. It will help you to locate the folder easily at a later stage if required.
8. Close the popup windows and Quit Lightroom.
9. Open Lightroom again. That’s it. You are done with installing presets into Lightroom. Now you can access your installed Lightroom presets.
Now you know the exact procedure for installing Lightroom presets. So, download and install presets and apply them to your photos.