Topaz AI Clear- Do You really Need It?
It is a real pain to remove noise and artifacts in your image. It is followed by the image sharpening process, especially when for a batch of images. Topaz AI Clear from Topaz Labs claims to remove image noise, artifacts and sharpens the image with a single click. Did I say, with a single click? Yes, Topaz Labs claim so. Let us find out whether it does the job or not.
If this turn out good then you can cut down some of your post-processing time. You don’t have to do the Image noise reduction and sharpening separately anymore. Topaz Labs have created an artificial Neural network model using millions of image samples, with varying noise levels. Thus, they have trained the software to analyze the picture noise and sharpness and act accordingly.
It costs around $59. So, let us see whether it is worth for the money.
I will apply the Topaz AI Clear to some of my nature and wildlife images to see the effect.
UPDATE: Topaz Labs has removed Topaz AI Clear from their products section ant it got replaced by the new Topaz DeNoise AI.
Topaz AI Clear Tutorial
I will use a TIFF image generated from a RAW file on Adobe Lightroom, after applying the necessary photo edits, without sharpening or noise removal for this Topaz AI Clear tutorial. You can even import your camera RAW image directly into Topaz Studio.
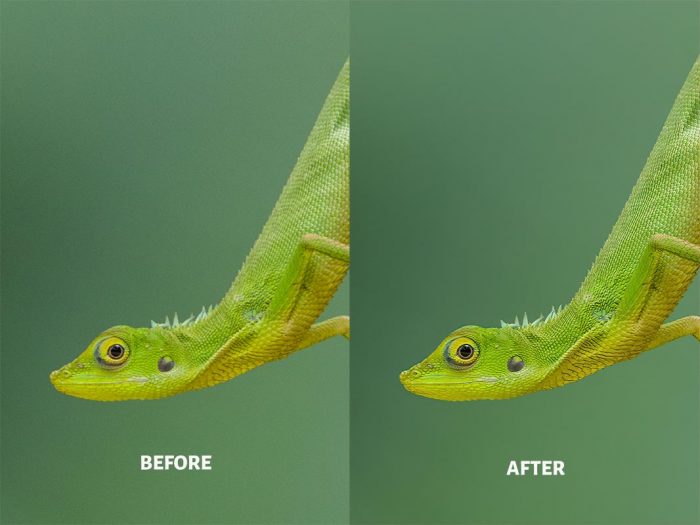
This image of the Lizard is photographed from Philippines during one of my photography expeditions. It was shot using Canon 1DX Mark II with Canon 500mm f4 L IS II Lens and a 1.4x canon teleconverter in Aperture Priority mode. The EXIF Data of this image is: Aperture – f/5.6, Shutter speed- 1/400th second, and 1600 ISO.
1. Open Topaz Studio in your computer.
2. Open the Image to apply the AI Clear effect by selecting the “Open Image or Project” option from the drop-down menu under the “File” section.
3. After importing the image, move the cursor to “Adjustments” menu to select the “AI Clear” option.
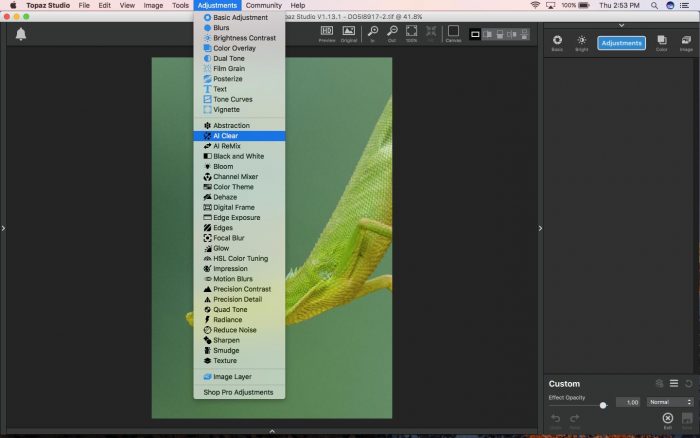
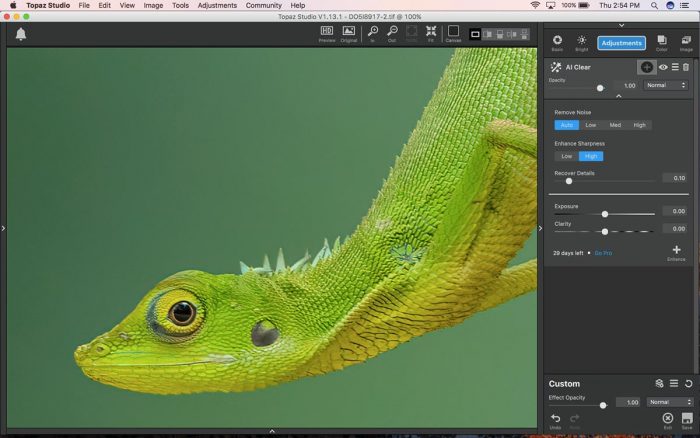
4. After Selecting the “AI Clear” option, it will start the free 30 day Topaz AI Clear free download, when you are selecting it for the first time. You will need the internet for downloading. Now, you can see the AI Clear with its settings in the tools panel.
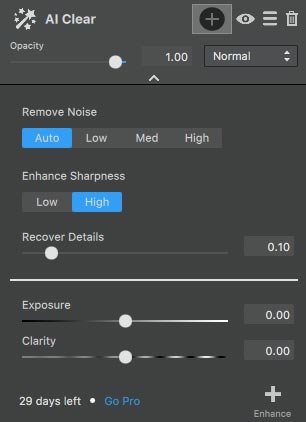
5. You will have four options under “Remove Noise” option – Auto, Low, Med, and High. Here, you can select any of these options accordingly. The Auto settings were good enough. Auto is selected by default.
6. For Sharpening, you have two options- “Low” and “High“. “Low” is selected by default. You can select “High” if you want to sharpen more.
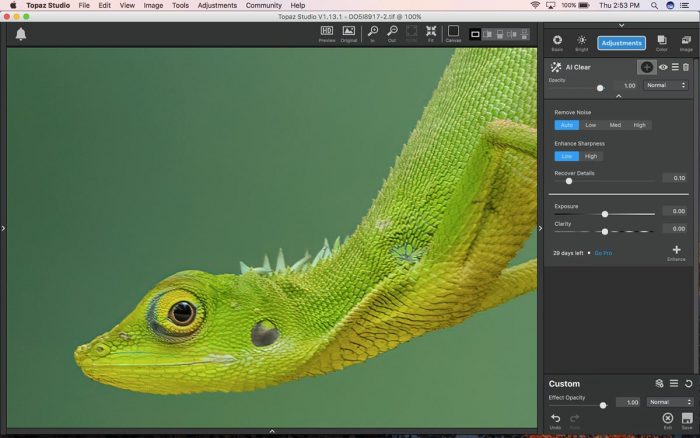
Low Sharpening Applied to Image by Default on Topaz AI Clear
High Sharpening Applied to Image on Topaz AI Clear
7. There are three more sliders after this. Recover Details, Exposure, and Clarity. You can fine-tune these settings.
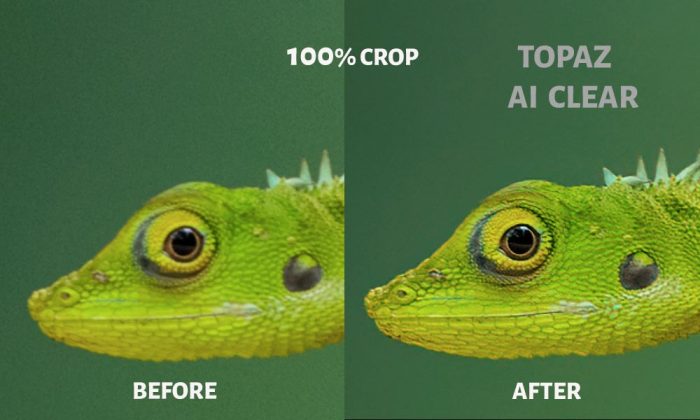
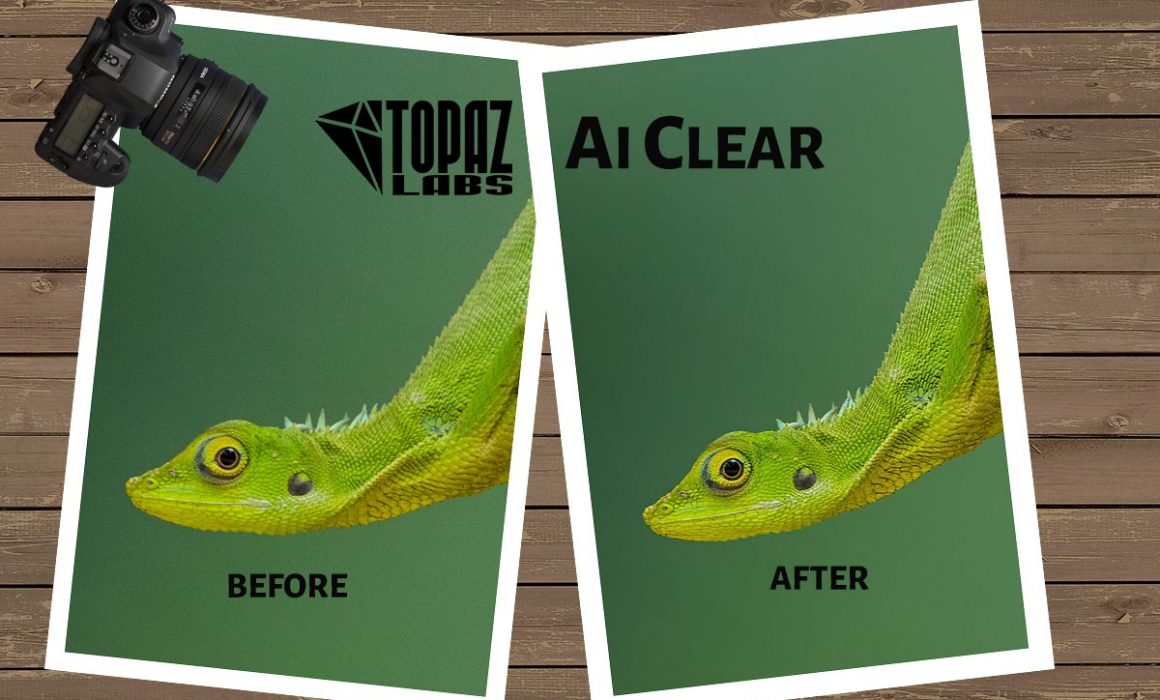
8. Have a look at the photo Before and After applying AI Clear effect (given below).
Topaz AI Clear Review with Few Examples
I will share some more examples to make things more clear.
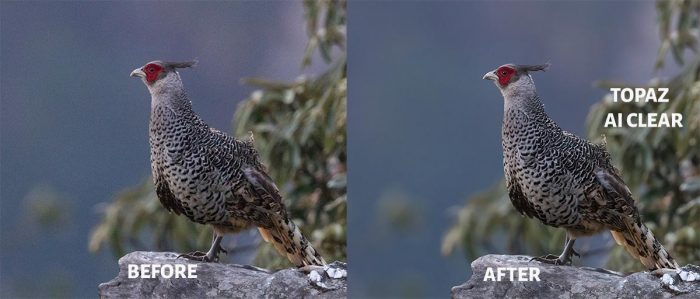
Early morning shot, captured at ISO4000

Image captured at ISO1000

Image captured at ISO4000
Conclusion
👉🏼 READ 📖 : Best Lightweight Tripod For Camping
So, it does a decent job of clearing the noise and sharpening the image with a single click. I recommend doing all other necessary post-processing on the photo on Lightroom or any other photo editing software, except for the sharpening and Noise removal part.
You can use AI Clear option in the Topaz Studio to save some time. In my opinion, it would be a real game changer if Topaz can make the AI Clear as a plugin for Lightroom or Photoshop. It will definitely hep to save lots of post-processing time.
It is always better to make the edits on a RAW file or the TIFF file. So, when you export the image from Lightroom, ensure that you are exporting it as TIFF, and not as the lossy JPEG.
I hope, many of you know about the Denoise tool from Topaz. So, if you take Topaz AI Clear Vs Denoise then AI Clear is a clear winner as it does two jobs with a single click instead of one.
You can always give a try with Topaz AI Clear. Topaz Labs offers a 30-day free trial version, which you can use it with the Topaz Studio. If you like the software, then you can go ahead with the purchase through my Affiliate link, Buy Topaz AI Clear.

Very nice sample shots, Govind!
Have you included AI Clear in your daily routine after this?
I normally use DxO PhotoLabs, occasionally export to LR for some more adjustments, and finally Aperture.
It is warm here in Thailand, I guess it is warm in Cochin as well!
Hi Tord,
Thanks. It’s warm in Cochin as well 🙂 . Now, I have included AI Clear in my workflow along with Adobe Lightroom. It saves good amount of time. It does a decent job, especially for web quality images.
Awsome sir
Too bad it’s not available as a plug-in for PS (like DeNoise). Would speed up the workflow.
Yes, it would have been really good if they can get Topaz AI Clear as a plugin for Photoshop and Lightroom. it would be a great valued addition and easy to include it in the workflow.
I just got the AI NOISE app. It is a Ps Plug-in! Can you get to a review & comparison & workflow suggestions for it vs AI Clear. Since the AI Noise has the sharpen slider also I might expect it to replace AI Clear. My quick tests show it is super on Noise, and the brighten setting is smooth (with a bit of artifact masking). I’m wondering if the defaults are a good setting for batch processing, or if they are too much/little.
Hi Peter,
I think you are referring to the Topaz DeNoise Ai software.You can find my review here: Topaz DeNoise AI Review
When compared to AI Clear, The performance is almost same when it comes to the de-noising feature