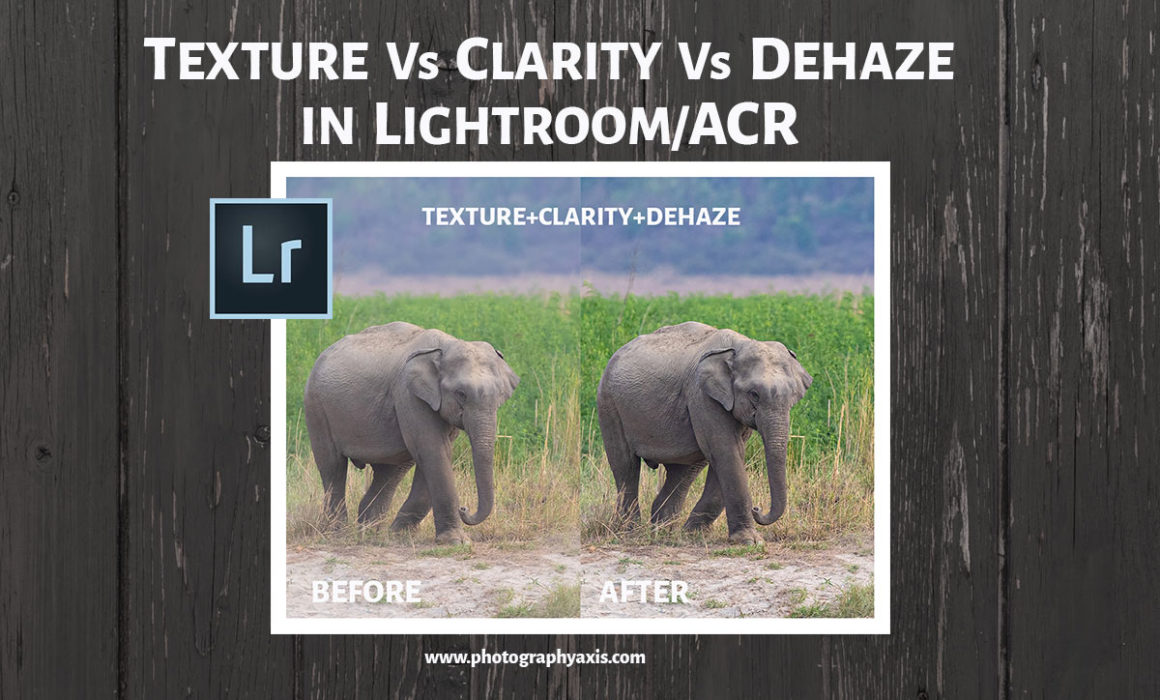
Texture Vs Clarity Vs DeHaze in Adobe Lightroom/ACR
Adobe has added the Texture and Clarity sliders to Lightroom Classic v8.3 (May 2019 release) and Adobe Camera RAW (ACR) photo editing software. Now, these two sliders are clubbed along with the DeHaze slider, inside the “Basic” editing module. They together form the “Presence” submodule. As the name suggests, you can use these sliders to vary the level of details of the subjects in the image.
Texture Vs Clarity Vs DeHaze
Presence = Texture + Clarity + DeHaze
In this article, I will show you the effects and differences caused by these three sliders. It will help you to get the best out of these tools while editing in Lightroom.
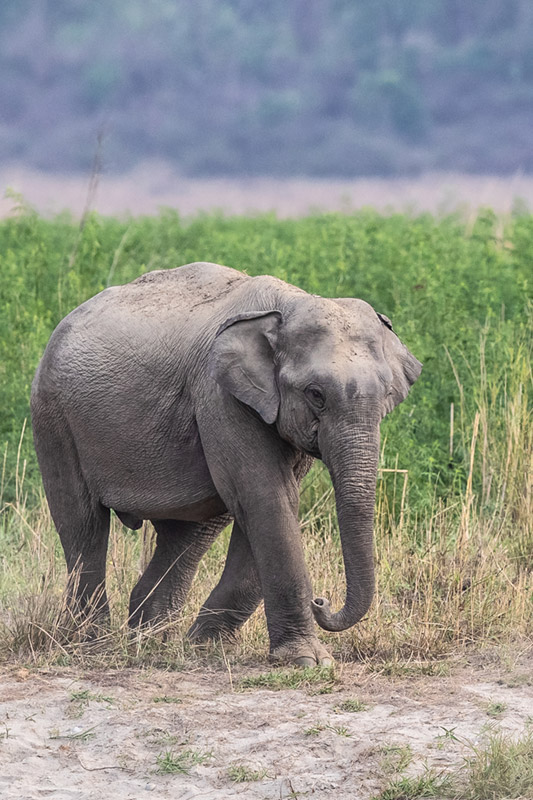
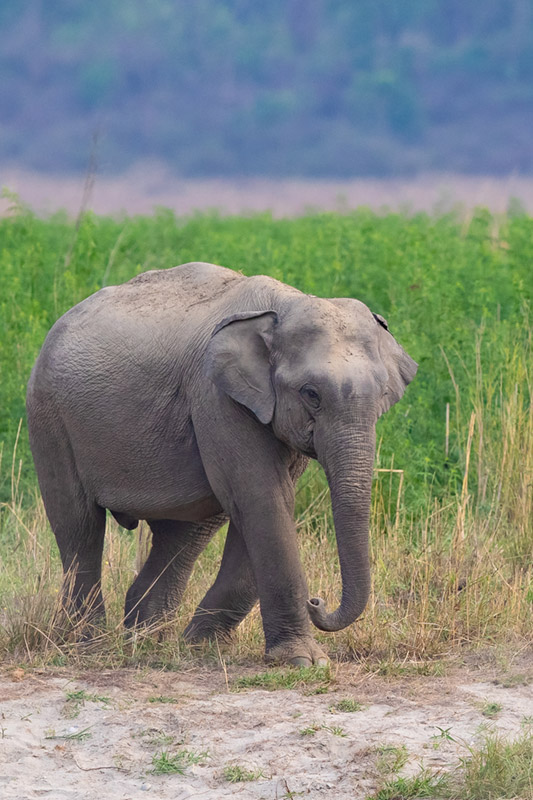
I will use one of my Elephant images from Corbett National Park in Lightroom on these three sliders. I chose this image because there is some haze in the image due to the flying sand created by the running Elephant. The Texture and Clarity sliders will work perfectly for the wrinkles and details on the Elephant skin. So, it will help you to understand in a better way.
1. Texture in Lightroom
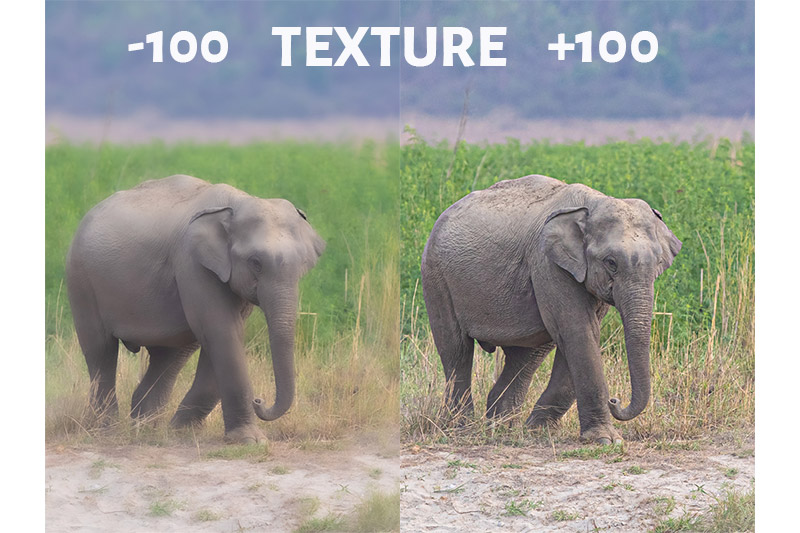
The best way you understand the Texture slider is to play with it. So, I will move the slider to the left and decrease the effect to -100.
The image has become completely soft. So, if you want to remove any unwanted texture in the picture, then you can pull this slider to the left. The best use case will be for smoothening the skin. When you do for the skin, you need to use a selective mask on the skin alone.
Now, let me pull the Texture to 100%. So, the wrinkles and the textures on the Elephant skin, the sand texture on the ground and the grass texture are more prominent now.
I have pushed the slider to the extreme left and extreme right to show you the clear difference. But, you should pull it only to the desired level so that it will not look artificial and ugly.
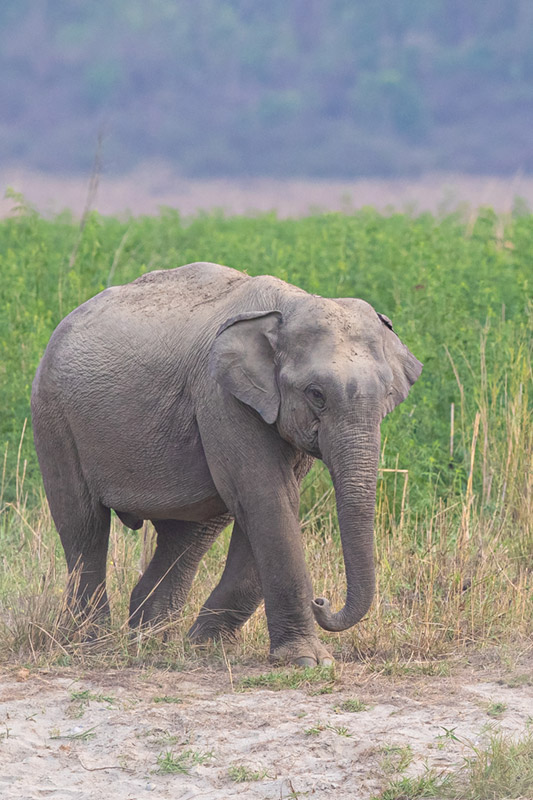
The final image with just the Texture effect alone is shown above.
2. Clarity in Lightroom
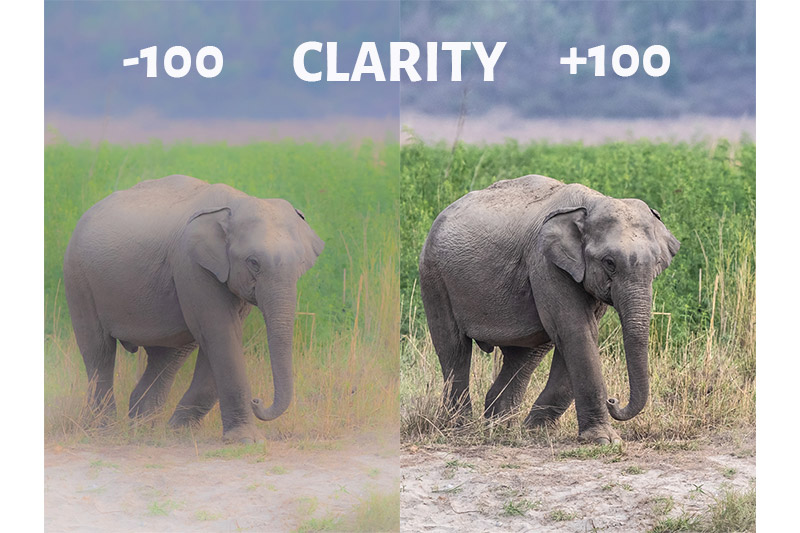
Now, I will put the Texture slider back to 0. It is to show you only the changes brought by the clarity slider. Let me decrease the Clarity value to -100. So, the clarity is removed from the image.
Now, I will increase the Clarity slider to +100, to the extreme right. So, the overall clarity of details on the Elephant’s body and the grass has increased.
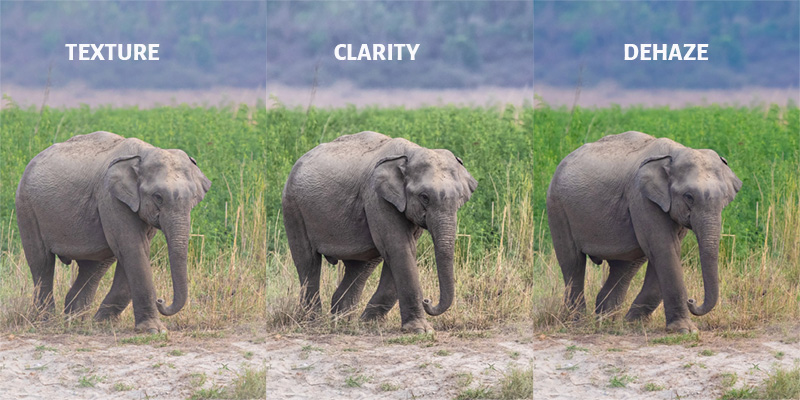
So, let me pull the clarity slider alone to an appropriate value.
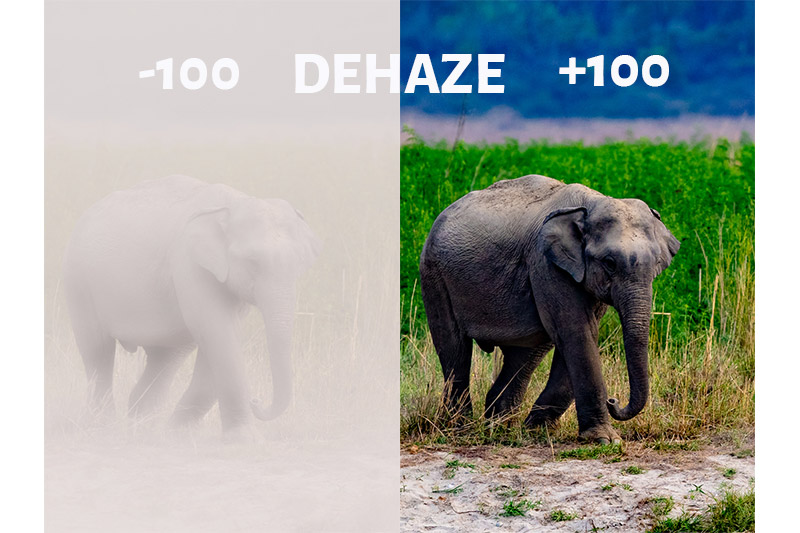
3. Dehaze Slider in Lightroom
While Texture and Clarity have to do with details and textures in the scene, Dehaze deals with colors and lighting.
READ: How to use Lightroom Dehaze?
Pulling the DeHaze slider towards left adds Haze to the image, which you would be doing very rare unless you want to give a Hazy effect to the picture.
Push the Dehaze slider to the right to remove the Haze. When I push it to the extreme right (+100), you can see that the colors have become more saturated along with the haze removal.
 So, let me push it to an appropriate value to remove the sand haze.
Texture Vs Clarity Comparison
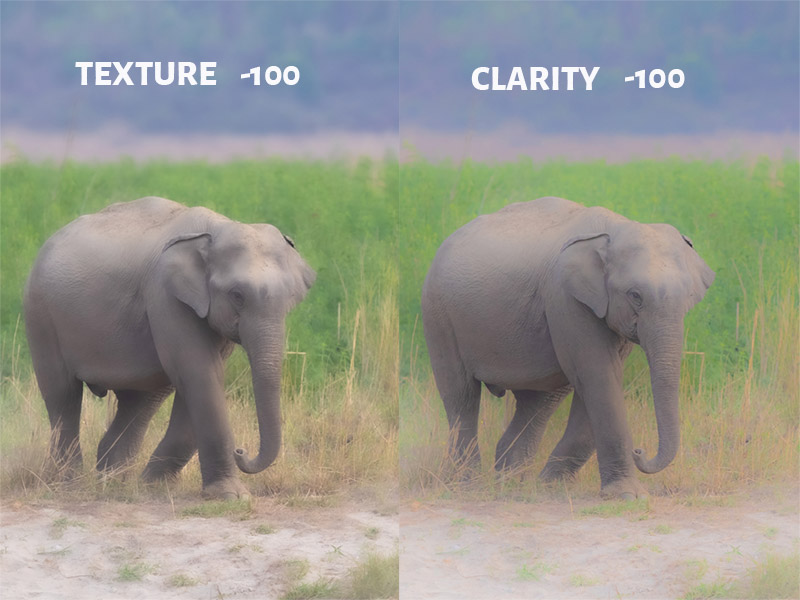
So, let us compare the image with -100 Texture and -100 Clarity. Both pictures look soft. But, there is a clear difference between the two.
When you remove the clarity from the picture, the edge of the subjects in the scene also goes very soft. But, if you see the -100 Texture image, the grass edges and elephant body outline is still visible. So, there is a clear difference between these two sliders.
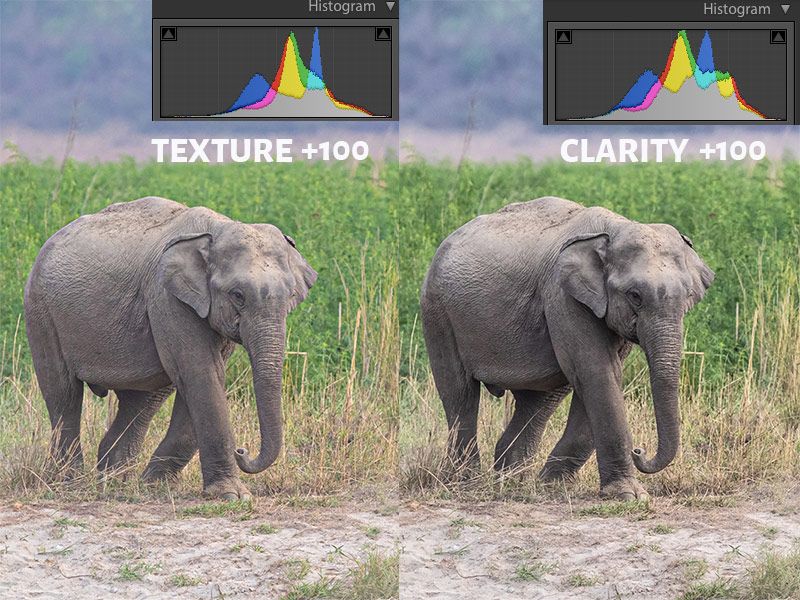
Now, see the difference when both the sliders (Texture and Clarity) are increased to +100. So, clarity darkens the image as it adds contrast.
If you see the histogram, the area under the histogram is more when you bump the clarity slider when compared to the Texture one at the same strength..
Texture Vs Clarity Vs DeHaze
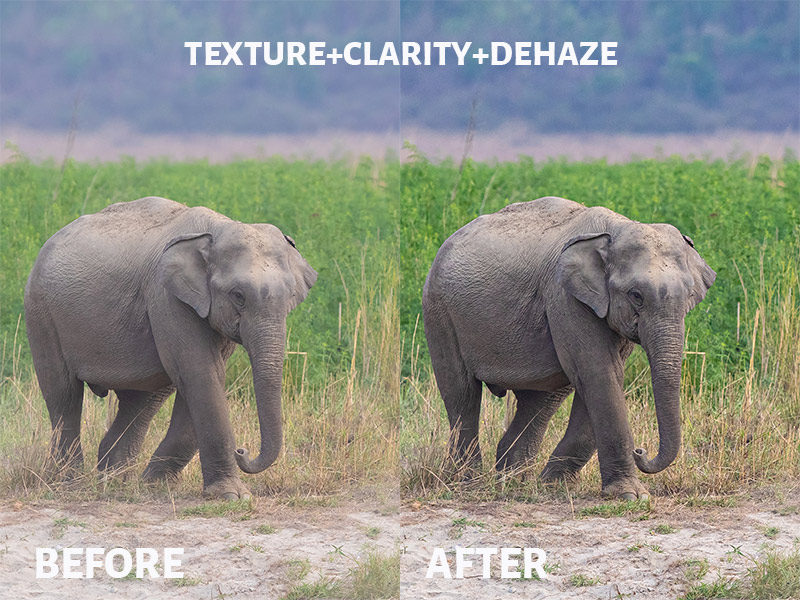
Let us see how the Before/After image looks after playing with these three slider settings.
From the above comparison image, it is quite clear that only clarity and DeHaze has an impact on the overall contrast of the picture, the texture settings doesn’t bring any change in image contrast.
Conclusion
Now, we know what the three sliders are capable of doing. So, whenever you want to fine-tune the details, textures, and DeHaze the image, use these three sliders in the “Presence” submodule.
Thus, the addition of new sliders made Lightroom and Adobe Camera RAW more powerful.