Topaz Sharpen AI Review- Does It Really Work?
Topaz Labs have launched yet another stand-alone photo processing tool in their AI Series, Topaz Sharpen AI. It claims to sharpen images that are shaky. We need to test and see whether it does a good job or not.
😍 UPDATE [28 DEC 2020]: Click here to claim a 30% discount + use code “holiday15” and receive an additional 15% additional discount for Topaz Sharpen AI for a limited time, this holiday season.
The main issue with any Sharpening tool is that it does not discriminate between the details and the noise in the image. So, the sharpening gets applied to both noise as well as details.
Otherwise, you need to do selective sharpening by using the Layers feature in the software to hide the out of focus region in the image. But, it would be time-consuming and a little hectic, especially, if you are not used to it.
How to use Topaz Sharpen AI?
I will be using the 30-day trial version of Topaz Sharpen AI for this review.
I ran this software on Apple’s 13inch MacBook Air with the following specification:
1.3 GHz Intel Core i5 Processor
4GB 1600 MHz DDR3 Memory
Intel HD Graphics 5000 1536 MB Graphics
1. Open Sharpen AI software.

2. Drag and drop the image into the software for sharpening. You can only process one image at a time. The software doesn’t allow you to drag and drop multiple images for batch processing.
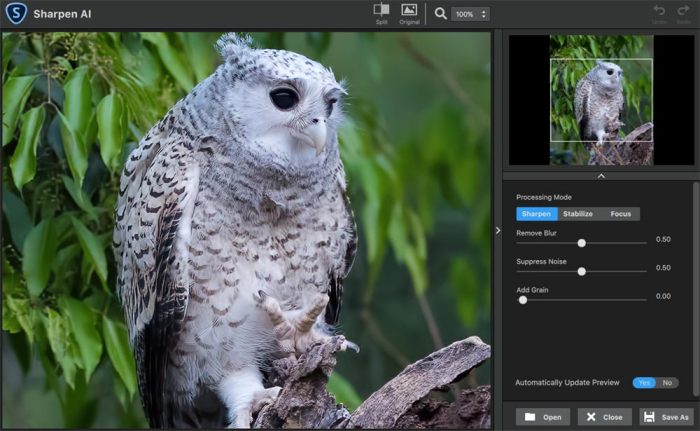
3. Topaz has provided three Processing modes. You can choose any of these modes according to your requirement.
3.1 Sharpen
Sharpen mode is basically to sharpen the image. This option looks like a basic sharpening one.
3.2 Stabilize
If your image had a stabilization issue with a minor blur due to camera shake or lack of shutter speed, then you can select the “Stabilize” mode.
3.3 Focus
If the subject of interest is not focused, then it will look soft. The Focus mode is for such situations.
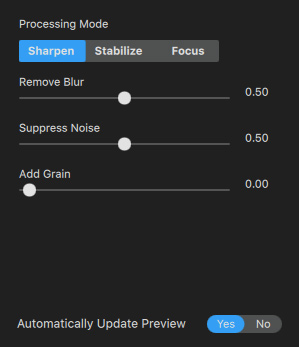
4. All these three processing modes come with the same 3 slider options: “Remove Blur”, “Suppress Noise” and “Add Grain” options.
5. There is an option to Enable/Disable the “Automatically Update Preview”. They have given this option because every time you change the settings, then the software consumes lots of CPU for showing the preview. It was somewhat irritating.
6. Once you disable the automatic preview update, then a Blue color button becomes visible above, “Update Preview”. Once you are done with the settings, you can click on this button to see the final result. It looks a better option when compared to the automatic one.
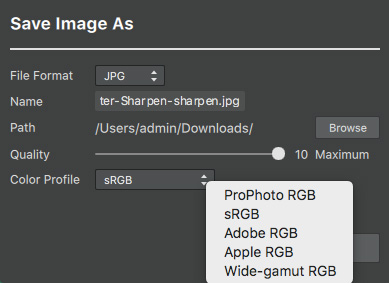
7. Once you are done with the settings then you can click the “Save as” button in the bottom right corner to save the final file. You have five file formats to choose from JPG, JPEG, TIF, TIFF, and PNG.

8. You can enter the file name and the location for saving. There is an option to control the final image Quality. You can move the slider from 1 to 10 to choose the picture quality, 10 being the maximum.
9. There are five different color profile options to choose from: sRGB, ProPhoto RGB, Adobe RGB, Apple RGB, and Wide-gamut RGB. After this, you can go ahead and save the file by clicking the “Save” button.
A 1000 x 667 image with a file size of 360KB took around 18 seconds for processing.
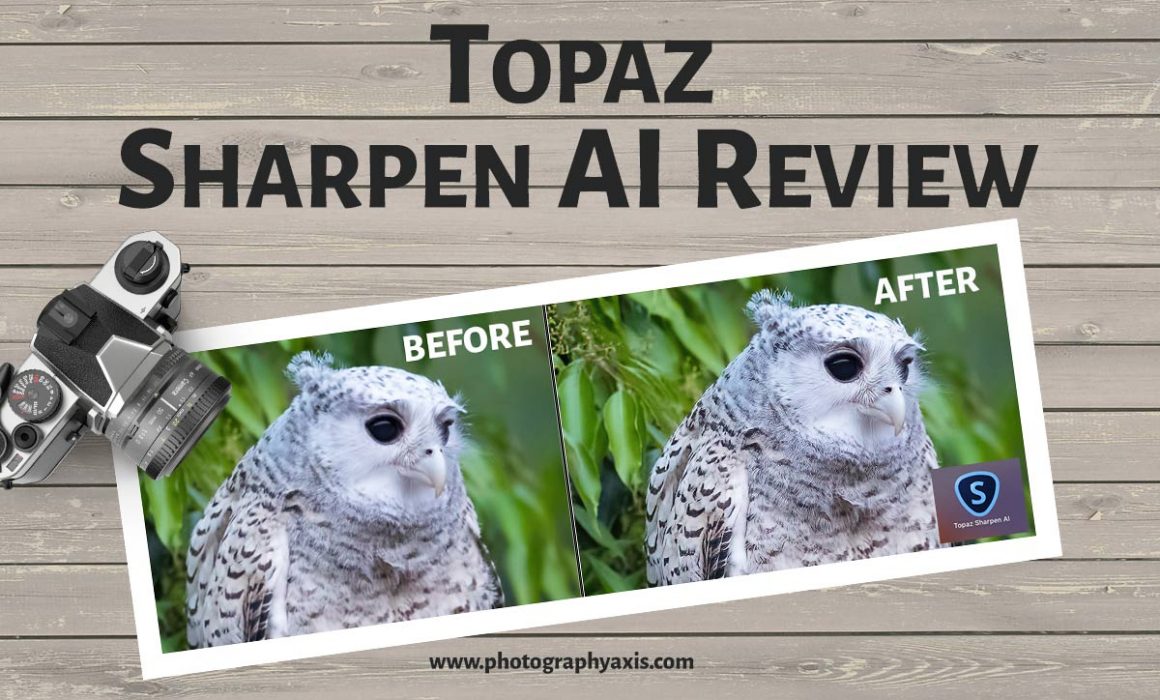
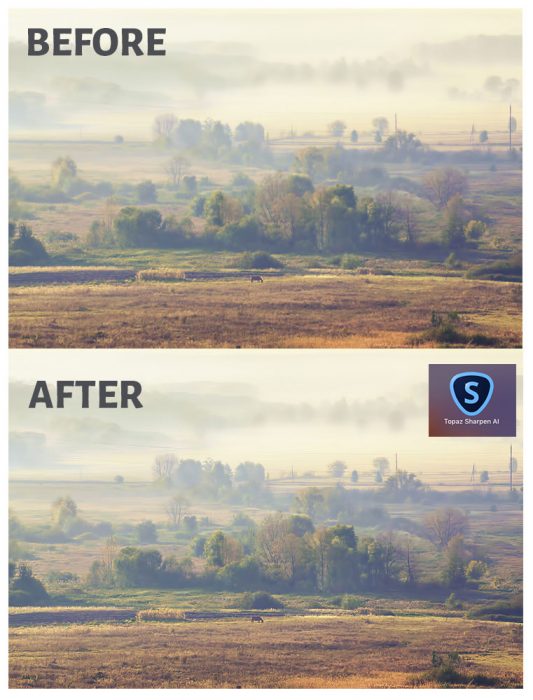
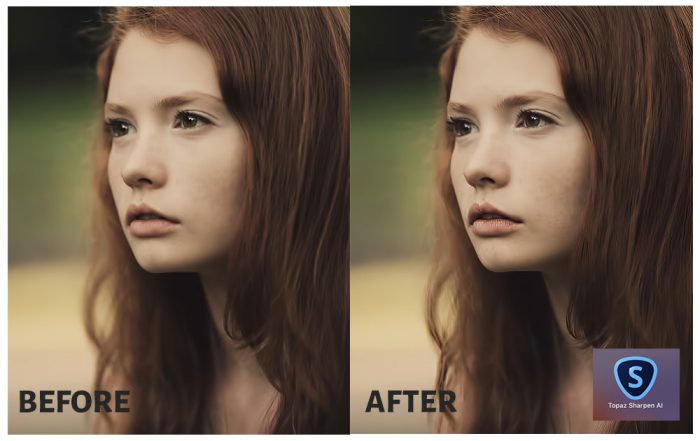
Topaz Sharpen AI Before After Image
I will use it to sharpen different types of photos which include, portrait, wildlife, and landscapes. Let us see how the Before/After images look.
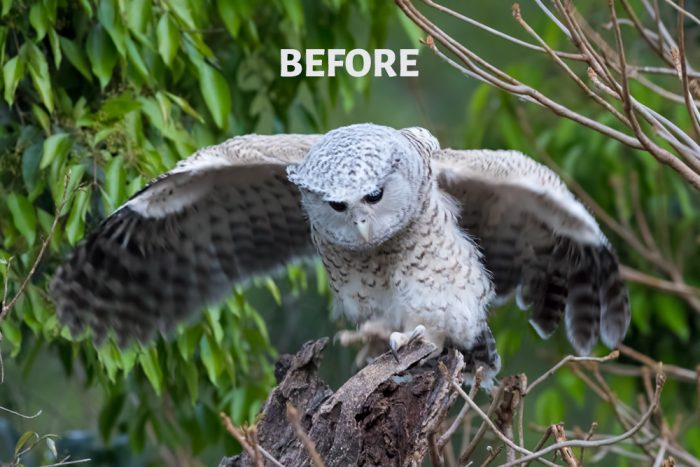
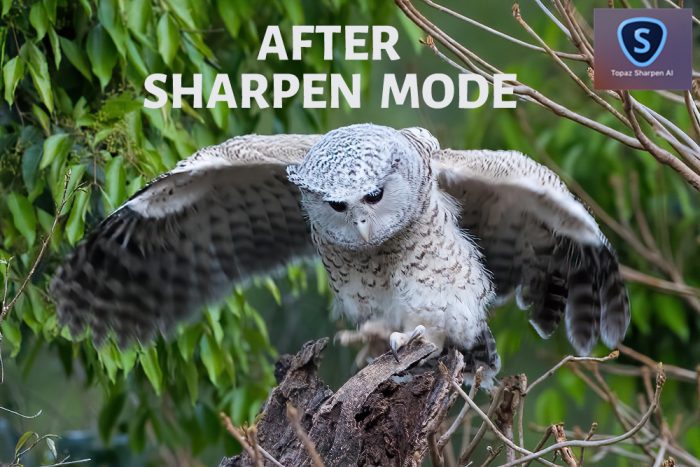
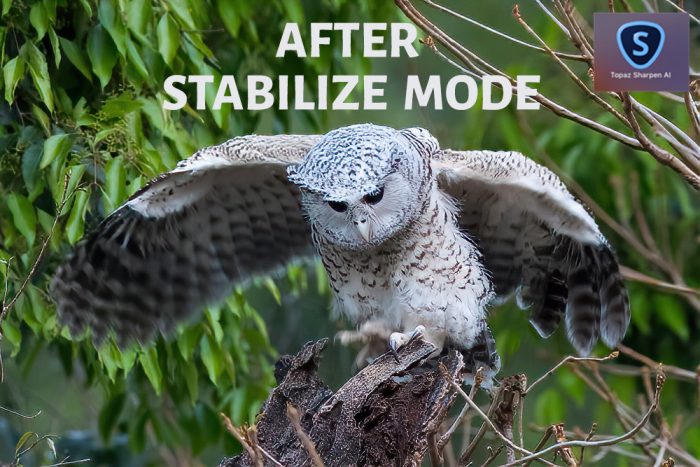
Let us try this software on this image of Spot Bellied Eagle Owl, which is soft. The softness is the result of noise removal. This image was taken at 6400 ISO in low light.
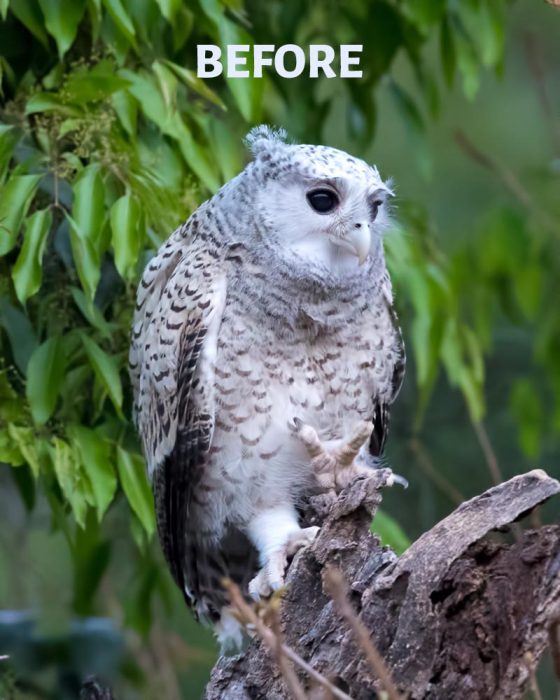
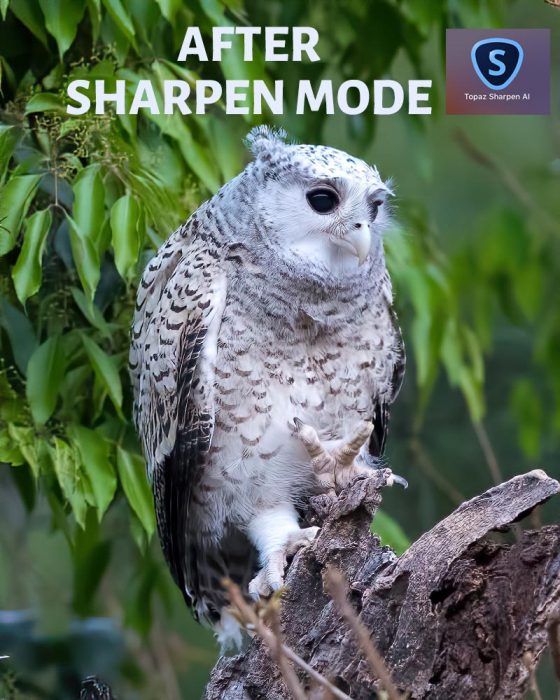
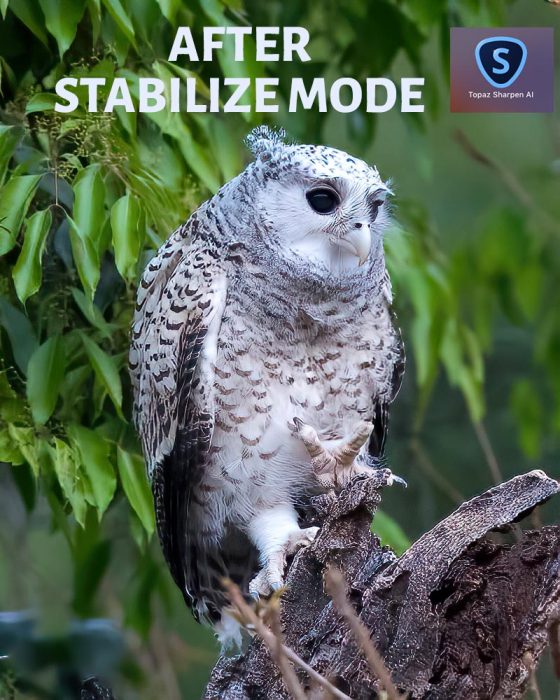
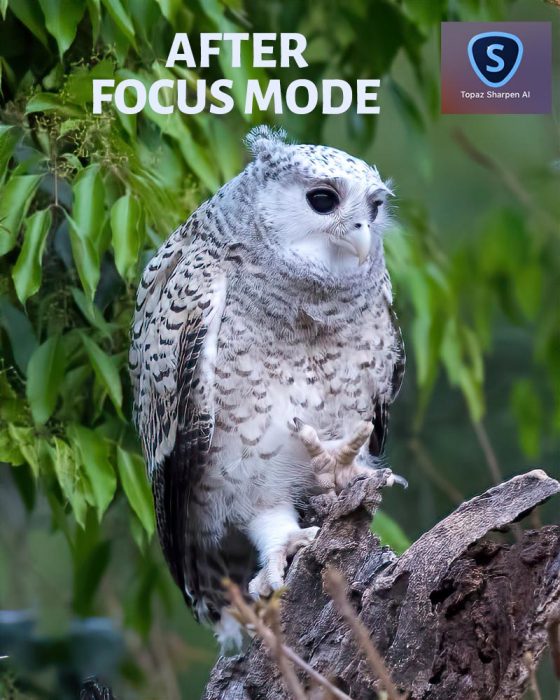
I will try the three processing modes on the same image to see which one suits the best for a soft image. Stabilize mode and Focus mode does a bit of over sharpening since there is nothing to be stabilized.
So, the Sharpen mode does an excellent job for the soft image.
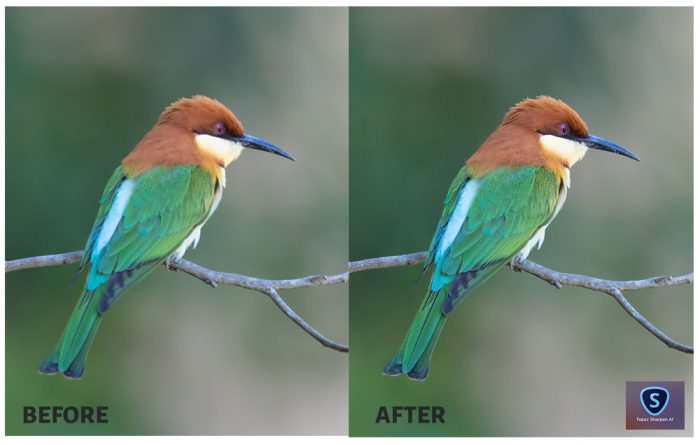
Now, let us have a look at the effect on a Landscape image and a portrait image.
Now, let us test the stabilization part. So, we will use a shaky picture.
So, the Sharpen mode does a better job here. The Stabilize mode slightly over sharpens the picture with the same slider settings.
Conclusion
So, if you are a perfectionist, who is looking for tack sharp images, then this software is for you. It does an excellent job in fixing the minor blur in details in the photos. This blur can be due to lower shutter speed or due to shaky hands.
Now, the question is, what difference does this software has when compared to Topaz AI Clear? Topaz AI Clear does the job of sharpening and noise removal in a single click. Sharpen AI is for sharpening images which are slightly out of focus.
If you are into action photography, like wildlife photography and sports photography, then you may be facing the issue of minor blurs in the image due to the subject movement, especially in low light.
You can make use of Topaz Sharpen AI to fix this issue. It would be useful if you are printing your images. If you are interested, you can purchase this software through my Link, Buy Topaz Sharpen AI.
If you want a single application that combines the features of Sharpen AI along with Denoise AI and Gigapixel AI, you must check out the Photo AI from Topazlabs. You can read my Topaz Photo AI review to know more about it.
If it only haven’t taken ages to save processed file…
Thank the powers for trial periods.
I tried the 30 day trial of this software and while finding it worked reasonably I found I could generally sharpen almost as well – sometimes better – in Photoshop. For what it does, I would consider it way over priced.
The performance also leaves much to be desired. Every change you make – even just moving the image slightly – is reprocessed with a very long wait and for the final save you may as well go and make a cup of tea as it takes agea and slows anything else down to a painful crawl. Practically speaking I very much doubt that my old laptop would run it. Perhaps if you have a latest super fast computer with 6+ cores it may be more acceptable.
So taking price and performance into consideration, it is not for me.