Intervalometer – Do You Really Need Them?
Are you looking to buy an intervalometer for your camera? If yes, I highly recommend you read this guide. It will help you decide whether you need to purchase one or not.
What is an Intervalometer?
An intervalometer is a photography accessory for photographers to prolong the camera exposure for a predefined time or trigger timer.
It is also known by other names like interval meter, interval timer, etc. It will help you set the camera exposure time to long values like 1 minute, 3 min, 4min 30 seconds, etc.
The intervalometer also helps to capture multiple sets of long exposure images by setting the number of frames and exposure duration accordingly in the device.
You can also use it as a delay trigger.
So, keep the camera set up in the desired location and set these parameters in the intervalometer. The camera will get triggered automatically with the help of the intervalometer.
How to Use an Intervalometer?
So, let us see how to use an intervalometer for your shots.
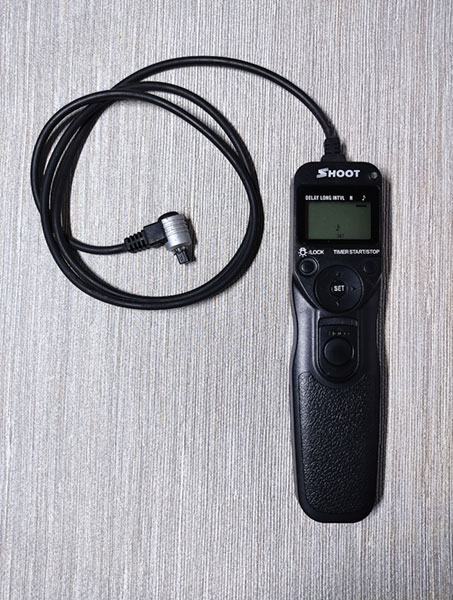
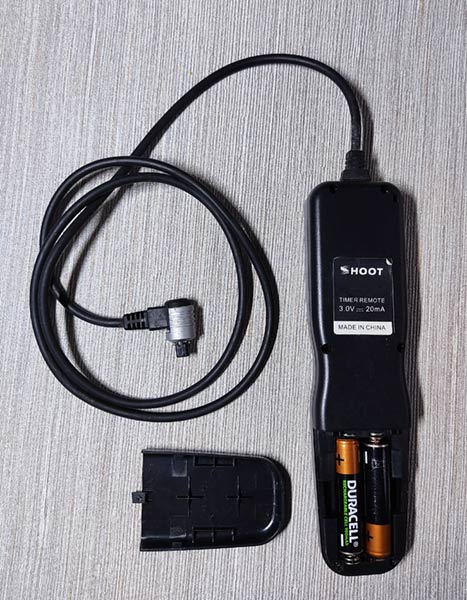
I have been using an intervalometer from a local brand called, Shoot. I bought it for around $16. It requires 2 x 1.5V AAA batteries for its operation.
Connect the intervalometer to your camera.
The connector jack will go into the remote trigger connector in the camera. This connector will vary for different cameras. So, make sure that you buy a matching intervalometer.
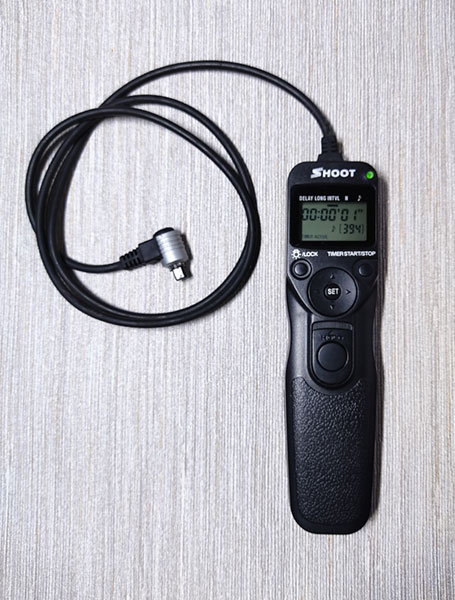
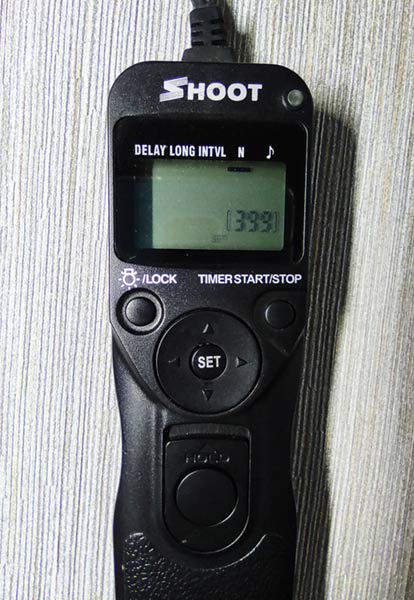
You can click on the bulb button to enable the backlight feature in this camera accessory. This feature is handy during night photography.
There is a “Hold” button in the center of the device. You can press and slide this button upwards to start the shutter timer. Once you pull it back down, then the timer stops. Thus, you can use it in Bulb mode for long exposures.
The different menu options are listed above the display of the device. To navigate between these options, just click the “Set” button and press the forward and backward arrows in the joystick. The bar sign will apply to the bottom of each of the menu options during this joystick movement.
I will list out the different ways to use this intervalometer.
1. Delay
Select the “Delay” option. Click on the “Set” button to use this option.
You can see the time setting option in the display in Hours: Minute: Seconds. Set it to introduce the time delay for the click. Here, the blinking number indicates that you can change that value. Use the arrow keys in the joystick to change the values.
Once you are done with the settings, click the set button to set the timer.
To activate the delay time module, you need to click the TIMER START/STOP push button switch.
2. Long
The Long option allows you to make the shutter open for a predefined time value.
For example, if you want a camera exposure for 2 minutes 20 seconds, then you can set the time for 2 minutes 20 seconds in this option.
The shutter will remain open for this set time.
You can also do the same setting via the press and slide switch at the center. In the case of the press and slide switch, you will have to look at the display constantly to see when to stop it.
3. Interval
The next option is the “Interval.” It is the primary use of this device.
You can use this option to trigger the camera for multiple shots at a defined interval.
For example, if you want to capture snaps every 30 seconds and you want to capture 50 frames, you can set the 30 seconds in the time window and 50 in the bottom frame window.
Here, the intervalometer will trigger 50 shots every 30 seconds time interval. You can enter the frame value up to 399. If you want images more than that, you can set it to “– –” which will trigger the camera an infinite number of times.
You can use this feature for your timelapse images.
4. Beep ON/OFF
By default, the intervalometer will beep every time when it triggers a click. It can be annoying if you are shooting a timelapse with many images. So, you can turn the beep sound off using this option.
Now you know how to use an intervalometer along with your DSLR/Mirrorless cameras.
Even though I have explained it for an intervalometer from Shoot. The basic settings will be almost the same for most of the intervalometer.
Why Buy an Intervalometer for Photography?

Now the question is, do you really need an intervalometer for photography?
If you are a newbie in photography, you may be confused about whether to buy it or not.
In the early days of photography, an intervalometer was used as a remote shutter release for the camera.
Nowadays, all new cameras come with a self-timer feature. You don’t have to buy an intervalometer if the purpose is just to do the remote shutter release.
The current DSLR and Mirrorless cameras allow you to set exposure up to 30 seconds in the camera.
So, if you plan to do exposures above 30 seconds, the intervalometer is the best option.
You can use it along with the Bulb mode in the camera.
Which Types of Photography require an Intervalometer?
An intervalometer may not be helpful for all types of photography. So, I will list out the different genres of photographers who will find this camera accessory useful.
1. For Long Exposure Photography
If you are planning to do long exposure photography, you must invest in the intervalometer. It will be a useful camera accessory for you.
Long exposure photography demands the shutter to be open for a long duration of time.
So, you can capture the image in Bulb mode using your intervalometer for a defined time duration of exposure.
For example, if you want a long exposure shot of 25 minutes exposure, you can use the “Long” option in the device and set the long interval to 25 minutes and capture the image.
Long exposure photography deals with a very slow shutter speed. So, use an intervalometer to avoid the camera shake due to pressing the camera shutter button.
You can use it along with the mirror lockup feature in your DSLR camera to remove the camera shake during long exposures.
Thus, you can avoid touching the camera physically while triggering the shot.
2. For Time Lapse Photography

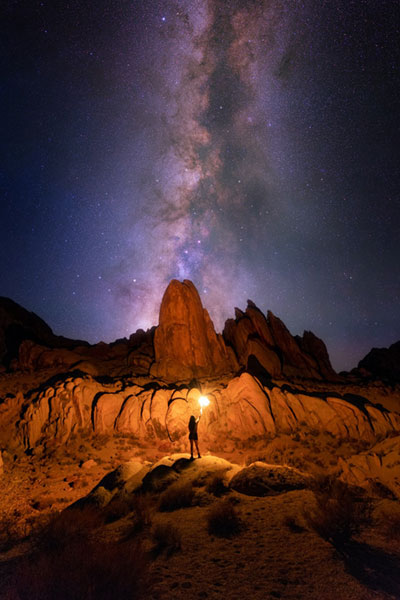
The primary use of an intervalometer is for timelapse photography. Astrophotographers use timelapse photography for capturing star trails, the milky way, etc.
In timelapse photography, you will need many frames at different instances of time to generate the final image using any photo editing software.
The “Interval” option helps to capture multiple frames of the scene at the programmed time interval.
You can even create a timelapse video using these frames.
Wireless Vs Wired Intervalometer
You can get two types of intervalometers in the market. One is the regular wired one, and the other will be the wireless one.
The wired intervalometer will have a wire extension with the connector plug at one end of the device. You need to plug in this connector in the respective camera slot for operation.
In the case of the wireless intervalometer, it is a two-piece solution. You will have a transmitter block, which is the intervalometer stick with the display and the receiver block. The receiver block will sit on the camera hot shoe. You will have to connect the wire end plug of the receiver module to the camera.
In the wireless intervalometer case, you will have to carry two sets of batteries, one for the receiver module and the other for the transmitter module. The wireless intervalometer gives you the advantage of remote triggering your camera, which is absent in the wired model.
The wired model avoids the burden of carrying too many batteries with you.
When you compare the cost factor, you can get the wired intervalometer for 1/3rd or ½ the price of the wireless one.
Both do the same job. So, the choice is yours.
Which Intervalometer Brand Should I Buy?
There are many intervalometer brands available in the market.
You may be using a Canon, Nikon, Sony, Olympus, Pentax, or any other type of DSLR/ Mirrorless camera.
So, ensure that the model which you select is compatible with your camera. If you are using a Sony mirrorless camera, then go for an intervalometer for the Sony camera. A Nikon intervalometer cannot be used with the Sony camera since the camera connectors and the design are different.
There are branded ones like the Canon Intervalometer (TC-80N3) for Canon DSLR cameras, which will cost you around 200$.
I don’t recommend going for the highly-priced ones. A cheap intervalometer is good enough to do the job.
You can easily get a good intervalometer for a price range of $20 to $30.
There are many third-party brands, like Shoot, Viltrox, Neewer, Aputure, Pixel. Pholsy, etc.
While buying any of these third-party intervalometers, ensure it is compatible with your camera model.
Conclusion
Now you know what an intervalometer is capable of doing.
If you are looking for these features in your photography workflow, you can definitely invest in an intervalometer to simplify your photography process.
If it does not bring any value to your photography process, better not to buy one.