What is Mirror Lockup+ When & How to Use It?
Are you facing the issue of lack of sharpness in your image from a DSLR camera, even after using a tripod? If yes, then this article is for you. In this article, I will show you how to use the mirror lockup feature in a DSLR camera for tack sharp images.
What is Mirror Lockup?
The mirror lockup is the feature in a DSLR camera to hold the mirror in the flipped-up state permanently.
This feature allows the incident light to fall on the camera sensor once the shutter is opened. Thus, there won’t be any flipping of mirror in the process.
Once you enable this option, you will not be able to see the scene through the viewfinder. You are disabling the mirror feature in the DSLR camera completely.
Where is the Mirror Located?
It is a good idea to understand where this Mirror come in a DSLR camera. Starting from the front section of a DSLR camera, we have Aperture, followed by the mirror, shutter and the camera sensor.
When you press the shutter button in a DSLR camera, the mirror flips up at first. It is followed by the shutter opening for the specific shutter speed.
After that the camera sensor gets exposed to the incoming light rays, and the image gets recorded in the memory.
The mirror returns to its initial position once the shutter is closed. It is how the mirror mechanism works in a DSLR camera.
When to Use the Mirror Lockup Feature?
You can use the mirror lockup feature in the following situation.
1. Landscape photography
When it comes to photographing landscapes, you will be shooting at slower shutter speeds with camera mounted on a tripod.
The use of mirror lock up feature can help to avoid image blur due to camera shake.
2. Long Exposure photography
When you do long exposure photography, even a small camera shake can have a big impact on the image sharpness.
It is due to the fact that the camera shutter remains open for a long time.
Testing the Impact of Mirror Shake in a DSLR Camera?
Let us test the shake caused by the flipping of mirror in a DSLR camera.
You don’t need any high-end equipment to test this shake. You just need a drop of water for this test. Am I Kidding? Did I say a drop of water? Yes, it is true.
👉🏻 Test Set Up
1. Mount the camera on a tripod.
2. Once your setup is ready, place a drop of water on the hot shoe of the camera. Ideally, it should be on the metal part of the hot shoe, only then you can see the effect of the shake.
3. Use a camera trigger or the inbuilt camera timer for triggering the shot. It is to avoid the camera shake caused due to the pressing of the shutter buttton.
👉🏻 Testing
1. Keep your eyes on the water droplet when the shutter gets activated.
2. You can see ripples on the water droplet. It indicates that there is some amount of shake on the camera body even if we use the remote trigger for the shot. This shake will have an adverse effect on your image sharpness, especially when you use slower shutter speeds or for long exposure photography.
How to Use the Mirror Lockup Feature in a DSLR Camera?
Whenever you use a tripod for photography, you can enable the Mirror Lockup feature in your DSLR camera to get tack sharp images.
👉🏻 Mirror Lockup on a Canon Camera
1. I will show you how to enable the mirror lockup feature on a Canon camera.
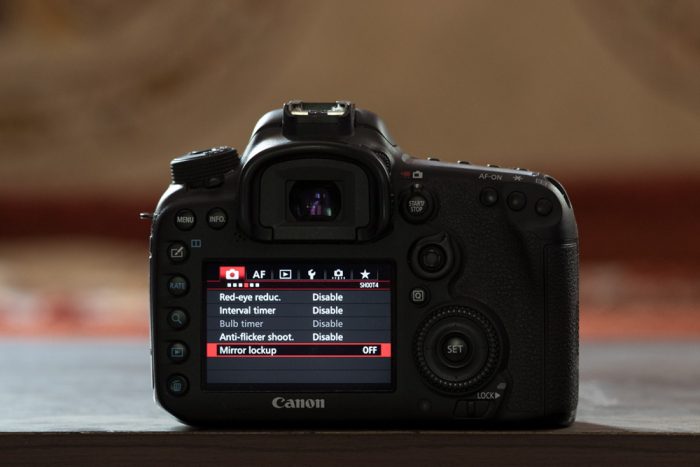
2. Press the menu button.
3. Go to the fourth window under the first camera icon in the settings menu.
4. You can see the “Mirror Lockup” option at last. It will be “OFF” by default.
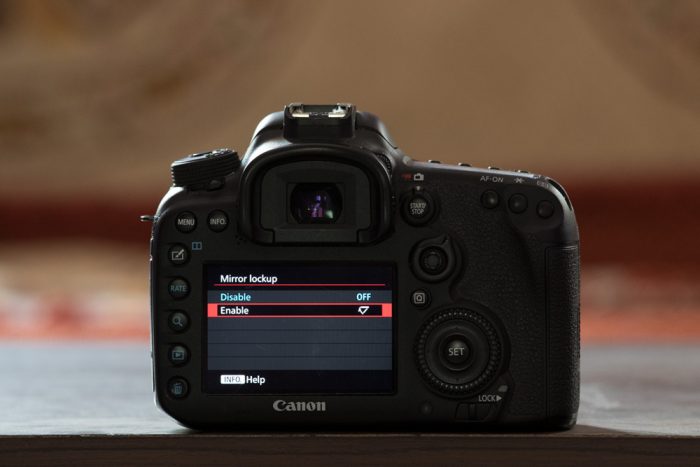
5. Press this option, and a new window will open up. It will show the option to enable and disable the mirror lockup feature.
Mirror Lock Up Feature Test
I will test the mirror lockup feature using a Canon 1DX Mark II camera with a Canon 70-200 mm f4 L IS II USM Lens.
This camera setup is mounted on a Manfrotto Tripod and a 2-second timer is used to trigger the shot.
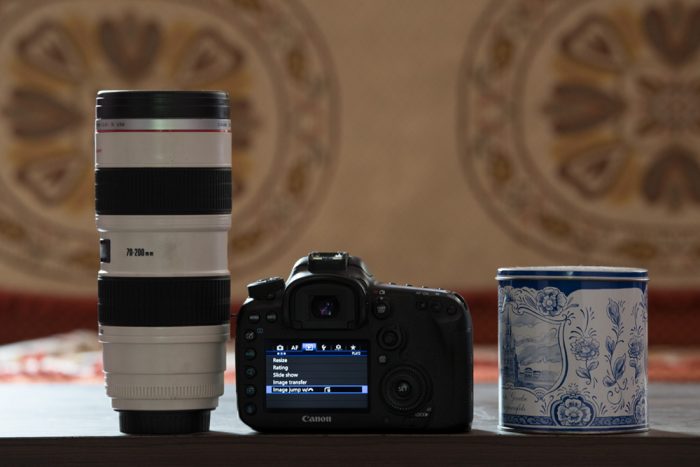
First, let me capture an image with the “Mirror Lockup” feature disabled.
I have photographed the above picture in Aperture priority mode with settings of f/6.3, 1/13 seconds, 800 ISO. A slower shutter speed is used here to see the difference.
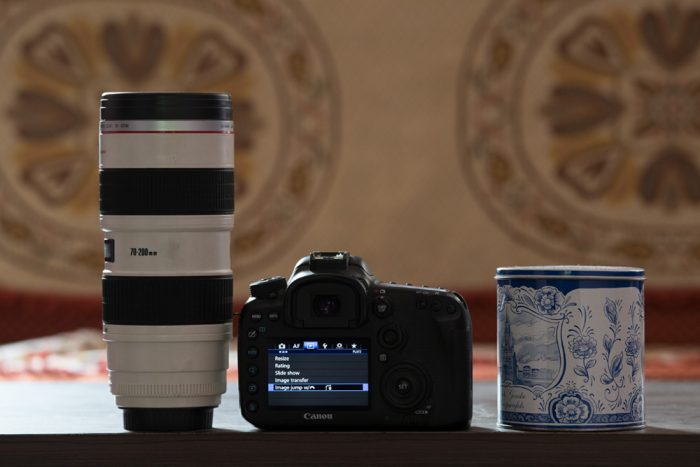
Now, I will enable the mirror lockup feature and capture the same scene using the same exposure settings.
I can hear the mirror getting flipped after the 2-second inbuilt camera timer.
The camera shutter is activated only after 3-4 seconds after this flip. This delay ensures that the entire set up is steady before the capture.
The first and second image looks almost the same since it is a bigger image displayed on a smaller screen.
So, I will zoom in the image to 100% and take a cropped section from both the images.
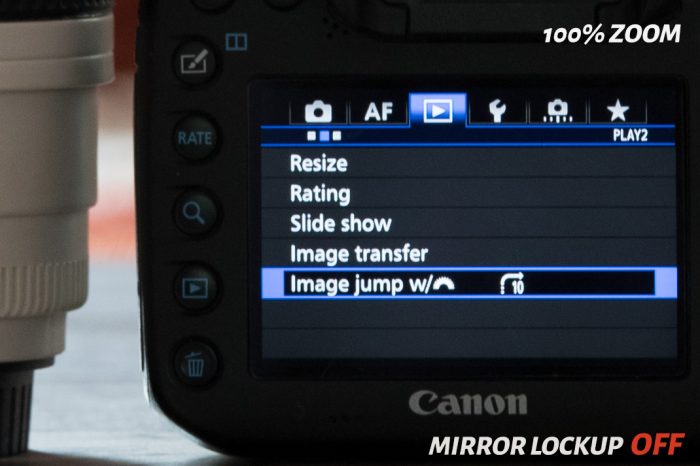
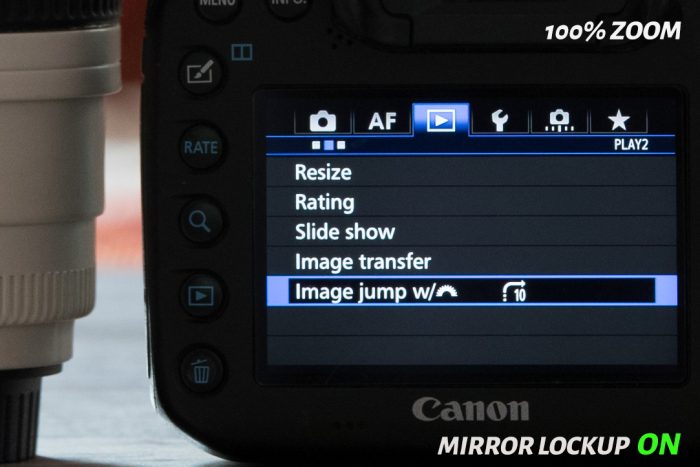
The first image is less sharp when you compare with the second one.
If you notice the edges of the camera and the lens mug, the edges are soft, when compared to one taken with mirror lockup enabled.
Even the writings on display and the buttons are not sharp on the image without the Mirror Lockup.
Thus, it is quite clear that the flipping of the mirror has got a real impact on image sharpness.