Lightroom Perspective Correction- Do It the Right Way
Do you face the issue of slant and leaning buildings/structures in your images?; except for structures like the Leaning Tower of Pisa, which is already a leaning structure 😉. If you are into Architecture photography, photographing buildings and monuments, then you may come across this problem. It is a perspective distortion due to the angle of photography and camera optics. But, you can correct perspective in Lightroom. I will explain the 🖥 Lightroom Perspective correction in detail in this tutorial.
🖥 Lightroom Perspective Correction
1. Import Image
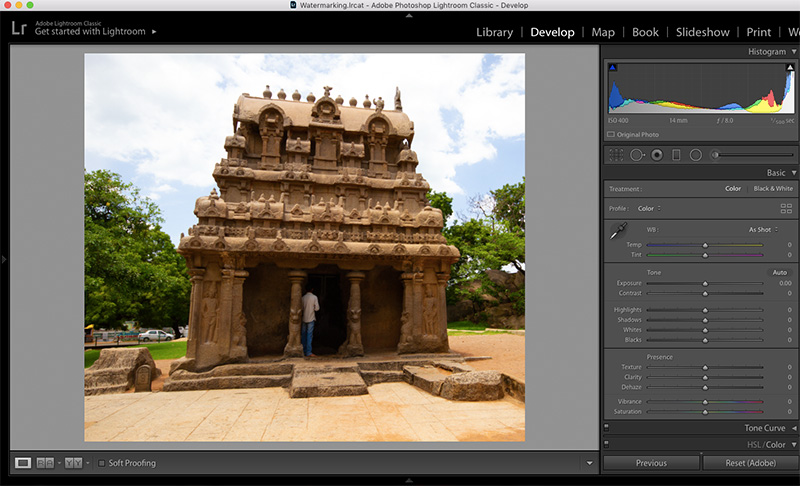
Open Lightroom and Import the image for perspective correction. Hit “D” to open the image in the Develop module for editing.
2. Apply Lens Corrections
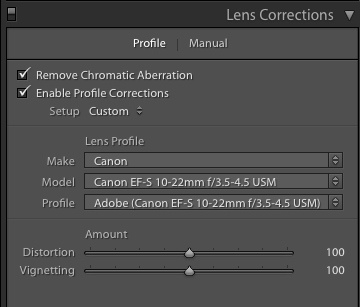
The first thing to do is to go to the “Lens Correction” module to fix the Lens distortions.
We will do it the easy way 😎. Tick the “Remove Chromatic Aberration” and “Enable Profile Correction” checkboxes. It will apply the known correction factor to the picture.
3. Transform the Image
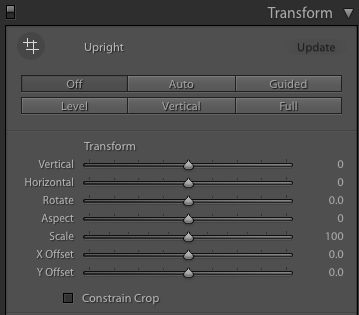
We will use the “Transform” module in the edit window for the perspective correction.
If you think that the Straighten option in Lightroom is going to fix this, then you have got it completely wrong 🙃. It will not help.
There are two ways to correct perspective in Lightroom. On is the Auto option, and the other one is the Manual method.
3.1 Auto Perspective Correction
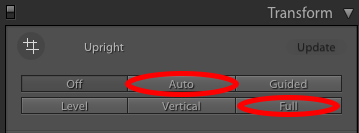
I will explain the easy way first 😃.
For Auto perspective correction, you have two options. You can either click on the “Auto” button or the “Full” button.
From my experience, the “Full” option does a better job than the Auto one.
After clicking any of these buttons, you can move the slider option below for a fine adjustment, if needed.
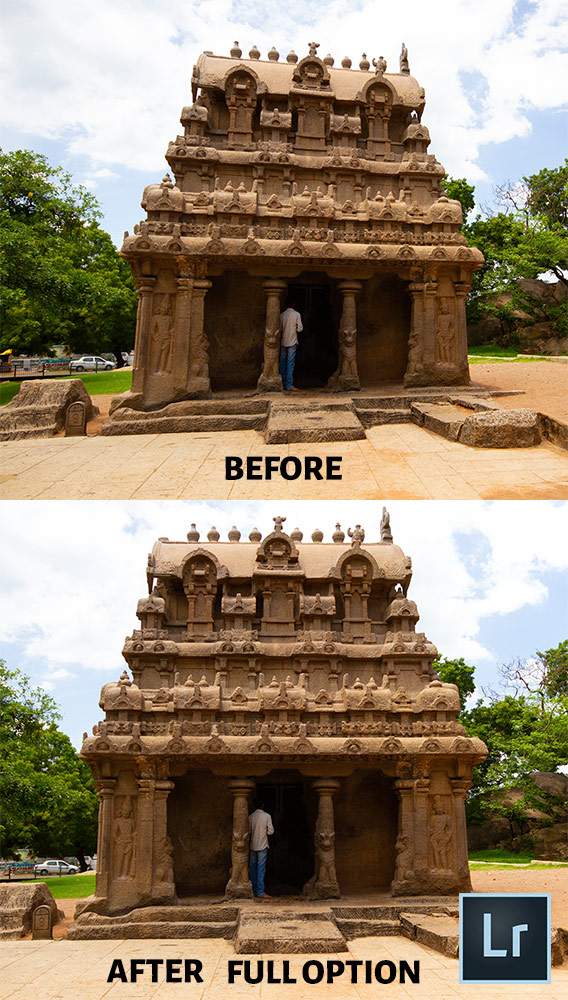
Lightroom Before After Perspective Correction-Full Option
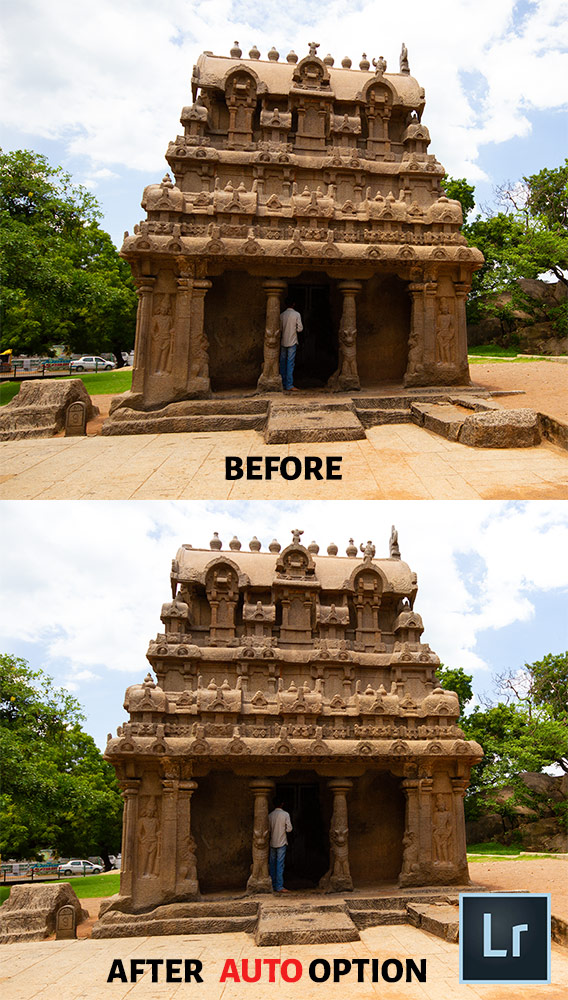
Lightroom Before After Perspective Correction-Auto Option
You can see the “Auto” and “Full” effect on the same image above.
In the Auto mode, the final image still has some distortion, which needs to be corrected. So, the Full option does a good job 💚here.
3.2 Manual Perspective Correction
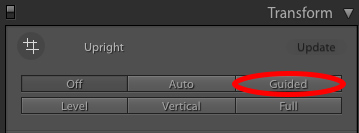
If the Full/Auto option doesn’t give you the desired result ☹️, then go for the manual one. It is the best method to correct Perspective in Lightroom. You can click on the “Guided” button to activate it.
Now, the pointer turns into a cross pointer for drawing lines. You will have 4 grid lines to align for the distortion correction.
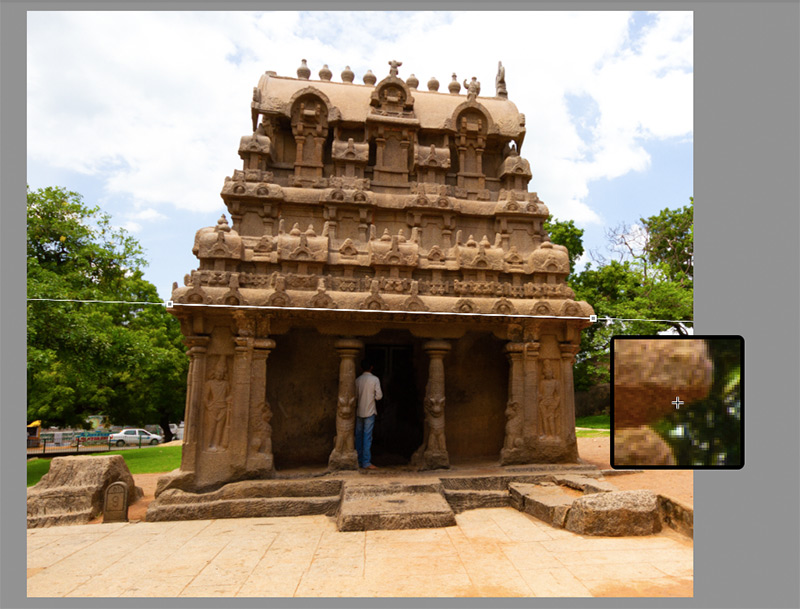
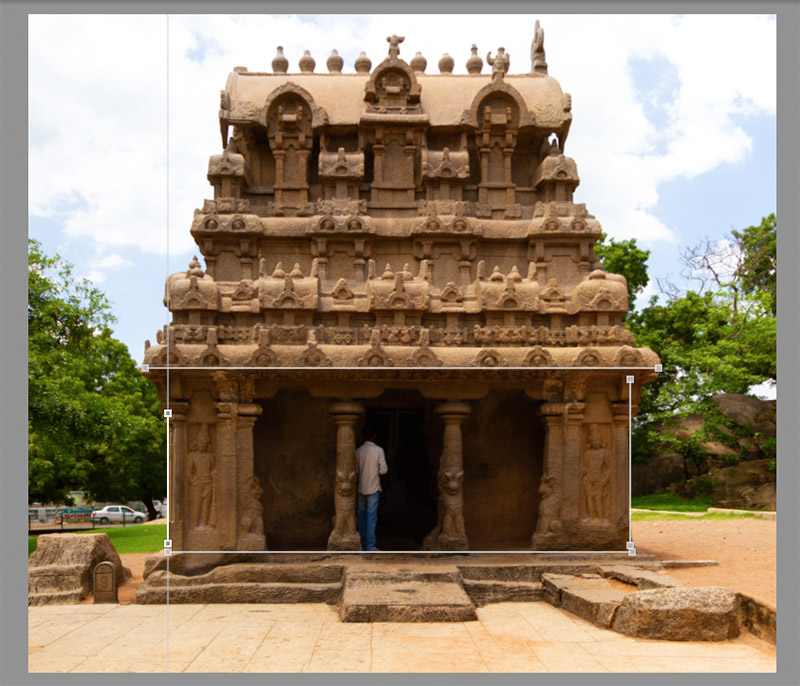
You can draw these four lines along the edges of the structure in the scene, which has to be a rectangle/ square in the actual scenario (shown in the screenshots above).
![]()
For a precise drawing of lines ensure that the “Show Loupe” checkbox is ticked. Once enabled, it will show a zoom-in view of the cross pointer location.
After drawing all the four lines, you can click on the “Done” button to see the final image without these grid lines.
After completing it, you can still play with the sliders for some minor final adjustments.
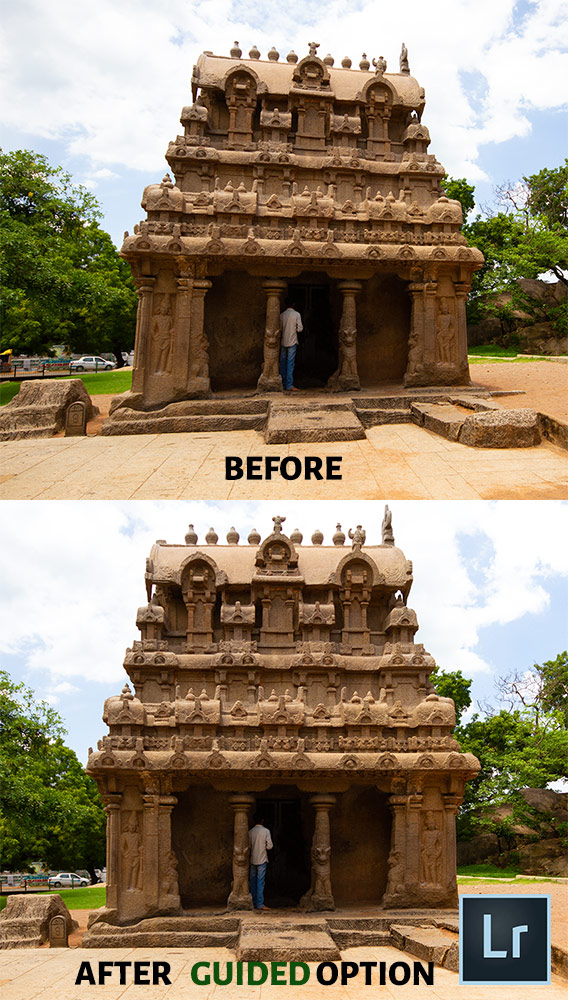
Lightroom Perspective Correction-Manual Guided Option- Before After Image
The Before/After image above 👆🏻😇.
Lightroom Before After Perspective Corrected Images
I have applied the perspective distortion correction to a few more images 😎.
You can see the Lightroom Before After Images below 👇🏻.

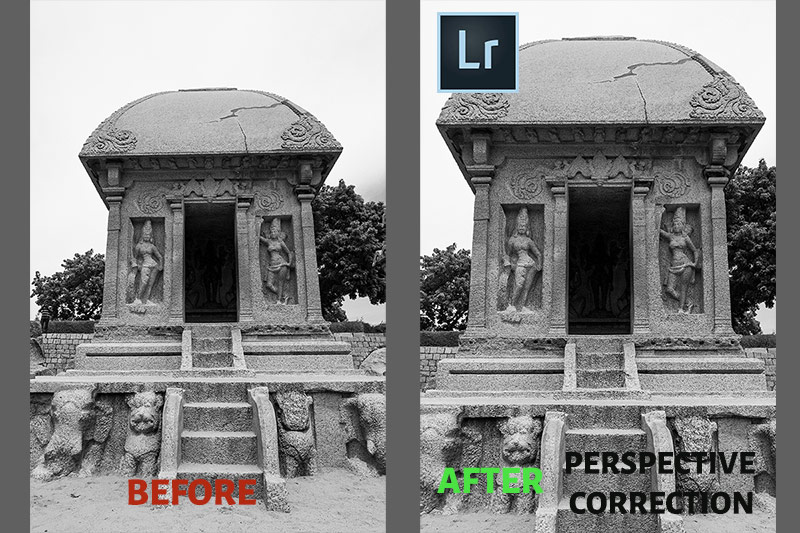
TIP 📷 : When you capture pictures with buildings and structures, if there is a perspective issue, then leave some extra space on all the four edges of the frame. The perspective correction in Lightroom will result in the chopping of some parts of the frame edges. So, frame carefully.
Read 📖: How to Batch Edit in Lightroom

