Luminar 3 Review- Is it a Good Lightroom Alternative?
Skylum Luminar 3 is an award-winning photo editing software. It has all the basic photo editing modules along with the new generation filters. How good is this photo editing software? Does it meet the expectation as a good Lightroom Alternative? Let us find out.
In this article, I will be doing an in-depth Luminar 3 review with the 3.1.1 Version (Latest). I will also make a comparison of Luminar Vs. Lightroom.
Computer/Laptop Used for Review
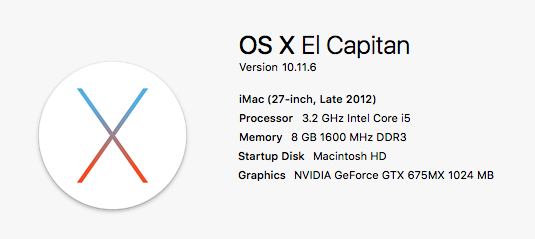
I will be using my 13” mid-2013 model MacBook Air and 27” Late 2012 model iMac to do Luminar 3.1.1 review.
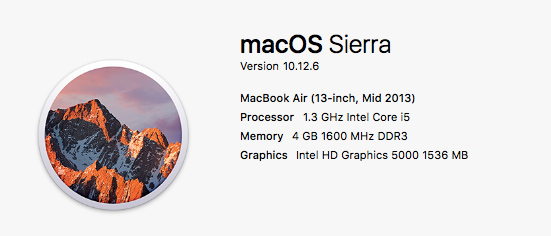
OS Compatibility
Skylum Luminar 3 is available for both Mac as well as Windows users.
Luminar 3 Review

I have used the Luminar 2018 earlier. But, it lacked the Library feature.
The new Luminar 3 version comes with the Library feature. Thus, the new version has solved one of the significant drawbacks of the earlier version.
Luminar 3.0 to 3.1 Update
There are some significant improvements in Luminar 3 with the 3.1.0 update.
1. New Accent AI 2.0 Technology with Human Aware feature. Use facial recognition features to detect skin tones and apply the effect accordingly. A pretty useful feature, especially for Portrait and Wedding photographers.
2. Easy to Organise RAW+JPEG photos. If you have captured both RAW and JPEG images of the same picture, then this option allows you to show either of the pictures or separately.
3. Enhanced Sync Adjustment Command. Now, photographers can apply the same settings to all other images with the Sync option.
From Luminar 3.1.0 to Luminar 3.1.1
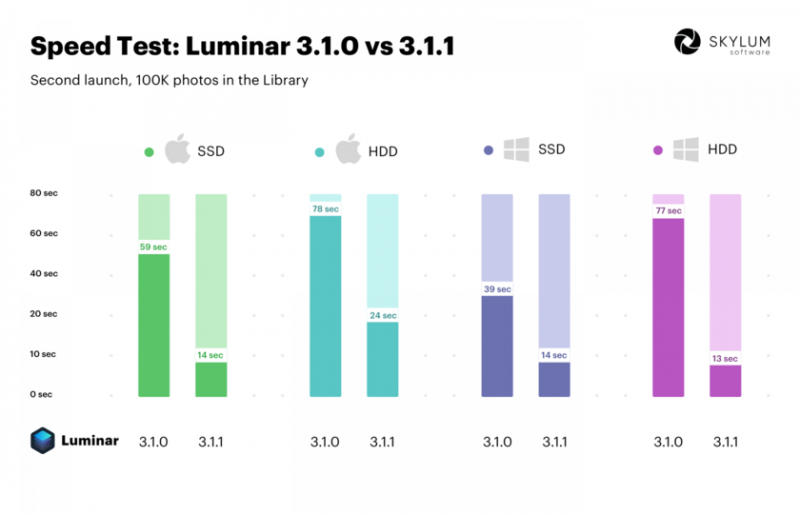
Luminar 3.1.0 to 3.1.1 Speed Improvements (Photo Courtesy: Skylum Luminar)
Skylum has made the following improvements from the 3.1.0 version to Luminar 3.1.1 version:
1. Improvement in Launch Time Speed.
2. Easy navigation. Right Click on Image and Select Go To=> Folder in Library option to view other images in the same folder.
Image Organizer and Management
Luminar 3 users don’t have to create any separate catalog for their images. You can store the pictures in the respective folders in the hard disk.
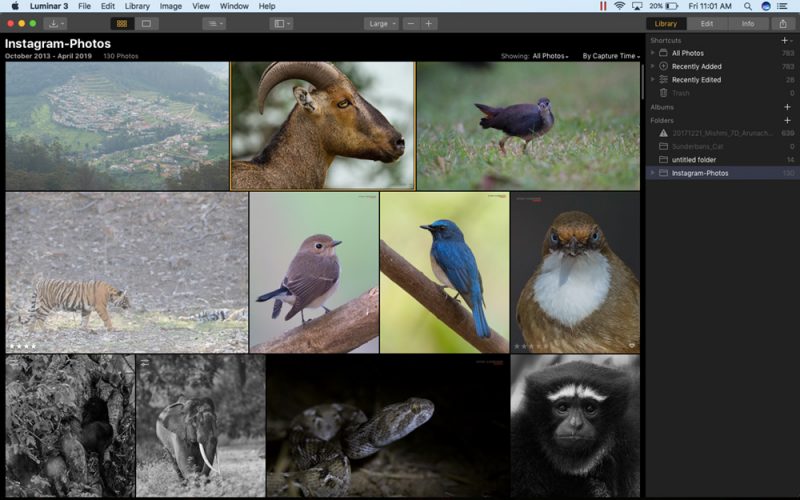
When you want to do a photo edit in Luminar 3, add the folder in the Library section. Once you select the folder, Luminar will automatically list the images from the selected folder.
There are two types of views in the “Library” section. You can view the entire images in the folder as small thumbnails.
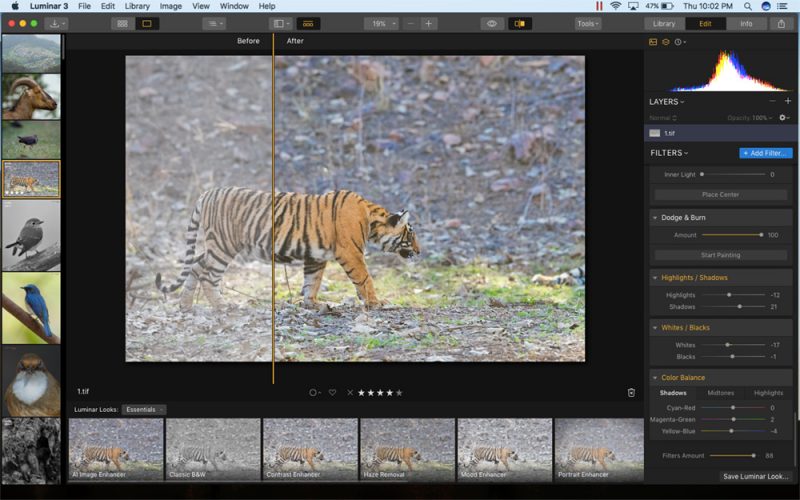
The other way is to double click on an image to get an expanded view, with the other pictures listed as thumbnails on the left side of the window. Now, you can see the “Luminar looks” options along with the preview window in the bottom panel.
You have the option to tag the photos, add to favorites option, and star rating option on the bottom of the image. You can also do it by right-clicking on the image. If you want to open/edit the image in any other installed photo editing software, right click and select “Open In” option. These are some of the must-have features for a photographer.
NOTE: Luminar Looks corresponds to Presets in Lightroom. Luminar Filters corresponds to individual editing modules in Lightroom
Workspace Optimization
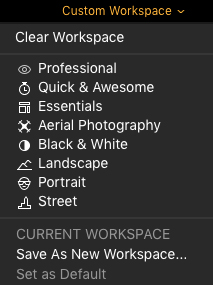
This feature is something which I liked very much about the Luminar photo editing software. It gives you a customizable workspace in the “Edit” panel.
There are 8 inbuilt workspaces according to the types of photography. It includes Professional, Quick and Awesome, Essentials, Aerial Photography, Black and White, Landscape, Portrait, and Street workspace.
Each workspace comes with a predetermined set of filters for editing. You can also create a customized workspace which suits your post-processing workflow. Click on the “Add Filter” option to add multiple filter blocks to your workspace and save it as your custom workspace. I have created my workspace with Filters for editing.
The Basic Editing Tools
All the basic editing modules like the Exposure Adjustment, Histogram, Tone Curve, Contrast settings, and White Balance Adjustment are present in Luminar 3. The performance of these filter modules is pretty good.
Image Sharpening
When it comes to Image sharpening, there are multiple filter options provided in the Luminar. So, you need to play with each of these filters to get the best results. The Filters include “Structure,” “Clarity,” “Details Enhancer,” and the basic “Sharpening” filter.
Noise Reduction
I recommend making the Noise reduction first, followed by image sharpening. It is an excellent practice to follow with any photo editing software.
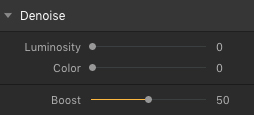
Luminar 3 comes with the “Denoise” Filter to remove noise from the image.
It has 3 sliders: Luminosity, Color, and Boost. You can adjust theses sliders according to the noise level of the picture. Don’t expect Luminar 3 to do wonders on a high noise image without losing details in the image. It does a decent job when it comes to noise reduction.
I have tested it on images from ISO 400 to ISO 6400 taken with Canon 1DX Mark ii. It works well for pictures up to 800 ISO. For higher ISOs, make use of the layers and masking feature for selective noise reduction.
I prefer to use the Topaz DeNoise AI for the noise removal part as it does a better job for high ISO images.
So, the Luminar 3 is equipped with all the basics features required for a good photo editing software.
Now, let us have a look at the additional features which Luminar 3 offers to the photographers and photo-editors.
EXIF Data Viewer
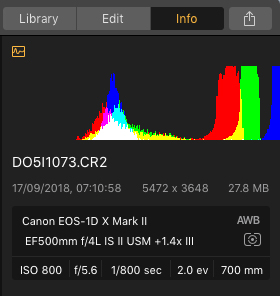
You can view the EXIF data of the image in the last tab called “Info.”
It will show the details like Camera Body, Camera Lens, Aperture, Shutter speed, ISO, Exposure, and Focal Length, along with the Image Histogram.
The date of image capture, along with the size and resolution information, is also displayed.
Luminar Filters
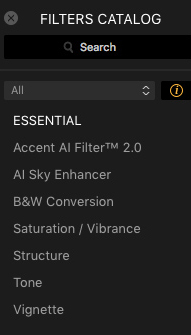


There are 5 set of filters in Luminar 3.
Essential Filters include Accent AI Filter 2.0, AI Sky Enhancer, B&W Conversion Filter, Saturation/Vibrance, Structure, Tone, and Vignette filter.
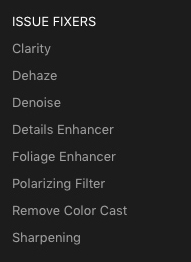
Issue Fixer Filters like Clarity, Dehaze, Denoise, Details Enhancer, Foliage Enhancer, Polarizing filter, Remove Color cast, and Sharpening filter are also included.
Creative filters include Brilliance/Warmth, Cross Processing, Dramatic, Grain, Hue Shift, Image Radiance, Matte Look, Orton Effect, Soft Focus, Soft Glow, Split toning, and Texture overlay filter.
Professional Filters include Advanced Contrast, Channel Mixer, Color Balance, Color Contrast, Curves, Dodge and Burn, HSL, LUT Mapping, Microstructure, Photo Filter, and Split Color Warmth,
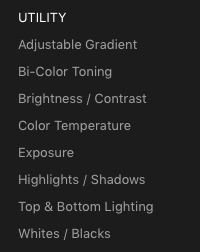
Different Utility Filters are Adjustable Gradient, Bi-Color Toning, Brightness/Contrast, Color Temperature, Exposure, Highlights/Shadows, Top and Bottom Lighting, and Whites/Blacks Filter.
Interesting Luminar Filters to Look For
Accent AI Filter 2.0
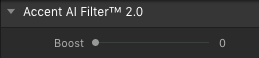
Accent AI Filter something that makes Luminar 3 stand out from the rest of the photo editing tools. This Filter does the job of image enhancement by detecting the different tones in the image and boosting them accordingly.
In the 3.1.0 version, they have upgraded the Accent AI 1.0 to Accent AI 2.0 version.
Here, the AI algorithm does an excellent job in identifying the skin tones in the image and boosting it to the right amount. I am impressed with this Filter.
AI Sky Enhancer
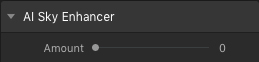
This one is an exciting slider and a very useful one too. When we shoot landscape and nature images, one of the most commonly faced issues is the incorrectly exposed sky. It is mainly due to the dynamic range limitation of the camera.
The AI Sky Enhancer helps to solve this problem. Otherwise, we need to go for a Grad ND Filter or merging a Bracketed Exposure. Thus, this AI Sky Enhance feature saves a good amount of processing time.
Sunrays Filter
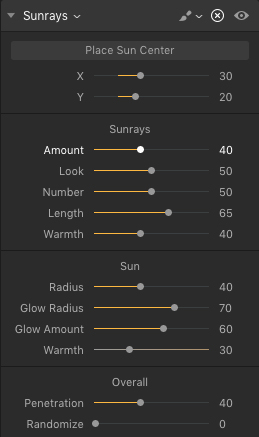
Sunrays Filter is a mind-blowing filter. This Filter is capable of introducing sun into the scene, and you can control the intensity and pattern of the rays too.
Another exciting thing which I noticed is that when clouds are there in the scene when you move around the sun, it will go behind the clouds. So, this Filter does an excellent job, if you are looking to introduce sunrays artificially in your image.
Thus, you don’t have to spend your time working in layers to get this effect.
Golden Hour Filter
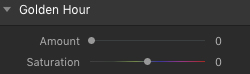
If you have any image captured during the Dusk or Dawn time, golden hours of photography, then you can use the Golden Hour filter sliders to enhance the image.
I don’t recommend to use it on an image taken at daytime to get a golden hour feeling. I tried doing this and messed up the whole picture. It will look more artificial image with a white balance issue.
B&W Conversion Filter
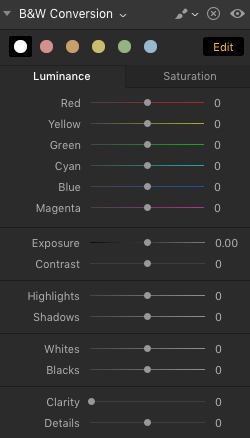
If you are planning to convert the image to a Black and White one then “B&W Conversion filter” is there for you.
It gives you more control over the various tones in the image. You can vary the luminance part and the saturation part separately. I use this filter when I feel that the picture is the right candidate for monochrome.
Dedicated Clarity and Details sliders are provided in this filter for a better monochrome editing. So, if you are a fan of Black and White photography, then Luminar would be an ideal choice for you.
High Key Filter
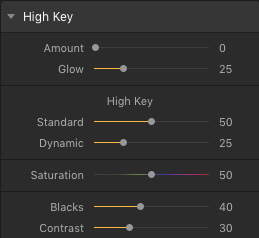
If you are editing your high key images, then this filter would be beneficial. You can even use it convert your photos to high key ones, provided they are the right candidate for high key pictures.
Specific sliders like Saturation, Blacks, and Contrast are provided for high key image editing. You can vary the “Amount” and Glow also.
It would have been good if they had a Low-key filter like the high key filter in Luminar. There are many people, including me, who love Low key images more than a high key image. So, I hope they will include it in their next release.
Fog Filter

Typically, people would be looking to remove the fog from the image as it makes the image soft.
But, there are instances when fog can improve the scene. So, you can use this “Fog” filter which comes with “Light Fog,” and “Dark Fog” settings with a slider to vary the amount of the effect.
Luminar Vs. Lightroom
Now, we will do Luminar Vs. Lightroom comparison to see whether Luminar is a good Lightroom alternative or not.
1. Costing Model
Luminar 3 comes with a one-time price. So, you need to pay only once and use it for a lifetime.
In the case of Adobe Lightroom, they use a Subscription based costing model. So, you will have to pay monthly to use it.
So, you may find Luminar’s costing model more user-friendly, unless you are a high-end professional photographer who can afford to pay every month.
2. Price Factor
Lightroom comes in 3 pricing plans. The basic Lightroom plan costs $119.88/yr, Creative Cloud Photography Plan at the same price of $119.88/yr, and the Photography Plan costs $239.88/yr.
The Basic Plan includes Lightroom with 1TB of cloud storage. Creative Cloud Plan includes Photoshop, Lightroom, and Lightroom Classic with 20GB cloud space and your portfolio website. The Photography Plan is almost similar to the Creative Cloud Plan but includes 1TB of cloud space instead of 20GB.
Luminar 3 alone costs the US $69. There are two more bundles from Skylum; Signature Edition which comes with Signature Looks presets from famous photographers at the US $79, and Creative Pro Bundle which include Aurora HDR software along with the Signature edition stuffs at the US $149.
Thus, Luminar is a cost-effective, Lightroom alternative.
3. Plugin Availability
Lightroom was released in 2007. So, it is there in the market for around 12 years as one of the best photo editing software for photographers. Thus, there are lots of third-party plugins available for Lightroom.
Luminar got released in 2016. It is only 3 years they are in the market. So, there are no third-party plugins available for Luminar as of now.
But, you can use Luminar as a plugin for Lightroom. If you select the drop-down menu from Luminar, then you will get the “Install as Plugin” option.
Skylum has also launched “Luminar Flex – Plugin for Lightroom,” which is Luminar without its library features.
4. Import Vs. Folder Browsing
An earlier version of Luminar had the issue of missing Library option, which all Photographers require to organize their images. So, the new Luminar 3 version comes up with this library option. You can select the folder from the path and view the thumbnails of the images in the preview window.
In Lightroom, you need to create a catalog file and import images to that file. Some users like this feature, whereas others don’t. So, Luminar 3 avoids this catalog creation, and you can directly access the images in the default folder structure.
5. Luminar Looks Vs. Lightroom Presets
Luminar comes with lots of Luminar Looks options for Image Enhancement. Many of these “Luminar Looks” are very useful and exciting. You will get some free “Luminar Looks” along with the software. You can also purchase paid Luminar Looks online.
For Lightroom, you have Lightroom presets. You can create your own presets or you can download Lightroom presets online. Both paid and free Lightroom presets are available.
Both Luminar and Lightroom allows you to create your looks/presets.
6. Working in Layers
Luminar allows you to work in layers. But, Adobe Lightroom doesn’t support this feature since they have implemented the layers feature in their high-end photo editing software, Photoshop.
So, it’s a big win for Luminar here.
7. Workspace Customization
I liked the way how Luminar allows the user to customize his workspace according to his photo editing needs. Lightroom also allows user for workspace customization.
But, Lightroom doesn’t support such a huge collection of modules for customization.
You cannot create different workspaces in Lightroom like Luminar for different editing needs.
8. Lens Correction Option
When it comes to lens defect correction like Vignetting, Chromatic Aberration, and distortions, both Lightroom and Luminar have options to fix it.
For Luminar, you need to select the check boxes. In the case of Lightroom, sometimes the checkbox selection doesn’t work, and you will have to select the camera body model and lens model manually.
Both Lightroom and Luminar come with manual adjustments also.
Luminar Issues
No photo editing software is perfect; so is the case with Luminar also. I will list down the issue which I faced during photo editing with Luminar.
If you have lots of images to browse in a folder, then it takes some time to show the preview images. It happens with Lightroom also. But, the image browsing speed has improved if you compare the 3.1.0 version to 3.1.1 version.
Sometimes when I browse through the filters, it gets stuck for a couple of seconds.
When you are exporting the final processed image from Luminar, then you cannot use any of the other Luminar sections until the image export gets completed.
All these bugs are minor ones, and even Lightroom also have such flaws.
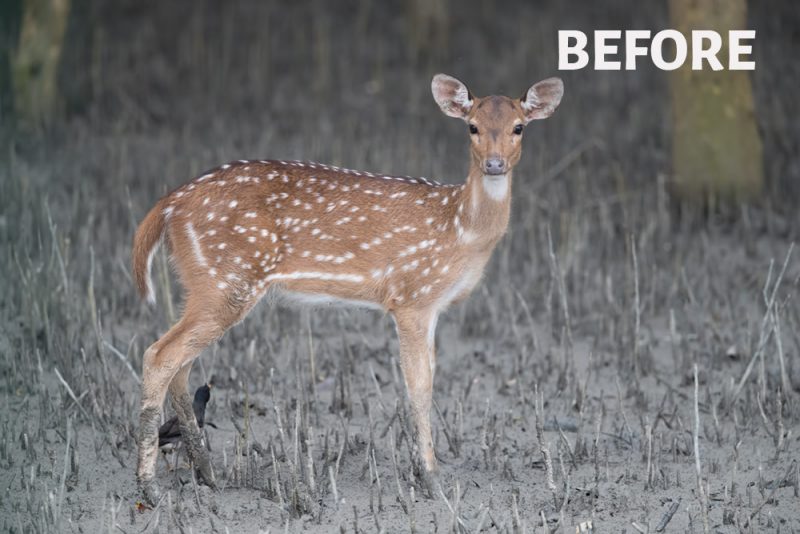
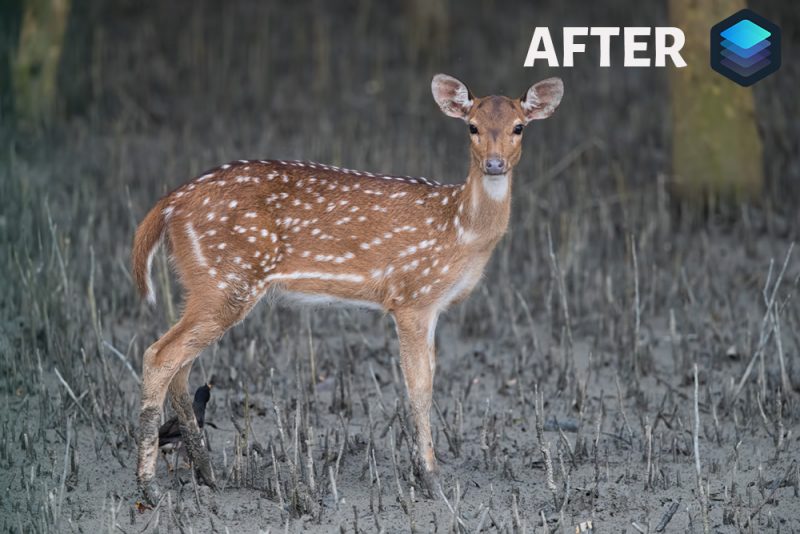
Luminar 3.1.1 Before/After Images
I am sharing some of the Luminar Before/After images which I have processed. It took around 25 seconds to export the processed RAW image in JPEG format with maximum image quality in my MacBook Air laptop and around 20 seconds for the same image in my iMac.


Conclusion
So, Luminar 3 is one of the best photo editing software for both amateur and professional photographers and photo-editors.
It has impressed me with its features like Accent AI 2.0, AI Sky Enhancer, Sunrays, and Foliage Enhancer. The workspaces are designed in such a way that it suits all types of photographers, both amateur and professionals.
The only thing which I feel requires improvement is the noise reduction part. I think it would be good if Skylum can implement the AI algorithm on noise removal for better performance. The current noise reduction filter is almost similar to the Lightroom one.
So, Luminar 3 is a good Lightroom alternative in many aspects.
You can download 30-day free Luminar software and give a try. If you are interested to buy, you can use my Luminar Discount code “PHOTOGRAPHYAXIS10” to get a 10% discount on the purchase.