
Topaz DeNoise AI Review- Is it Effective? [2024]
There are some great improvements to the popular image-denoising software, Topaz DeNoise AI. The current version is 3.7.0. I have been using the DeNoise AI for quite a long time. So, I will share an in-depth review of Topaz DeNoise AI in this guide. It will help you decide if this denoiser is for you.
There are other AI-powered tools from Topaz Labs like Gigapixel AI, Sharpen AI, and JPEG to RAW AI.
You can use Topaz DeNoise AI as a standalone version as well as a plugin for Photoshop and Lightroom. You can download it for free here.

It supports both Windows and Macintosh OS.
I will be doing the Topaz DeNoise AI Review (Ver 3.7.0)on my 13” MacBook Air 2020 running Mac OS Monterey (Version 12.4).
Buy Topaz DeNoise through this link to get a 25 % discount (Offer valid Till 31 Dec 2022).
Downloading & Installing Topaz DeNoise AI

1. Download and Install Topaz DeNoise AI. The downloaded installation file will be around 1.24 GB. You can double-click on the package to start the installation process.
2. Once the installation is complete, you can see the standalone version in the applications. If you have already installed Adobe Lightroom or Adobe Photoshop, you can see it as a plugin over there.
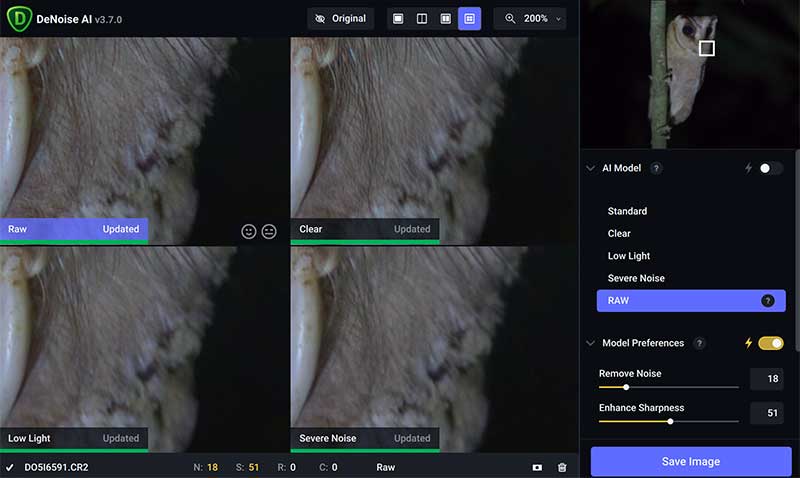
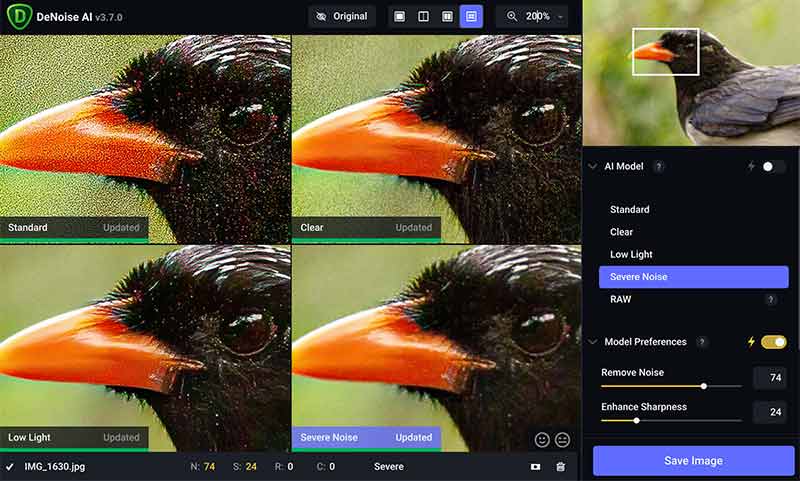
The Topaz DeNoise AI comes with 5 AI models for noise removal.
1. Standard: Good for low and medium noise removal
2. Clear: For low and medium noise removal with increased subject sharpness.
3. Low Light: For Images photographed in low light conditions.
4. Severe Noise: For Extreme Noise removal.
5. RAW: To Remove Noise from an Unprocessed Image in RAW, JPEG, or TIFF format.
You can see a toggle button on the AI Model. If you switch it ON, the software will automatically select the AI model based on the image.
![]()
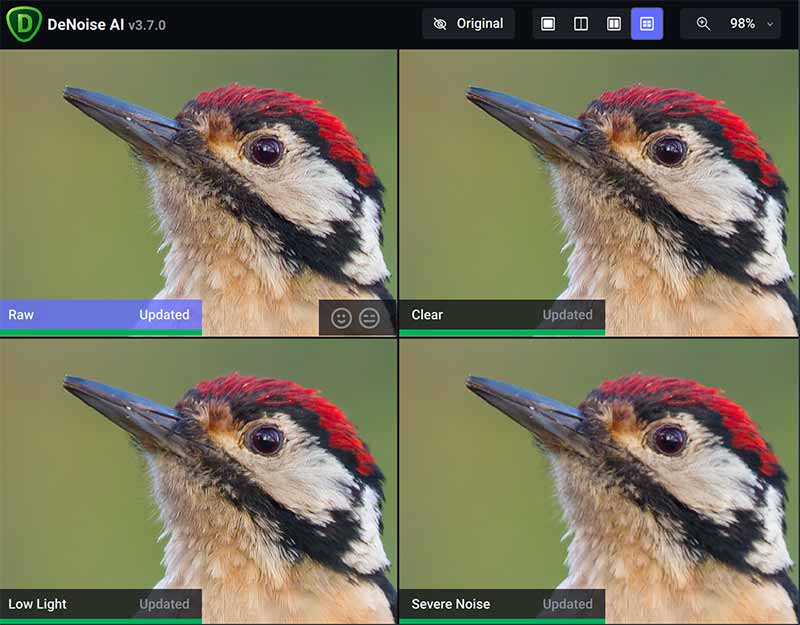
There are four types of Before/ After Topaz Denoise AI previews in the top menu. If you click on the 4 by 4 preview one, you will see the effect of 4 different AI models on the same image.
I prefer this preview window for selecting the appropriate AI model for each image. You can see the difference between each of the models for that particular image. The AI suggest feature will not work when you use this preview option.
You just need to click on one that you find best for your image. If you want to do any further adjustments, you can always do it manually with the help of the slider given on the right-side panel.
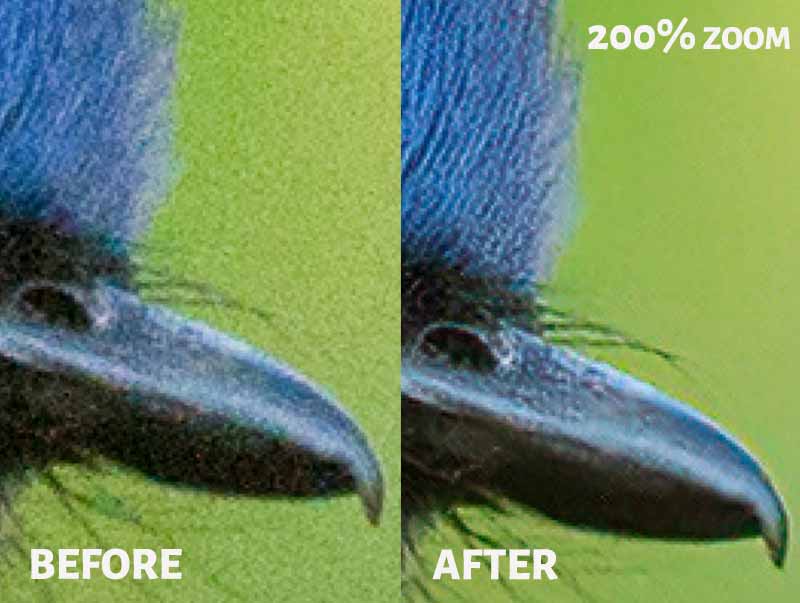
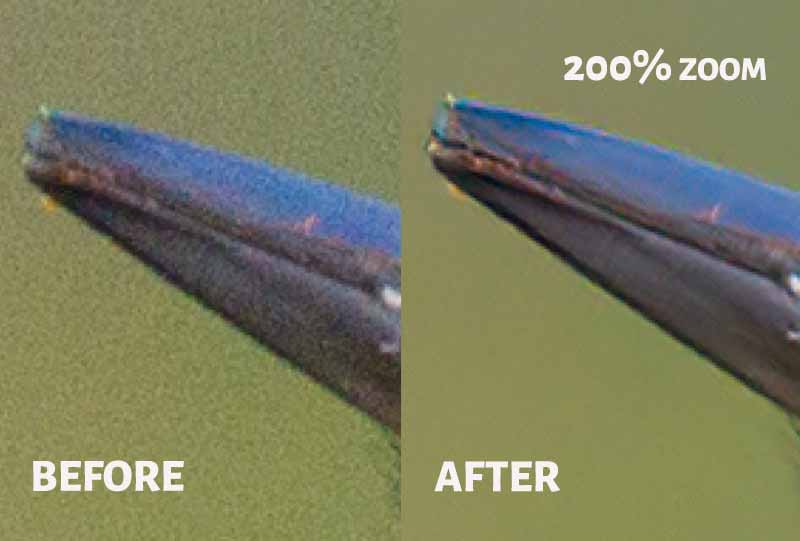
QUICK TIP: When you preview the results, always go for a 200 % Image Zoom, it will help you to see the effect of the various denoiser AI models.
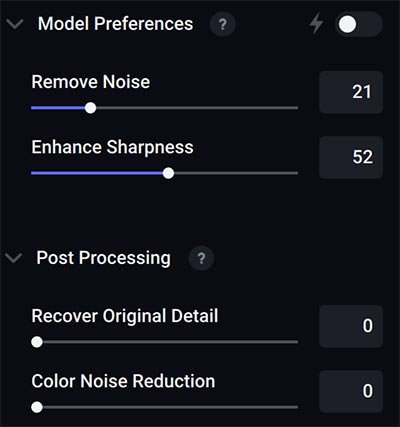
I liked this fine-tuning feature. It helps to make precise adjustments for the sharpness and noise of the image. If the image is too soft after noise removal, you can increase the sharpness here.
JPEG Image
Many record JPEG images, especially when using your smartphone or point-and-shoot cameras.
So, we will test a noisy JPEG image on Topaz Denoise AI software.
When I toggled the AI model button, it suggested using the Standard AI model for this image. Anyway, I will check with all the AI models to double-confirm this decision.
Both Standard and Clear AI model previews do look good. But the noise is slightly more on the clear one. So, I have decided to go with the Standard output.
You can see the Before/ After image above.
RAW Image
You can also import RAW images directly into the Topaz Denoise AI software for removing image noise.
I will import one of my RAW images (.CR2 Canon RAW file) into this software and see how good it is at removing noise.
When you take the RAW image directly into this software, it will take more time to generate the output previews because of the large file size.
The Autosuggest feature suggested going with the Severe Noise model. But, when I compared the outputs, the image was a bit soft in the severe noise model.
The RAW and the clear model outputs were looking better. So, I decided to go with either of these two. The output from thee clear AI model is better for this night image.
The processed image will be saved in the DNG format. It took around 4 minutes and 17 seconds to save the processed picture.
The RAW images are generally dull. So, when I import the RAW files to Denoise AI, the autosuggest feature tells me to go with the Low light or the Severe Noise model for most of my images. But, other AI models like clean and RAW does a better job for many of these images. So, always make a proper comparison before selecting any of these AI models.
TIFF Image
Many photographers prefer to store their final edited images in the popular TIFF file format. It is also known as the digital negative. Also, when you check in to Lightroom.
I will test the DeNoise AI on some of my TIFF files that still have some noise.
For testing, I will use one of my Himalayan Woodpecker bird images that I have processed and saved in the TIFF image file format.
After comparing the output from the 5 different AI models, the image from the “Clear” AI model does a better job for this picture.
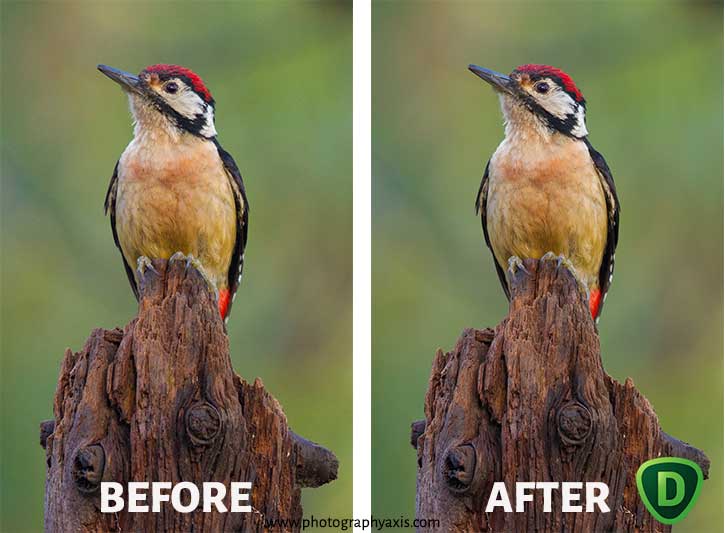
You can see the Before/ After image above. The Topaz DeNoise AI works well with TIFF images.
I will also try to export the final image after processing it in the RAW AI model for comparison.
If we compare the images, we can see that there are some small specks of noise on the bird’s body in the image from the RAW AI model.
This image is already processed in Adobe Lightroom. Thus, if you use an already processed image, it is better to try the other four models.
Low Noise Image
I will drag and drop a low-noise image into Denoise AI to test it.
This image is captured at 400 ISO. Most photo editors that support noise removal can quickly fix the noise in this picture.
When it comes to an image with less noise, you need to ensure that the noise removal software does not reduce the image sharpness heavily.
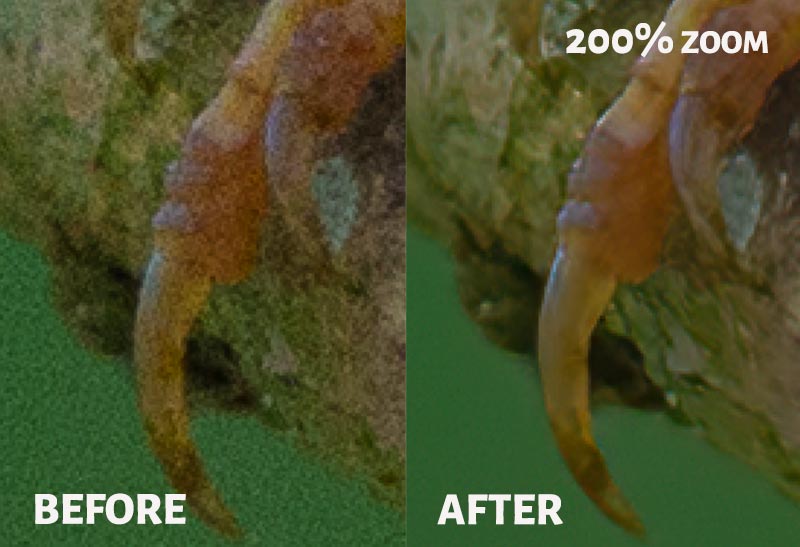
I will use my Common Rose finch bird picture for this test. The amount of noise is very less in this picture.

When I used the Autosuggest option, it suggested using the Standard AI model.
Since I have been using the Topaz Denoise AI for a long time, I know that the autosuggest is incorrect in many instances.
So, I will run this image on all 5 AI models. The 4-window comparison option is the best place to make the comparison.
After the comparison, it is clear that the Clear and Standard AI model outputs are good.
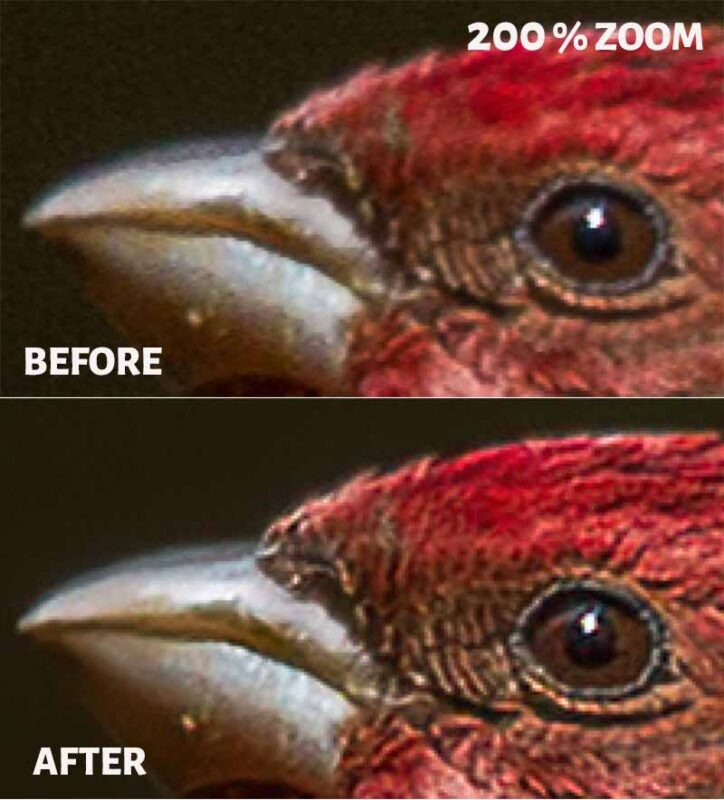
On a closer look, the Clear AI model has also sharpened the bird in a better way. Thus, this output is better than the Standard one.
The Before After image is above.
Thus, the software does a perfect job of removing the noise along with enhancing the image sharpness.
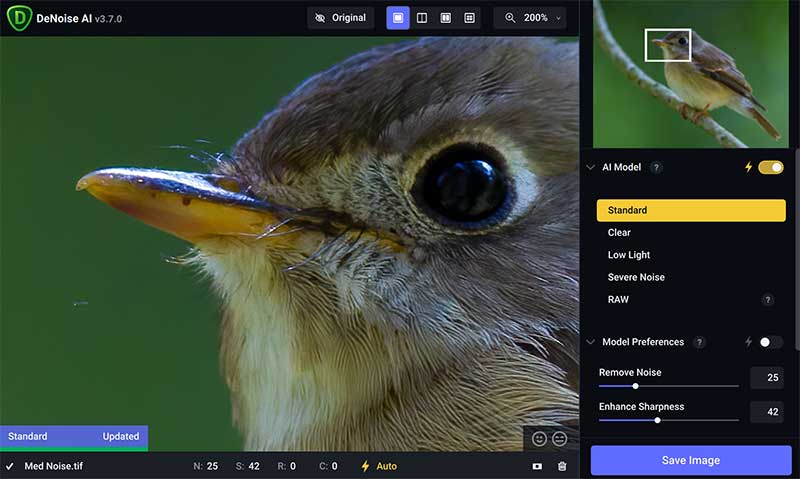
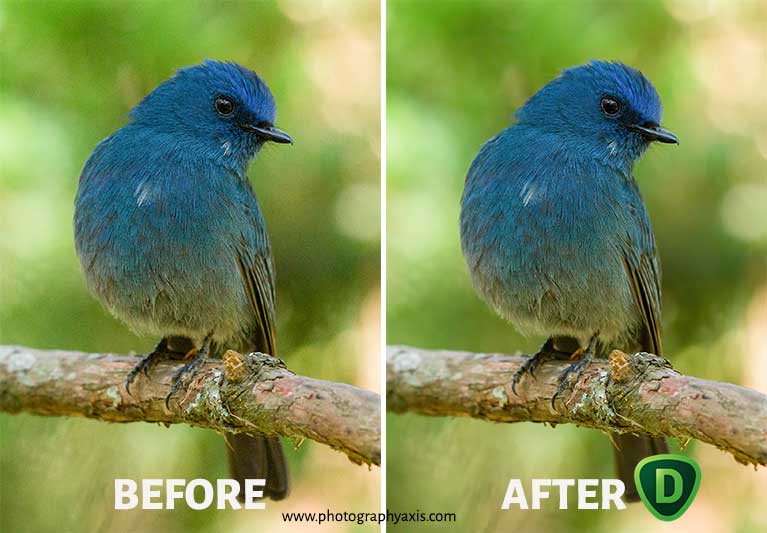
Medium Noise Image
Now, we will see the performance of this image denoising software on a medium noisy image.

I will test it on one of my flycatcher images which is slightly more noisy, especially in the blurred background region.
I have tried all the AI models, and the Standard one does a good job.
So, I decided to process this image using this AI model. Even the autosuggest feature has also suggested this model.
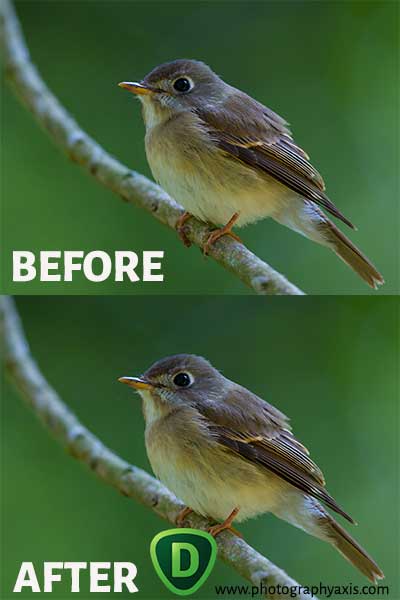
You can see the Before/After Image above.
The noise is removed from the image without affecting the details in the sharp areas. So, the software does a pretty good job for medium noisy pictures.
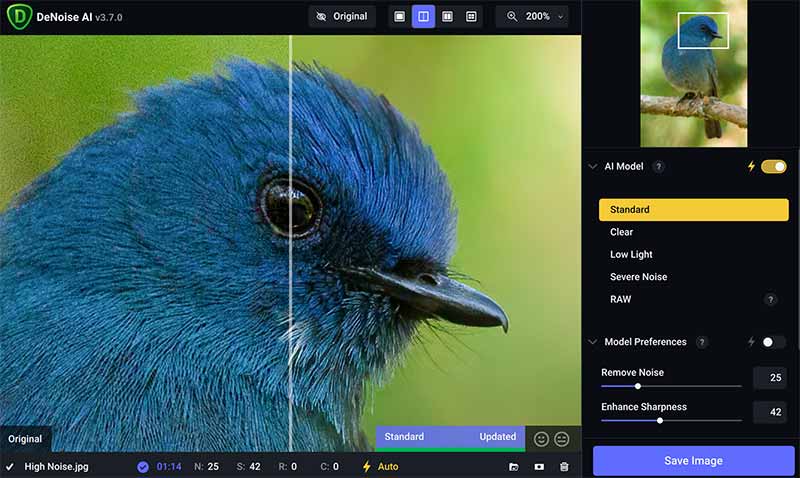
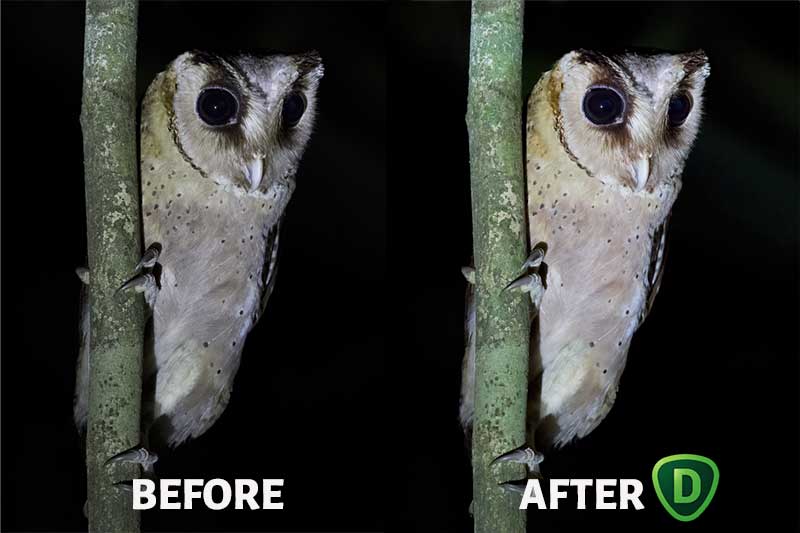
High Noise Image
When I shoot wildlife/birds early morning and late evening, I need to use very High ISO values. So, I ended up capturing noisy images many times.
Now, we will see the performance of the Topaz Denoise AI in one of my noisy pictures.
I will use this Indian paradise flycatcher bird image that has lots of grainy noise for this test.

I will make the 4-window comparison to see which one suits you best.
Here, there is still some noise in the Clear AI model results, and the Severe Noise AI model result is soft.
I tried the RAW one, but the results were unsatisfactory since it is an already processed image.
So, I will choose between the Standard and Low Light one. The feathers appear very soft in the Low Light AI model.
When I toggle the AI model button, it tells me to go with the Standard AI model. When I compare also, the Standard output is better.
I have decided to go with the Standard one for this image. The software’s prediction based on AI seems to be right here.
The Topaz Denoise does a good job of removing noise from a highly noisy image.
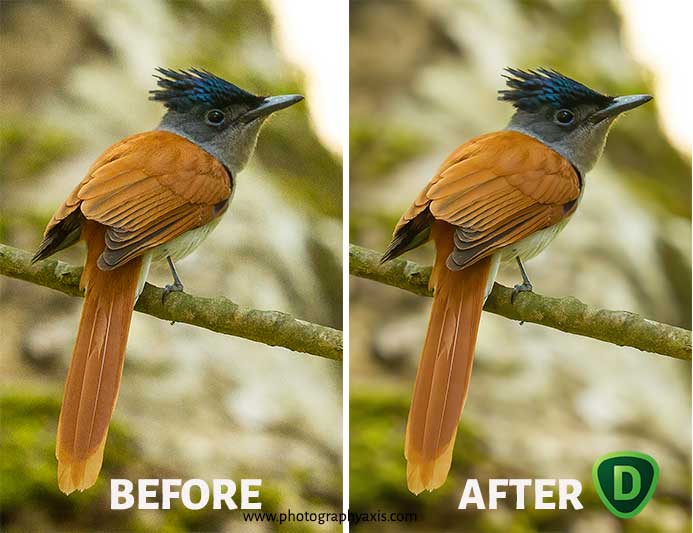
You can see the Before/ After image above.
It took around 12 seconds to save this 7.2MB file.
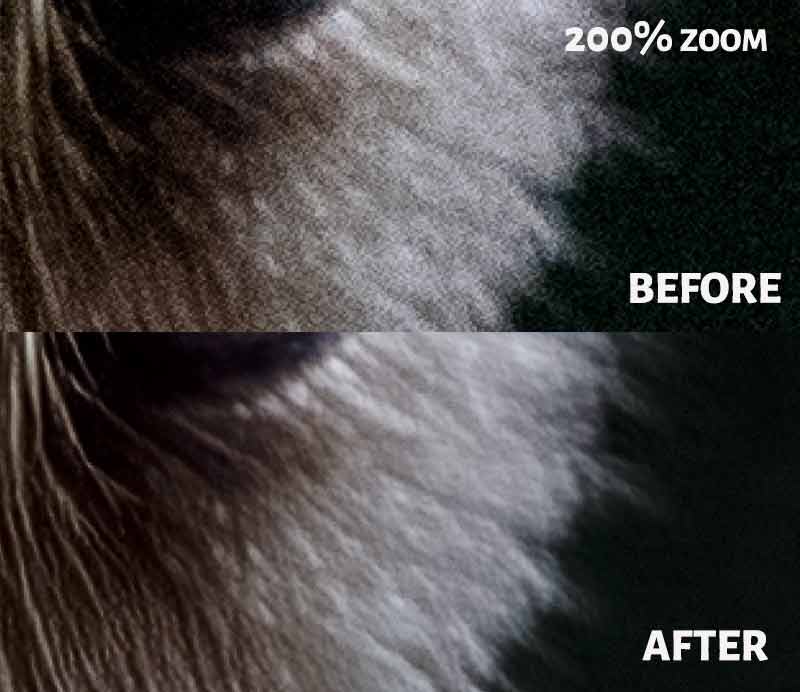
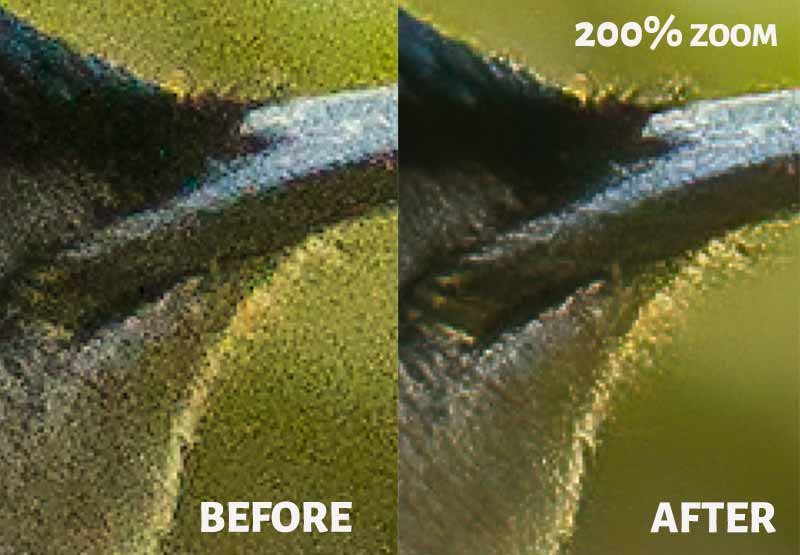
Very High Noise Image
Now, I will test the Topaz Denoise AI on images with extreme noise levels. It is extremely difficult to remove this noise from the image using any photo editing software.
These images are unusable because of the very high level of noise visible in the form of heavy grains.
When I used the Autosuggest feature, the software recommended using the Standard AI model. But, the preview image from this AI model does not look that good.
Since I have been using the Topaz Denoise AI for quite a long time, I know that this Autosuggest feature is not that accurate, especially for images with heavy noise.
So, I will use the 4-window comparison option. I tested all 5 AI models. Here, the Low light and Severe Noise models did a better job compared to other models.
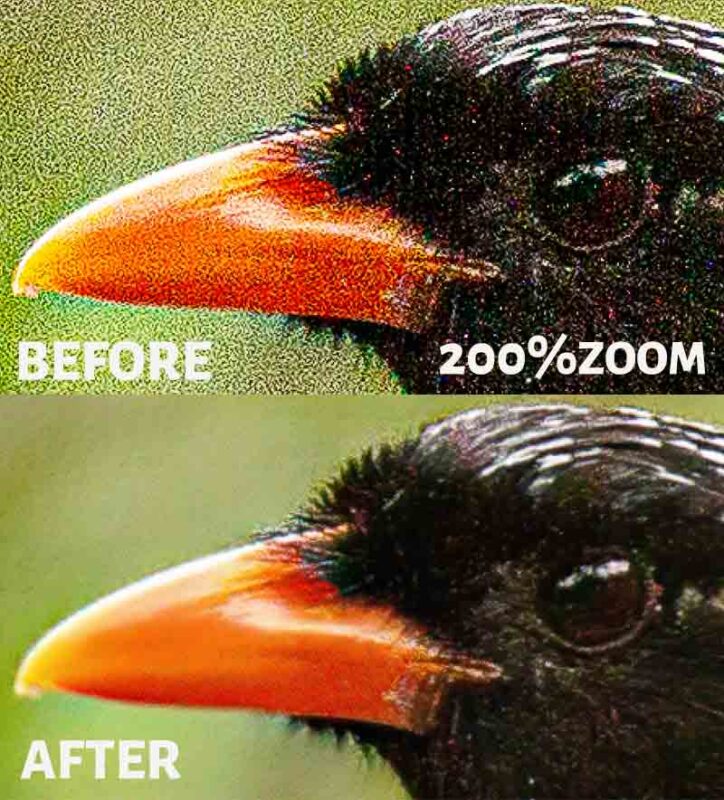
When I compared these two, the Severe Noise model output was better.

You can look at the Before After image from Topaz Denoise AI above.
This denoised image is not good for high-resolution prints. But still, you can use the final image for the web and small-size prints.
The Topaz Denoise does a good job of converting an unusable noisy image to a usable one.
When To Use Topaz Denoise AI (Processing Stage)?
Now, the question that comes to your mind will be, at what stage of the photo editing workflow, should I use the Topaz Denoise AI?
You can use the Denoise AI in the following stages.
1. Directly Import RAW files for noise removal and export the processed file as DNG for further processing.
2. Editing the RAW file in software like Lightroom or Photoshop. You can transfer the image to Denoise AI in between (during the editing), do the necessary noise correction, and take it back to the photo editing software.
3. Do all the edits except noise removal in the photo editing software. You can export this final image in TIFF or JPEG format. After that, you can open these files in Denoise AI to remove the noise.
I prefer to use Topaz Denoise as the 2nd option.
Pros 😎
1. Easy to remove noise from the image. Minimal effort is needed.
2. The four options preview, Standard, Clear, Low Light, and Severe Noise, help the user to select the appropriate one without any editing efforts.
3. Provide a manual option along with AI to adjust the noise and sharpness of the image.
4. A very good noise removal software for low-light images.
5. You can use it as a Standalone software and plugin for Lightroom and Photoshop.
Cons 😠
1. Real-time processing and a preview of the image take time.
2. It will take lots of time if there are many images.
3. The AI Suggestion feature may not be correct all the time.
Final Thoughts
Topaz Denoise AI is my go-to software to remove noise from images.
Most good wildlife and bird sightings happen early morning and late evening. This software helps to fix the noise at high ISOs with a couple of clicks.
If you also shoot at low light conditions at high ISO values, you can definitely consider investing in the Topaz Denoise AI software. It will help you save editing time.
If you are interested in a single tool that offers the features of Denoise AI along with Sharpen AI and Gigapixel AI, you must check out the Photo AI from Topazlabs. Consider reading the Topaz Photo AI review to know more about it.
Do you know if you can use the new Denoise AI as a plug in for Adobe Camera Raw?
You cannot use Topaz DeNoise AI with Adobe Camera RAW. You can use it only with Adobe Photoshop or Lightroom
Valuable review, thank you!
Thank you. Very helpful indeed.