Lens Flare – How, What, When and Why?
Have you observed the lens flare effect at any time in your picture? If you are new to photography then the term “Lens Flare” itself would be like Greek and Roman to you. You might have seen this effect in the picture without knowing what caused it and how to avoid it. In this guide, I will try to help you to understand all about lens flare.
What is Lens Flare?
It is the effect caused by the unwanted light entering the camera system through different means. This unwanted light causes light scattering and flares in the captured image. This light reaches the camera sensor after multiple internal reflections from the glass elements.
Lens Flare Effect Seen in Photos
It can leave two types of effects in the photos.
1. Artifacts
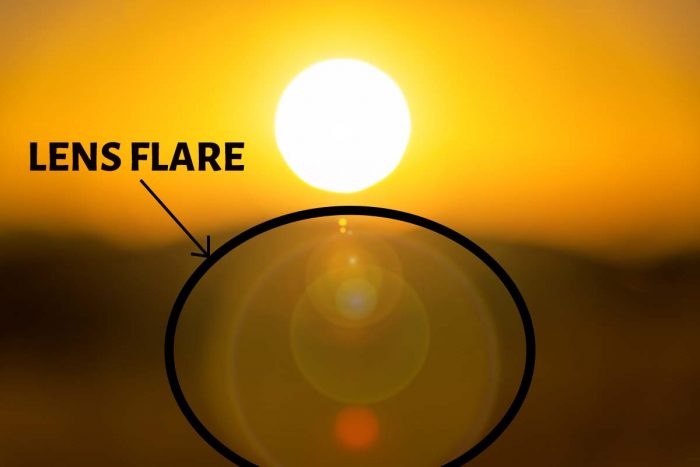
It results in artifacts in the image. These artifacts will be visible in the form of circular or polygonal patterns in the picture. It corresponds to the shape of the lens aperture opening.
If your lens aperture is a 6-bladed one, then you will get hexagonal-shaped patterns of flare in the image.
2. Haze
It results in a Hazy picture thereby reducing the overall image contrast. So, you will be getting unwanted light in the shadows and dark sections of your image. Your image will look whitewashed. This haze reduces the image saturation also.
Haze usually occurs when the bright light source is present on the sides of the scene and not in the frame.
What Causes Lens Flare?
The primary cause of Lens Flare is a bright light source in the scene. It can be the natural sunlight or artificial lights in the scene like floodlights or camera lights. It occurs mostly when you are shooting against this light or when you have a bright light source in the scene.
This unwanted light enters the camera lens and causes multiple internal reflections inside the lens elements before reaching the camera sensor.
The effect is severe on an entry-level camera lens, which doesn’t have any internal coatings on the glass elements. These coatings are given to minimize the internal reflections of such stray lights.
Good Vs Bad Lens Flare Effect
Who told Lens Flare effect is always bad for your image since it produces haze and artifacts? Some flares are actually good for your pictures.
It makes the picture look more vivid and vibrant. It blends into the image by becoming one of the exciting elements in your image composition.
Now, you would be thinking, how will I know whether the flare is good or bad? You will come to know this only through practice.
Have a look at some of the examples given below for good lens flares


So, next time when you get a lens flare in pictures, try shooting at different angles to see the varying shapes and effects of lens flare patterns in your image. It will help you capture a good lens flare in your pictures.
How to Reduce Lens Flare?
Now, we know that there is both good and bad lens flare. So, we want to avoid or reduce the bad ones in our image. Let us have a look at the 7 different ways to reduce lens flare.
1. Use Camera Lens Hood
Lens Hood is the most useful camera accessory to reduce the lens flare effect.
When you shoot against Sun, make sure to use a lens hood along with your camera. It will block the unwanted side light from entering the camera. Use a camera lens hood to minimize the haze effect in your pictures.
Make it a habit of using a lens hood all the time so that there are no more unwanted light-scattering patterns in your pictures.
2. Take Trial Shots
You will be taking some trial shots of the scene to check your exposure levels and composition.
I recommend you look for the bad lens flare effect also in the image while capturing trial shots. It will help you to avoid the lens flare in the final image.
3. Use D0F Preview Button
All DSLR cameras come with a Depth Of Field (DOF) preview button. More than 70% of photographers don’t know that such a button is present in their cameras.
It will be located near the place where the lens gets attached to the camera body.
You can make use of this button to check the lens flare in the scene without capturing the image. Press and hold the DOF preview button to get a preview of the image. You can make use of this button if you don’t want to reduce your camera shutter count.
4. Don’t use Cheap Camera filters
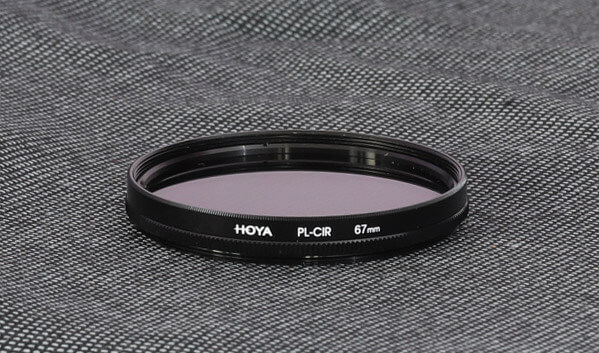
Cheap camera filters will do more harm than good. They won’t come with anti-reflective coatings, which are present in good quality camera filters to reduce the flare.
So, if you make use of a UV filter or CPL filter, or an ND filter with your camera, make sure to use a good quality one. Also, go for one which is made of thin glass rather than thick glass.
5. Change Angle of Shooting
Sometimes, changing your angle of shooting can help you to avoid lens flare. So, you need to try photographing at different angles.
But, this will not be possible always as you cannot change your image composition.
6. Prime Vs Zoom lens
A zoom lens is more susceptible to lens flare than a prime lens. It is due to two reasons.
Firstly, the zoom lens has a varying focal length. So, your lens hood cannot block the unwanted light which causes the flare at all focal lengths.
In the case of a fixed focal length prime lens, the lens hood is specifically designed to remove the flare effect at that specific focal length.
It is also one reason, why the image quality is better in a prime lens when you compare between Prime Vs Zoom lens.
7. Wide Vs Telephoto Lens
If you compare a wide-angle lens and a telephoto lens, then the effect would be more for a wide-angle one.
It is quite obvious as the angle of view is more for the wide-angle lens. Hence it will cover more area in the scene. So, the chances of including the bright light source in the scene are more here.
Lens Flare Addition through Post-processing
We have learned that certain lens flares are good for photos. So, we can add some deliberately to the image by using post-processing tools.
There are many software programs designed to add this effect to your photos. You can use it as a stand-alone tool or as a plugin with your favorite photo editings tools like Lightroom or Photoshop. These software programs also allow you to change the shape of the flare.
You can also get it online as a Lightroom preset (both free and paid). You need to install the Lightroom preset to apply the lens flare effect on your photo with a click of a button.
Conclusion
Now, you know, what is lens flare? How it is caused, how to avoid it, and also how to use it to your advantage. So, next time when you are out for photography, check for this flare effect, especially if you are shooting against the sunlight.
Unlike other photo imperfections, this one is under your control. So, you can decide whether to include it or not in your picture.