33 Photography Composition Techniques To Master| Complete Guide
What is composition in photography? What are the different photo compositions used by professional photographers? Is my composition good or bad? These are some of the questions that arise in the mind of an amateur photographer. If you are looking to find the answers to these questions, then this guide is for you. It will help you to learn everything about the popular image composing techniques used by many famous photographers.
What is Composition in Photography?
Composition is everything in photography. It is how the photographer arranges different subjects and elements in his frame. The composition can include more or fewer elements. It is up to the person behind the camera to decide, what needs to be in his image.
There is also a famous photography quote about photo composition.
“Beauty can be seen in all thing, seeing and composing the beauty is what separates the snapshot from the photograph. ”– by Matt Hardy.
So, learning and using these photo composition techniques will help you create beautiful images.
👉🏻 📖 READ MORE: What is Emphasis in Photography?
Why Image Composition is Important in Photography
Many people would have clicked images of the Taj Mahal from India. But, only some of these images will look interesting to the viewer. Do you know why? The answer is image composition.
The photos that look great are composed and captured by the photographer using popular photo composition techniques. It will make those images stand out from the rest.
I think it is better to explain the importance of an image with an example.
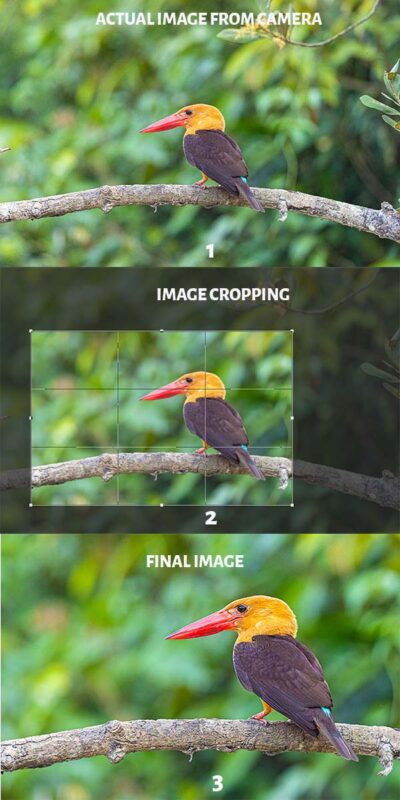
The first image of the Brown-capped Kingfisher is the picture directly from the camera. I didn’t get enough time to compose this image on camera since I photographed the bird from a boat.
So, the composition is not so good for the actual image. Here, centering the subject does not make a good composition. There are distractions in the scene in the form of branches and leaves on the right side.
I cropped this image to apply the rule of thirds so that the two intersection points coincide with the head and leg of the bird, with the vertical line going through the body of the bird.
You can see the big difference in the final image (3). Picture 1 is poorly composed, and Picture 3 is well composed using the rule of thirds and negative space on the left side.
I will give you three good reasons to understand the importance of composition in photography.
1. Decides the Subject/Subjects in The Picture
There will be many elements and subjects in the scene. It is the composition of the image that decides what needs to be in the scene. It decides the main subject, other supporting subjects, and elements in the scene.
A good composition will also ensure that there are not too many subjects in the picture, often leading to tension in the frame.
2. Sets the Mood & Feel of the Image
Different compositions can set different feel to the picture. So, it is up to the photographer to choose the photo composition he wants to set the mood and feel that he intends.
3. How to bring the Viewer’s attention to the Subject
There are many ways to bring the viewer’s attention to the different elements in the scene. It is the composition technique that defines how you will get the viewer’s eye on the subject.
Poor composition techniques will not help to bring out the real beauty of the frame. So, the photographer needs to know which method to use for which type of scene. It will come only through experience.
33 Photography Composition Techniques for Stunning Pictures
I will share 32 photo composition techniques that you can use in your images. You can use these rules with any type of camera.
1. Rule of Thirds
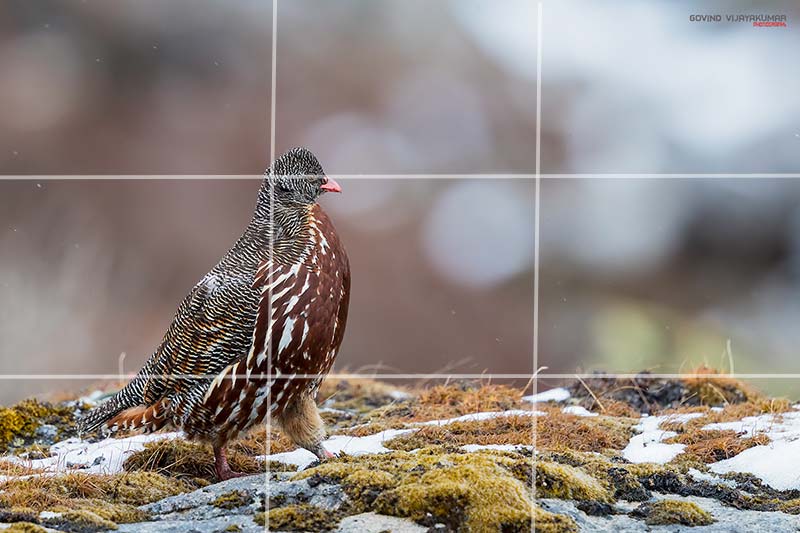
The first rule to learn as a beginner is the rule of thirds in photography. I would like to say that this rule emphasizes more on the position of the subjects in the frame.
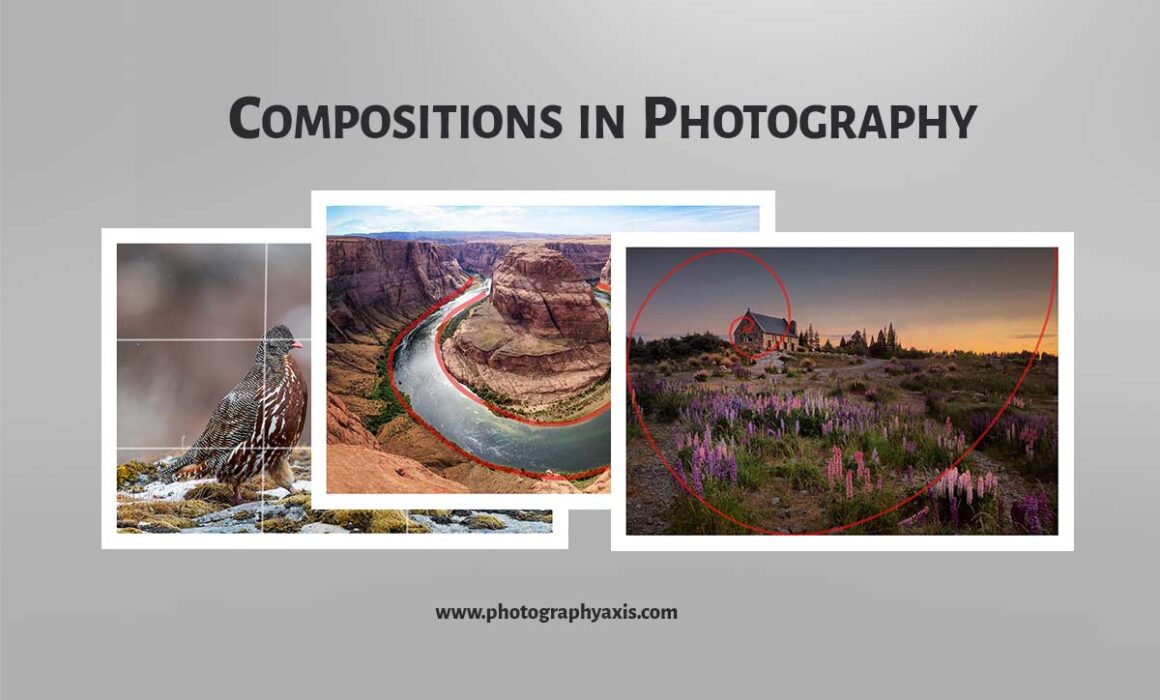
According to this rule, you can position your subjects in any of the four intersecting points of the grid formed by two vertical and horizontal lines.
You can also align your subjects along any of these four lines. If you have a horizon level in the image, which is quite common in landscape images, you can place the horizon on any of these lines to draw the viewer’s attention.
This rule is of the popular types of composition in photography.
The bird (Snow Partridge) is framed using the rule of thirds. The two points of intersection of the grid lines, along with one vertical line fall on the bird’s body. The bird’s eye also lies on the top horizontal grid line.
2. Leading Lines Photo Composition Technique
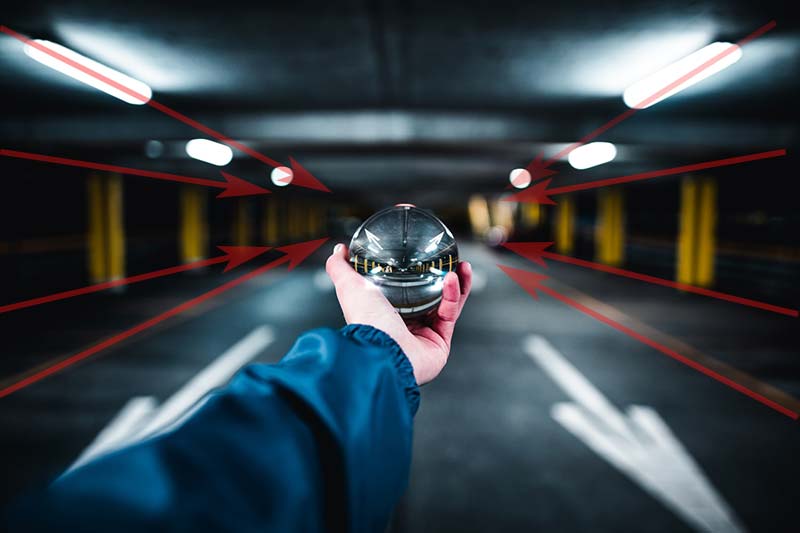
Another useful technique to learn is leading lines photography. It is also easy-to-use rule.
You can make use of the different lines in the scene to lead toward your subject. Thus, the viewer’s attention can be easily drawn to the subject of interest.
These lines will be in different forms. It can be a road, rail, series of lampposts, a series of patterns, etc.
Here, Photographer uses leading lines photography composition to do lens ball photography. The blurred tube lights along with the yellow marking line on the road and the series of pillars on either side act as the leading lines pointing toward the lens ball in hand.
3. Use of Negative Space
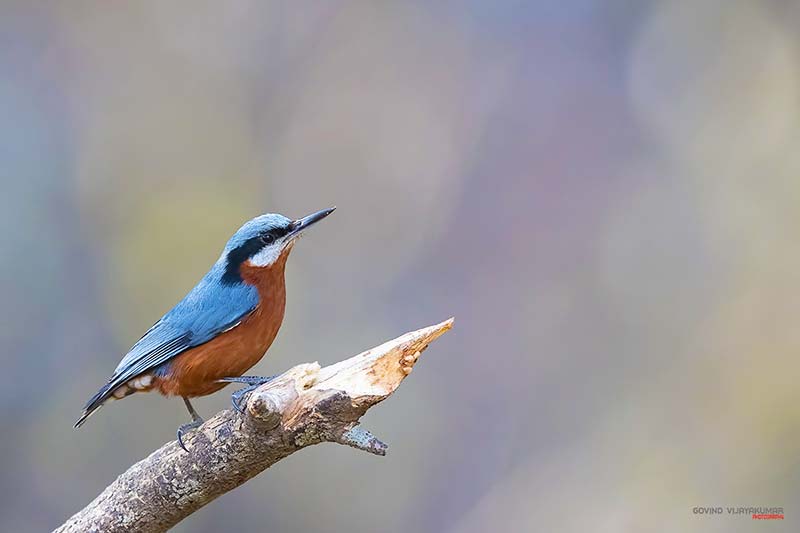
You can also use the negative space technique. Here, the subjects will occupy less area of the frame. There will be more blank space which can be anywhere in the frame.
This rule is mainly used to create minimalist photographs. People who are looking to capture pictures for banner and poster designs also use this technique.
Here, the image of the bird, Chestnut-bellied Nuthatch is framed in such a way that there is a lot of negative space on the right-hand side.
4. Fill the Frame Photography Composition
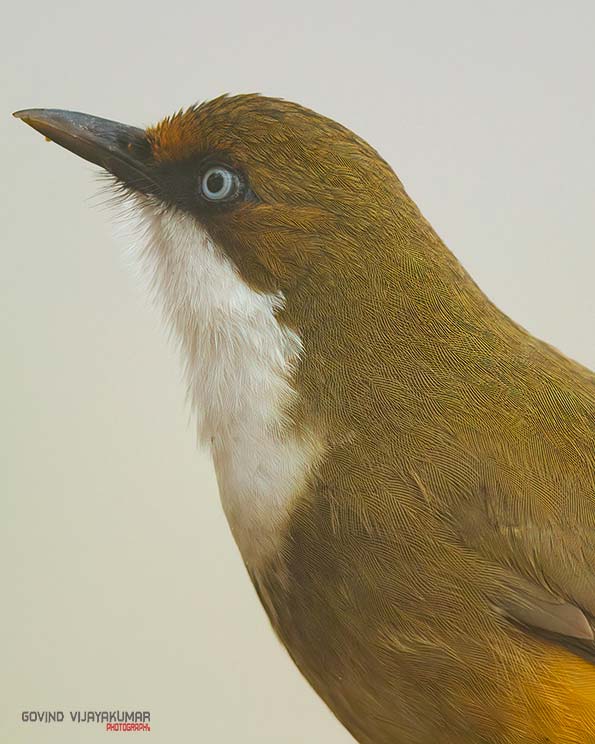
Fill the frame composing technique is another popular photo technique. You can use it for portraits, wildlife, birds, etc. Here, the subject occupies most of the frame.
In the case of portraits, it will be a tight portrait, without leaving much breathing space on the sides. This rule may not work for all types of scenes and situations.
Fill the frame type of composition in photography helps to capture and show more details of the subject.
The tight headshot image of this bird is a good example of the fill the frame technique.
5. Keep It Simple Technique
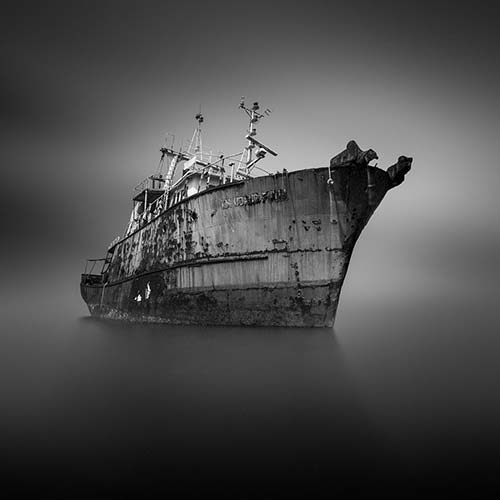
The common photography mistakes made by most amateurs are trying to put more elements and their details in the frame. It often leads to lousy composition as it may distract the viewers’ attention to a different element in the scene.
So, try to use the, Keep it simple technique. It will make life easy for you.
The image of the ship in water is a good example. Here, the photographer uses the long exposure photography technique to make the sea calm that makes it look like a simple image of a ship without any distractions.
6. Golden Ratio Rule
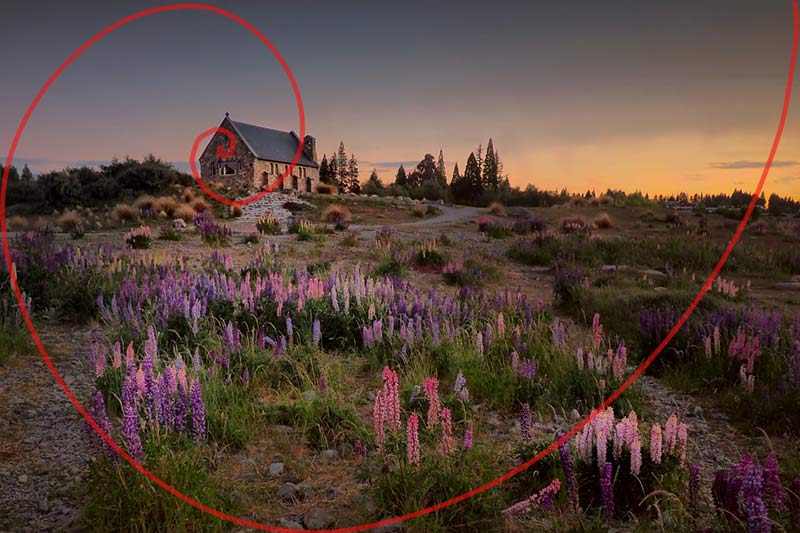
Golden ratio rule is also known by other names like Phi grids, Golden spiral, Fibonacci spiral, etc. It uses the Phi Grids or the Golden spiral to position the different elements in the scene. This grid may not be available in all cameras.
You can apply this rule either in the field or during photo editing. If you want to use it on the field and your camera doesn’t support it, still there is one way.
You can take a print out of the grid/spiral on a transparent plastic sheet. The size of the grid must match with the live view screen in your camera. Take a cut out of print and place it on top of the live view screen to use the rule.
In the above picture, the photographer has placed the house (the subject of interest) at the spiral end to follow this rule.
7. Frame Within a Frame
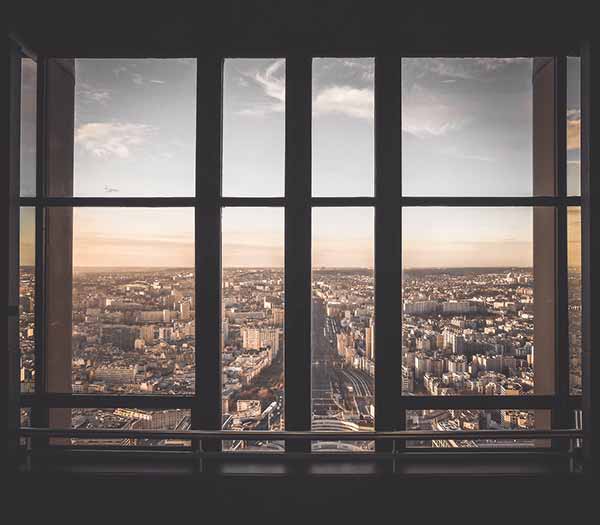
The frame within a frame photo composition technique works best when the foreground border and the subject are in focus.
You can either expose both the foreground and the subject or the subject alone. It depends on you and also on the scene.
You can use the windows, doorways, aeroplane windows, etc., to try this technique. You can use it for portraits, landscape, architecture, and street photos.
Here, the photographer uses the window of his building to capture the city scene lying below, which is a good example of the frame within a frame technique.
8. Composing with Lines: Horizontal

Horizontal lines in the frame can be used for composition. These lines will make the viewer’s eye move from left to right of the frame. The frame will look more attractive if you can include your subject in this type of line in your photography composition.
Here, the yellow building sections act as the horizontal lines that aid in the photo composition. The windows along with the air conditioner are the different elements in the scene.
9. Composing with Lines: Vertical
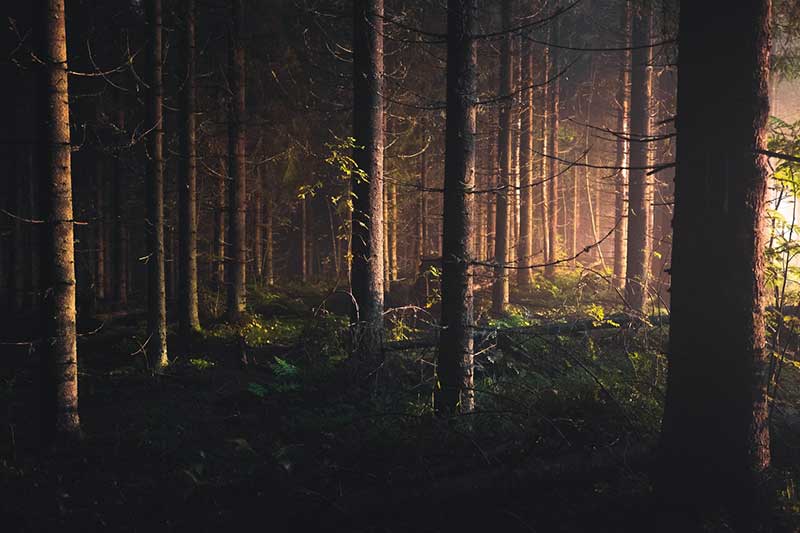
If you are doing forest photography or architecture photography, you can use vertical lines in the composition scene. In the case of the forest, you will have vertical lines in the form of trees.
You can use buildings and tall skyscrapers as vertical lines for architectural images. The vertical elements can be anything else also.
Photographer, Niilo Isotalo, uses the vertical lines composing technique with the help of the tall trees inside the forest.
10. Rule of Diagonals
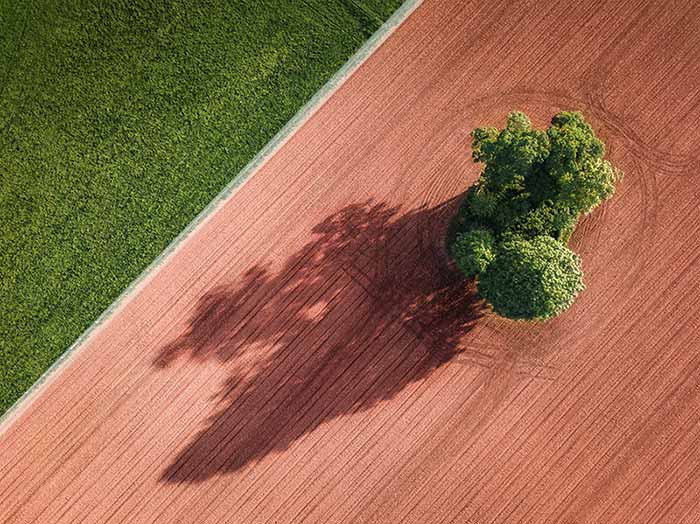
You can use the diagonal lines in the scene to compose frames. The diagonal lines tend to produce strong images than the horizontal and vertical lines.
The diagonal which connects the opposite corners of the frame must not be used. It will not help to create beautiful images.
Too many diagonals in the frame can create tension. So, try to avoid that too.
11. Composing with Horizon Line
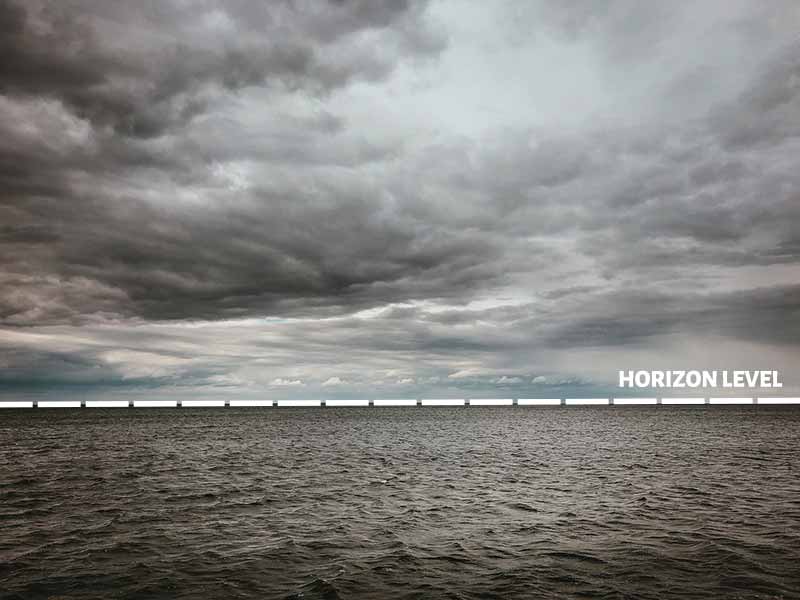
Most landscape and architecture photographers use the composition with the horizon line rule in their images.
The horizon line can be anything. It can be the line separating the sea from land, land from the sky, mountains from the sky, etc. Try to get a perfect level horizon. The photo will look best if the horizon line is parallel to it.
Here, the line separating the sea and the cloud-studded sky is the horizon line, which is framed parallel to the frame to create this image.
12. Golden Triangle Composition
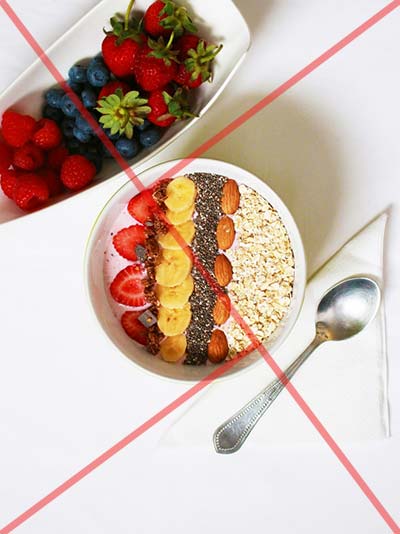
The Golden triangle photography rule is a famous composition technique used by both painters and photographers. This technique uses a grid formed by a diagonal line in the frame along with two perpendicular bisectors of the diagonal line from the other corners.
You must place your subjects in any/two-point of intersections of these lines to follow this rule. Here, the whole frame gets divided into four triangles. You can also align your subjects along these lines or inside the triangles.
In this food image, you can see that the two intersection points coincide with the center food bowl (main subject). The supporting fruit bowl along with the main bowl and the spoon are aligned along the diagonal.
13. S-curve Photography Composition
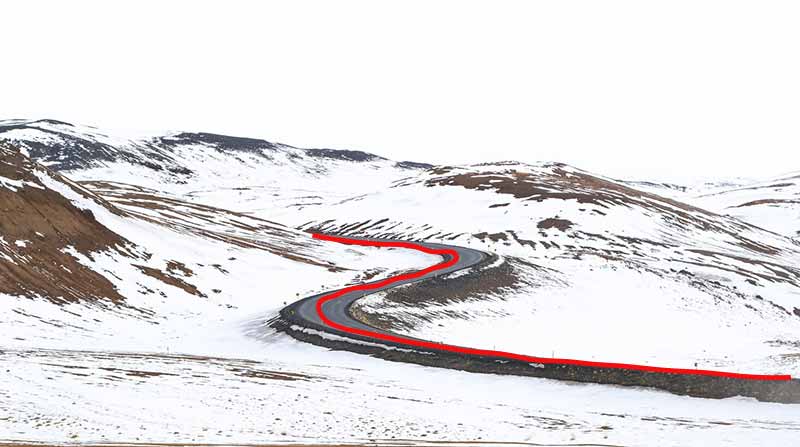
You can also make use of the S curve in the scene to compose your shots. The picture will look great if the S curve can lead to your subject. Thus, it is easy to draw the viewer’s eye.
The S-curve can be a road, rail, or a series of houses, trees, etc. You need to find the elements and the camera angle to get such a curve in the scene.
In this picture, it is a flipped S-curve formed by the road, which directs the viewer’s eye to the mountains.
14. Composing with Curves
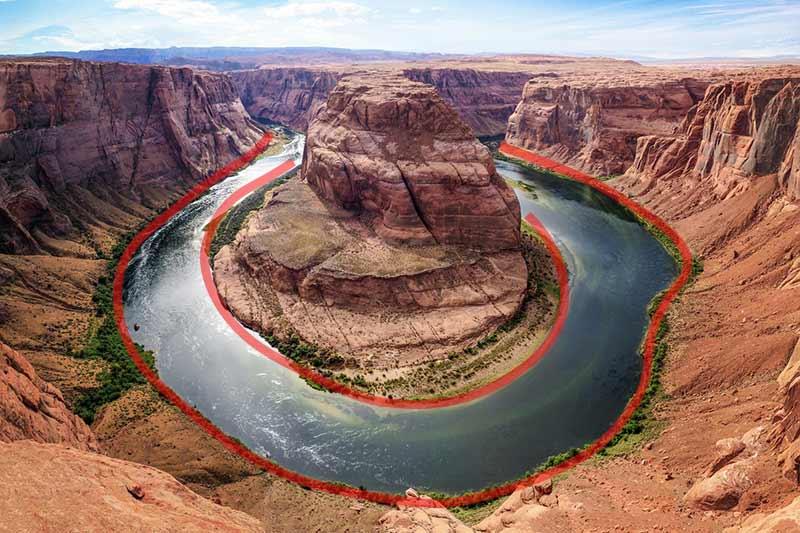
You may not have S-curves in all the scenes. Some frames may have curves in different shapes like “C”, “U”, etc. You can use these curves to your advantage.
Try to bring your subject at the end of the curve or along with the curve. If you have multiple subjects, then try to connect everything using these curves. It can also act as the dividing element, especially for drone shots.
The water body in the shape of a curve makes the image attractive.
15. Composing with Colors
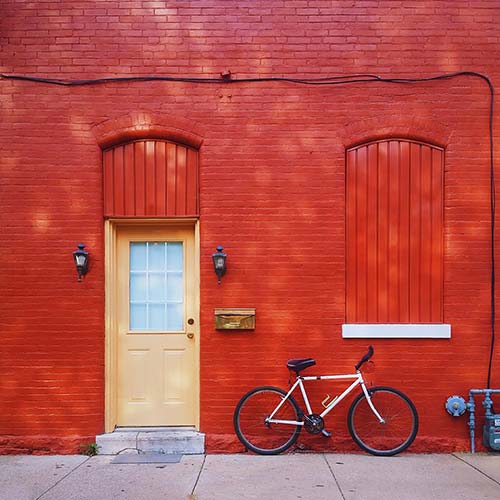
You can also compose images with colors. Vibrant colors help to emphasize the contrast. Saturated colors easily attract the viewer’s attention. Different colors gives a different feel and emotion to the picture.
Green shows hope as it is linked to Nature. Desaturated colors will help to provide a soft look. Muted colors in an image will help to create a long-lasting impact than strong ones.
The vibrant red color is the predominant one in the scene. It makes the yellow door and the black and white cycle very interesting.
You can use the color wheel to get your color combinations.
Some of the popular color combinations that work well for images include complementary, analogous, split complementary, and triadic colors.
16. Juxtaposition in Photography
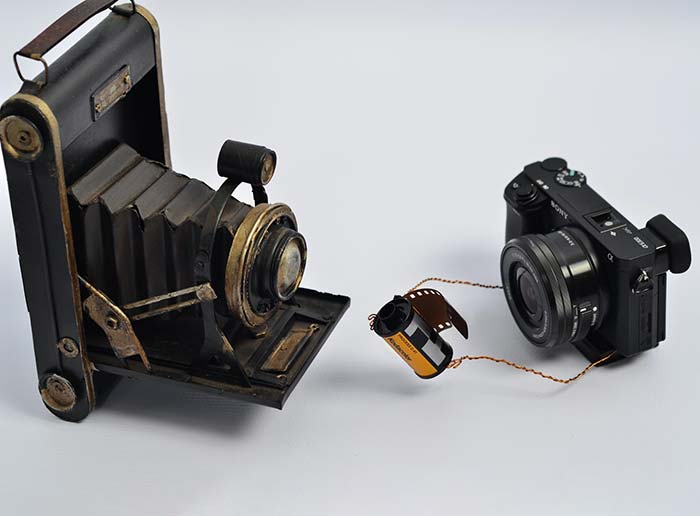
When you put two contrasting subjects together in a frame, then we can apply the Juxtaposition rule to the picture.
It can be male vs female, rectangle vs square, new vs old, fat vs thin, kid vs adult, etc. If you come across such contrasting subjects, try this rule.
The image of an old film camera vs the new mirrorless camera is a good example of the Juxtaposition technique.
17. Repetition Photography Composition
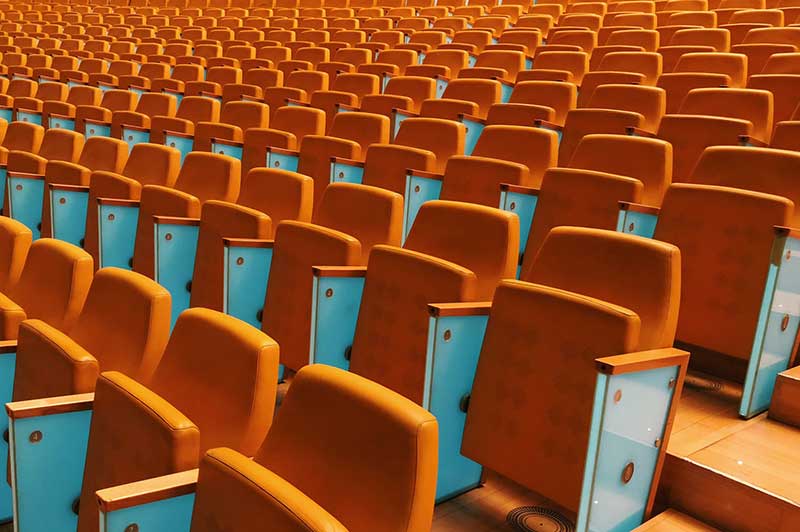
If you have repetitive patterns in the scene, then you can use the repletion composition technique.
Some of the situations where you can use this rule include a crowd, sand pattern, bricks, a stack of fruits, windows, chairs, ripples in water, etc.
Here, Photographer Nacho Capelo has captured a frame with orange chairs using the repetition composition technique.
18. Balance in Photography
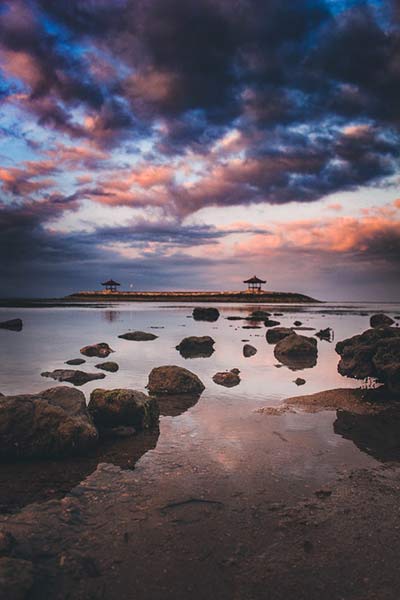
The term “Balance” comes in composition when you have two or more subjects in the frame. There are four key ways to achieve this balance. They are symmetrical balance, asymmetrical balance, balance on the vertical axis, and balance on the horizontal axis.
Symmetrical balance is created by two subjects in a scene of similar size. Subjects of different sizes create asymmetrical balance.
Here, the rocks in the foreground appear to be larger in size than the rocks on the backside, which makes the entire frame balanced.
19. Texture in Photography

Using the textures in the scene is an excellent way of composing pictures. The texture can be anything. It includes tree bark, building walls, paper, sand, rope, mountains, leaves, etc.
If you are using an interchangeable lens camera, use a macro lens to get the maximum texture details. Exciting textures can create beautiful images.
An image of the texture of the paint on the wall is shown above.
20. Symmetry in Composition
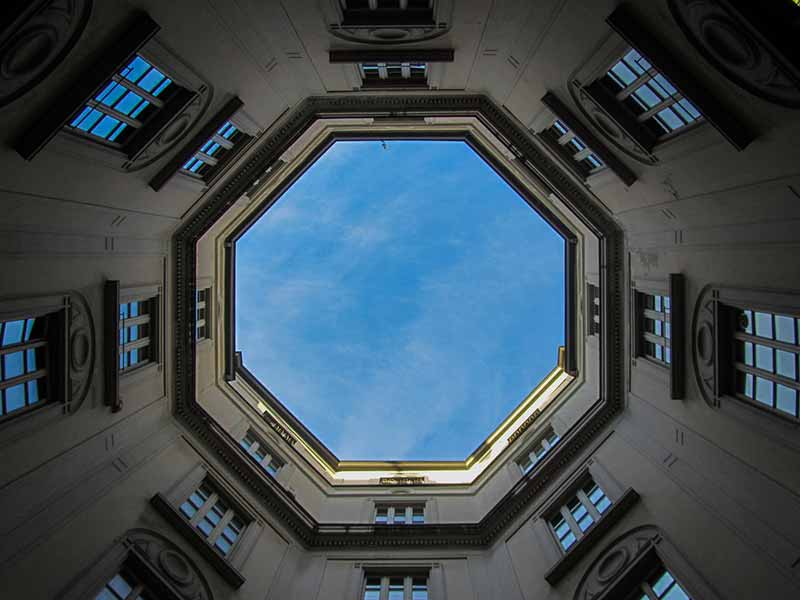
You can make use of symmetry in the scene to compose photos. When you divide the picture horizontally or vertically along the center, if one side reflects the other, then we can say that the image is using symmetrical composition.
The other side need not be an exact reflection copy. You can use this rule for water reflection photography. Buildings and structures are two other good subjects to create such images.
The above image of the building from a worm’s eye perspective, captured inside the building makes an interesting composition. This image is symmetrical along both the horizontal axis as well as the vertical axis.
21. Composing with Foreground Interest
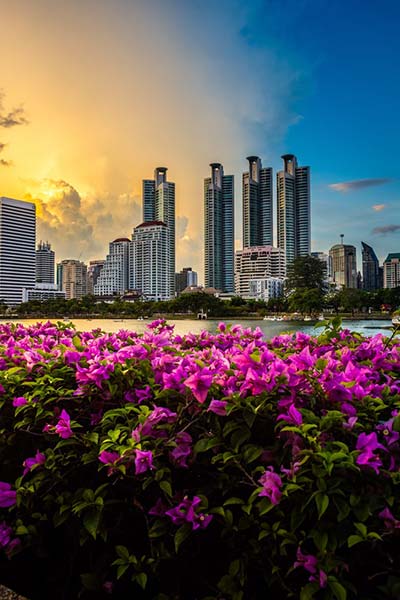
You can use the foreground elements in your scene to make interesting compositions. If the middleground and the background elements are less attractive, then the use of foreground elements will help to make the image more pleasing.
In this case, you must also double-check the image exposure. Sometimes, the elements in the foreground can go dark, and the details will not be visible. So, you will have to go for the fill-in flash technique or the HDR.
The use of flowers in the foreground made the image with tall skyscrapers and the lake in between more beautiful.
22. Composing with Background
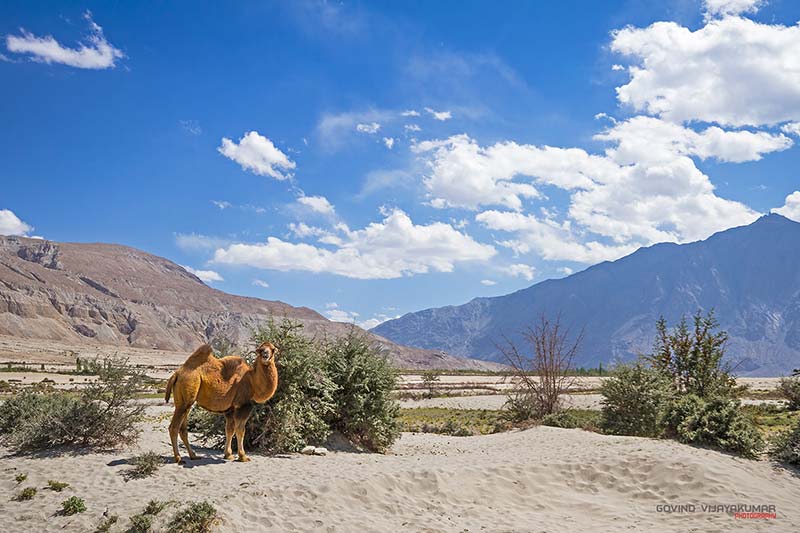
Sometimes, the background makes the picture more dynamic and lively. But, you must ensure that the background is not dominating the picture.
When you take a picture of a person in his working environment, the background plays a significant role in depicting his environment. So, you must capture the background details also.
Here, you will have to shoot with a wide-angle lens with a narrow aperture opening to get the background also in focus.
I have captured this image of the Double-humped camel in its habitat, which comprises the mountains and shrubs in the desert.
23. Light & Shadow Photography Composition
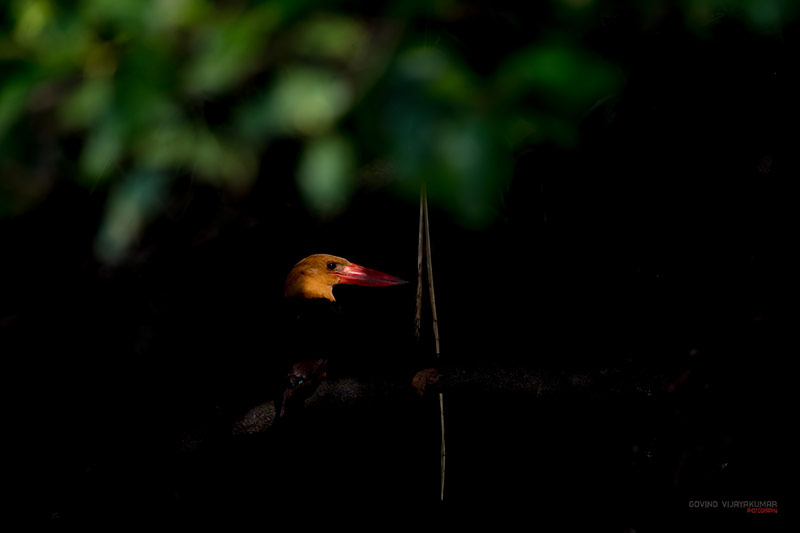
The Light and Shadow technique is popular in the early days of photography also.
Here, the light will be falling on the subjects of interest, and the other areas of the scene will be predominantly covered by shadows. The light can be natural or artificial.
In this image, the light is falling on the bird’s head, and I underexposed the photo by 2 stops to get such a result. So, the viewer’s eye is drawn to the head without any distractions.
24. Triangle Composition
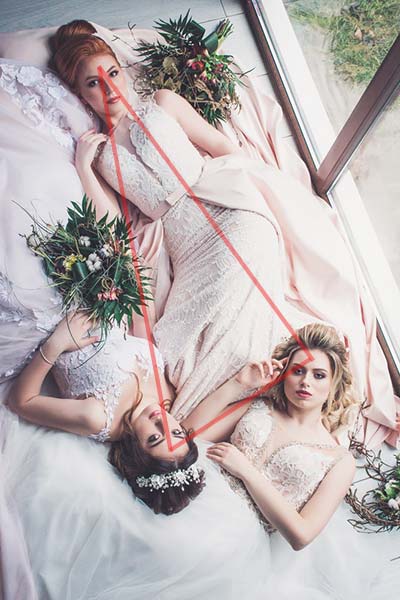
The triangle composition method is another exciting rule. It uses the triangle shape formed in the scene.
The triangle shape can be formed in different ways. If there are three subjects in the scene, then you can frame it in such a way the subjects form the vertices of a triangle. If you can connect 3 interesting points in a frame in a triangle structure, then you can use this technique.
Photographer, Valerie Elash uses the triangle photo composition rule for the picture, where the three women form the 3 vertices of the triangle.
25. Subject Isolation using Depth of Field
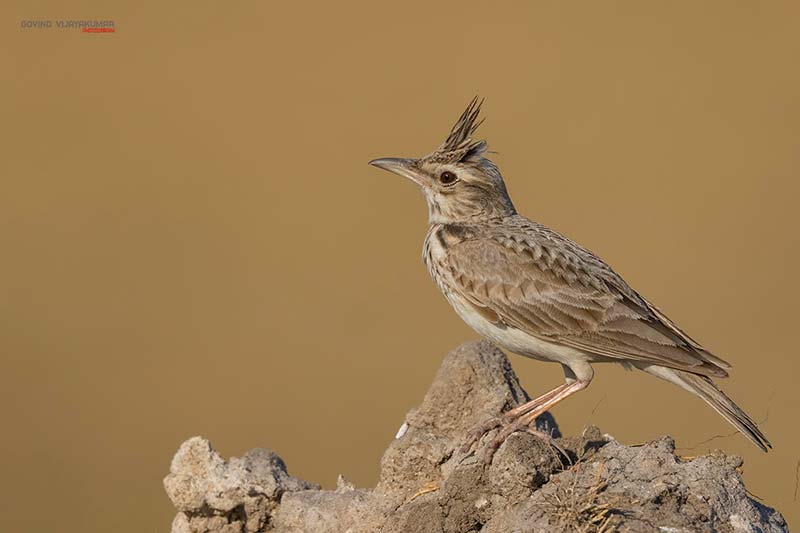
Isolating the subject is a common technique used by portrait, fashion, wildlife, and bird photographers.
Here, the photographer uses a shallow depth of field to make the subject stand out in their environment. Large focal lengths and wide aperture opening help to achieve this result.
In the above image, the viewer’s eye is easily drawn to the bird perched on the rock without any distraction. The 500mm telephoto length and the use of a wide aperture of f4.0 have made it possible to get a nice background blur.
📖 READ MORE 👉🏻 : Essential Camera Functions
26. Changing Vantage Point
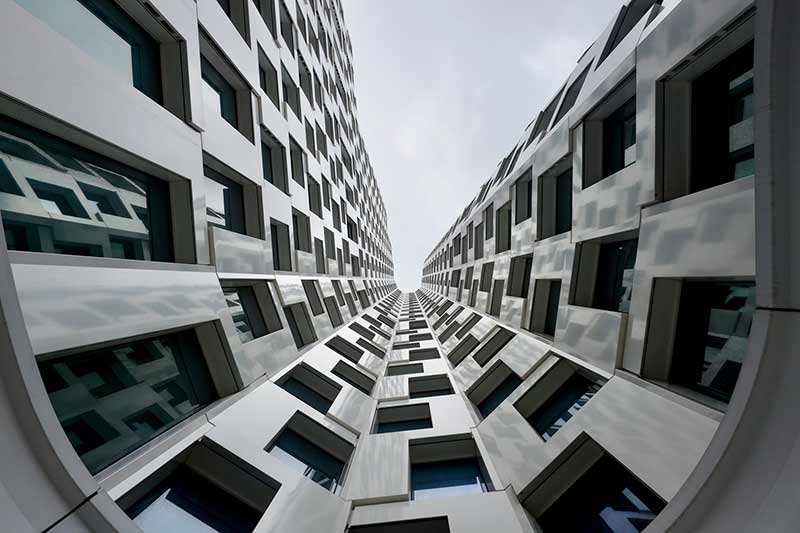
Sometimes, changing the vantage point can help you to get better compositions.
Certain frames look good from a birds eye view than the eye level view. Some other scenes look best in worms eye view.
So, you must try to visualize the same scene from different camera angles to see what is best for the scene. You may have to use a drone for getting an aerial perspective.
Here, the use of worms eye view helped to create this interesting photo composition of the building.
27. Radial Balance Photography Composition
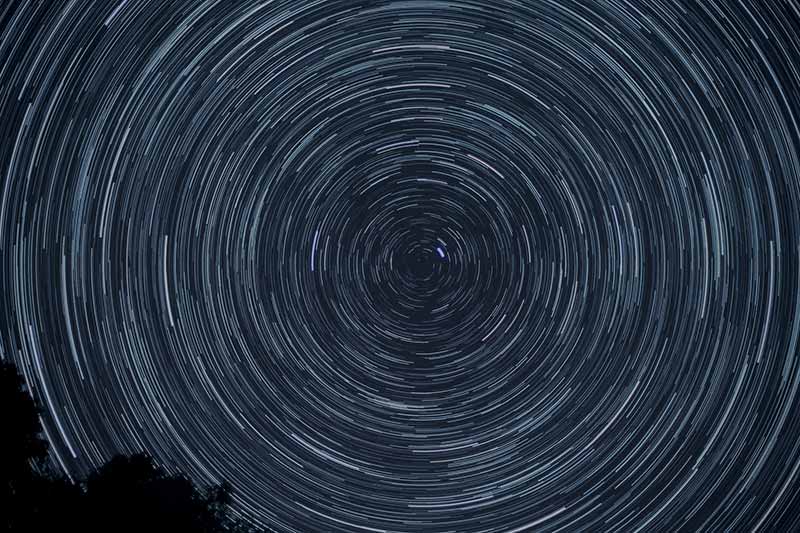
You can use the radial balance technique to create images that radiate outwards, not necessarily from the centre. Photographers use this technique to photograph star trails, flower photography, radial patterns in architecture and buildings, etc.
It helps to bring a perfect balance to the frame. The centre of the radial pattern can be in the centre of the frame or at a different place.
Steel wool photography is a perfect example of the radial balance technique.
Here, the long exposure photography technique is used to create these star trails which have got a radial view.
28. Subject Centering
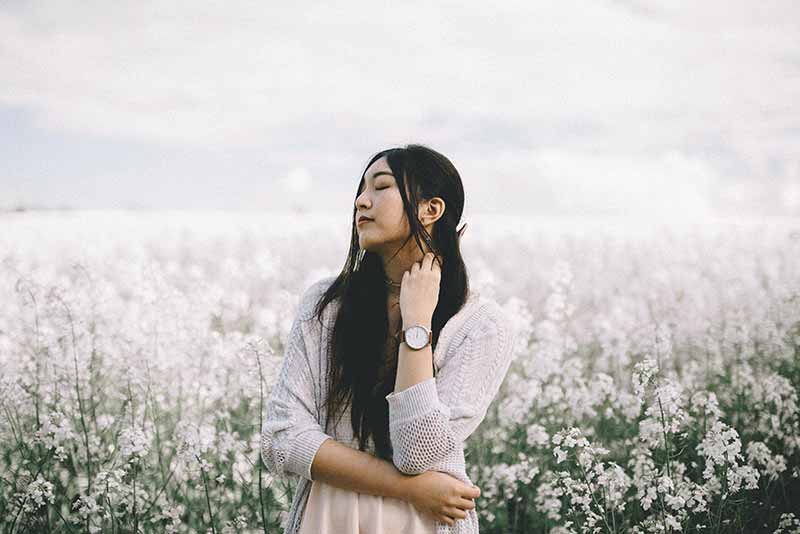
Centering the subject does not work for all types of pictures. But, there are situations where it works best. It works for many portrait shots.
If you plan to include the person’s environment or looking for a nice background blur, then this may work. It helps direct the viewer’s eye to the subject without any distractions.
In this photo, the lady occupies the centre part of the image with beautiful white flowers on either side.
29. Depth with Subjects at Different Distances
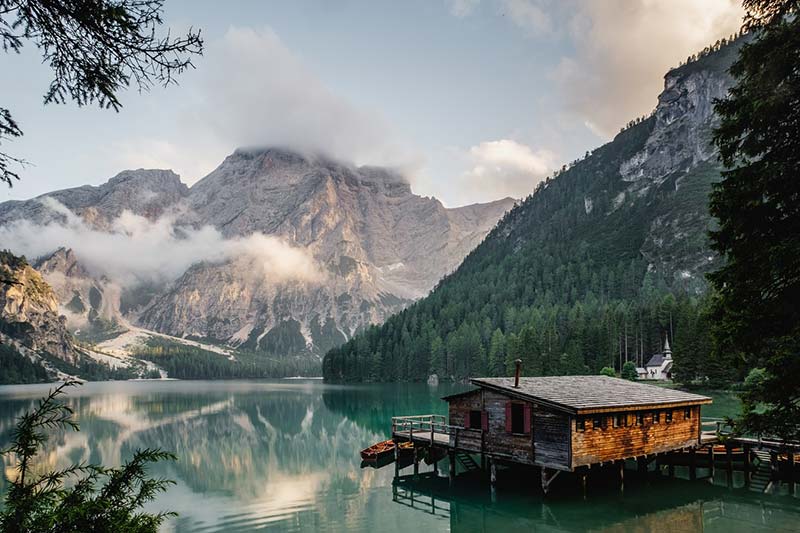
The technique of creating more depth in the scene is used commonly by Landscape photographers. You can use a wide-angle lens along with a narrow aperture to get this effect.
Use the Hyperfocal distance to get a wide Depth of Field. It will ensure that the subjects in foreground, middleground, and background are in focus.
The use of a narrow aperture helped to keep both the house in the foreground, trees, and lake in the middle ground, and the mountains in the background in focus. Thus, more depth is created in the image.
30. Depict Motion of Subjects
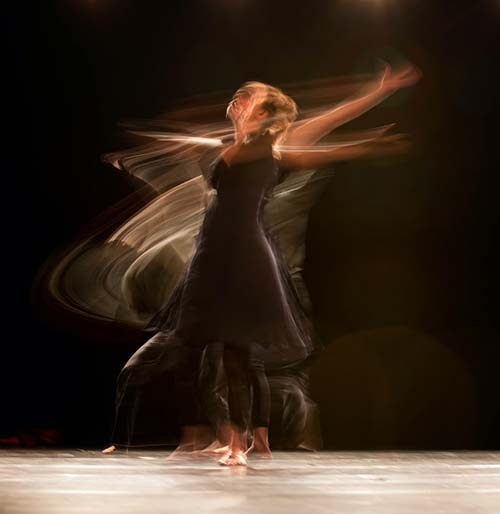
You can compose images by depicting motion in the scene. You can do it either by panning shot method or by you can long exposure photography. Such photos will give a sense of motion to the viewer.
In this image, Photographer Ahmad Odeh uses the long exposure technique to create a motion effect of the dancer, visible in the form of motion blur.
31. Interaction – Story-Telling Images

A great way to bring pictures to life is to capture storytelling images. By looking at the picture, the viewer must able to see the action that is going on.
The image by Matty Adame is an excellent example of a storytelling scene. Anyone who sees the picture can interpret that the crowd is enjoying the music played by the DJs, while the cameraman is busy capturing the footage.
32. Landscape Vs Portrait Orientation
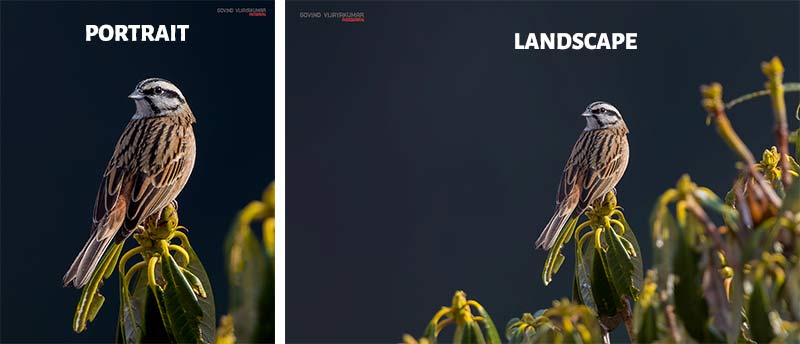
You can capture pictures in landscape and portrait orientation. Some photos look best in one orientation than the other. So, try composing with both orientation to see which one suits the frame and select accordingly.
I have cropped the image of the Rock bunting bird into portrait orientation (original image in landscape orientation), to show the difference between the two. The bird details are more visible in the portrait orientation.
33. Rule Of Odds

The rule of odds deals with the number of subjects in the picture. According to this rule, the photo will be more pleasing to the viewer if there are an odd number of subjects.
In the above picture, we can see three kids (odd number) that satisfy this rule. This rule works for odd numbers like 3,5, and 7. You may not be able to use this rule all the time for your photos.
5 Ways To Improve Photography Composition During Photo Editing Stage
You can also enhance the photo composition during the photo editing stage. I will share some of the editing techniques that you can use to improve your picture composition.
1. Crop the Picture
Cropping the image is a great way to enhance the image compositions. Most photo editing tools offer various compositional grids when you enable the crop feature.
It is available in two of the most popular photo editing tools, Adobe Photoshop and Adobe Lightroom. Rule of thirds, golden spiral, golden ratio, and diagonal grid.
Cropping is also effectively used to change the aspect ratio of the image, which will completely change the camera composition.
2. Vignetting
When you have frames where the subject occupies most of the picture, little vignetting can help make the subject stand out.
You can apply the vignette using the photo editing tool. Don’t apply too much.
3. Black and White Conversion
Some images look better in Black and White than in color. So, try converting the same image to black and white to see which one is the best.
It is good to capture the image in RAW format if your camera supports this file format. It will help you to get the maximum details of the frame.
4. Contrast Adjustments
In certain scenes, the picture will look more appealing if the amount of contrast is more.
You can boost the contrast of the image during editing. But, make sure that you don’t increase it too much and make it look unnatural.
5. Levelling the Horizon
Sometimes, when you capture the image in the camera, the horizon may not be leveled perfectly.
It is mostly because of not using the in-camera grid feature. Landscape photographers face this problem quite often.
5 Recommended Books To Read For Photography Composition
I also recommend you to read the following books, if you want to learn more in-depth about camera compositions.
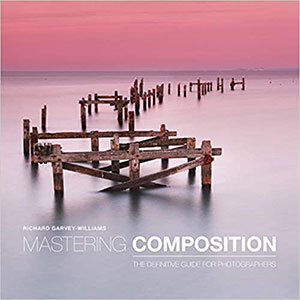
1. Mastering Composition- The Definitive Guide For Photographers by Richard Garvey Williams
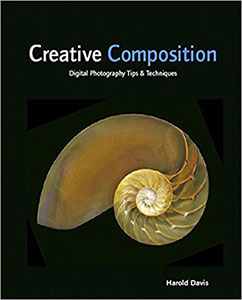
2. Creative Compositions by Harold Davis
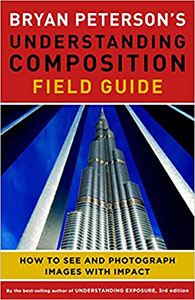
3. Understanding Composition Field Guide by Bryan Peterson
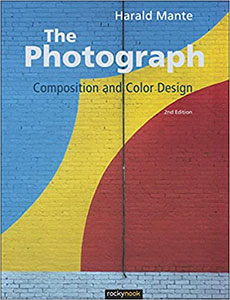
4. The Photograph: Composition and Color Design by Harald Mante
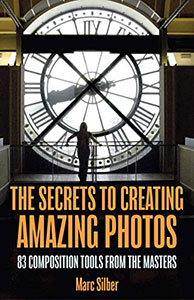
5. The Secrets to Creating Amazing Photos: 83 Composition Tools for Masters by Marc Silber
Conclusion
Now, you know what is image composition and the different photography composition techniques. It is essential to try out these rules to get a better understanding. It will help you to decide which technique to apply at what time.
Sometimes, you may use multiple composition rules in a single image, which will be like a masterpiece picture. Learn and master these techniques. Later, you can break these photography composition rules and develop your style.
If you are a beginner, then I strongly recommend trying the first six photo composition techniques.
👉🏻 📖 READ MORE: How to Get into Photography?

that was so informative and worth a read..
Thanks, Tintu. I am glad that you found these composition techniques useful.
This was really helpful man.