WidsMob Viewer Pro Review- Is it the Best Mac Photo Viewer?
Are you looking for a good photo viewer and image browser for Mac? If yes, then WidsMob Viewer may be a good choice. In this article, I will review the WidsMob Viewer Pro in detail. So, let us see if it is a suitable replacement for the inbuilt Mac Photo viewer.
🖥 WidsMob Viewer Pro Review and Tutorial
I will install the WidsMob Viewer Pro on My MacBook Air 🖥 with the following specifications. You can also download WidsMob Viewer Pro for free.
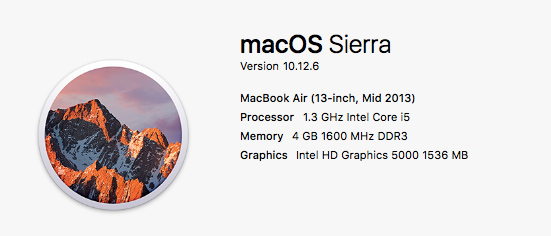
The installation is complete. So, I will start using it.
1. User Interface Introduction

Open WidsMob Viewer Pro. You can see the folder structure in the left window. This is the “Library”. Here, you can add the picture folder to browse the image. Few folders will be there by default. So, you can even point the respective sub-folder from it.
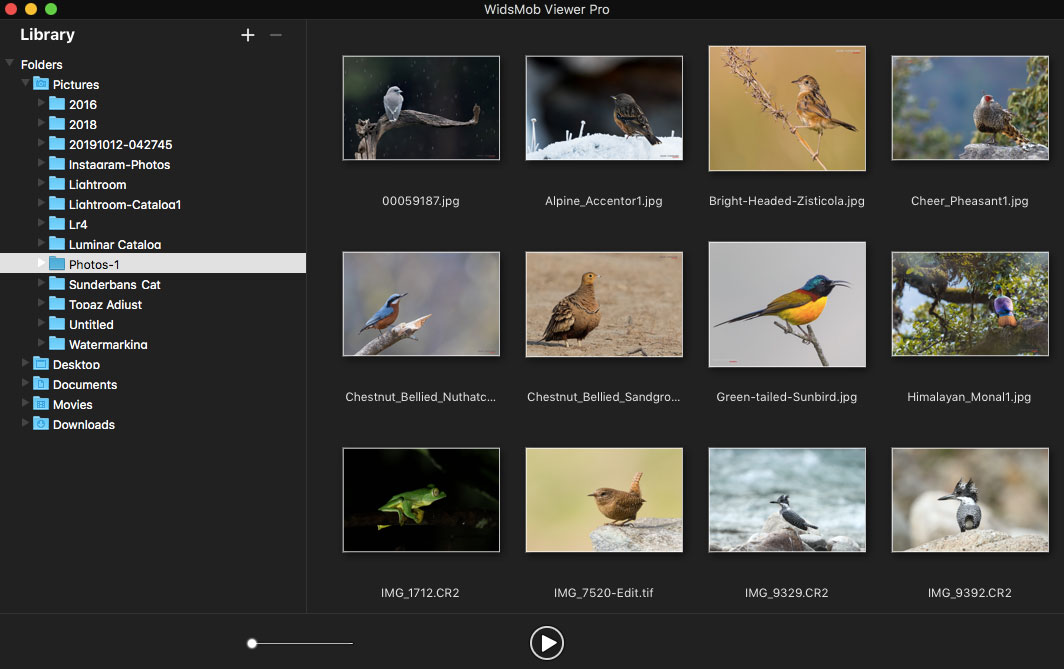
Once the folder is selected, you can see the photos inside it in a thumbnail fashion on the right-side window. The loading speed of the images is pretty impressive. I pointed it to a folder containing pictures in JPEG, TIF, and RAW image file formats.
It not only supports photos but also popular video formats. It supports popular video formats like MP4, FLV, MKV, MOV, M4V and many more. So, using a single software you can view both pictures and videos.
You can find a bottom toolbar that has an image icon on the left side. If you click on this icon, then you can view the selected picture in full-window mode. There is a slider in the toolbar for adjusting the thumbnail size. It is smooth and easy to use. It is followed by a play button.
2. Photo Slideshow
If you click on the play button in the bottom toolbar on the main screen window, then you can start the photo slideshow. Otherwise, use the “Slideshow” option in the “View” dropdown menu. “Shift+Cmd+F” is the shortcut key.
Once you enter this mode, then you will get another toolbar with slideshow adjustments like forwarding, backward, pause, and play.
There is a four-square icon called the “Index Sheet”. I liked this option very much.

It takes all the images into a full-screen thumbnail mode with a distraction-free black background. Here, you can select individual photos and double click the picture to take you back to the slideshow window.
You will also see the option to adjust the window size to Actual and fit to screen. Click on the “X” to exit the slideshow window.
3. Image Zooming

If you double click the image, then you can see the 100% zoom in image option in the bottom toolbar. The bottom toolbar is visible when you move the cursor down.
You will see a different set of icons in the bottom toolbar now. The four-square icon on the extreme left is switch back to thumbnail view with the Library structure.
Click on the “1:1” button to view a 100% zoom in the image. You can also see a small thumbnail scroller to select and view pictures. You can zoom in the photo by 400%
4. Delete an Image
If you want to delete an image, you can either click on the “Trash bin” icon or hit the “Delete” button in the keyboard.
5. Edit Image
They also have an Image Edit option, which is a bonus for an image viewer application. You can use it to make some minor adjustments like Exposure, Contrast, Color, and Sharpness.
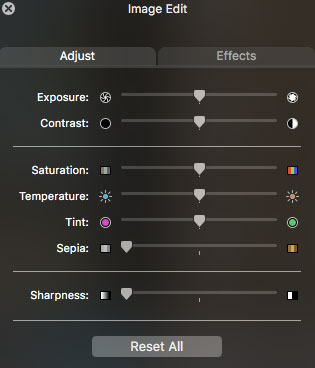
It comes under the “Adjust” tab.
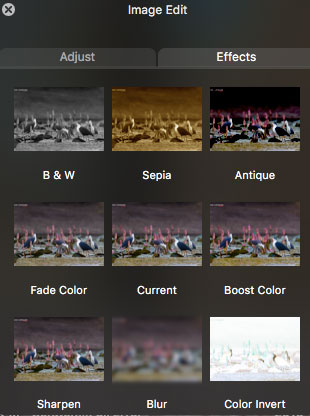
There is also an “Effects” tab, adjacent to it.
There are 9 effects that you can apply to the image. It is good to have these effects. But, you don’t get the option to vary the strengths of these effects.
Click on the edit button in the bottom toolbar in the full window image mode to activate the Edit window.
6. Image Sharing
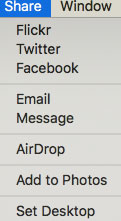
Nowadays, most people capture photos to share in social media sites like Facebook and Flickr. WidsMob Viewer Pro comes with the option of uploading images directly to Flickr, Twitter, and Facebook. You can also share the picture via email, Apple message, and AirDrop. It also allows you to add pictures directly to your Photos.
You can select the “Share” option in the top toolbar for sharing. The other option is to click on the share button in the bottom toolbar in the full window image mode.
7. Favorite Image Tagging
When you are back from vacation. You will be browsing lots of pictures in your camera and smartphone on your computer. There will be a few which you like the most. You can use the favorites option to tag such photos. Thus, you can easily access these photos.
Click on the “Star” icon on the bottom toolbar to add the image to favorites. You can also select the “Add to My Favorites” option from the Edit dropdown menu.
8. Image Rotation and Flip
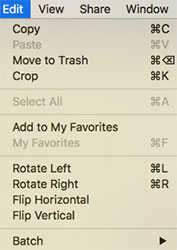
WidsMob Viewer Pro allows you to rotate and flip the image. You can get these options from the “Edit” dropdown menu.
You can use the “Rotate Left” and “Rotate Right” options to rotate the photo.
Use “Flip Horizontal” and “Flip Vertical” to flip the pictures in the desired orientation.
9. Batch Edit
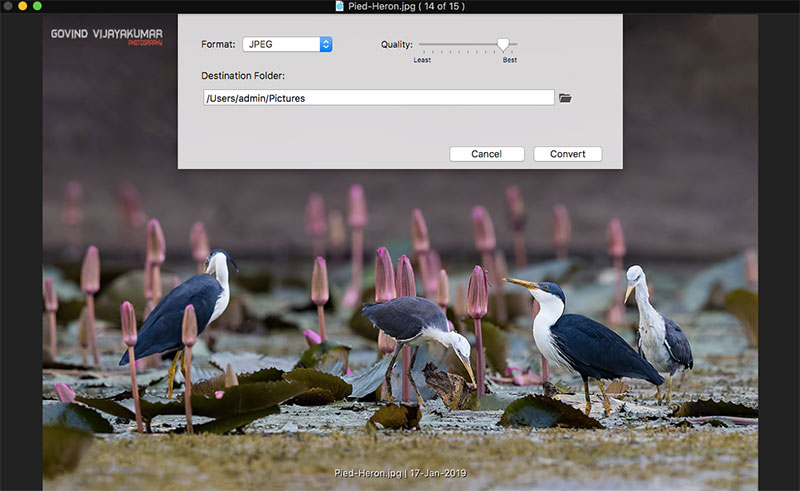
Batch Editing makes WidsMob Viewer Pro even more powerful.

You can do batch renaming, resizing, and picture format and quality conversion.
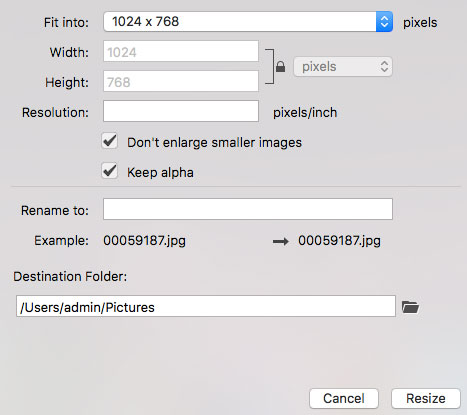
This option helps to save a good amount of time. All the photos in the current folder will be processed in the batch edit option.
10. EXIF Data
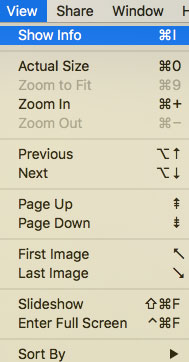
Another feature that I loved the most in WidsMob Viewer Pro is the EXIF feature.
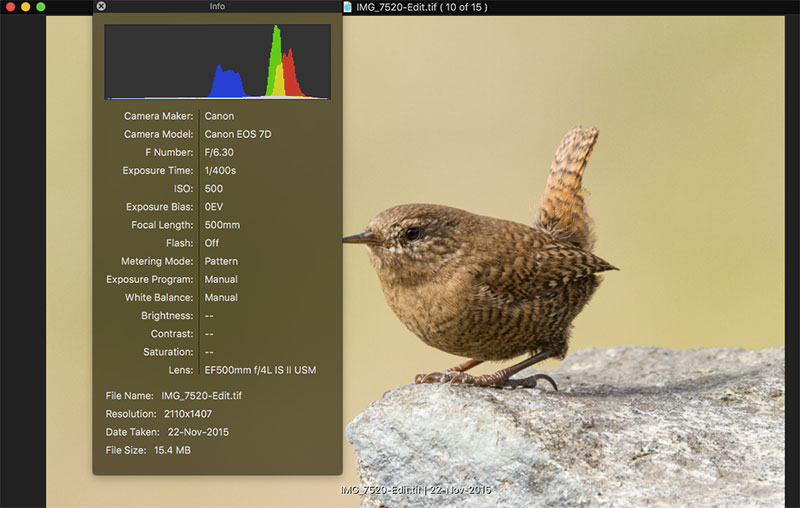
Click on the “Show Info” option from the View dropdown menu to see the photo EXIF data.
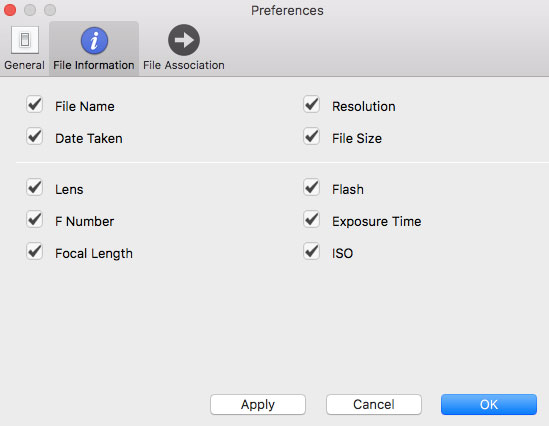
You can also enable viewing of the EXIF information of each image in the Preferences section. Select the “Preference” option form the “WidsMob Viewer Pro” dropdown menu. Click on the “File Information” tab.
Select the checkboxes, whichever you want to see for all the images. Select “Apply” to see the effect. You can see the EXIF information on the bottom of each picture.
11. Photo Printing 🖨
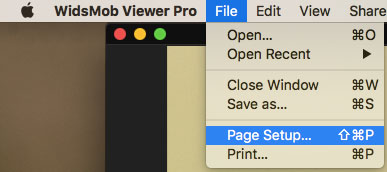
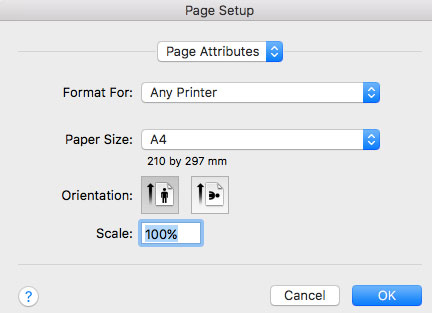
WidsMob Viewer Pro allows you to print photos directly. You can select the “Page Setup” to set the page attributes.
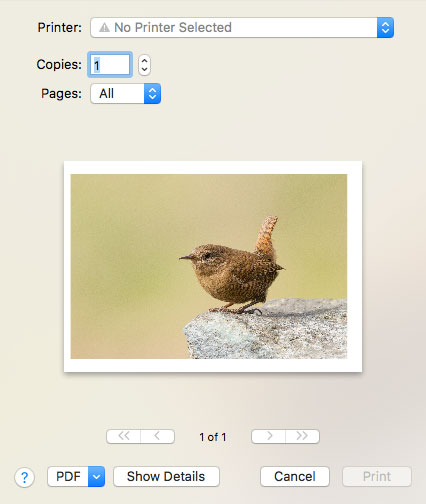
Once it is completed, then select the “Print” option from the “File” dropdown menu. So, we don’t need to exit from this software for printing pictures, if you have a printer connected to the computer.
12. Full-Screen View
As a Photo viewer, it should have a Full-screen view option.
You can activate it by selecting the “Enter Full Screen” option in the” View” menu. Otherwise, use the “Control+Command+F” shortcut key.
13. Image Crop
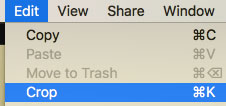
You can crop your image in WidsMob Viewer Pro. Select the “Crop” option from the “Edit” dropdown menu. It comes with basic photo crop ratios like 16×9, 4×3, 3×2, and 1×1.
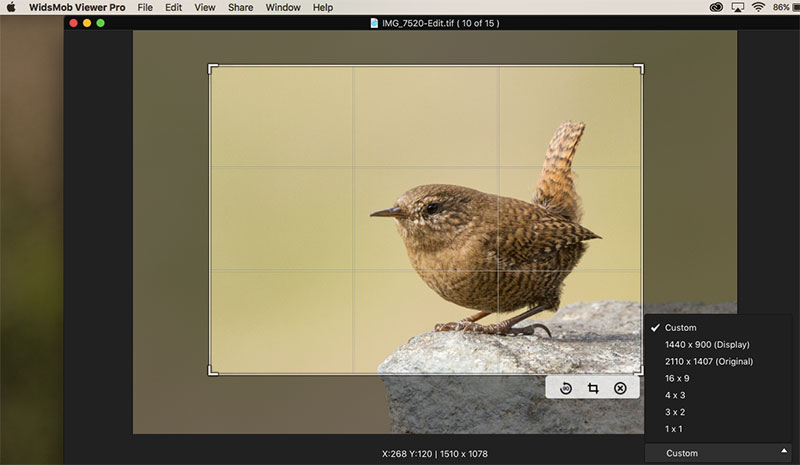
It also supports a Display size image crop, which is useful for setting the picture as your wallpaper. You can also do a custom Crop using your mouse. But, it doesn’t allow you to enter custom crop ratios.
You can switch between the Landscape or Portrait orientation crop by clicking in the 90-degree icon on the bottom of the crop grid. Click on the “Crop” icon next to it to do the cropping.
Things I Like 😍
👉🏻 1. Easy to use User Interface
👉🏻 2. Fast Navigation
👉🏻 3. EXIF data display
👉🏻 4. Quick Edit Option
👉🏻 5. Good Viewer for Photos and Videos
👉🏻 6. Batch Edit feature
Things I Didn’t Like ☹️
👉🏻 1. Custom Aspect Ratio for Crop option is not there.
👉🏻 2. No Strength control for Special Effect looks.
Conclusion
So, it is an easy to use Image viewer for Mac users. It comes at 15$. You can always give a try by downloading the trial version for free.
UseWidsMob Viewer Pro coupon code, “20offspecial” to get a 20% discount in the price. If you feel that it is a bit pricey, then you can even share one license with your friends. A single license can be used in 5 machines at a time. So, the net cost per user comes down if you are ready to share 😎.

