F stop Chart (Aperture Stop Chart) Explained
Are you finding it hard to understand and set the aperture for your clicks? If yes, this f stop chart, also called the Aperture stop chart will be useful 😇 . You can download this f stop chart for free and keep it on your smartphone/tablet/computer and use it as a cheat sheet for your photography. You can also take a printout of the same and keep it in your pocket or camera bag.
What is F stop chart?
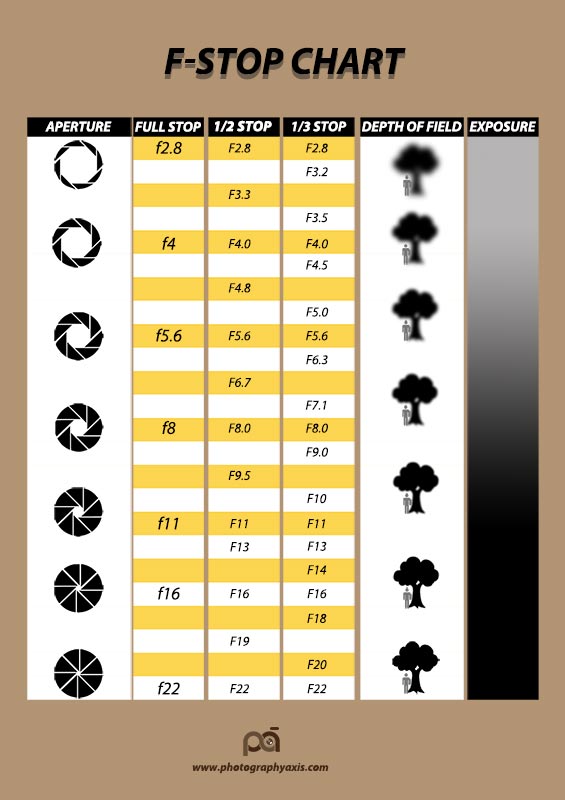
The F stop chart infographic is shown above.
This visual camera aperture chart will make photography easy for you 😎.
We can divide this infographic into 4 sections- Aperture, F stops, Depth of Field, and Exposure.
Aperture

As you know, the aperture is the opening of the lens through which light enters the camera.
In this aperture f stop chart infographic, we can see that the camera aperture opening is arranged in descending order (w.r.t size of the opening).
F Stop- Full Stop, ½ Stop, & 1/3 Stop
You can see three columns- full stop, ½ stop, and 1/3 stop. These values correspond to the Aperture value in your camera.
The term “F stop” can be really confusing if you are a beginner in photography.
A smaller f-number corresponds to a larger aperture opening and a larger f-number corresponds to a smaller opening.
You can see in the f stop chart that the opening is really big for an aperture value of f2.8 when compared to f11.
👉🏻 Full Stop
If aperture f2.8 allows x amount of light into the camera, then aperture f4 will allow x/2 amount of light. Here, the f2.8 aperture allows one stop of extra light into the camera when compared to f4.
In other words, the light falling in the camera sensor gets reduced by half when you decrease the aperture by one full stop.
👉🏻 1/2 Stop
If you see the ½ stop column in the chart, you can see that there is one aperture value in between each successive full stop. If you go with these values then you will get half of the light that corresponds to next full stop.
Here, basically, you are dividing one full stop into a half stop.
👉🏻 1/3 Stop
In the case of 1/3 stop, we are dividing a stop of light into 3 equal parts. So, between f2.8 and f4.0, we will have two more aperture values f3.2 and f3.5.
In most of the DSLR/Mirrorless cameras, you can increase/decrease the aperture by 1/3 Stops. Thus, it gives you better control of light entering the camera. Some cameras will allow you to change this 1/3 stops to ½ stops.
Depth of Field

Another important parameter that is controlled by the aperture is the Depth of Field. The fifth column in the infographic represents the variation of Depth of field with respect to change in aperture values.
You can see that the person standing in front of the tree is in focus and the tree appears to be blurred when the aperture is at f2.8, which corresponds to a large opening.
When you increase the f-number, you can see that the tree is coming to focus gradually. Both the tree and the man are in focus from an aperture of f16 and beyond.
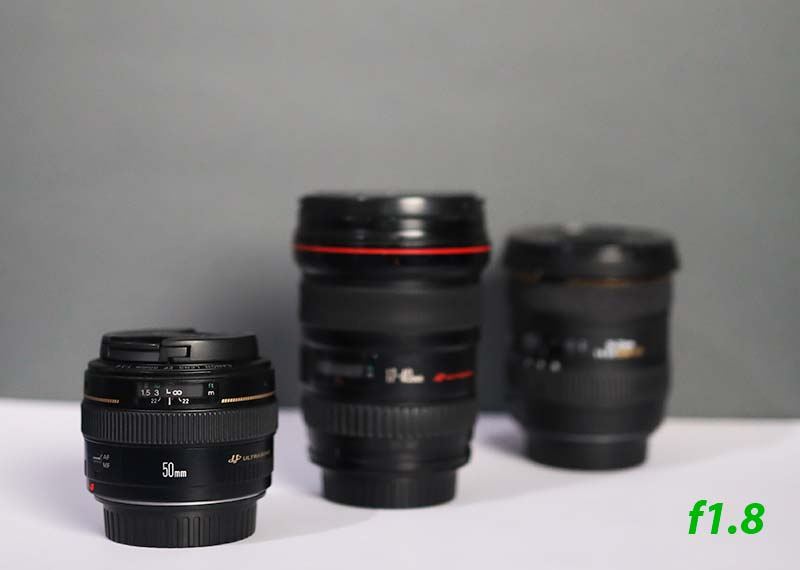
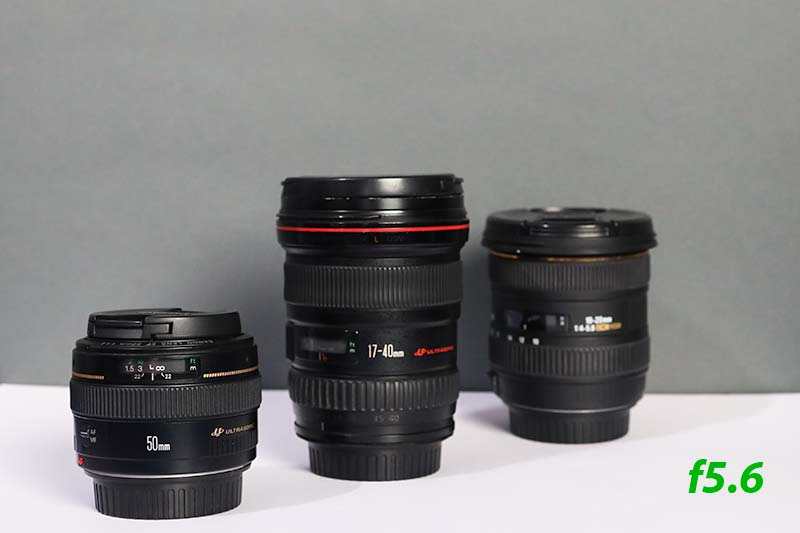
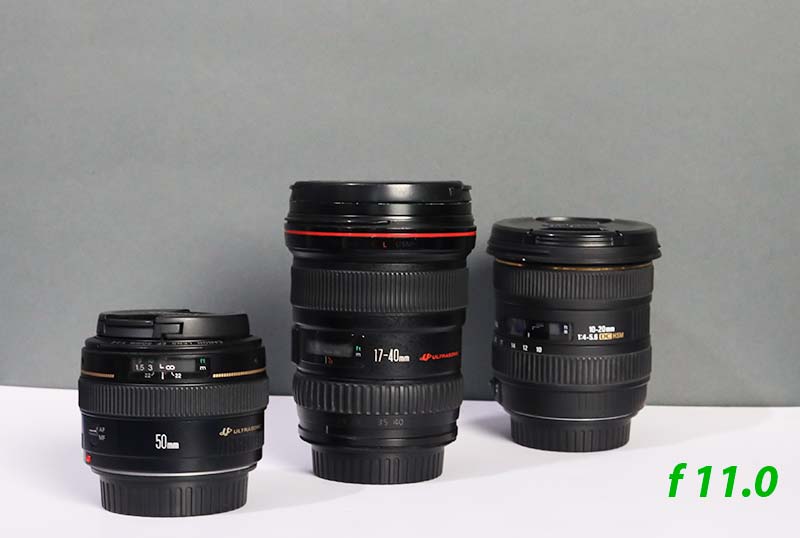
In the first image, only the 50mm lens, which is in the front is in focus. Both the lenses that are behind the 50mm lens appear blurred. It is possible with the help of a wide aperture of f1.8 in the RF 50mm lens.
In the second image, an f-stop of f5.6 makes the markings on the second lens (17-40mm lens) visible. But, still the second lens is not as sharp as the 50mm lens in the front.
In the third image, the 50mm and the 17-40mm lens appear sharp and there is some amount of blur in the 10-20mm lens, which is at the last. So, we need to reduce the aperture beyond f11.0 in this situation to get a picture with all the details of the three lens.
In all three images, the focus point is on the first 50mm lens.
Now, it will be quite clear 😎, how varying f-stop impacts the depth of field in an image.
Exposure

The last column in the infographic will give you an idea about the variation in exposure with a change in aperture opening.
The light entering into the image sensor of the camera decreases as we increase the f-number.
So, the image exposure gets reduced when the f-number is increased (considering shutter speed and ISO values are kept constant throughout).
How to use the F Stop Chart? 😇
Now, you know, what an aperture f stop chart is all about. So, let us see, how you can use it in your photography.
You can’t use the same aperture values in all situations. You need to set different aperture values in different situations and for different types of photography.
📷 Situation 1: Everything in Focus
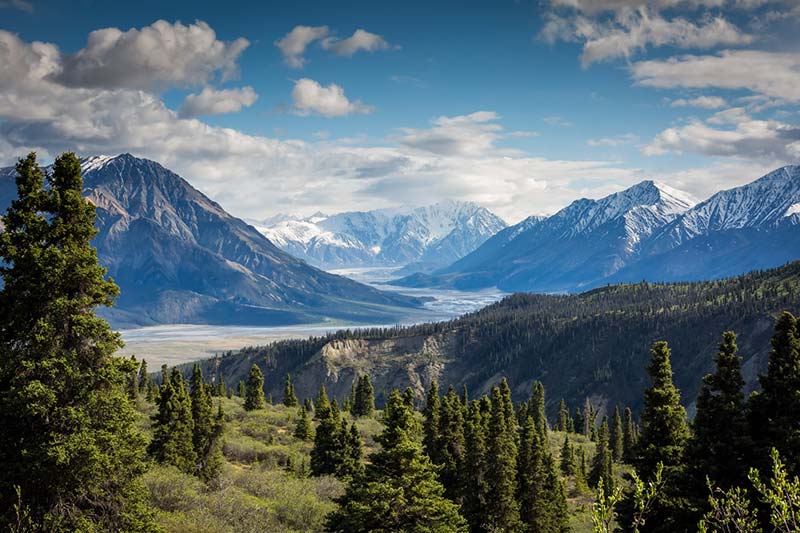
If you want to get both subject and the background elements in focus, you will have to go for a narrow aperture. It will help you get a wider depth of field thereby getting everything in focus. If you are into landscape photography, you want everything to be in focus.
From the f stop chart, you can see that things are more in focus from f16 onwards. So, try to start from this value and play around it in the camera to get the perfect value for your lighting conditions.
📷 Situation 2: Only Subject in Focus
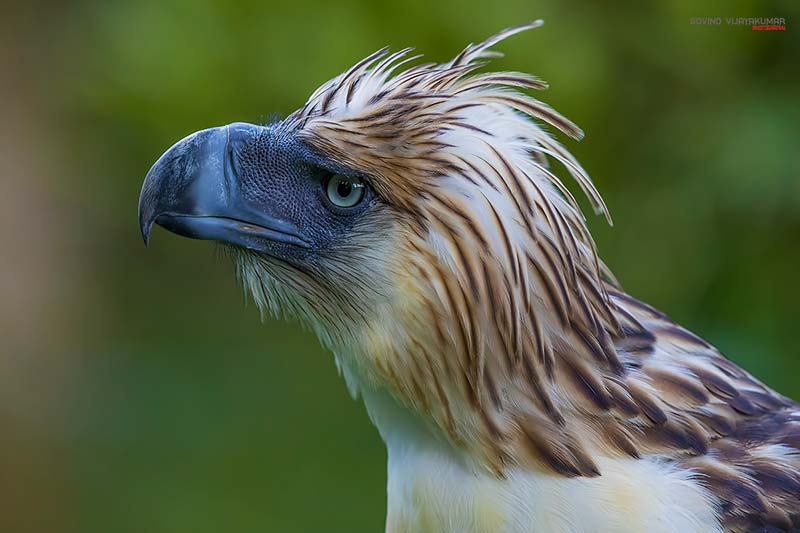
Sometimes you want only your subject to be in focus. In such cases, you want a shallow depth of field.
From the infographic, it is clear that a wider aperture corresponds to a shallow depth of field. You can see that the background tree is blurrier at an aperture value of f2.8.
It does not mean that you must select the maximum possible aperture in your camera. Sometimes what happens is that the person’s eye will appear more sharp than the nose or other parts of the body. It is due to the very wide aperture opening.
So, you need to increase the depth of field by a little. Push the aperture to f4.0 or f3.3 and see where you get the desired results. You can use these apertures when you photograph people portraits, animals, and birds to make the subject stand out from their environment.
Minimum Vs Maximum F-stop
In this f stop chart infographic, I have listed aperture values from f2.8 to f22. It is the commonly seen aperture range in many lenses.
The actual minimum and maximum f-stop value will fully depend on the lens you are using.
For Example, Canon 50mm f1.8 lens has a maximum aperture of f1.8 and a minimum aperture of f22. There are variable maximum aperture lenses like the canon basic kit lens, Canon EF-S 18-55mm f/3.5-5.6 IS lens. This lens will have a maximum aperture of f3.5 at18mm and f5.6 at 55mm.
NOTE: Maximum aperture corresponds to larger opening and vice versa.
👉🏻 📖 READ MORE: How to Get Into Photography?
How to Check the Maximum F-stop of a Lens? 😎
If you plan to buy a new lens or if you already own one, you may be interested to know the maximum f stop of the lens.
You can easily find it in the lens specification itself.
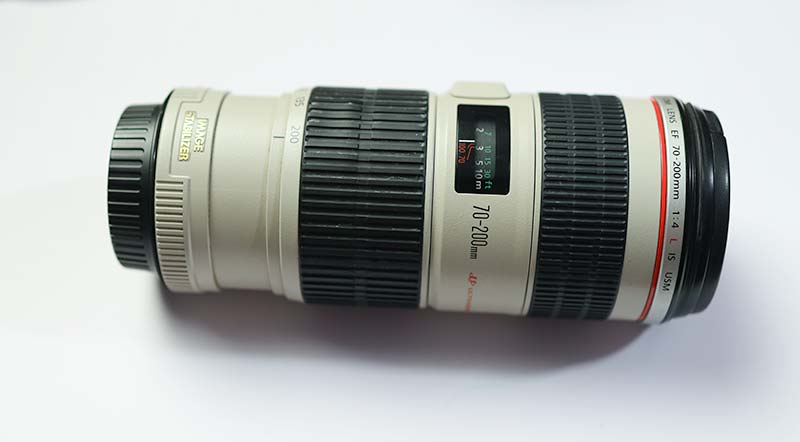
For Example, Canon 70-200 f4 L IS USM lens comes with a maximum aperture of f4 (mentioned in the lens specifications). If you see the above image of this lens, you can see the marking 70-200mm 1:4 L IS USM. The ratio 1:4 indicates that it has a maximum f-stop of f4.0.
How to Set the F-stop in Camera?
You can either go to the Aperture mode or the Manual Mode in your camera to set the f-stop.
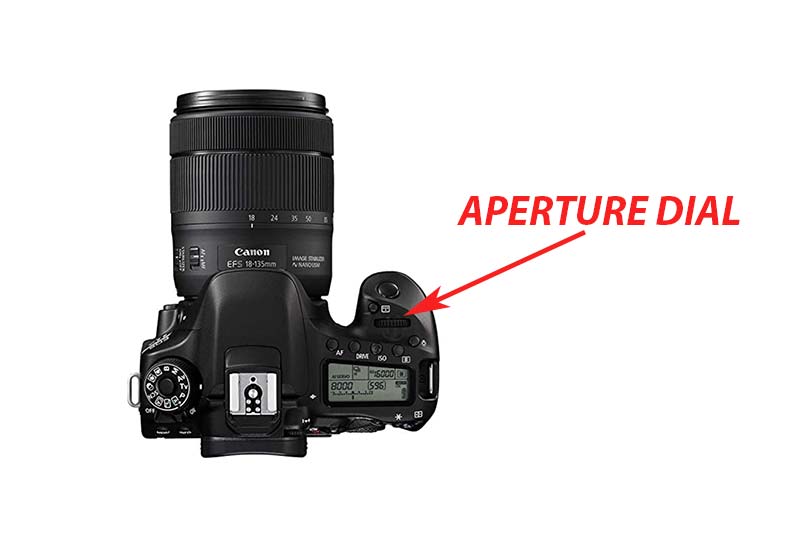
Most cameras will have an aperture dial located on the top right corner, near to the shutter press button. The exact buttons to change the f-numbers vary for different camera models. Please refer to your camera manual to know the right button.
You can also change the aperture in the LCD display of the camera using the buttons mentioned in the camera manual.
Download the high-resolution version of the f-stop chart for free. Link below.
👉🏻 📖 READ MORE: ISO Chart (Image Noise Chart) Cheatsheet

