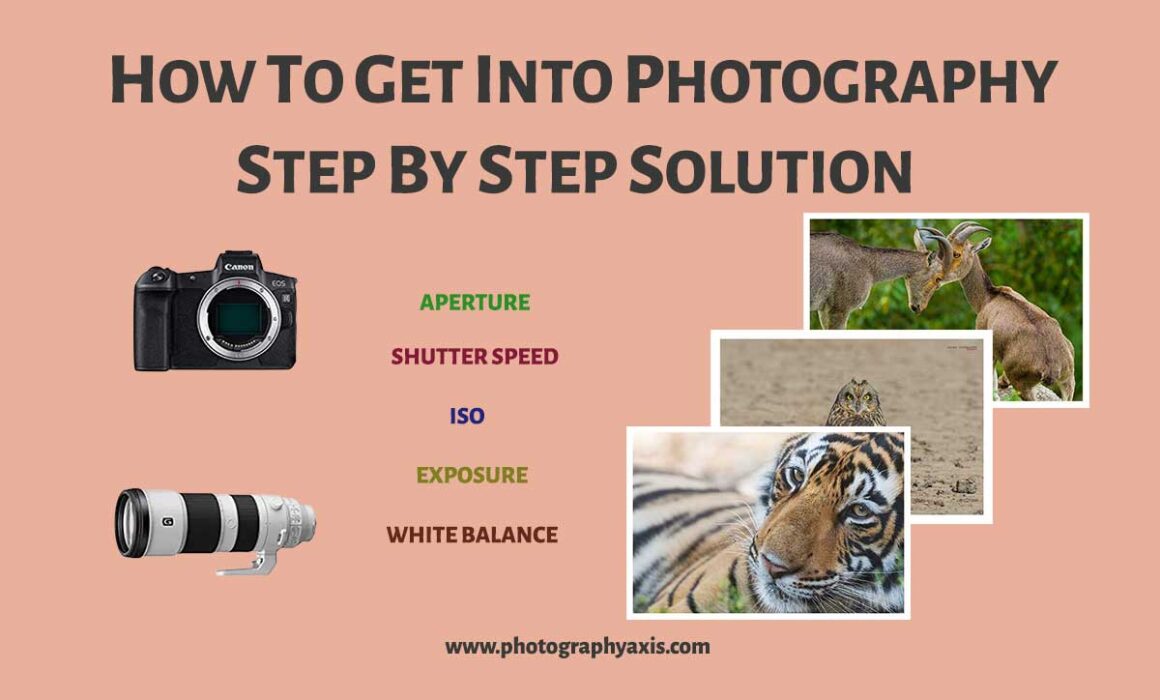
How to Get into Photography – A Beginner’s Guide
One question I frequently get these days is, “How to Get into Photography?” There will be two types of people who will be looking to enter photography. One set of people will be looking at photography as a hobby, and the other section as a career option.
Believe me, buying a camera alone will not help you to get started in photography. There are many other aspects of photography that you need to learn and master. This guide will cover all these important aspects of photography in detail that will help you start with photography.
Step #1 – Pick the Right Camera 📷
The first thing to do is to pick the right camera. There are different types of cameras in the market.
You need to consider your photography niche while selecting the camera. If you plan to photograph portraits, landscapes, nature, birds, or wildlife, a DSLR/ Mirrorless camera would be the best choice.
If your interest is in photographing underwater, you can consider purchasing underwater cameras or GoPro-type action cameras.
When it comes to a DSLR or Mirrorless camera, you can either go for a full frame or APS-C camera. An APS-C camera will come with a crop factor. So, the effective focal length of your shooting will change.
For example, if the crop factor of the APS-C camera body is 1.6x and you use a 100mm lens, you will get an effective focal length of 160mm. This extra reach is good for photographing birds and wildlife.
One thing that makes full-frame cameras better than the APS-C ones is the noise factor. The noise performance of the full frame camera will be very good compared to the APS-C ones. So, a full-frame camera body will be a better choice if you plan to shoot in low light (night photography or astrophotography). But a full-frame will cost you more compared to an APS-C camera.
Step #2 – Pick the Right Lens

Now, you need to pick the right lens. As you are starting in photography, it is good to invest in one or two lenses. But, please don’t buy too many lenses. It can do more harm than good.
There is a famous saying, “Too many Cooks can Spoil the Dish,” which is the case with lenses.
You must select a lens based on the type of photography you are interested in. For example, if your interest is in photographing birds and wildlife, you need to get a telephoto lens.
Here, you will have two options; you can either go for a prime or zoom lens. However, a prime lens will cost you more than a zoom lens. So, I strongly recommend using a zoom lens that covers the telephoto range since you have just started photography.
You can use the Nikkor 200-500mm lens if you are a Nikon user. Canon users can go with the Canon 100-500 mm lens. If you have invested in a Sony camera body, go for the Sony 200-600mm lens.
You can also consider using a third-party lens from brands like Tamron or Sigma. You can get third-party lenses at a lower cost.
If your interest is in nature and landscape, you need to choose appropriate wide-angle lenses. If you are interested to capture portraits and people, you can go for portrait lenses.
👉🏻 📖 READ MORE: Different Lenses For Your Camera
Step #3 – Buy Basic Camera Gears & Accessories 🎒
Once you are done with the camera and lens, you must buy the necessary camera accessories. Unfortunately, there is a tendency to overbuy camera accessories among amateur photographers. So, buy only must-have accessories.
If you are going to use a tripod or monopod for your shoot, you need to get a good quality tripod with an appropriate tripod head. If you are not comfortable using the camera strap that comes with your camera, you can consider investing in another.
Consider investing in a remote shutter release if you plan to shoot time-lapse, long exposure, or nighttime shots. It can be a wired remote trigger or a wireless one.
You may have to buy artificial lights like an external flash or continuous light if your photography demands it. Make sure to invest in appropriate light modifiers also. You must also buy a couple of memory cards (2 x 32 GB or 2 X 64GB)and a spare camera battery.
Once you have purchased all the camera gear, you need to get a good camera bag to carry the camera and accessories. Invest in a high-quality camera bag that will protect the camera from rain, dust, and accidental drops or hits. Make sure you can use it for a long time.
Step #4 – Learn Photography Basics
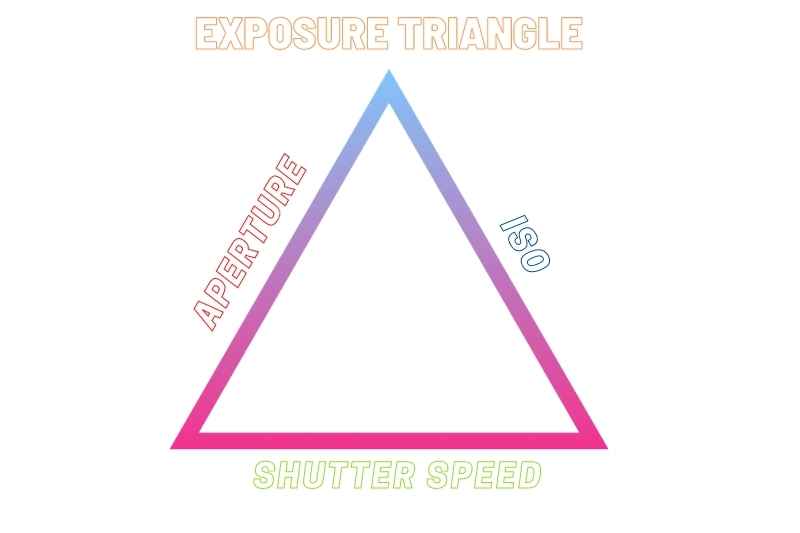
You need to learn photography basics first. You can start with the three main parameters that help to create an image in the camera. They are Aperture, Shutter speed, and ISO. These three parameters combine to form the exposure triangle. They are responsible for the image exposure.
The aperture is the opening in the lens part of the camera. Shutter comes in the camera body part. ISO is associated with the sensor of a digital camera. You need to learn what changes come to an image when you change any of these parameters. It will help you understand the image exposure part.
Consider reading this article to learn photography basics.
Step #5 – Learn Camera Basics
Once you understand photography basics, you can start learning how to operate your camera. You need to know which mode to select, how to change the settings, file format, etc.
It is a good idea to keep the camera manual next to you while learning the camera basics. It will help to locate the buttons quickly. You can also download a soft copy of the camera manual online and keep it on your phone and computer for quick reference.
You can start with the Aperture priority mode in the camera at first. Here, you need to set the aperture, and the camera will give the shutter speed and ISO for the scene based on your exposure. You can see that the exposure compensation dial will be at “0.” If you want to bring more light into the image (overexpose), you need to increase it to the right. If you want to cut down some of the light (underexpose), you can decrease to exposure compensation value to the left side (negative).
Go for a small aperture (high f-number) if you want more objects to be in focus and vice versa. The amount of light entering the camera will be less when you use a small aperture. So, you will get a slower shutter speed with a higher ISO combination to capture a properly exposed image.
You can set the white balance as Auto (AWB). The camera is capable of choosing the correct white balance in most lighting conditions.
Before you go out for shooting, you need to know where all the settings and buttons are located in the camera. Otherwise, you will end up looking in the camera manual during the shoot. Thus, you will lose focus on your photography.
Consider reading this article to know the different camera parts in detail.
Step #6 – Learn Basic Photo Composition Techniques
One thing that separates a photographer from the rest of the people who snaps is image composition. As a beginner, you can learn basic composition techniques. I will list a few here which I think are good for you to get started.
👉🏻 Rule of thirds
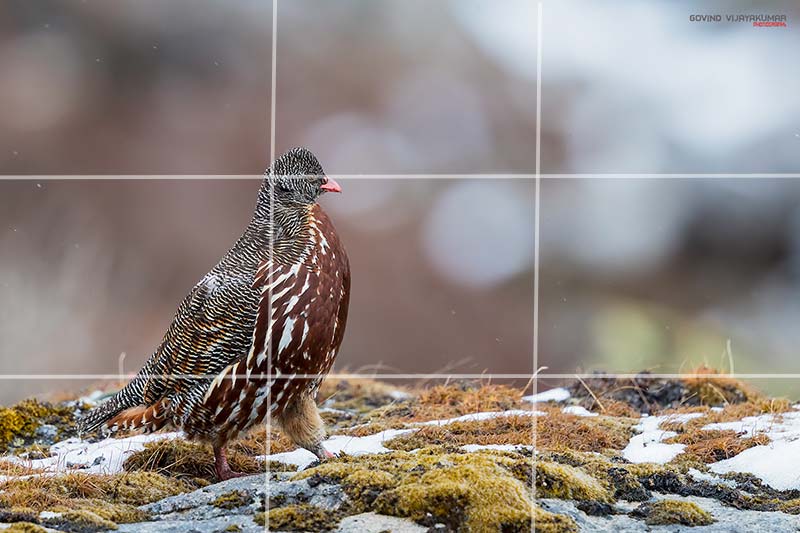
The first composition rule that you need to learn is the rule of thirds. It is a simple rule that states that a frame can be divided into nine equal sections by two vertical and parallel lines. Then, you can place your subject or elements of interest on these lines or any of the 4 points of intersections to create a pleasing frame.
You can turn on the grid lines in your camera in the live view mode to compose images using the rule of thirds.
👉🏻 Leading Lines Composition Technique
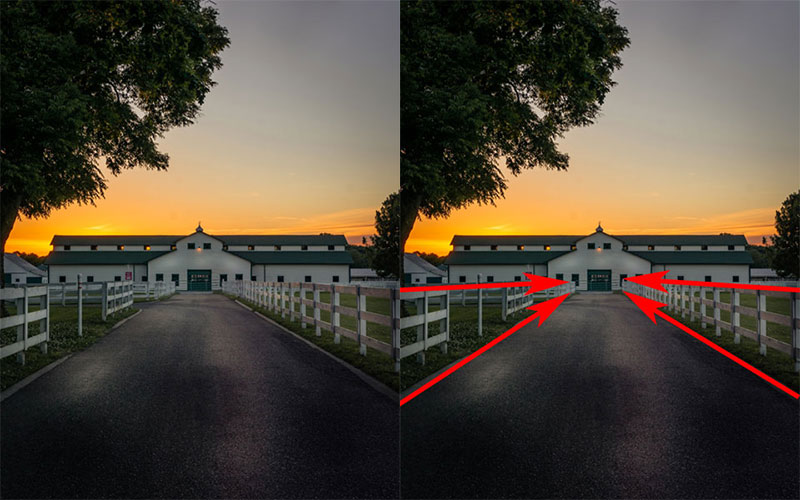
Another rule that you can try as a beginner is the leading lines composition rule. You need to make use of lines in your scene for this rule. These lines will be in the form of roads, pathways, rivers, etc. Use these lines as a pointer toward your subject.
👉🏻 Fill the Frame
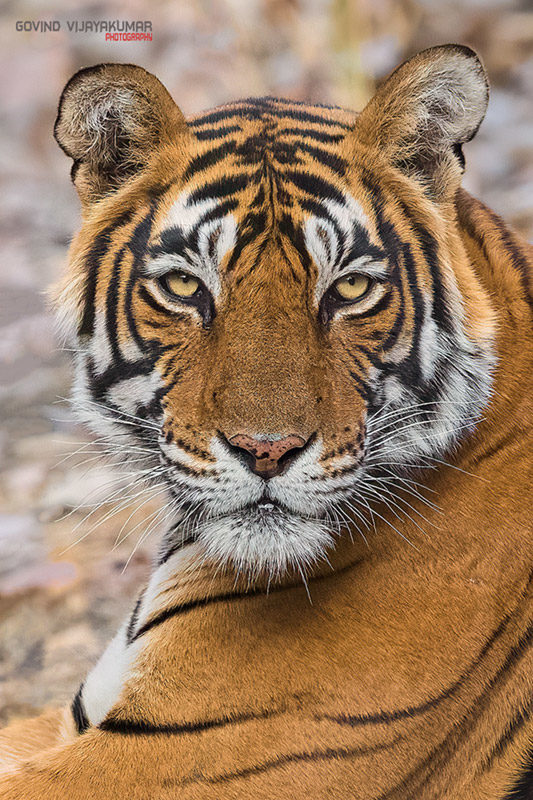
Tiger Portrait using fill the Frame Composition
It is an easy-to-use composition technique that is good for portraits of humans, birds, and animals. As the name suggests, you must fill the frame with your subject. Here, the majority of the frame will be occupied by the subject.
I recommend using these composition rules when you get into photography. There are many other photo composition rules. Once you are thorough with these basic rules, you can explore other composition techniques. It includes composing with curves, diagonals, golden triangle, golden ratio, negative space, etc.
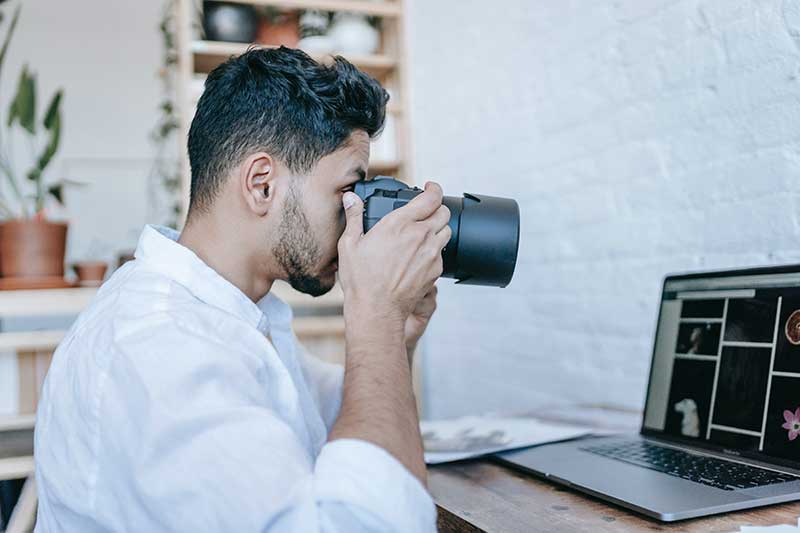
Step #7 – Go Out and Capture Pictures 📸

Now, you have some understanding of photography basics and a basic understanding of your camera. So, it is time to go out and start capturing images. You need to practice your theory to become a better photographer.
You will be making lots of mistakes when you start photography at first. I have made a lot during my initial photography days. It’s all about learning from your photography mistakes.
Try capturing images with different camera settings. You will come to know the effect of different parameters in the camera.
It is a good idea to record the picture in RAW format. It will help you retouch the image in a better way during the editing phase. You can also go for “RAW + JPEG” format since you are shooting for the first time. It will consume a good amount of space on your memory card. So, make sure to carry sufficient memory cards with you.
Step #8 – Pick a Photo Editing Software 🖥

Once you have captured the picture in your camera, you need to do some basic retouching before sharing it on social media or with friends. So, you need to pick a photo editing software.
In my opinion, Adobe Lightroom is the best option for a beginner photographer. It is a paid software. If you are looking for a free one, you can consider the software that comes along with the camera, Gimp, Raw Therapee, etc.
Step #9 – Learn Photo Editing Basics & Try It on your Pictures 👩💻

Once you select the photo editing software, you need to learn the photo editing basics. You can easily get all the necessary tutorials to learn basic photo editing for free on Google and YouTube. It will not take much time to learn photo editing basics. You can learn it within a day or two.
You can even join a photo editing course if needed.
Some of the basic edits that you need to learn are given below:
- Crop Image
- Adjust Image Exposure
- Fix Image White Balance
- Remove Noise from Image
- Sharpen the Image
- Select Color space for Image
- Export & Save Final Image
Once you learn the editing basics, you can start applying them to your images. Different photos require different types of retouching. You need to practice a lot to get a good hold of photo editing.
Step #10 – Check out the Works of Popular Photographers in your Niche
In my opinion, photography is a continuous learning process. So, you need to ensure to learn something new about camera or photography every day. It will help to improve your shots.
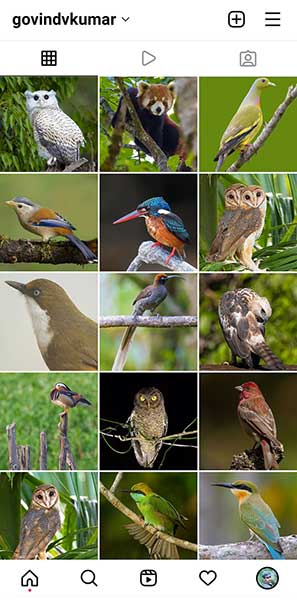
One best way to do it is to check and follow the works of famous photographers in your niche.
For example, if you are into photographing birds, you can follow famous bird photographers on Instagram, Facebook, Twitter, and other sites. Check their images. See how they have composed their images. Which vantage point have they used for the capture? Try to learn from their pictures. It will also give you an idea about the current trend in photography.
Final Thoughts
You can make use of these 10 steps to get into photography. Photography is not a challenging subject to master. But you must have good interest and dedication to become a good photographer. You can always learn photography at your pace.