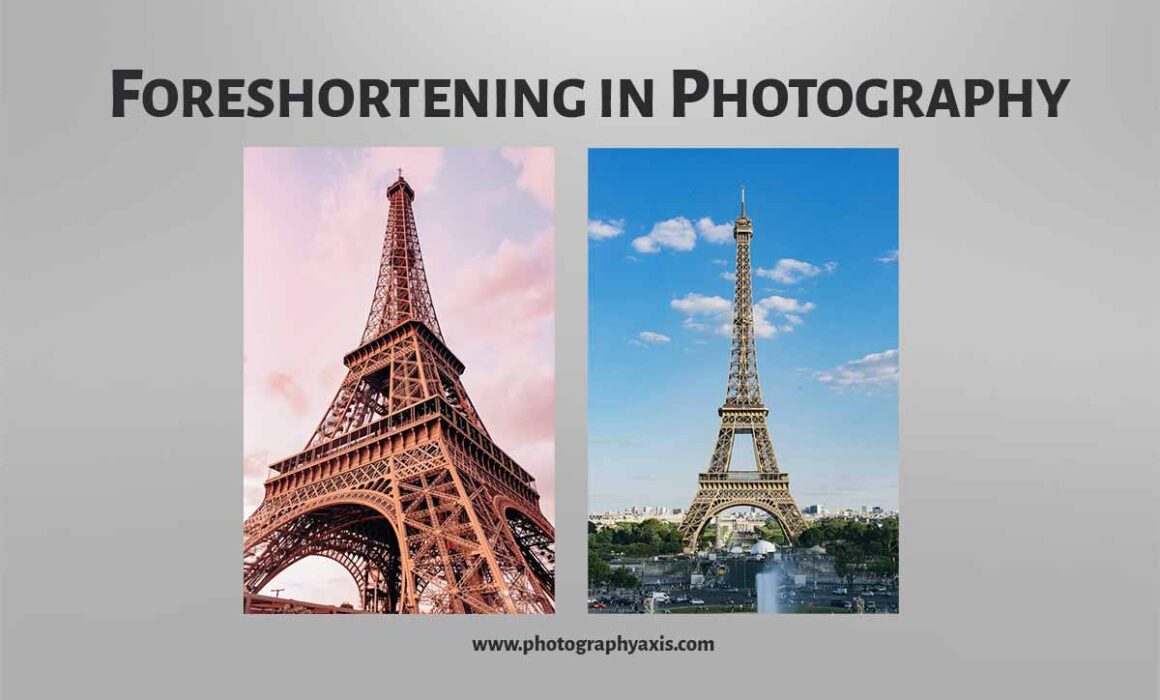
Foreshortening in Photography- How to Use, Avoid, Types & Tips
Have you ever seen pictures of people where some parts of the body appear larger when compared to other parts? If yes, it is due to the phenomenon of foreshortening in photography. This foreshortening can make the subject appear bad at times. But if you know how to use this foreshortening effect creatively, you will be able to capture mind-blowing compositions. We will see foreshortening in photography in detail in this guide.
What is Foreshortening in Photography?
The term “Foreshorten” means to show an object closer with less depth. Foreshortening in photography is a kind of perspective distortion. It is due to the conversion of a 3-dimensional object to a 2-dimensional object in the picture. Here, the parts of the subject that are closer to the lens appear much larger than their actual size.
What Causes Foreshortening of Subjects in an Image? 🤔
Foreshortening happens in photography due to two reasons. They are listed below.
1. Angle of View
The angle of view from where you capture the image is one of the main reasons for foreshortening.
When you try to photograph a person from a worms eye view, the legs of the person will appear larger than other body parts.
If you shoot the same person from a birds eye view, the head of the person will appear larger when compared to the body.
So, changing the angle of view may result in perspective distortion of the scene, thereby resulting in a foreshortened image.
2. Some Subject Parts Closer to the Camera
When you photograph a subject and some part of the subject is very close to the camera than other parts, then you will end up with a foreshortened image.
For example, when you are doing a portrait photoshoot at eye level, and you ask your model to point both hands towards the camera. You will end up in an image where the hands of the model will appear large (out of proportion) when compared to the rest of the body.
How to Avoid Foreshortening in an Image? 😇
The main reason for a foreshortened image is that the different parts of the subject are not in the same focal plane. So, as a photographer, you need to bring the whole subject in the same focal plane if you are interested to remove this effect completely.
If you are a portrait photographer, you can go for the 6 feet rule for portraits. According to this rule, you need to ensure to maintain at least 6 feet distance between the subject and the camera.
Sometimes when you capture the portrait of a person, the hands of the subject may come closer to the camera due to the posing. Thus, the hands and rest of the body will be in different focal planes. So, the hands will appear larger in the image.
If you are an architecture photographer, you must not try to photograph very near to the building from an ant’s eye view perspective.
You can use the same techniques for other types of photography also to avoid the foreshortening effect.
What are the Different Types of Foreshortening in Photography?
I will list out the various types of foreshortening in images
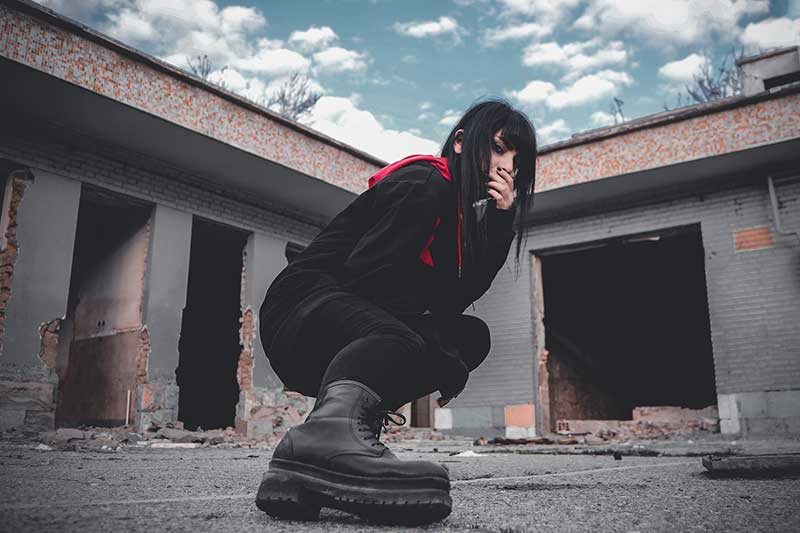
1. Low angle Foreshortening photography

When you capture subjects from a lower angle, the lower half of the subject will appear large and it is called low angle foreshortening photography.
In the above image, the pair of shoes appear larger than other parts of the person. It is due to the fact that the image is photographed from a low vantage point.
2. High angle Foreshortening photography

When you capture subjects from a top angle, the upper half of the subject will appear large and it is called High angle foreshortening photography.
In the above image, the face and head of the lady appear slightly bigger. It is due to the fact that the image is photographed from a high vantage point.
3. Foreshortening Due to the Distance Between Subjects
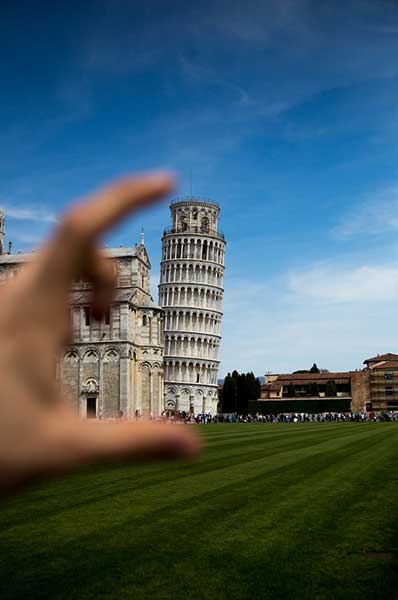
Another popular type of foreshortening arises due to the distance between the subjects in the scene, one being closer to the camera.
When there are two main subjects in the frame, if the distance between the two is large, then you can see this effect.
In the above image, the size of the hand is almost equal to the leaning tower of Pisa. It is because the hand is closer to the camera and the leaning tower is far from the camera. Here, the distance between the hand and the tower is quite large.
Foreshortening Photography Ideas 😎
Even though foreshortening is a distortion, you can use it to compose images creatively. I will share some ideas where you can bring the picture to life with the foreshortening effect. It can be a little tricky, especially if you are a beginner. But you can master it with practice.
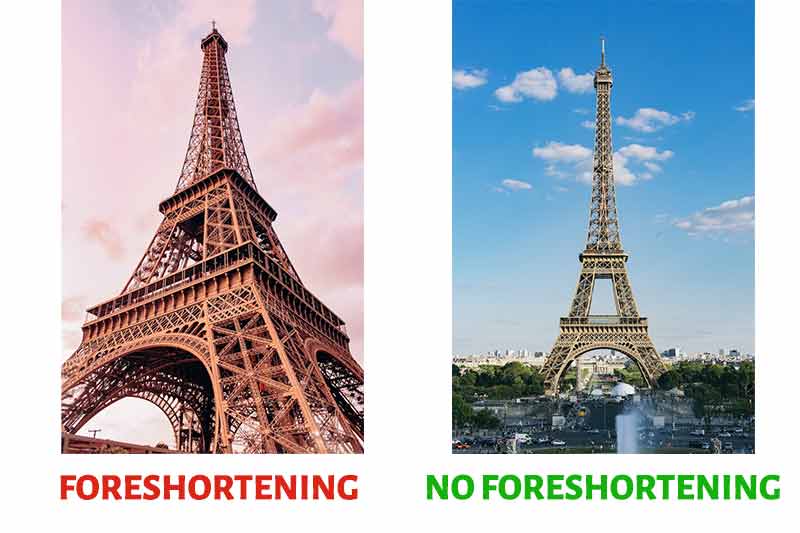
1. Create Aesthetically Pleasing Images of Tall Subjects
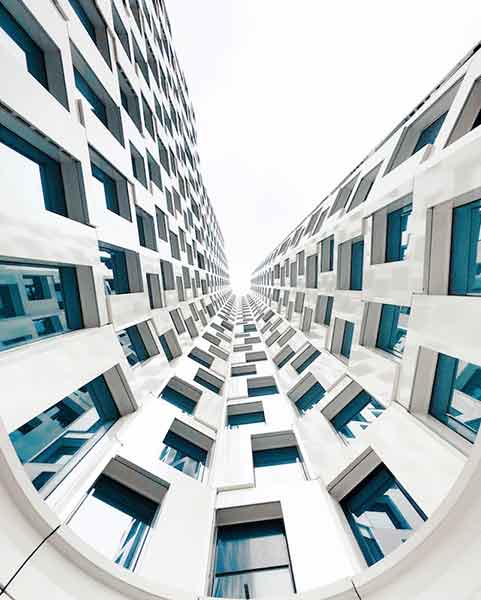
When you shoot architecture like tall buildings, standing from the bottom of the building, you can make the building look more gigantic with this photography technique.
You can stand near the building and point your camera toward the top in such a way that the entire building comes into your frame and capture the image.
When you look at this picture, you can see that the bottom part of the building will appear bigger and wider compared to the top part.
When you move toward the top of the building, it will appear narrow. Thus, this distortion helped you to capture a powerful and aesthetically pleasing image.
If you capture the building from a distance, you will not be able to capture the image with the same effect.
2. To Emphasize an Action of the Subject
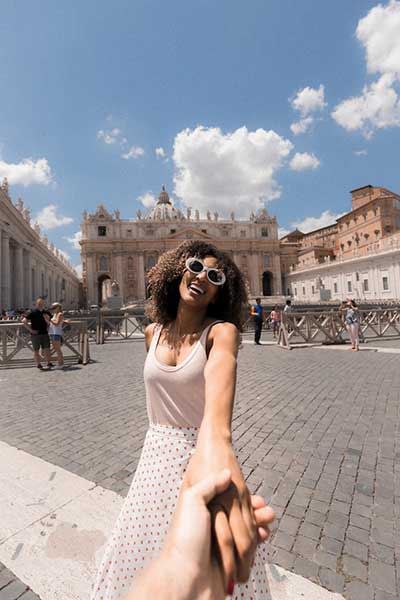
The foreshortening in the image helps to bring emphasis to the desired element of the scene.
So, you can easily draw the viewer’s attention to whatever element you want in the frame with the help of this perspective distortion technique.
In the above picture, the emphasis is on holding hands. Here, the foreshortening effect has helped to make the hand appear bigger in the frame.
3. As a Creative Photography Option
You can use this technique to capture some creative pictures. If you are interested to create some unique images, you must definitely try to bring this effect to your image.
Before trying it out, make sure to have a good understanding of this effect. Otherwise, you may end up in a crappy image.
4. To Get a Varying Depth of Field in the Frame

When some part of the subject/ element of the scene is close to the camera lens, that element will appear sharper and in focus in the image. As you move toward the background of the scene, you can see more blur (out-of-focus areas).
Thus, the foreshortening helps to create varied depth in the frame.
You can vary the depth of field by changing the aperture settings. If you want more blur, go for a large aperture and vice versa.
5. To Create a Frame within a Frame Effect
You can get more creative with your frame by using this perspective distortion effect.
You can use the elements that are near the camera lens in the foreground to create a frame within a frame effect in your image. It can make your photo look more attractive to the viewer.
When you shoot a portrait, you can ask the model to show her hands towards the front to create a frame within a frame effect.
Foreshortening – Wide Vs Telephoto
Both a wide-angle lens and a telephoto lens can result in foreshortening.
When you use a wide-angle lens, the subjects in the foreground will appear magnified when compared to that in the middleground and background. The elements in the background will appear much smaller in size. This effect will be more prominent when you use extreme wide-angle lenses like a fish eye lens.
When you use a telephoto lens, there will be compression happening for the foreground elements. The subjects that are in the background will appear closer in the image.
Frequently Asked Questions 🤔
Is Foreshortening in photography Good or Bad?
Foreshortening in an image can be good as well as bad. It all depends on how you use it.
Do Foreshortening breaks the harmony of an Image?
Yes, foreshortening does break the harmony of an image at times. It is because of this reason that it makes the different parts of the subject in the image are out of proportion. But if you have a good understanding of this concept, you will be able to capture a harmonious image.
Is Foreshortening the Same as Forced Perspective?
Forced perspective in photography is a technique where the photographer captures an image in which some objects appear larger and some smaller.
It is mainly due to the reason that the different subjects in the scene are positioned at different distances from the camera. So, forced perspective photography can be called a kind of foreshortening.
Is Foreshortening Good or Bad for Portraits?
If you use foreshortening accidentally in your portrait, you can end up in a bad portrait. But there are situations when you can capture good portraits using the same foreshortening effect.
The foreshortening helps to bring more emphasis to the face or other parts of the body. So, as a photographer, if you are interested to capture such an image, then the foreshortening is going to be good for your portrait.