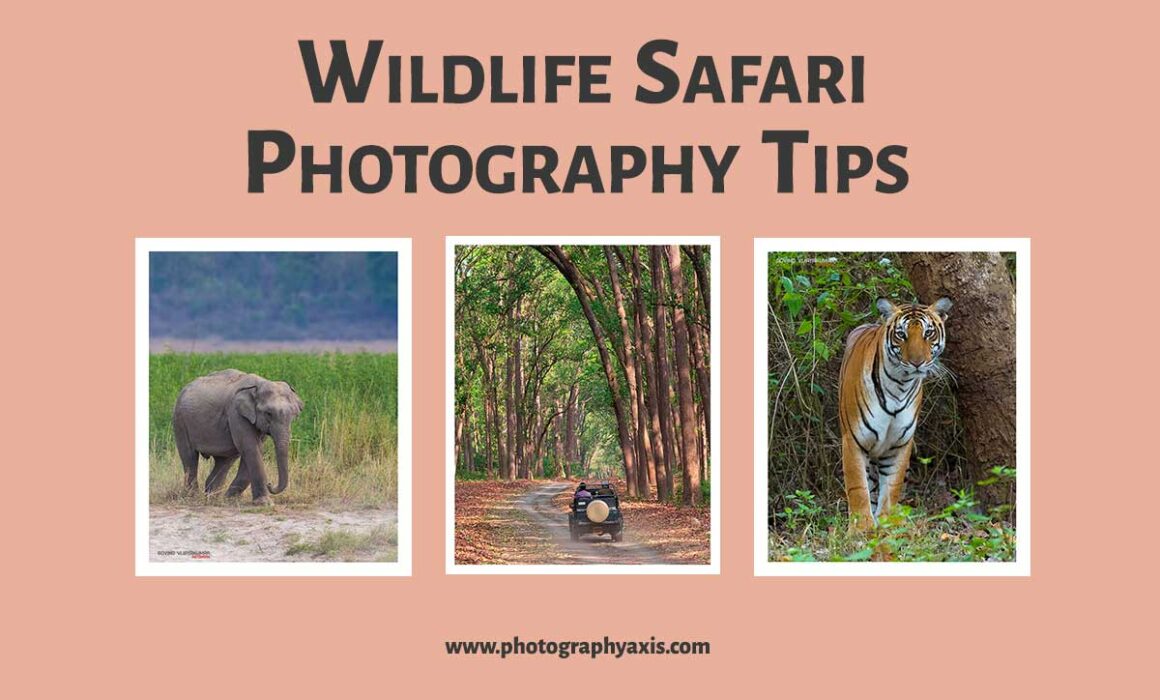
11 Pro Tips for Wildlife Safari Photography
One of the best and the most popular ways to do wildlife photography is through safari. Going on foot in a jungle with wild animals is not a good idea, and you are not allowed to walk inside the wilderness with your camera. It is for your safety. In such forests, safari is the only option to capture wildlife images.
If you are a newbie in wildlife photography, you might be struggling to get good shots from a wildlife safari. I have been to many national parks for wildlife photography. The majority of the wildlife parks offer safari services for photographing wildlife. In this guide, I will share seven valuable tips that will help you get the best images from wildlife safari photography.
1. Carry A Couple of Lens & Camera Combination
During my early days of wildlife safari, I used to carry only one lens and camera combination. I used Canon 500mm f4 along with Canon 7D initially. Later, I realized that I missed many good frames due to this single camera setup.
One main disadvantage of using a prime lens for wildlife photography is that you will not get the luxury of composing the image. You will have to make this compromise for a better image quality even in low light conditions.
So, it is always good to carry another camera and lens combination if possible. Now, I carry a Canon 1DX Mark II attached to Canon 500mm f4 L IS II USM lens and Canon 7D Mark II attached to Canon 70-200mm f4 L IS USM lens. The 500 mm prime lens helps to capture good portrait and action shots. The 70-200 mm focal range allows me to compose beautiful wildscapes (images of wild animals with the habitat).
I don’t recommend carrying a single camera body along with multiple lenses and changing the lens during the safari. It is because, when you switch lenses, there is a good chance that the dirt and dust will easily enter the camera body. It will result in the accumulation of dust in the camera sensor. So, you will end up cleaning the camera sensor after every safari tour.
2. Try to Capture Eye Level Shots
When it comes to wildlife photography, eye level photography works best. However, sometimes, when you are inside a vehicle, it is difficult to capture images at eye level. So, you will mostly end up in high angle shots.
You may have to bend and adjust your camera angle or park the vehicle so that the subject comes at eye level. In addition, you may have to move some distance away from your subject.
3. Use Custom Settings Option in Camera
You will be using a Mirrorless/ DSLR camera for shooting wildlife. Both these types of cameras come with custom settings options.
You can configure these custom settings buttons for different types of shots. For example, you can configure one button for action shots and another for portraits. It will help you become a fast shooter, which is needed in the case of wildlife photography.
Wildlife sightings can happen at any time. So, you must not search for settings during that time. Otherwise, you will end up missing some great wildlife shots.
4. Composition is the Key
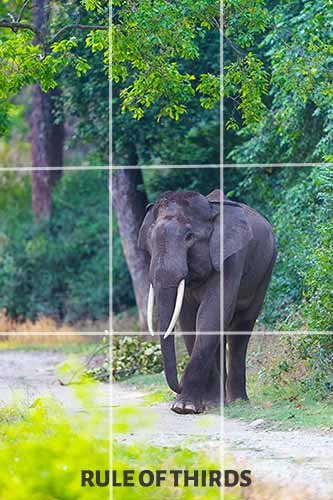
Many wildlife photographers feel they can compose the image later during editing. But it will not work all the time. Also, you may not be able to use the desired composition during the post-processing.
So, it is always a good idea to compose your frame in your camera itself. There are many photo composition techniques that you can use for wildlife images. It includes the rule of thirds, fill the frame, leading lines, golden ratio, etc.
Whatever technique you use to compose your shot, make sure you do proper justice to the image.
5. Viewfinder Vs LCD Live View
When it comes to wildlife shooting with an interchangeable camera like a mirrorless or DSLR, you have two options. You can use the camera viewfinder or the LCD Live view option for shooting.
I recommend using the viewfinder option for shooting wildlife. You will see the frame through one eye, and your full concentration will be on the frame.
When you use the Live View option, you can get distracted by things happening around you. Also, the viewfinder option will give you extra stability because of the way you hold your camera and lens set up.
6. Hire the Best Guide
Whenever you are visiting any wildlife park, you must make full use of it. Only the best guides can get you the best sightings.
You would be visiting the place for the first time or after a long time. So, you won’t know about the wildlife activity in the park.
Only the best guide can get you to the right spots at the right time. So, hire the best one, and you will not regret the decision. They will also know where and how to park the vehicle to get the best shooting angle. These guides will be doing this on a regular basis. So, they know what works and what doesn’t.
7. Switch OFF the Safari Vehicle
When you spot any wildlife activity during the safari, it is a good idea to keep your vehicle at a distance and switch off the vehicle.
If you keep the safari jeep in the ON condition, it can result in a blurry image. When the vehicle is ON, there will be vibration in the chassis of the vehicle.
So, when you keep your camera and the bean bag set up on any part of the vehicle, the camera will also vibrate during the capture. To avoid this vibration, it is better to turn OFF the vehicle.
8. Utilize Golden Hour
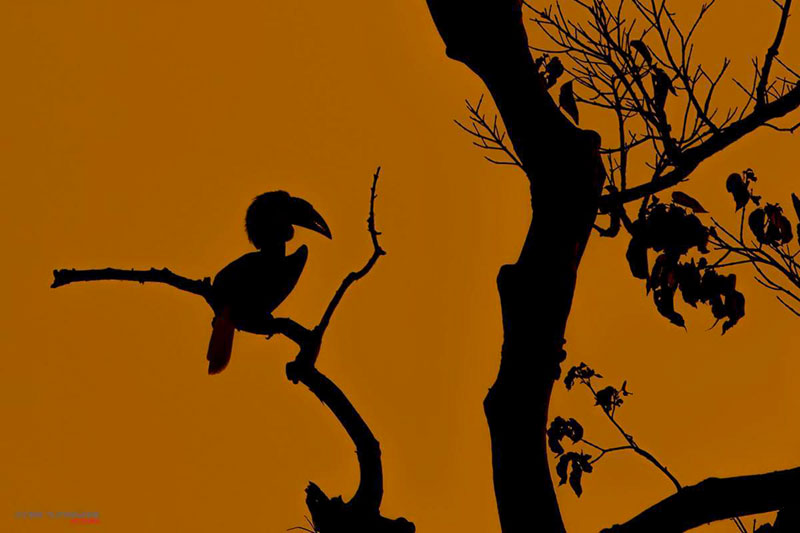
Most photographers prefer to do a photoshoot during the Golden hours, which is during the sunrise and sunset times.
The main reason for selecting this time is the soft and warm light available during this time of the day. However, for wildlife photographers, there is one more reason to choose this time. Most wild animals will be active during this time.
When you are doing a safari, make sure to spot some wildlife during the golden hours. Believe me; you can take magical frames during the golden hour. Sometimes, the sun will be behind the subject. You can do a wildlife silhouette in such situations.
9. Bean Bag is the Best Stabilizer
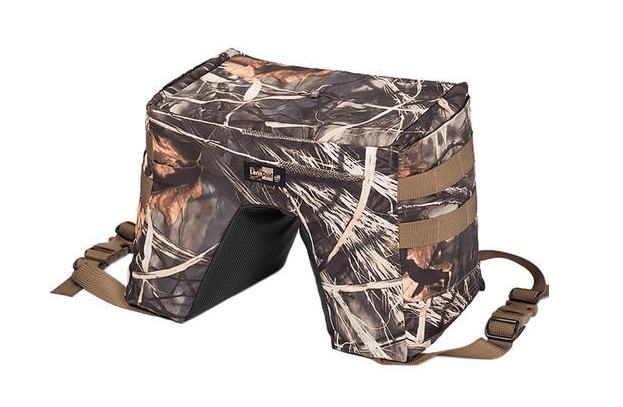
Bean bag
When it comes to safari, you won’t be able to use a tripod inside the safari vehicle. Of course, you can use a monopod. But it won’t be easy to use one inside the vehicle. So, one of the best ways to stabilize your camera gear is to use the bean bag.
The main advantage of using a bean bag is that you can place it anywhere in the vehicle. But unfortunately, when it comes to wildlife photography, you don’t have the luxury of placing your subject in the desired spot.
Sometimes, the animal will come on the left, right, straight, or behind the vehicle. If you have a bean bag, you can quickly move it to different sides of the vehicle and place your camera accordingly. It will help you to move fast.
There is no set time needed for a bean bag. I will help you to provide better stabilization for your camera gear. Thus, you will be able to capture blur-free shots.
10. Clamps & Tripod Head Combination Do Help
Another alternative for a bean bag is the clamp and tripod head combination. You can use the rails and side of your vehicle to use this combo. One issue with this setup is that it is a little tough to move this setup from one spot to another.
If a wildlife activity is happening at a spot and you are waiting in that location, then this setup will be helpful for framing and capturing images.
This setup will be very useful if you are capturing videos along with pictures.
11. Good If You Can Get the Full Seat
When you are inside a wildlife safari vehicle, you will have to shoot to the left or right at times.
If two persons are sitting nearby, it will be tough for you to move around in either direction with your big telephoto lens.
So, it is better if you get the full seat row for you. It will also make you more comfortable and relaxed during the shoot.