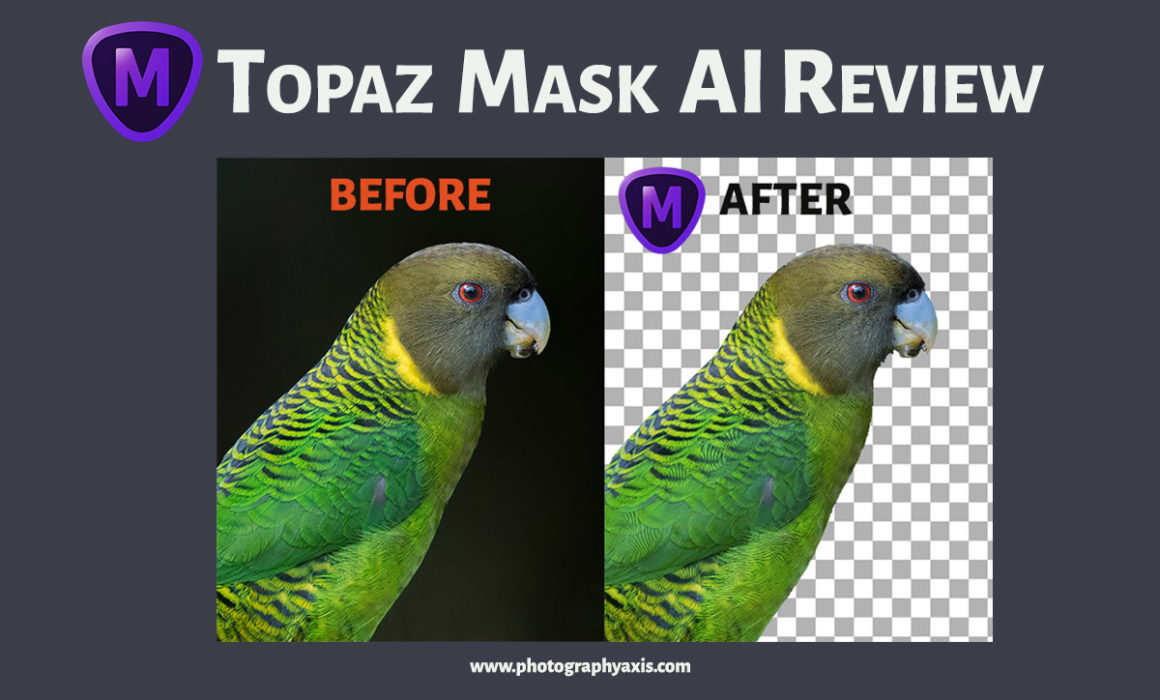
Topaz Mask AI Review- Does It Make Masking Easy?
Topaz Mask AI, another product from Topaz Labs in their AI series. I have tried all the other AI products, which include Gigapixel AI, Denoise AI, Adjust AI, Sharpen AI, and JPEG to RAW AI software. The performance of each product is really good 😊. In this article, I will do the Topaz Mask AI review in detail. So, let us see whether the Topaz Mask AI keeps the promise or not?
😍 UPDATE [28 DEC 2020]: Click here to claim a30% discount + use code “holiday15” and receive an additional 15% additional discount for Topaz Mask AI for a limited time, this holiday season.
🖥 Topaz Mask AI Review and Workflow
Mask AI is compatible with both Windows and Mac OS. You can use it as a stand-alone application as well as a plugin for Adobe Photoshop or Topaz Studio 2.
I will review Topaz Mask AI on my MacBook Air with the following specifications.
1. Download Free Topaz Mask AI

I will download the 30-day free Topaz Mask AI trial version.
It takes around 2.2 GB of hard drive space for installation. So, make sure to keep sufficient free space in your computer hard drive.
2. Open Mask AI
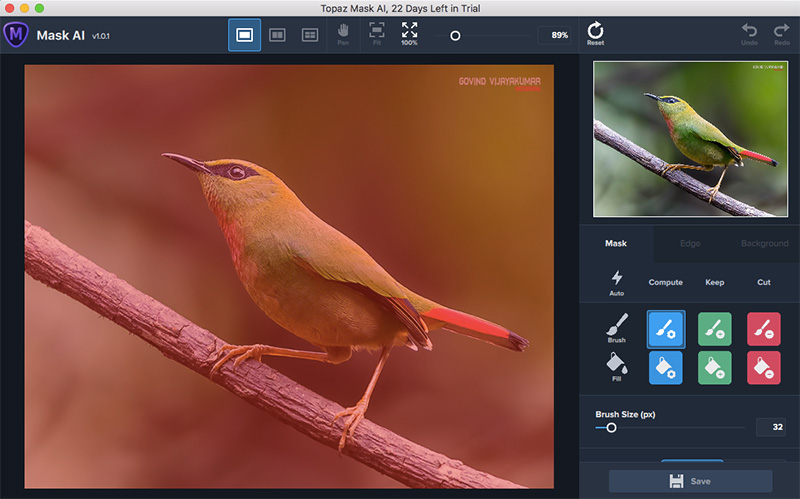
Let me open the Mask AI. You can either drag and drop an image into it or use the “Open Image” option from the “File” dropdown menu.
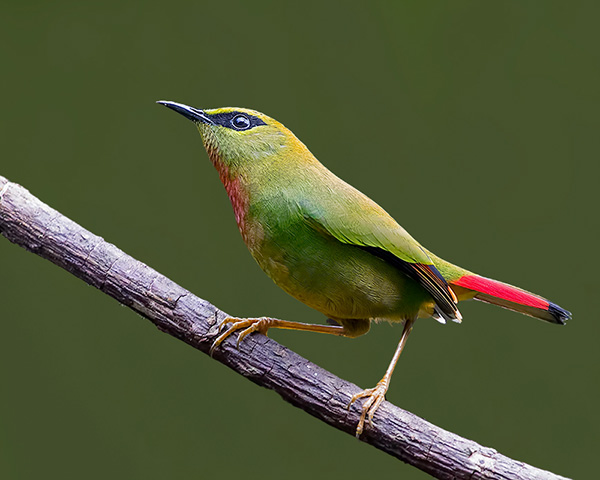
I will use one of my pictures of Fire-tailed Myzornis bird photographed from Mishmi Hills, Arunachal Pradesh, India.
3. Mask Module Introduction
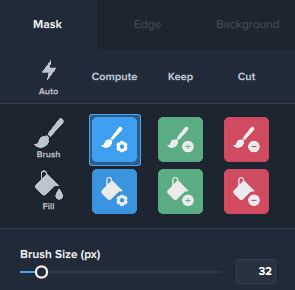
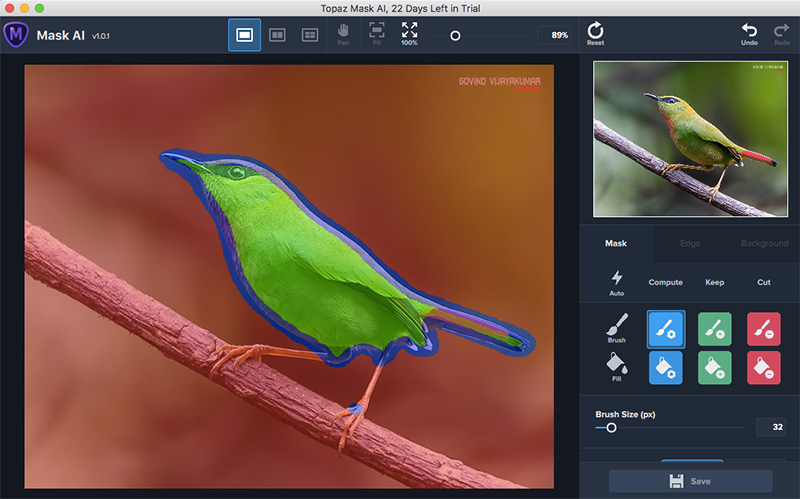
On the right side edit panel, you can see the “Mask” module. It will have the “Auto” option below.
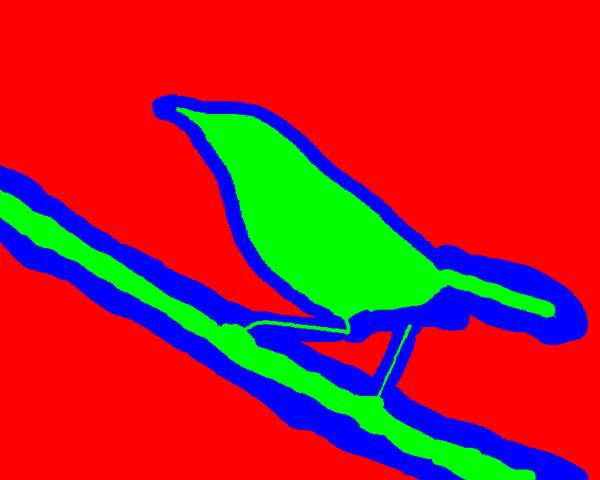
You can see two options, “Brush” and “Fill” for masking. Each of these tools will have three colored icons in Blue, Green, and Red.
By Default, the Red Mask will be there on top of the image. It is the Cut mask.
Blue color mask is to mark the intersection of the actual subject and its boundary, which will be overlapping.
The Green colored Brush and Fill option is to mark the interior of the subject to be masked.
4. Auto Mask Selection
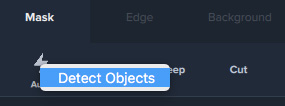
Right-click on it to select the “Detect Objects” option to automatically detect the subject and mask accordingly.
It does a good job of choosing the main subject.
5. Masking Process-Continued
But, here, I also have the trunk along with the bird subject to mask. So, I need to do the Compute, Keep and Cut on the other areas to finalize the mask selection.
So, first, I will use the Green brush to mask the subject interior. It doesn’t have to be accurate. If the area is more, then you can do an outline with a Green brush and use the Green Fill brush to fill Green inside.
Now, I will do the subject to background intersection masking using the Blue Colour brush. Make sure that there is no Red between the Green and Blue.
A precise marking is not needed here. You can roughly mark it with a bigger brush so that the Blue color overlaps both the subject and the boundary.
You can increase or decrease the brush size by pressing the “[“and “]” respectively. Otherwise, use the “Brush Size” slider on the right side to do the same.
6. Mask Generation
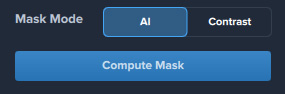
Once you complete the Masking process, use “AI” or “Contrast” mask modes and click “Compute Mask” to generate the Mask. I found the AI option to do a better job.
The software will not allow you to Compute the mask unless you fill all the three color masks: Red, Green, and Blue on the image.
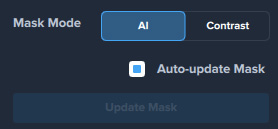
You can either select the “Auto-update Mask” option to see the change previews. Otherwise, untick this option and click on “Update Mask” every time you want to see the change. The Auto-update process will take some time to process and preview the change. So, if you have multiple changes, then I recommend you going for the second option.
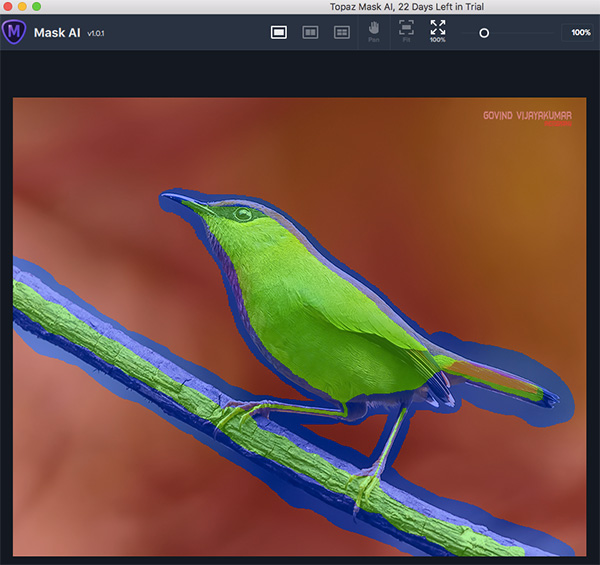
7. Multiple Mask Previews
Once you “Update Mask”, you can see split preview windows on the main window.
The left side image will preview the colored mask, and the right-side one will show the actual mask effect on the picture after the cut with a transparent background.
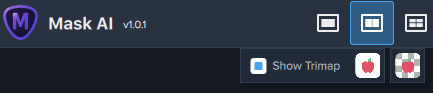
You can also see the “Show Trimap” option visible at the top. You can uncheck it to see the original image on the left side image without the color masks.
Next to this option, you can see two square icons with the apple icon. Click on this to select different views for each image on the left and right sides.
Different views include Original, Mask, Keep, and Cut. You can also see the four views at a time by selecting the quad window split on the top toolbar.
8. Edge Refining
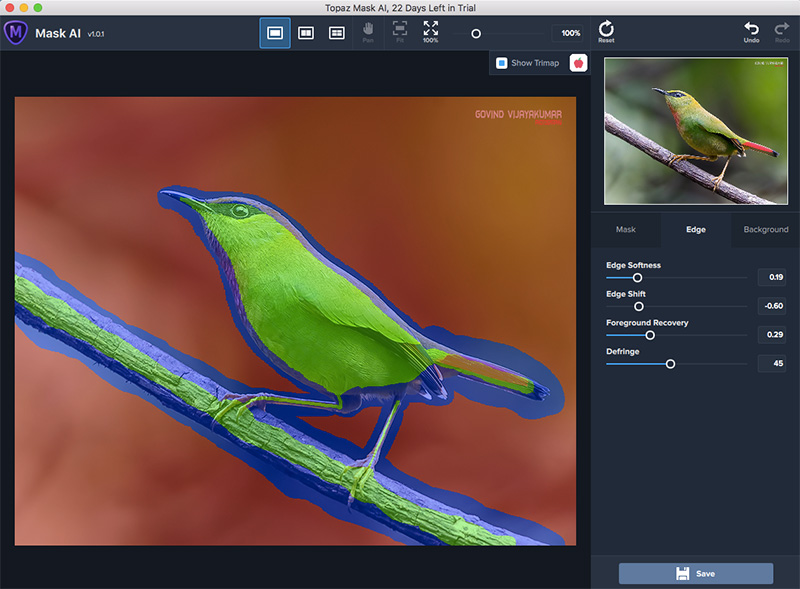
Now, we need to fine-tune the Mask selection. So, click on the “Edge” tab option.
You can see four sliders here, “Edge Softness”, “Edge Shift”, “Foreground Recovery”, and “Defringe.”
Play with Edge Softness and Edge Shift Sliders to refine the edge selection. Make use of the Foreground recovery slider for altering the details in the edges. Use the Defringe slider to remove any color fringes at the edges.
9. Background Selection
You have four options for Background selection.
You can either go for the transparent background look, which is suitable for icons and design objects, Blur background option, colored background, and adding another image in the background.
9.1. Transparent Background Option
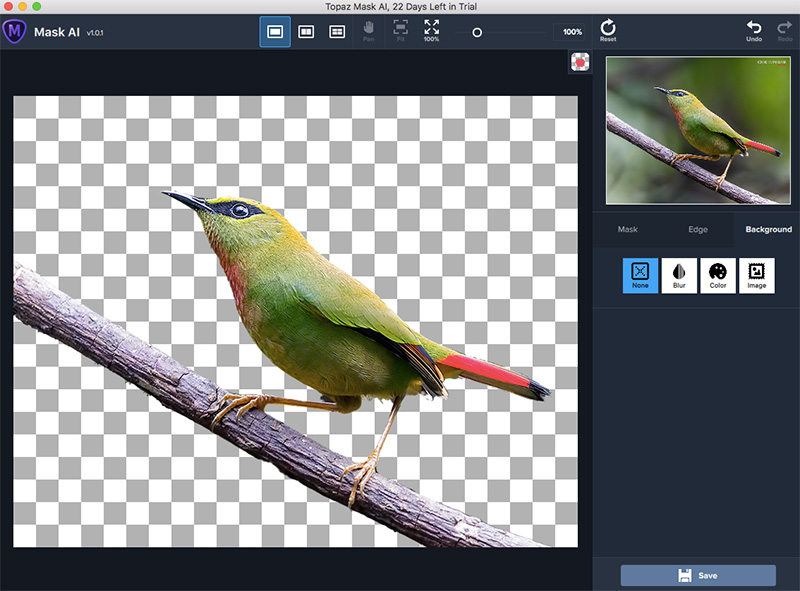
Use it if you want to remove the entire background and only need a transparent background. Select the “None” option for this.
9.2. Blur Option
If you want to increase the Depth of field effect, to give a Shallow Depth of Field to the image, then go for the “Blur” option.
Control its strength to get a nicely blurred background in the picture. Don’t use it too much. It will make the photo look unnatural.
9.3. Color Option
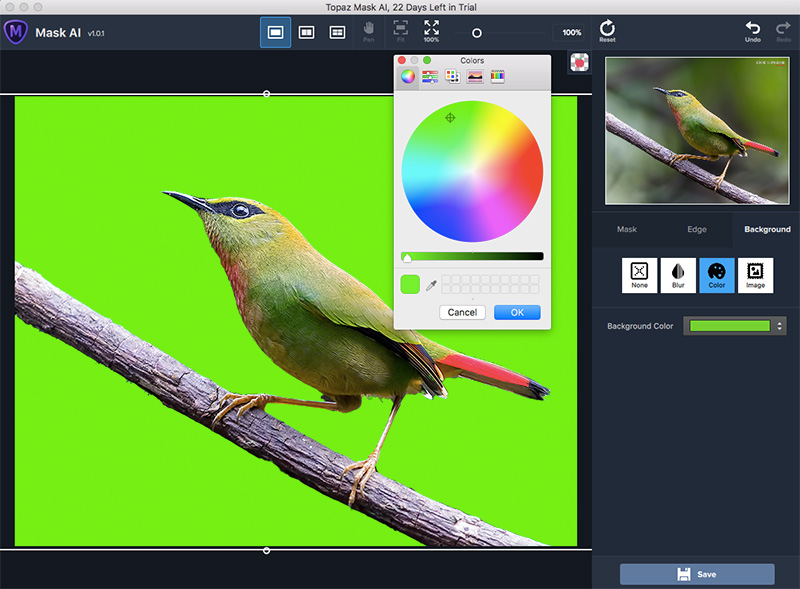
Use the “Color” option to give a background color. You can use it to provide any color in the background.
I actually found this option useful in the Mask refining process. Simply put a color in the background, and you will see any imperfections at the edges easily. Bright shades of Red, Green, and Pink works well for this.
9.4. Background Option
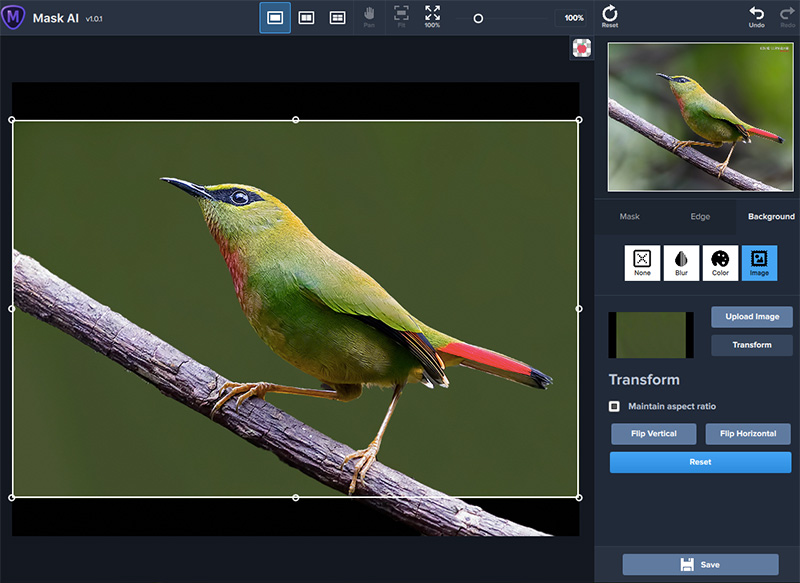
My real intention is to add a background image for review, which is the last option on the menu. Click on the “Upload Image” button to browse and add the image.
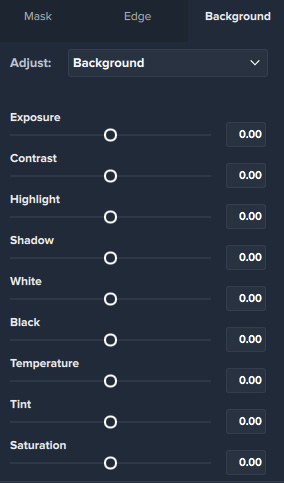
Once done, you can see the “Adjust” option to fine-tune the Foreground and Background Exposure and Color settings in the form of different sliders. Use it for proper blending of Background and Foreground.
Click the “Transform” button, if you want to resize the Background to match with the foreground image size. You can see a rectangular box around your image. Resize it to adjust the background image. I need to resize it here as the dimensions are different.
It also gives you the option to flip the image vertically or horizontally.
10. Save Final Image
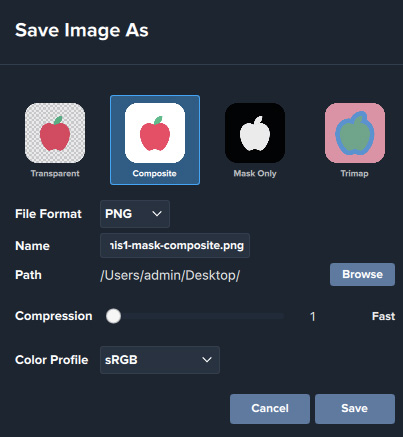
Click the “Save” button on the bottom to save the final image.
Topaz Mask AI allows you to save the picture in four types: Transparent, Composite, Mask Only, and Trimap.
You can select composite if you need only the actual final image with the changed background.
You can save the file in PNG, JPG, JPEG, TIFF, or TIFF format. The software allows you to set the Compression ratio and Color profile.
Click the save button to export the final image.
You can see the four types of images generated by Topaz Mask AI below.
Composite Background Image
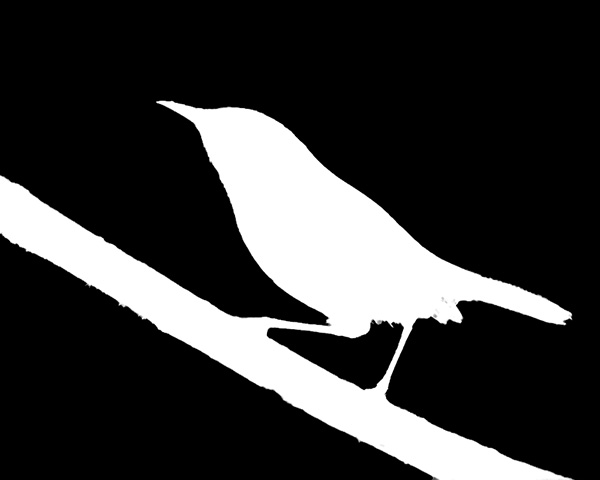
Mask only Image
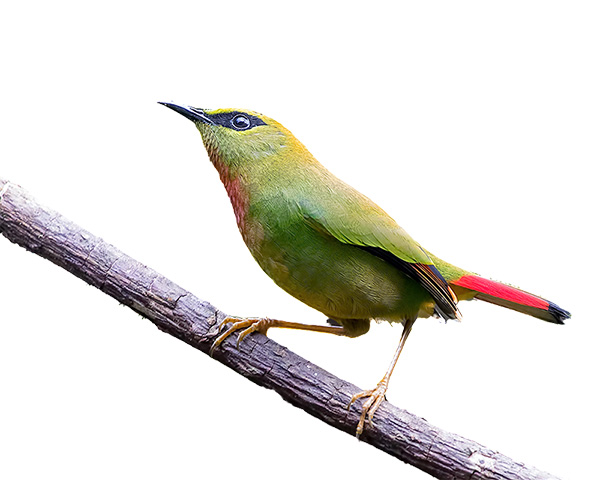
Transparent Background Image
Trimap image
😍 What I Liked
👉🏻 1. It is easy to generate a transparent background image using Topaz Mask AI software.
👉🏻 2. The Auto Detect feature helps to get a quick start for the image mask.
👉🏻 3.Easy to Use. The software doesn’t give too many options to control, which makes it user-friendly.
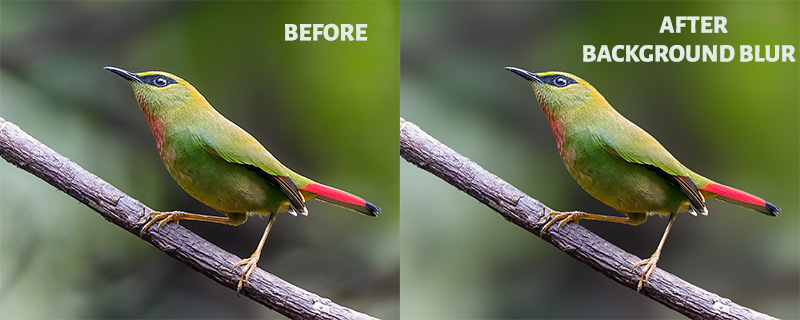
👉🏻 4. I loved the Background Blur feature, which helps to give an addition blur. Thus, one can replicate the Shallow Depth of field effect. It is realistic, just like the lens effect.
👉🏻 5. It makes the masking job really easy with the AI. Thus, it helps to save a good amount of editing time.
👉🏻 6. Useful too to replace a white-washed sky in the image.
☹️ What I Didn’t Like
👉🏻 1. If you keep the “Auto-update Mask” checkbox ticked, then whenever you make any edit in the mask, it takes some time to preview the change on the image. So, we need to turn it off for an efficient workflow.
👉🏻 2. The Auto detect fail to detect multiple objects of interest. For example the trunk in the above image.
👉🏻 2. Topaz Mask AI costs $99.99. So, a bit costly, only professional photographers and designers can afford it.
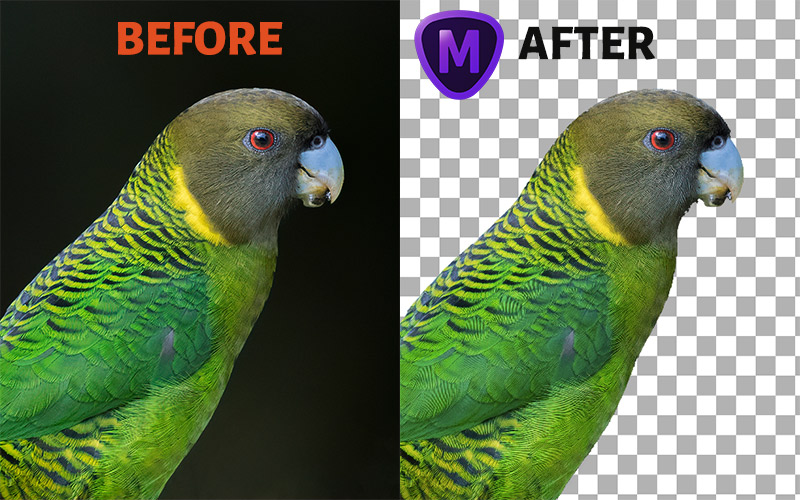
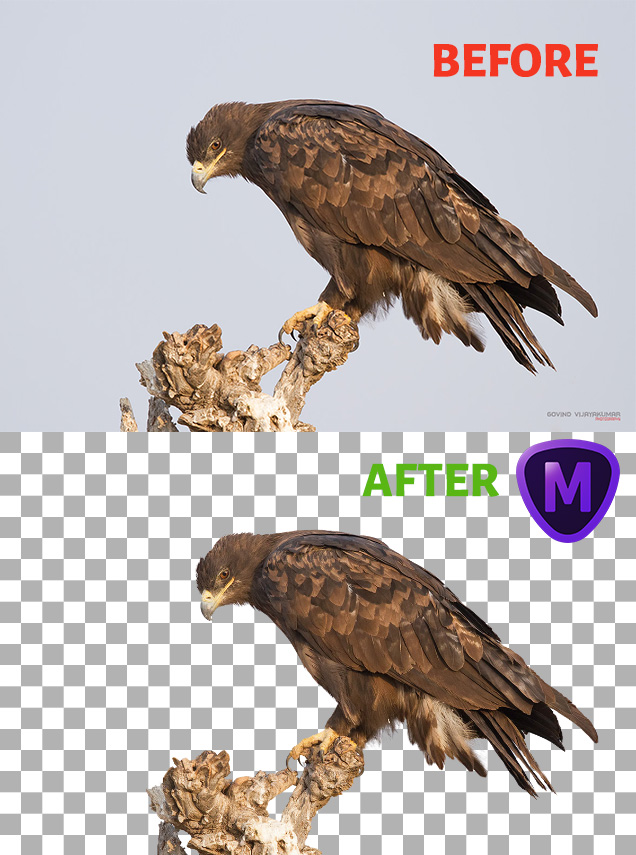
Topaz Mask AI Before After Images
I have played with lots of images while doing the Topaz Mask AI review with a pre-release version. So, I will share some of the Before and After Images.
So, what are you waiting for, download the free version of Topaz Mask AI and give a try.
You can get Topaz Mask AI for a limited time discounted price of $69.99 here 😎.
For more than a year, I have been posting one photo per day on my Facebook page. On this occasion, I developed a concrete knowledge of many TOPAZ programs (each photo is published with the post-production means used). While I was hesitating, the reading of your article, and especially the excellent description of the workflow, immediately decided to acquire this new Topaz program.
I am happy that you liked the workflow description.
El cuadro final para “guardar” (Save) no me aparece y cuando le doy a apply se cierra el programa y no ha hecho nada
The Final Save option will appear only after the “Compute Mask” is clicked. If it is still not working, try reopening the Mask AI application. If that too doesn’t work, then try reinstalling the software once more.
With complex masking it does a poor job of recognition. Like an image with multiple trees and plenty of foliage it does a rotten job
With plenty of trees, we need to get the masking proper from my experience with this tool and good amount of refining needs to be done. Here the issue is that the all the trees in the picture may not be in the focus plane. So, we need to put in more effort and time for getting the right trimask.
I wish you would have used a complex subject, such as a little girl with flyaway hair or a hairy dog. The images you used were way too cut and dried.
Sorry, I didn’t get such a subject. If you have any image which I can use without any copyright issues, feel free to share it with me. I will test it with Topaz Mask AI and will share the output in the Before/After section.
I bought Topaz Remask last year. Topaz promises free updates to all their products forever. Mask AI seems to be a replacement for Topaz Remask which apparently is a dead end product. Since I already own Topaz Remask I can get $20 off Mask AI instead of future upgrades of Remask which Topaz promised when I bought Remask. I wonder what US laws this violates.
If you own the Topaz CLassic Remask, I guess you are eligible for the upgrade to Mask AI. Just add the Mask AI to the shopping cart and the special price will be visible.
If it still doesn’t show up then raise a support ticket. I am sharing the link below t raise the support ticket
https://help.topazlabs.com/hc/en-us/requests/new
WHAT DIFERENCE ARE BETWEEN TIF and TIFF EXPORT?
Actually, there is no difference between TIFF and TIF file formats.
It is a file system limitation for the file format. Older FAT systems support only 3 letter extension, which is .tif.
So, here Topaz Mask AI just supports both the TIFF file extensions for image export
Thanks for the review. You can get tons of free images to work with from ☞ unsplash.com
Thanks for Sharing! Next time, I will use this one.
What happens to downloaded trial software after 30 days period is over??
Hi Vivek,
Once the 30 day trial period is completed, you will no longer be able to use the software. When you try to open the Topaz software, a window will pop up asking for you to make the purchase.
All the demos you show use a neutral background. How often do we shoot things with a neutral background? (Unless you’re a studio photographer). I need a masking system that can separate the subject from EVERYTHING ELSE IN THE IMAGE. Otherwise both ReMask 5 and Mask AI are of no use to me. Masking out background trees, shrubs, rocks, etc. simply takes way too much time.