Blue Hour Photography – Beginners Guide + Tips
Most photographers will know about the golden hour in photography, but many do not know about the blue hour photography.
How different is the blue hour from the golden hour and other times of the day? When is the blue hour? What camera gear and camera settings to use for blue hour photography? We will learn everything about blue hour photography in this guide.
Let us get started.
When is the Blue hour?
The blue hour occurs when the Sun is below the horizon, positioned at an angle between 4 degrees to 8 degrees below the horizon. It is a part of the twilight. There will be deep blue color shades in the sky during this time. It is because the blue color wavelength dominates the sunlight during this period.
You can see it twice a day. First, it will be there for around 20 minutes before sunrise in the morning. Then, it will be there for about 20 minutes after the Sun has entirely set in the evening.
Once this time is over, sunrise will happen during the morning time. When it is after the sunset, there will be a dark sky.
What is Blue Hour Photography?
Blue hour occurs for a small duration of less than an hour in a day. When you capture images during this time, it is referred to as blue hour photography.
The color tone you capture during this time of the day will be completely different. The quality of the light will be soft during this time. It is one of the magical hours of photography. You will be able to capture fantastic images during this time without any nasty shadows or burnt highlights.
How to Find the Blue hour of a place? 🤔
Now, you will be interested to know how to find the blue hour in any place. Everyone uses a smartphone nowadays. So, I would suggest using the “PhotoPills” app to find the blue hour in any place. This application is available for both iOS as well as Android. Unfortunately, it is not a free app and will cost you $10.99.

The easiest way to find the blue hour using the PhotoPills app is to use it as a widget on your phone. It will show the blue and the golden hour in your location.
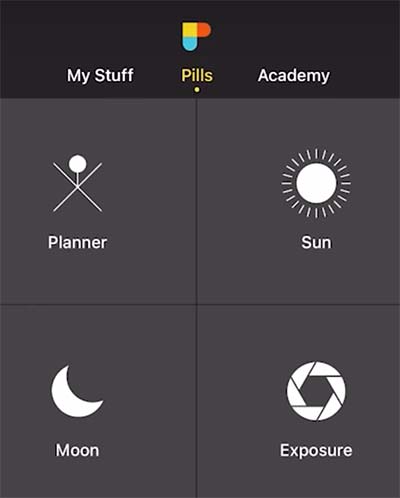
Otherwise, install and open the app on your phone. Next, click on the Sun icon. You will see the blue hour displayed for your location and date. If you want to know the blue hour of another place at another time, click on the “Settings” button and enter the location and date.
There is one more app that you can use, The Photographers Ephemeris.
How long does the Blue hour last? ⏰

Even though it is called “Blue hour.” It does not last for an hour. It will be there 20 minutes before sunrise and around 20 minutes after sunset.
So, the total duration of the blue hour is less than an hour during the whole day. The time duration of the blue hour depends on many factors like location, quality of air, and time of the year.
Don’t confuse the blue hour with the daytime, where the sky is rich in blue colors. Both are different.
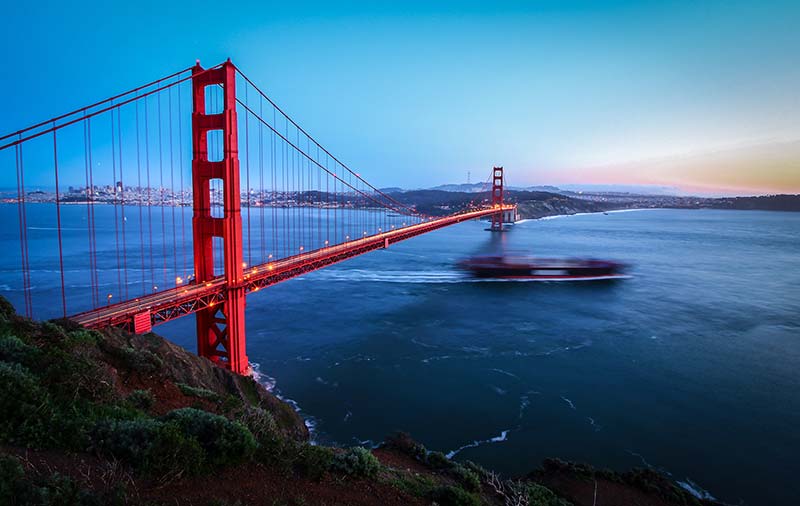
What to Photograph during Blue Hour? 🌉
All scenes may not look good during blue hour. I will share a few photography types that you can try during the blue hour.
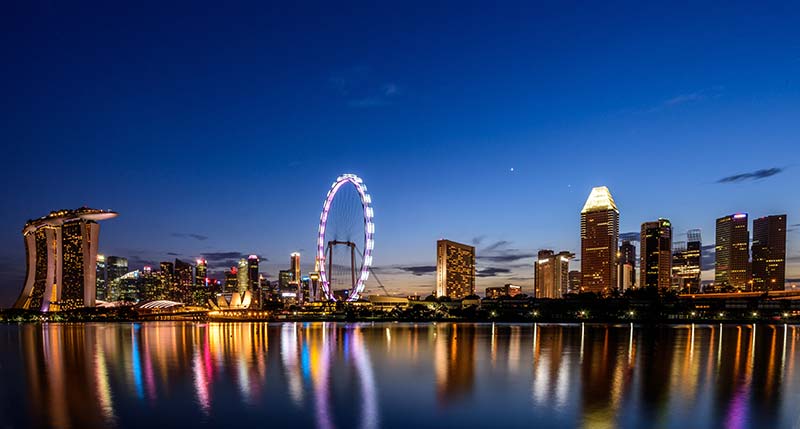
Cityscape
One of the best scenes to photograph during this time is the cityscape. You will be able to get a beautiful cityscape image with a lovely dark blue tone.
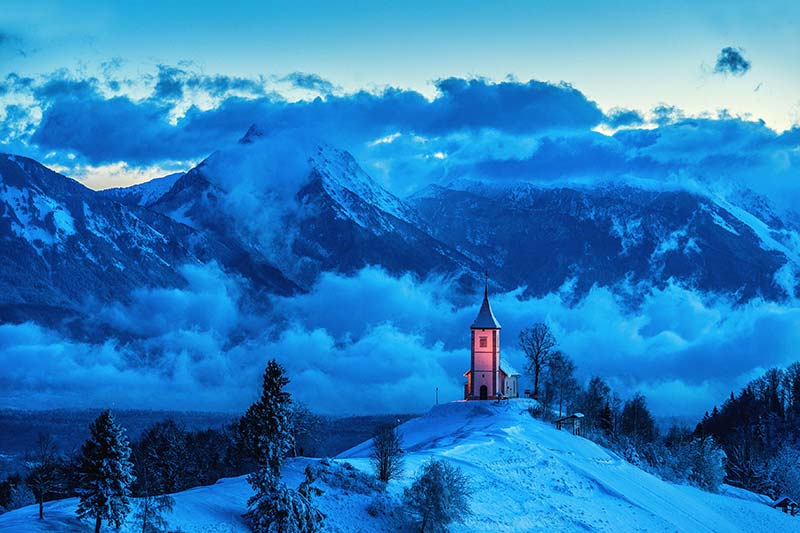
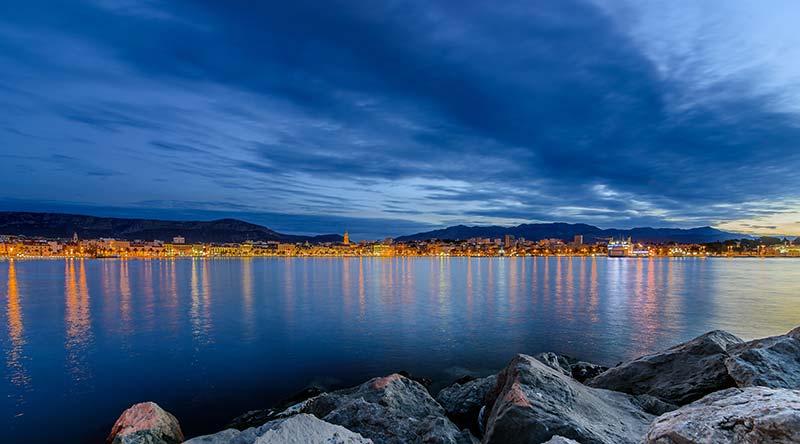
Landscape
The landscape with sky in the frame can be made more interesting with the shades of deep blue color during this time. If you are into landscape photography, I recommend giving it a try.
Architecture
Modern architecture structures and buildings will look more beautiful when you capture them during this time.
Wildlife
You can create a unique wildlife image during the blue hour. The only thing is that it will last for around 20 minutes. So, you need to find a wildlife subject before this time and plan accordingly.
Camera Gear for Blue Hour Photography 📷
If you plan to shoot during the blue hour, it is essential to have the right camera gear. Therefore, I will list the necessary camera gear and accessories you must carry for the shoot.
Camera
If you are serious about blue hour photography, use a mirrorless or DSLR camera. However, for the best quality images, go for a full-frame camera.
The amount of light will be low during this time of the day. Therefore, you will have to shoot at higher ISO values to get good exposure. The better noise performance of the full-frame sensor over the APS-C sensor will help capture less noisy images.
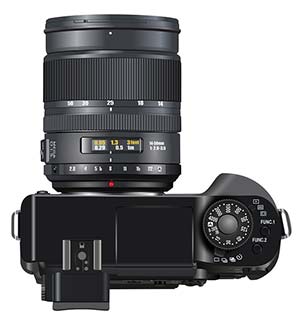
Lens
The quality of the lens does matter when it comes to image quality. You can select the lens according to your type of photography.
If you are shooting landscape, cityscape, or architecture, go for a wide-angle lens. You can use telephoto lenses for photographing birds and wildlife.
Go for a fast lens. It allows you to shoot with a wide-open aperture. Thus, you can shoot at lower ISO levels. It helps to reduce the noise.
Tripod
You must use a tripod when shooting at blue hours. It is because the amount of light will be very low.
If you try to shoot handheld, you may end up with a blurry image due to the camera shake. It is due to the fact that you will have to shoot at slower shutter speeds due to the lack of light. So, use a tripod or any other tripod alternatives for a tack sharp image.
Remote Trigger/ Intervalometer (Optional)
The lack of light will force you to shoot at slower shutter speeds. It may result in image blur even if you use a tripod with the press of the shutter button. So, it is good to use the remote trigger or intervalometer to avoid the shake that can arise due to the shutter button press.
You can also use the timer feature in the camera. Use the 2 sec or 10-second timers to activate the camera shutter.
If you are using a DSLR camera, enable the Mirror Lockup option to reduce camera shake.
Camera Settings for Blue Hour Photography
You can get the perfect shot with the right camera settings for blue hour photography.
Focus
Focusing on the subject can be tricky since the light is low during this time. So, if the autofocus is not working for you, switch to manual focus. Take a snap and zoom it to 100 percent in the viewfinder. Check and ensure that the picture is sharp and focused.
Exposure settings
You may find it a little challenging to get the correct exposure when shooting for the first time. So, I will share the exposure settings that you can use for your shots.
Aperture
The choice of the aperture will depend on your scene.
If you are looking for a shallow depth of field, a wide-open aperture will be good for you. In such cases, go for the largest aperture supported by your lens. You can reduce the aperture if you want more area to be in focus.
When you shoot landscapes and cityscapes, you will be interested in capturing an image with everything in focus. You need to go for a smaller aperture (large f-number). You can start from f8.0 and increase the f-number till you get the desired depth of field. You can use the hyperfocal distance technique to get more area in focus.
When you reduce the aperture, the amount of light entering the lens will be less. You will have to lower the shutter speed and increase the ISO. So, select aperture wisely.
I strongly recommend not to exceed the f22.0 aperture. It will result in a diffraction phenomenon, and you will end up with a soft image instead of a sharp image.
Shutter Speed
You can go for slower shutter speeds since you are using a tripod. However, if there are any winds, you need to take the wind speed into account for the shutter speed selection. The wind will affect the image only if there are movable items in the scene, like tree leaves.
You can start with a shutter speed equal to the reciprocal of the focal length of your lens. You can increase or decrease the shutter speed to get the desired exposure.
ISO
Next comes the ISO. You can go for an ISO setting that offers less noise in the image.
Sometimes, you may have to go beyond this value. In such cases, the selection should be made so that you can remove the noise later during post-processing without losing many details.
You can start with an ISO value of 400 for APS-C cameras and 800 for full-frame camera bodies. Capture images with this value and see if you are getting good exposure. If not, bump up the ISO. But don’t go for extreme ISO values. It will make your image grainier.
White Balance
Go for the Auto White Balance (AWB) setting in the camera with the image file format set to RAW. The RAW format will help to fine-tune the white balance of the image.
Image Retouching
I strongly recommend retouching your images. You can use the RAW photos to make the necessary edits like white balance adjustments, exposure correction, fine-tuning the sharpness of the image, etc. This editing process will help you bring out the nice color tone and the details in the scene.
You can use photo editing tools like Adobe Photoshop, Adobe Lightroom, or any other tools for the edits.
7 Best Blue Hour Photography Tips 😎
1. Go for a Wide Aperture
As you know, the blue hour happens before sunrise and after sunset. So, there is no direct sunlight available in the scene.
In order to get good exposure to the image in such a lighting condition, it is always good to shoot with the aperture wide open. It will ensure that more light enters the camera. Thus, you can avoid bumping up the ISO by too much.
2. Do Proper Planning
Proper planning is needed to get the best captures during the blue hour. You can use the PhotoPills app’s Planner to know the exact timing of blue hour at any location.
Open the app. Go to the Planner section. Drop on the Red pin on the destination place on the map. Set the date of shooting. The app will show you the timings.
You need to reach the destination at least 1-2 hours early. It is necessary to set up your camera and frame the scene.
3. Try HDR
It is a good idea to go for an HDR image. You can capture multiple photos using the exposure bracketing feature in your camera. These images can be merged using editing tools like Adobe Photoshop to generate the HDR version. It will help to bring out more details in the scene.
You can also use the HDR feature in your camera if your camera supports it.
4. Compose your Image
Capturing the deep blue shades in the sky alone will not attract the viewer to the image. You must compose your pictures properly.
There are many photo composition techniques out there that you can consider applying. It includes the rule of thirds, golden ratio, leading lines, diagonal lines, s curve, etc. Select an appropriate composition rule that will do proper justice to the image.
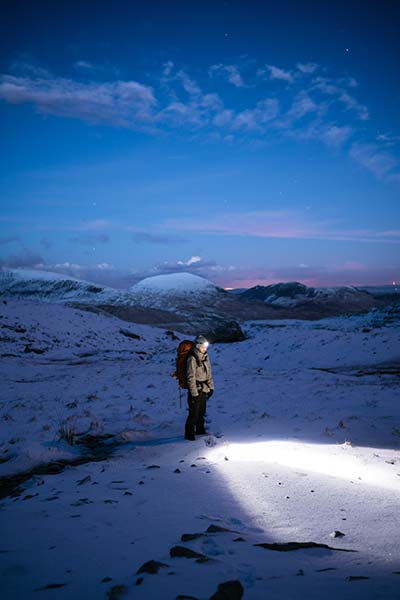
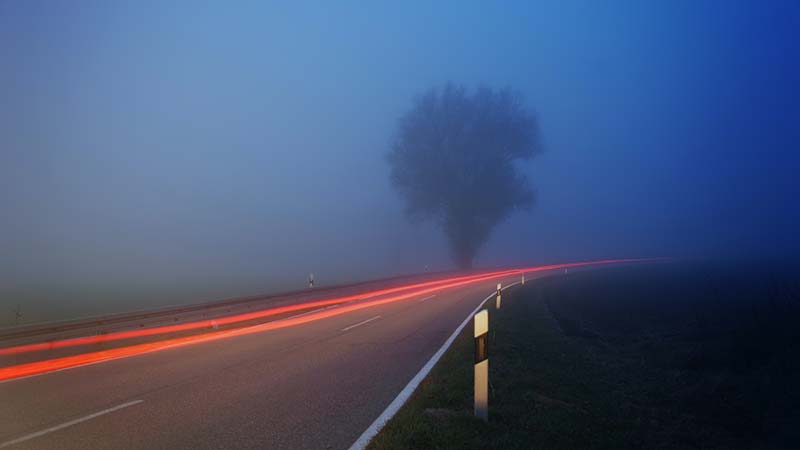
5. Capture Silhouettes
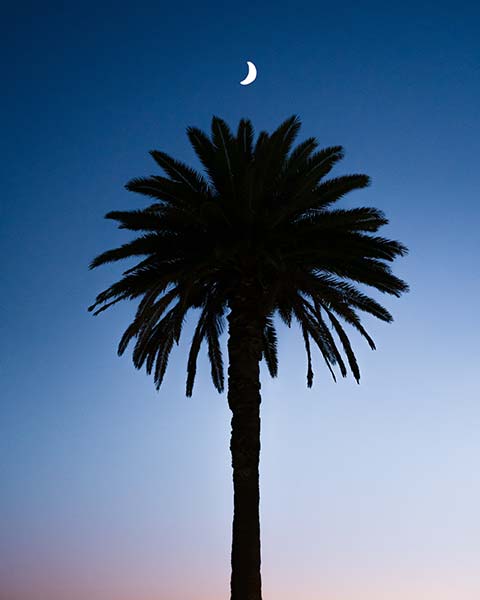
It would be a nice idea to do silhouette photography during this time. The amount of light will be less. So, you can capture lovely silhouette frames at lower ISO values.
6. Capture in RAW
I strongly recommend setting the image file format to RAW in your camera. It will help you to retouch the image in a better way.
The blue light can get tricky on the white balance of the image when you have set it to AWB (Auto). If the picture is in RAW format, you can quickly fix it during post-processing. You can also capture more details in the scene using the RAW format.
7. Check for Air Pollution
If the location where you plan to shoot has higher air pollution, then you may not be able to get a nice deep blue color tone in the image. It is because the pollutants present in the air will desaturate the blue light in the scene. So, choose your location accordingly.