Symmetry Photography Composition- 4 Types + 11 Pro Tips
Have you heard about “Symmetry in Photography Composition”? If not, then this guide is for you.
It is one of the great ways to compose an image. There are many advantages of using symmetry in photography.
Also, there are many ways to achieve symmetry in an image. In this guide, I will explain all these techniques in detail based on my experience.
Let us get started.
What is Symmetry in Photography Composition?
In general, symmetry means having similarities between things around an axis.
When one section of an image mirrors the other section, it is called Symmetry in photography composition. When you divide the image into halves, one section will appear as the mirror image of the other.
In my opinion, it is one of the easiest ways to compose an image. So, I highly recommend that beginners in photography try this rule for image composition.
Symmetry Photography Explained with an Example
To make things more clear, I will explain the rule of symmetry photography composition with the help of an example.
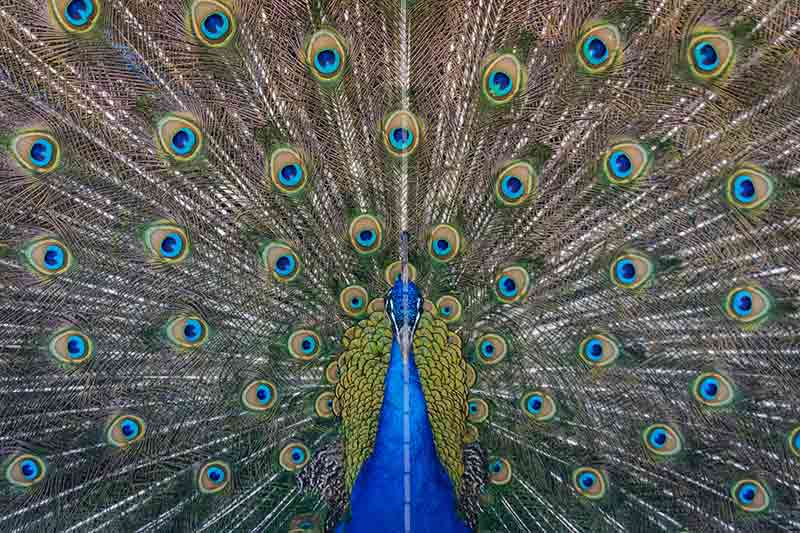
Look at the above image of the Peacock bird. Now, consider an imaginary vertical line going through the center of the image (dotted lines).
This imaginary line divides this peacock image into two equal halves. If you observe these two halves, you can see that one section is almost the mirror image of the other.
Thus, this image follows the symmetry in photography composition. The imaginary line dividing the picture into two equal halves is called the symmetrical axis.
Do Symmetry Help to Improve Image Composition?
🤔
The main goal of a photographer is to make the image appealing to the viewer’s eye.
One of the easiest ways to create this visually appealing image is by bringing symmetry to image composition.
You can use it to make a boring scene into an interesting one.
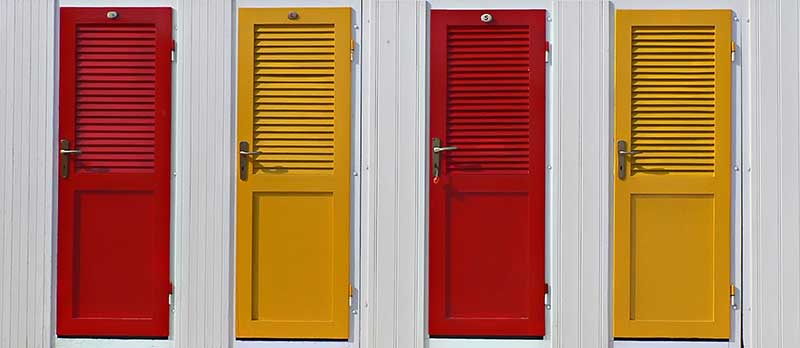
In the above image, you can see how the vertical symmetry of the pair of doors (Red & Yellow) on either section made the image interesting.
So, symmetry does help to improve photo composition.
Types of Symmetry in Photography 🤩
We will see the different types of symmetrical photography compositions that you can encounter while doing photography.
1. Vertical Symmetry Photography
As the name suggests, if the axis of symmetry is a vertical line dividing the image into two equal halves, the image is following vertical symmetry.
Here, you will mirror the left and right halves of the image.
For an image to be vertically symmetrical, the mirrored section need not be exactly identical to the other half.
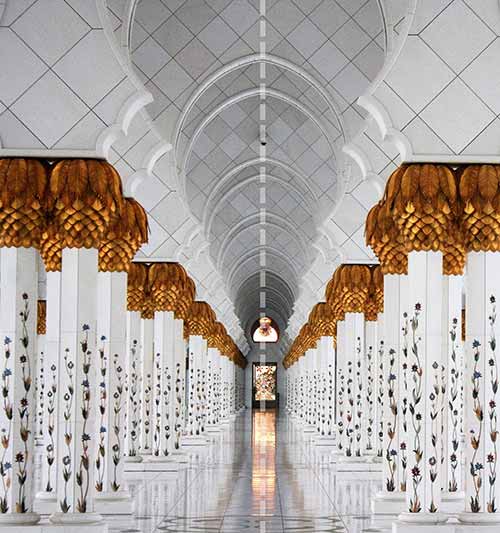
The image of the pillars on either side of the passage leading to the doorway is a good example of vertical symmetry in photography.
The imaginary vertical line (dotted line) passing through the center of the image divides the scene into symmetrical vertical halves.
2. Horizontal Symmetry Photography
As the name suggests, if the axis of symmetry is a horizontal line dividing the image into two equal halves, the image is following horizontal symmetry.
Here, you will mirror the top and bottom sections of the image.
For an image to be horizontally symmetrical, the mirrored section need not be exactly identical to the other half.
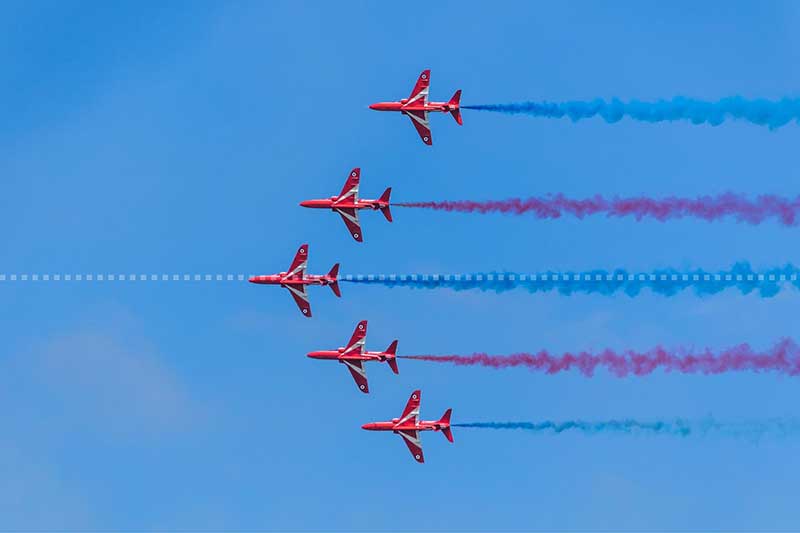
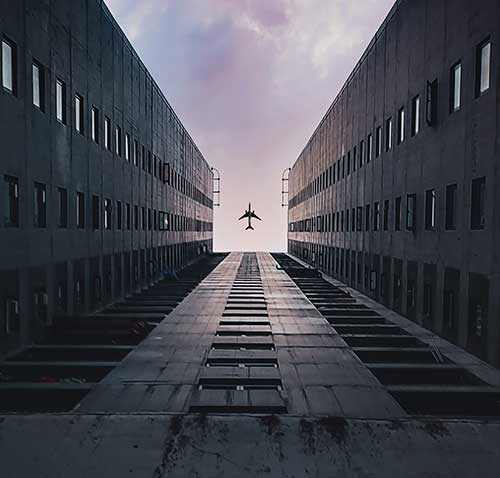
The above picture is a great example of an image following horizontal symmetry.
The horizontal axis (dotted line) passes through the center airplane, dividing the scene into two horizontally symmetrical halves.
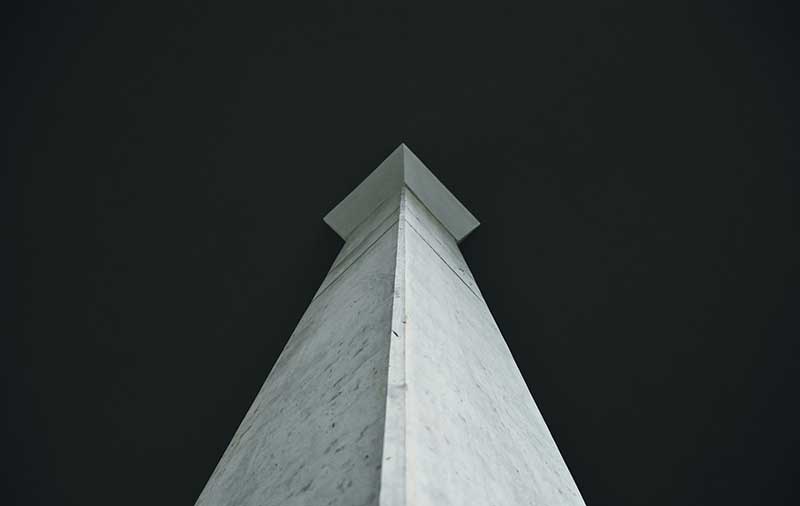
3. Radial Symmetry Photography
When it comes to radial symmetry, there will be a central point in the image. The image will be radially symmetric around this point.
Here, if you divide the image into two sections, horizontally or vertically, one section will appear as the mirror image of the other.
You can easily find radial symmetry in flowers and architectural structures.
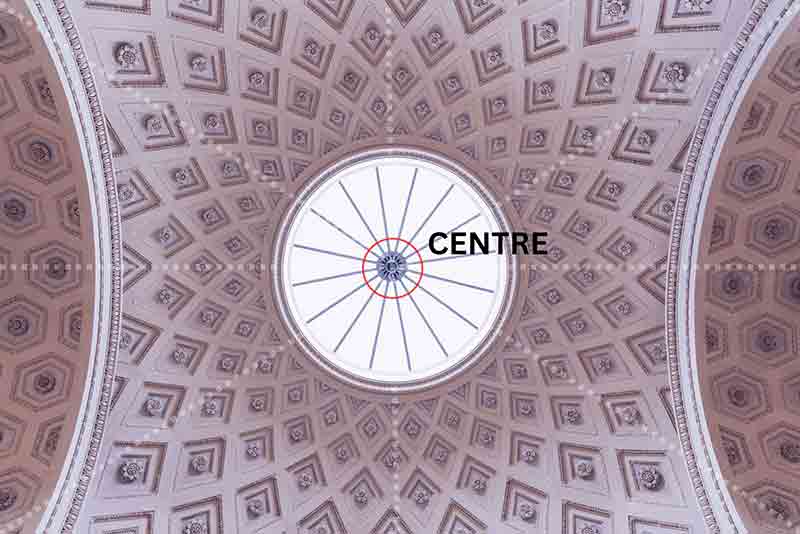
The above image of the rooftop is a good example of radial symmetry. You can see the “Centre” point of the image inside the red circle.
If you divide this image vertically or horizontally, it is symmetrical.
👉🏻 📖 READ MORE: Radial Balance in Photography
4. Reflective Symmetry Photography
When you use reflections in the scene to bring symmetry to composition, it is called reflective symmetry.
The reflection can be from the water bodies or structures made of glass. It requires some practice to compose images using this reflective symmetry technique.
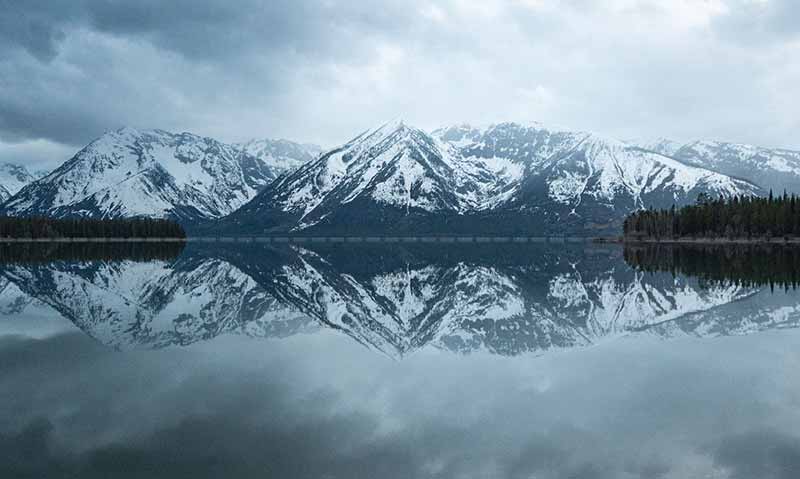
You can see the reflection of the snowcapped mountains on the water body. Here, the imaginary symmetrical axis passes horizontally (dotted lines).
The upper half of the image is a mirrored image of the bottom half due to the reflection from the water body.
Consider reading this article, if you are interested to learn about photographing water reflections.
How to Use Symmetry in Photography?
I will show you how I compose and capture images using the symmetry rule.
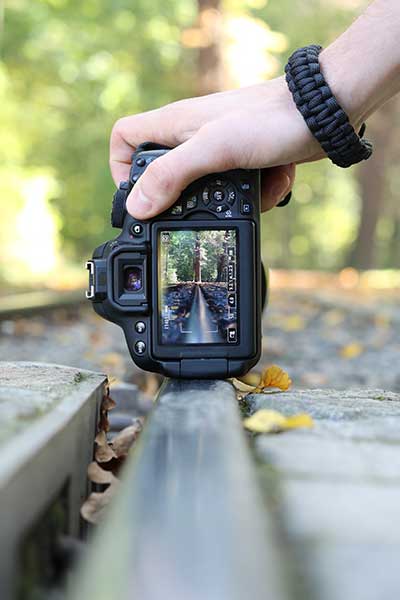
I prefer shooting in Live View mode when I use this rule. The first thing to do is to find the “Centre point of the image.” It is essential to get the desired symmetrical axis.
The imaginary horizontal or vertical line passing through this point will be the symmetrical axis of your composition.
It will be good if you can enable the grids in your camera. It will not be possible to align these lines with the symmetrical axis as they don’t coincide.
But it will help to capture a leveled image. Thus, you can avoid making angular adjustments to the image in photo editing software.
Once you get the perfect mirroring of the opposite section, you can go ahead with the capture.
Here, the thing is, there are 4 types of symmetries. Thus, you can capture certain scenes using any of these types.
So, as a photographer, it is up to you to decide, which type of symmetrical composition does justice to the image. It requires some practice.
If you are a beginner, you can capture the scene in all possible ways. Later, you can sit in front of the computer and see which one suits the best.
Also, if you are posting images on social media sites like Facebook and Instagram, the image in portrait orientation will be better than one in landscape orientation.
Is It OK to Break the Perfect Symmetry in Photography?
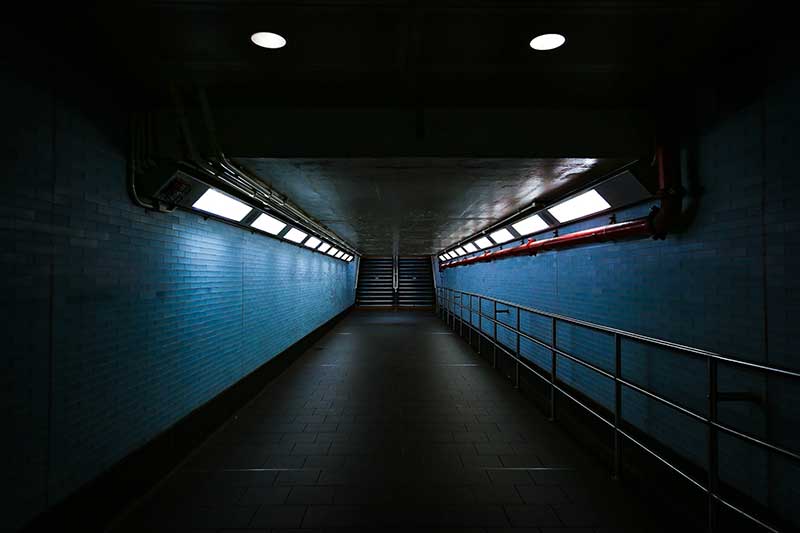
If you see the above image of an underground passage, it follows the vertical symmetry in photography.
When you closely observe this image, you can see that the right vertical section of the image has got two extra elements, the red pipeline, and the handrail.
These two elements break the perfect symmetry of the image.
But still, the image is an aesthetically pleasing one. So, it is perfectly OK to break the perfect symmetry in an image. But make sure you end up in a perfectly balanced image by doing so.
11 Pro Tips to Use Symmetry in Photography
1. Try Black and White
Many often forget the fact that they can make interesting compositions with black and white and not color alone.
When you use symmetry for black and white photography, it helps to give more importance to the tones and textures in the image.
Sometimes, the colors in the picture can be a bit distracting. Converting this scene to black and white while editing can help to remove this distraction and create a pleasing image.
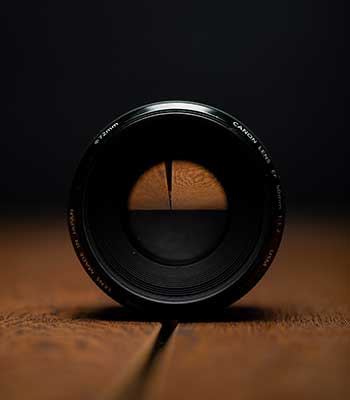
2. Make Use of the Depth of Field
If you look at the symmetrical pictures, all the elements in the scene will be in focus. It is because of selecting a larger f-number.
You can play with the Depth of Field by going with a smaller f-number. Thus, some of the elements in the scene will appear out of focus.
You can make the main subject appear sharper than the rest of the elements. It will help to bring the viewer’s attention directly to the subject.
You can give it a try when you shoot symmetrical portraits.
3. Symmetry in Product Photography with Mirrors
When you do product photography, if you just capture the product along with a background, it may look uninteresting.
To make the product photo more interesting, you can use the reflective symmetry technique.
Here, you can use a glass or acrylic sheet to bring the reflection of the product in the image.
Thus, the image can look better.
4. Use Tripod with Remote Trigger
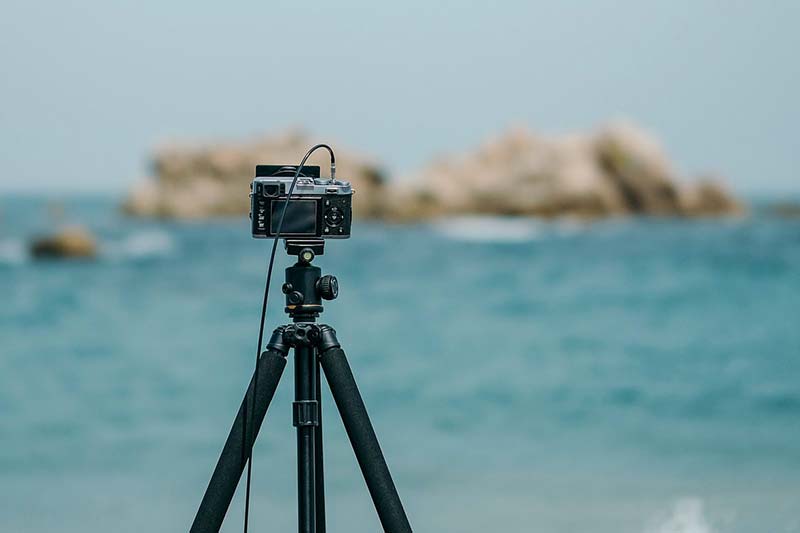
Even though you can do symmetry photography without using a tripod, I recommend using one.
In many cases, you will be shooting at a higher f-number. It demands a lower shutter speed. Also, you will be shooting at low ISOs to reduce the image noise.
So, it is a good idea to use a tripod for your shoot. You can also consider using a remote trigger to avoid noise due to the pressing of the shutter button.
5. Combine Symmetry with Other Photo Rules for Powerful Compositions
Sometimes, using this rule alone can result in a dull image.
So, it is a good idea to check if you can accommodate any other composition techniques along with this rule.
For example, you include the rule of thirds also in your image by positioning your main subjects in the point of intersection of the rule of thirds grid lines.
6. Go Close with Macro Lens
Try capturing symmetrical patterns using a macro lens.
It can help to capture more details in the scene.
In my opinion, you can easily find symmetrical patterns and elements when you do macro photography.
7. Try to Find Symmetry in Natural Elements
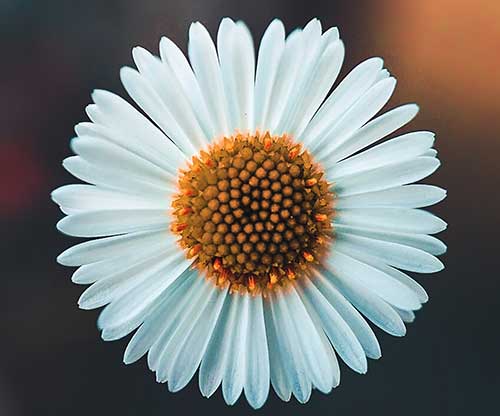
If you are into nature photography, try to find symmetry in the natural elements around you.
For example, if you closely observe the flower of a plant, you can notice that it follows the radial symmetry pattern.
Like that, you can find many other scenes from nature.
8. Try Drone Photography
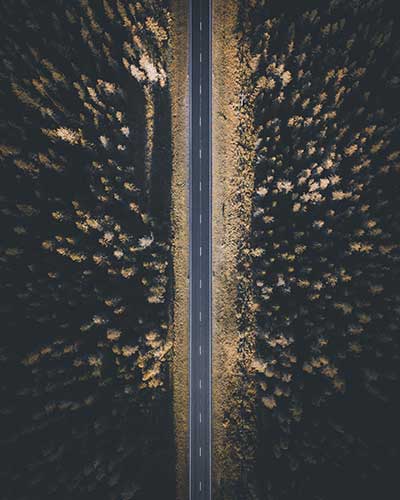
When you do drone photography, you can try to compose using symmetry.
For example, when you see straight roads with similar elements on either side through the aerial view from the drone, use the road as the symmetrical axis.
The elements on either side need not be exactly similar to follow this rule.
9. Try Symmetry for Flat Lay Photography
Food and product photographers use the flat lay photography style to create many of their images.
It is quite easy to implement symmetry in flat lay compositions. Here, the photographer has control over all the elements in the scene.
10. Crop the Image for Perfection
When you capture images using the symmetry rule, sometimes there can be a slight shift in the axis of symmetry.
So, it is a good idea to open the image using any photo editing software and correct these shifts if any.
You just need to crop and align the image using the grids to get the perfect symmetrical composition.
Thus, image cropping can help to perfect your image.
11. Symmetrical Shapes But Distinct Colors
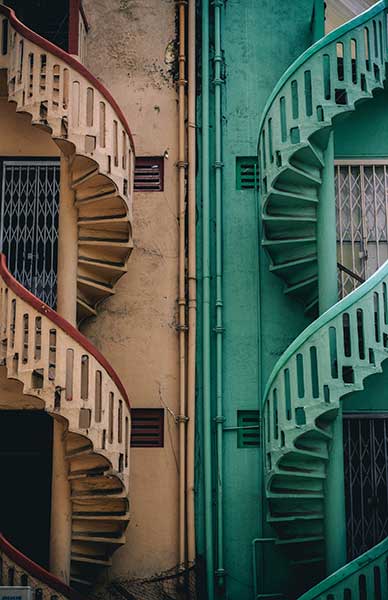
Sometimes, you will get scenes where you can see the shape and the structure of the elements around the symmetrical axis are similar.
But the color is different. Here, this difference in color helps to create a powerful image.So, don’t miss this opportunity
Symmetry & Types of Photography
Now, the question is, is the symmetry photography composition suited for which type of photographer? There are many types of photography out there.
But the symmetrical scenes are more common in certain photography types. I will list these types below.
If you are into any of these photography genres, you can try it out next time.
- 👉🏻 Architecture Photography
- 👉🏻 Landscape Photography
- 👉🏻 Wildlife Photography
- 👉🏻 Portrait Photography