Golden Triangle Photography Composition- Complete Guide
The golden triangle photography is a composition technique used by photographers. There are multiple ways to compose an image. It includes the famous rule of thirds, golden ratio, fill the frame, rule of odds, etc. Different scenes demand different photo composition techniques. It is the photographer who decides which technique to use for which type of scene. So, as a photographer, it is essential to learn the golden triangle photography composition method also.
In this article, I will teach you to use this composition rule in the right way. Let us get started.
What is Golden Triangle Photography Composition? 📷
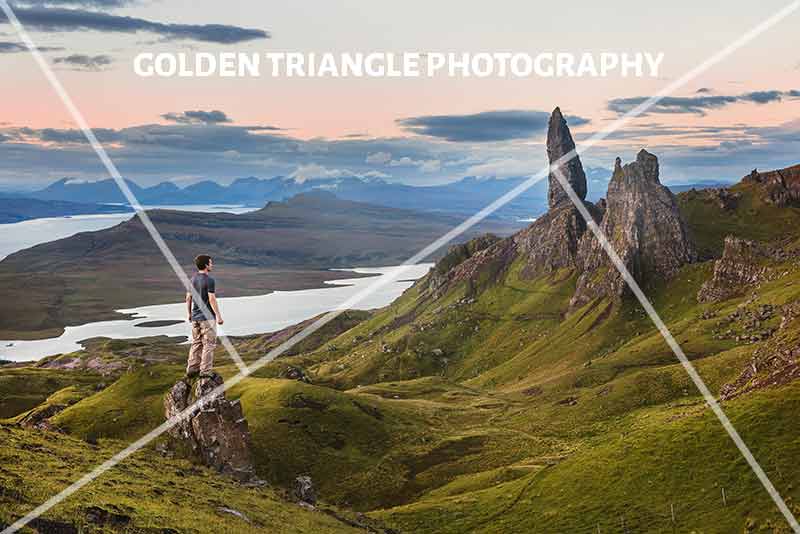
Golden triangle photography is a composition technique used in photography. According to the golden triangle rule, a frame is divided into four triangles by drawing a diagonal line and the perpendicular bisectors of this line from the other two corners of the frame. To follow this composition rule, the subjects/area of interest must fall on the two points of intersection or these three lines or inside these triangles.
Why Use Golden Triangle Composition Technique? 😎
When you start with photo compositions, you will be using the rule of thirds for most of your images. However, as a photographer, you must also try other composition techniques. This composition technique is an excellent rule to try once you are comfortable using the rule of thirds.
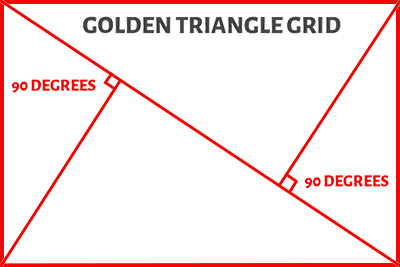
This composition technique also deals with placing the subjects of interest in the points of intersection formed by the diagonal lines. Unlike the rule of thirds, here, there will be only a couple of intersecting points.
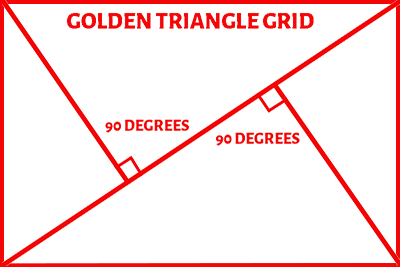
Some scenes will look better when you frame them using golden triangles than the rule of thirds or other composition techniques. The photographer must do proper justice to the scene by adopting the right composition technique. It will help you to become a better photographer. This rule helps to bring a balance to your composition.
How to Compose Pictures using the Golden Triangle Photography technique?
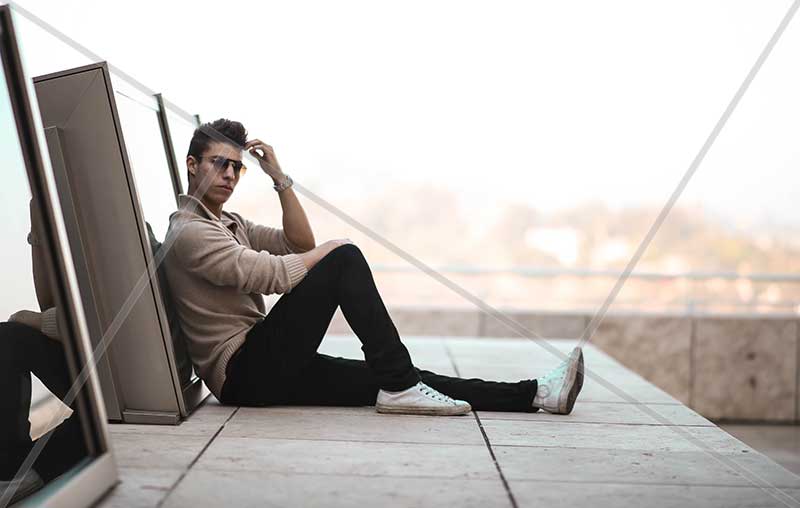
When using this composition technique, you can use the golden triangle grid in three ways.
Points of Intersection
There will be two points of intersection in the golden triangle grid. You can align your subject or the point of interest in any of these intersection points. If there are a couple of subjects, you can align each of them in each of these points.
Use Diagonal & Perpendicular Bisector lines
You can use the main diagonal line or the two perpendicular bisectors as the leading lines to the subject of interest.
If there are any pathways, roads, or rail in the scene, then frame the scene so that the path lies on one of these diagonal lines with the subject at the point of intersection.
Use the Triangles 🔺
Another way to use this grid is to make use of the triangles in the grid. For example, you can use it as a 3-triangle grid if you only take one of the perpendicular bisectors into account.
You can also use all the 4-triangles if the frame allows you to do so. The critical areas in the picture can be inside these triangles to make the frame aesthetically more pleasing.
Golden Triangle rule Explained with Example
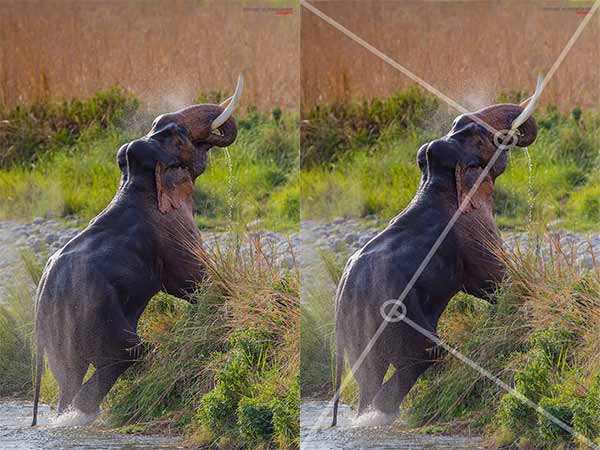
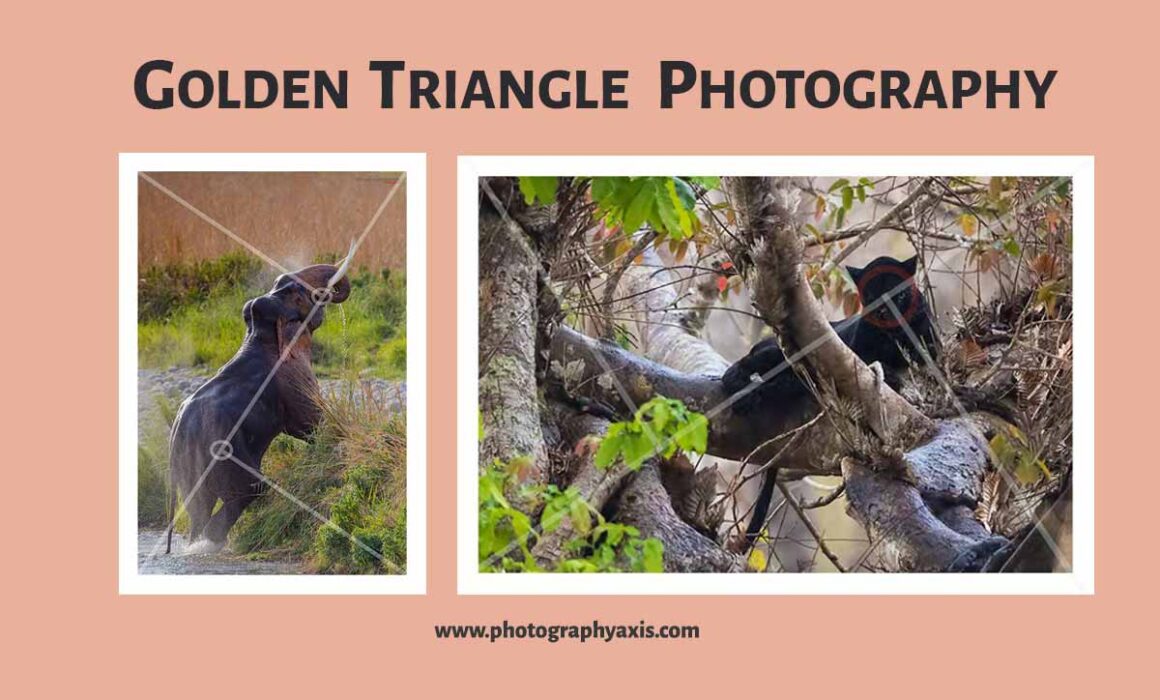
The above image of the elephant drinking water is an excellent example of the golden triangle composition rule.
Here, I have composed the image so that the elephant’s body is aligned with one of the diagonals of the golden triangle grid, and the two points of intersection fall on the elephant’s mouth and the body, respectively.
Thus, the use of 3 elements of the grid made this composition more powerful and visually pleasing.
Which Photography Type is Best suited for the Golden Triangle rule?
Even though you can apply this rule to all types of photography, it is mainly used by certain photography genres.
1. Food Photography 🍔

Many food photographers who use the flat lay photography style for their images use this golden triangle rule for placing the food in the frame.
In the above image, you can see that both the bowls with the dishes are placed in the diagonal line at the two points of intersection of the perpendicular bisectors.
2. Street Photography 👩🏻🌾
It is one of the popular photo composition techniques used by street photographers. This rule is helpful when you have two people in the scene.
3. Landscape Photography 🏞
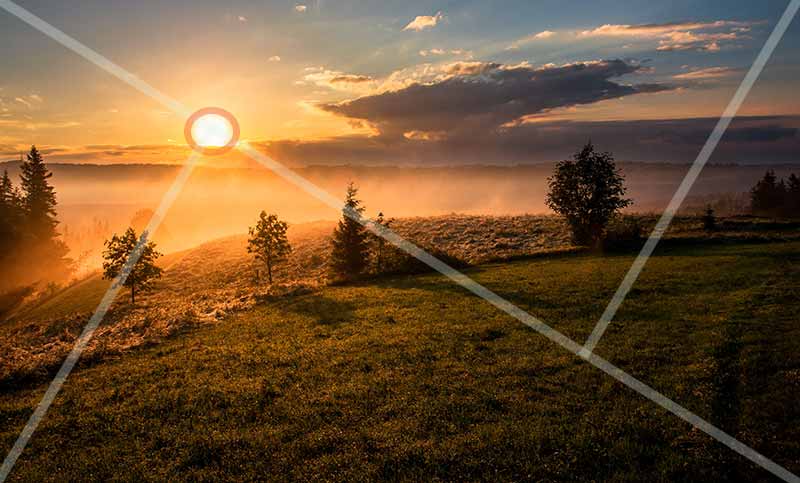
Landscape photographers who try to do something different in their images use this rule. For example, in the above landscape image, the sun is placed on one of the intersection points of the golden triangle grid.
4. Architecture Photography 🌆
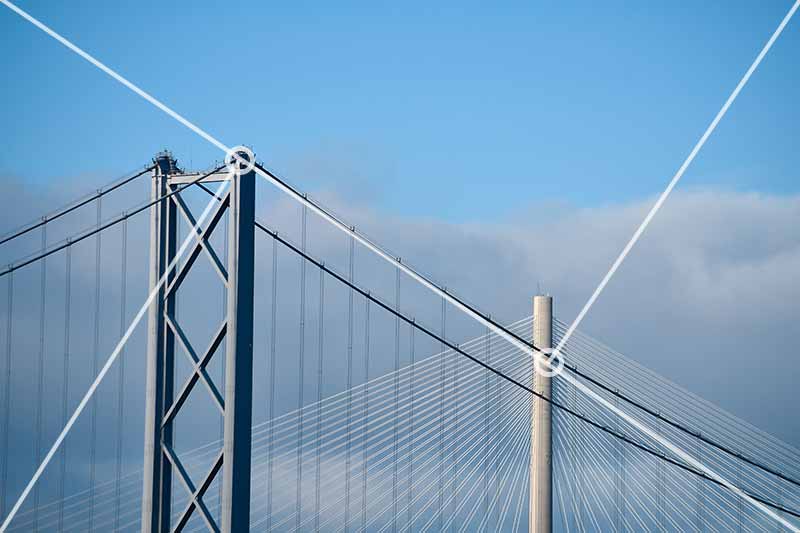
The above architectural image is composed using the golden triangle photography composition rule. Here, the two main elements of the scene, 2 ends of the bridge are on the two intersecting points.
5. Still Life photography
Photographers who do still life photography can try using this technique while composing their pictures.
In the case of still life photography, the positioning of the subject is under the control of the photographer. So, you can easily align the subjects according to your wish.
6. Wildlife Photography 🐘 🐅

Many wildlife photographers also use this rule. For example, I have composed the above image of the black panther with the help of this composition method.
The black panther is aligned along the diagonal of the grid, and its face is placed on one of the points of intersection. I applied this rule to this particular image during the editing stage.
How to Get the Golden Triangle composition In-camera? 📸
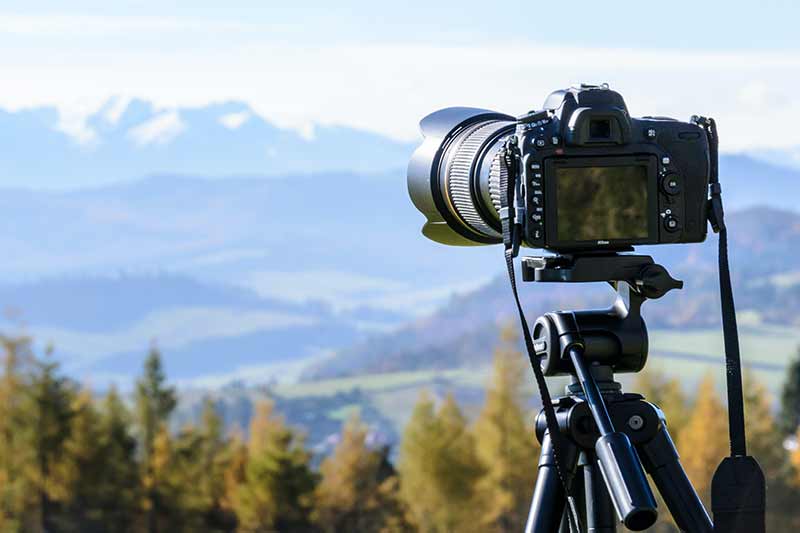
When it comes to using this composition in-camera, you need to have the golden triangle grid. But, you won’t be able to find this grid in the in-camera grid section. So, how do you take it?
You will be using a digital camera/ DSLR/ Mirrorless camera. All these cameras come with a digital LCD screen for shooting images. So, use this Live view feature for composing pictures using this technique.
What you need to do here is to get the golden triangle grid printed on a transparent sheet-like an OHP sheet. The sheet needs to be a thick one. You need to make sure that the rectangular box enclosing the grid matches your LCD size. Thus, you can keep the grid printed on the transparent sheet on top of the LCD display and align the subjects as per the golden triangle photography rule.
How to Apply Golden Triangles during Editing Stage?
You can also apply the golden triangle to the frame during the photo editing stage. It is one of the easiest methods and most commonly used by photographers.
If you plan to use this rule during the photo editing phase, you need to leave some space on all 4 sides of the images. It is because you need to crop the picture to get the required composition.
Using Adobe Lightroom 🖥
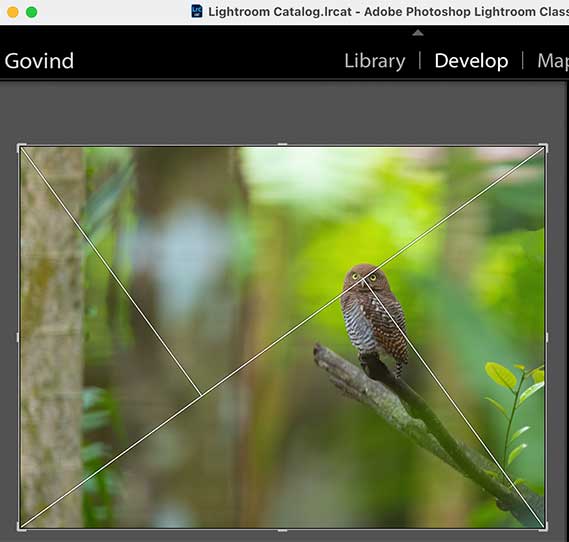
Most photographers out there use Adobe Lightroom for editing their images. I will show you how to apply this rule of photography to a picture using Lightroom.
- Open Adobe Lightroom and import your image for the edit.
- Click on the “Develop” module or hit the “D” button on the keyboard.
- Hit the “R” button on the keyboard to crop image in Lightroom.
- Hit the “O” button to see the different grid options. Continue hitting the O button until you get the golden triangle grid.
Once you get the grid, you can also click “Shift+O” to get the alternate grid option.
Now, you can crop the picture to align the subjects according to this rule.
Using Adobe Photoshop 🖥
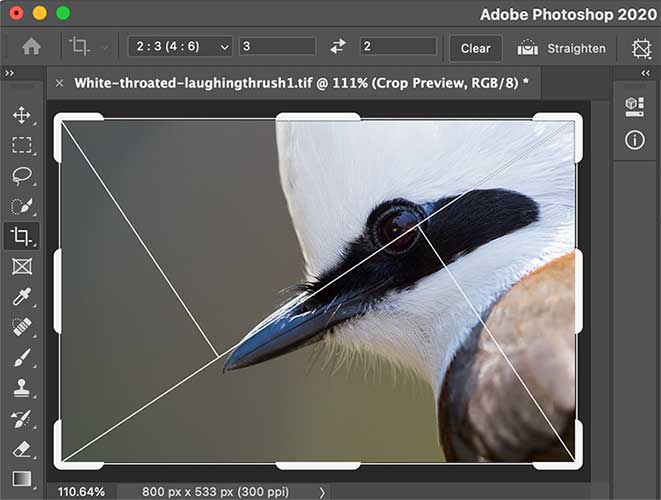
If you are using Adobe Photoshop to edit pictures, then also you can apply the golden triangle grids.
- Open the image in Adobe Photoshop.
- You can select the “Crop tool” from the left menu or hit “C” in the keyboard.
- You can see a white line on the edge of the frame. Click on the image to see the current grid option in the image. It will be the rule of thirds grid by default. Click “O” to toggle between different grids until you get the golden triangle grid.
- Hit “Shift+O” to toggle between the two different grid alignments.
- Now, you can move the grid and adjust it to set the composition according to this rule.
Golden Triangle & Image Aspect Ratio
You will be shooting with an aspect ratio of 2:3 mostly, be it in portrait or landscape orientation. You will be getting 2 points of intersection in this aspect ratio in both the orientations.
If you are cropping your image in square format for Instagram, then you will have only one point of intersection which will be the centre of the square image.

