Photography Basics for Beginners- Ultimate Guide
Have you bought a new camera recently or are you looking to learn photography basics, then you have come to the right place. I will be explaining all the photography basics, which will help you to shoot good images with your camera.
It doesn’t matter whether you use a DSLR or a mirrorless camera or any other types of camera, the photography basics remain the same, and you can apply these learnings while taking photos.
This article is not specific to any brands of camera like Canon, Nikon, or Sony, or any other camera manufactures. You can make use of these learnings to all brands of cameras.
PHOTOGRAPHY BASICS FOR BEGINNERS
Different Parts of a Digital Camera
First, let us see the essential parts of a camera. It will have three main elements in the following order: Aperture, Shutter, and the Camera Sensor.
In the case of earlier film cameras, Films does the job of the camera sensor and the memory card. But, in the case of digital cameras, the light information falling on the camera sensor gets converted digitally by the camera electronics and gets recorded in the camera memory.
Different camera models use different types of external memory cards as a storage medium. SD card, micro SD card, and Compact flash cards are some of the popular photo storage mediums.
Aperture
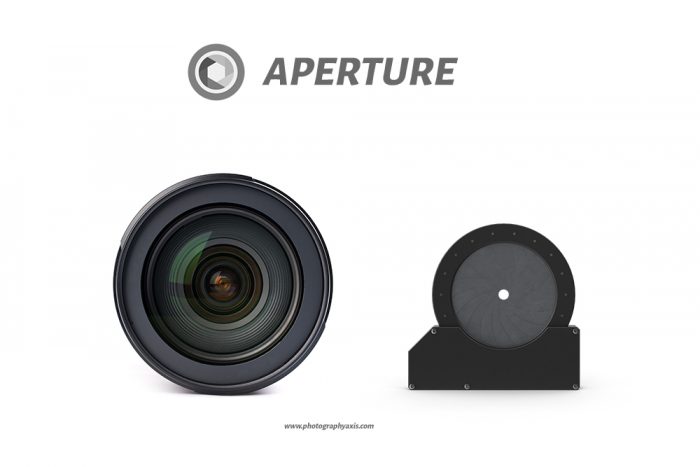
Aperture is the first part of the camera system. If you are using an interchangeable lens camera, then the aperture will come inside the lens section.
Aperture controls the amount of light entering the camera. It is the opening which is controlled from the camera body electronically or manually in the lens. More light will enter the camera if the opening is big and vice versa.
Shutter Speed
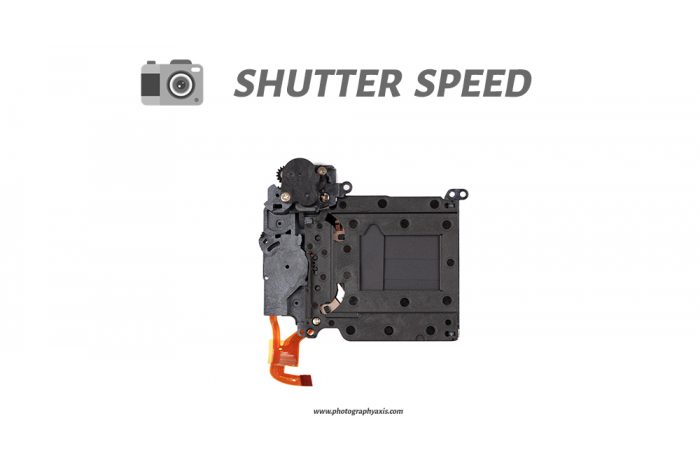
For an interchangeable lens camera, Shutter comes after the Aperture.
Shutter speed is another parameter which controls the amount of light entering the camera.
Shutter speed is the duration for which the Shutter remains open and the incident light coming through the Aperture passes through this shutter opening.
Finally, this light ray falls on the camera sensor, and the image gets captured.
ISO
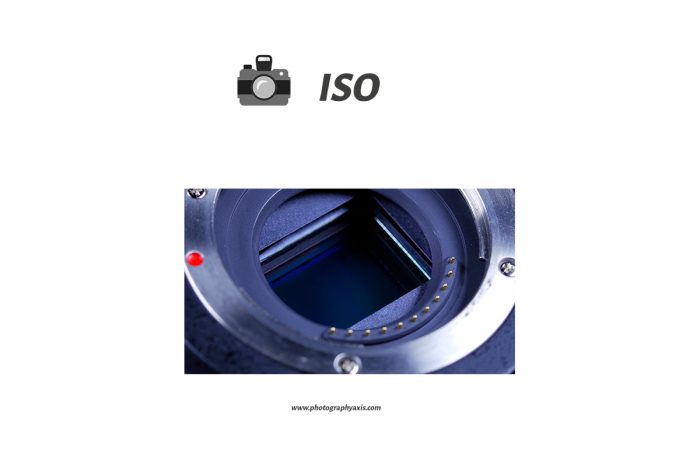
ISO stands for Image Sensitivity. It is a parameter related to the camera sensor. ISO helps to control the sensitivity of the camera sensor.
Higher the ISO, higher the camera sensitivity. But, increasing the ISO beyond a limit will result in a noisy image.
So, you should not increase the ISO beyond a particular value. This threshold ISO value varies with camera models.
You must test your camera by shooting at different ISOs to know your camera’s ISO threshold limit. Try to limit your ISO value within this threshold.
Image Exposure
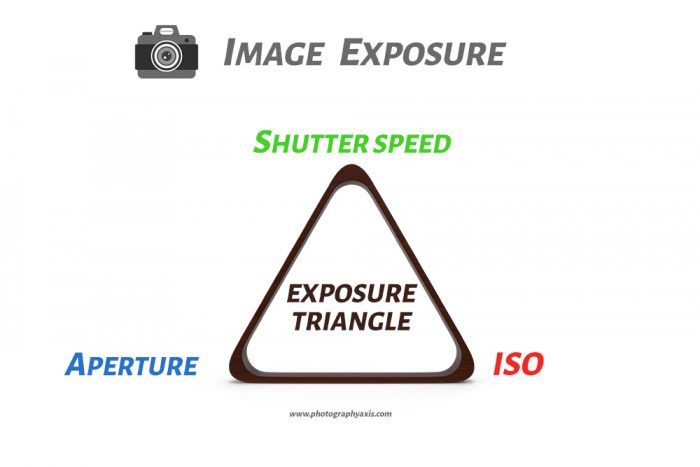
The three parameters explained above: Aperture, Shutter Speed, and ISO together forms the Exposure Triangle. . They are also known as the 3 Pillars of Photography. Together, they result in the Image Exposure.
Altering any of these three parameters will result in a change of exposure if you are using Manual mode for photography.
If you use any of the semi-automatic modes like the Aperture Priority mode or Shutter Priority mode then altering one of the parameters will change the other settings, provided the exposure is set to a particular value.
Once, you have learned these; then you are done with half the photography basics for beginners. So, let us move to the next half.
Camera Metering
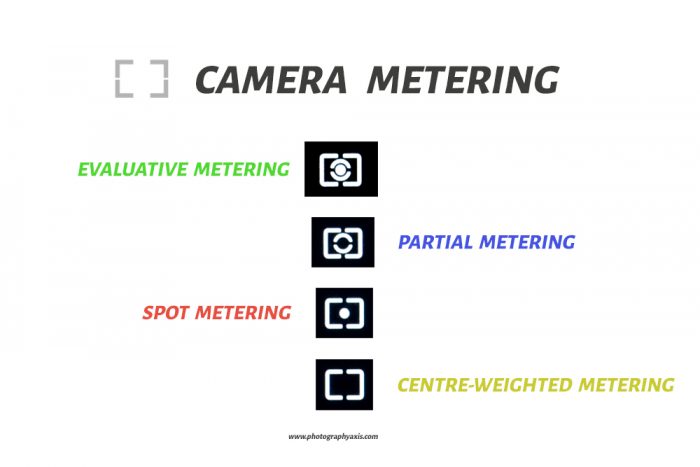
Most of the cameras come with four metering modes: Evaluative metering mode, Centre-weighted metering mode, Spot Metering mode, and Partial Metering mode.
Evaluative metering does the job most of the time. So, you can also start with this metering setting.
I have already explained these modes in detail in the article, Understanding Camera Metering modes.
White Balance
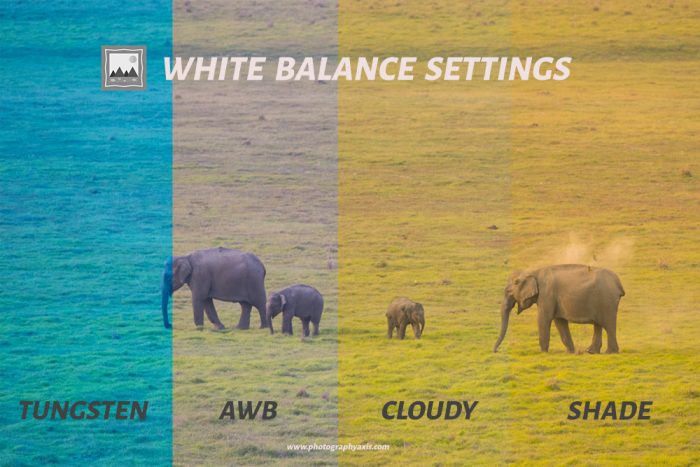
White balance settings set the tone of the image. Ideally speaking, you should set the white balance according to the time of the day.
For example; Set Daylight as the white balance during the daytime, and Cloudy for late evening shots.
If you find it difficult to set the white balance at the time of the shooting, you can even go for Auto White Balance settings denoted as “AWB” in the settings menu.
Shooting Mode
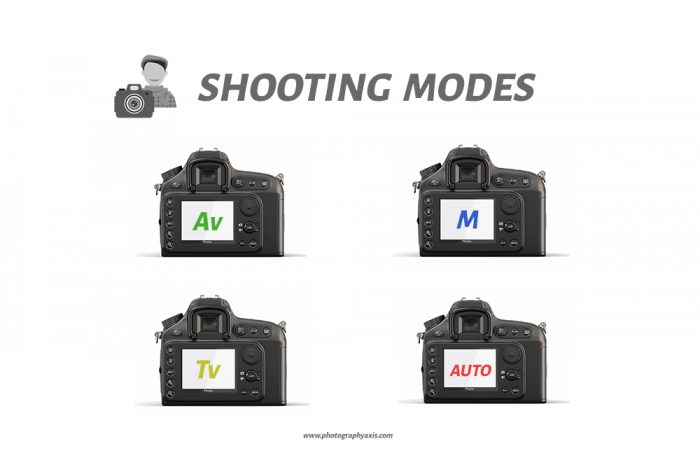
As a beginner in photography, never go for the fully automatic mode, if you are interested in learning photography basics.
I recommend starting with Aperture priority mode at first. This mode is more like a semi-automatic mode. Here you can set the Aperture settings of your choice and camera will give you the rest of the exposure settings based on the exposure.
Refer to my article, Aperture Priority Mode to understand this mode in detail.
Once you have a good grip over the Aperture Priority mode, then it is high time you switch to Manual mode. Here, you will set the Aperture, Shutter speed, and ISO of your choice according to the exposure you want. Only this mode will give you full control over the camera.
Read Mastering Manual Mode in Photography for a clear understanding of manual mode settings.
Focusing Mode
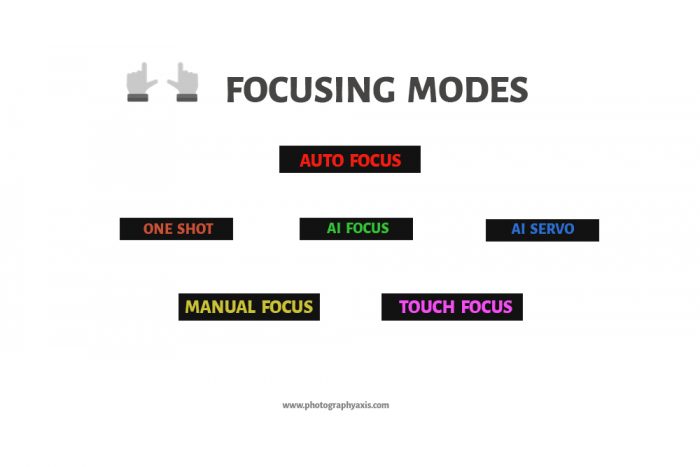
Most of the cameras come with three focusing modes: One Shot, AI Servo, and AI Focus mode.
One Shot mode is for stationary subjects and AI Servo for moving objects. If you want to get the benefit of both the focusing modes, then set AI Focus. But, this comes at the cost of focusing speed.
Read Different Focusing Modes to know more about these focusing modes.
Depth of Field
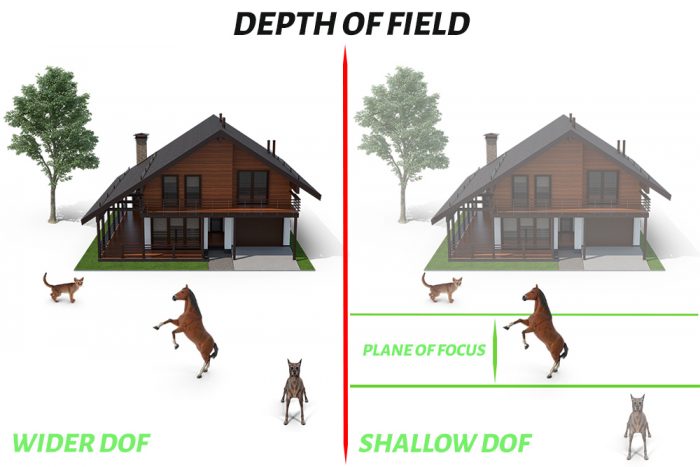
Depth of Field (DoF) is one important setting which most of the beginners in photography makes mistakes.
DoF is controlled by factors like the aperture of the camera lens, the distance between the camera and the subject, and the distance between the subject and the background.
In certain situations, you need to use Shallow Depth of Field and Wider Depth of field in other. If you are shooting portraits, then you will be going with a shallow DOF to get a beautiful background blur.
If you are shooting Landscapes, then you will need more DOF to get more things in focus.
Image Recording Formats
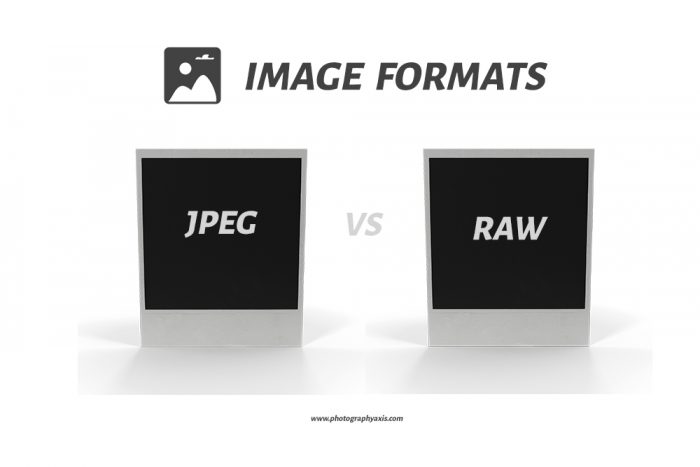
All digital cameras allow you to record images in memory cards in JPEG format.
If you are using a DSLR camera, or a Mirrorless camera or a Medium Format camera then it gives you the ability to shoot in RAW format.
The RAW format allows you to process the image in a better way. You will also have the option to record both RAW + JPEG together. I would recommend to go with RAW format and use any post-processing software to process these files.
Specific interchangeable lens cameras allow you to record images in TIFF format also.
Image Histogram
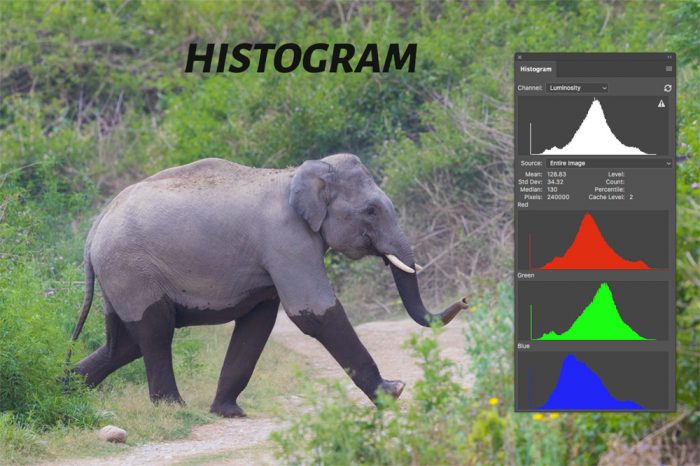
Now, you know the basic camera settings to capture an image. So, how will you check whether the image captured has come properly or not?
I think, most of you will respond to this question by telling: previewing the captured image in the camera display. But, this reply is partially wrong.
Previewing the image will let you know whether there are any blurry parts in the picture and issues with the image composition. If you are checking for image sharpness, then make sure to zoom in the image to 100%.
But, you cannot rely on the camera’s display for image exposure. Surrounding light will have an impact on the camera display, and you may get it wrong altogether.
So, the best way to check is to see the Histogram of the image. It will tell you whether there are any blown out highlights or crushed darks in the picture.
You can also enable the highlight alert option which will show the burnt highlight parts in the image while doing the preview.
Basic Image Compositions
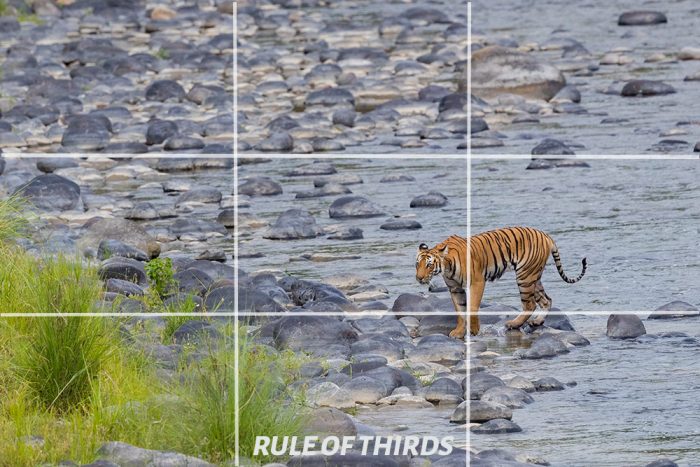
Now, you have a good idea about basic camera settings. You need to learn and understand these photography basics properly to capture good images.
Once you have a good grip over camera settings, then it is time to learn the basic image composition techniques.
To start with, you can make use of the rule of thirds for composition. Most of the cameras will come with the two-thirds grid feature. You can enable this feature to use this photo composition rule.
Other basic image composition techniques include fill the frame, composing with leading lines, frame with a frame technique, composing with verticals, horizontals, diagonal lines, etc.
Understanding Natural Lighting Conditions
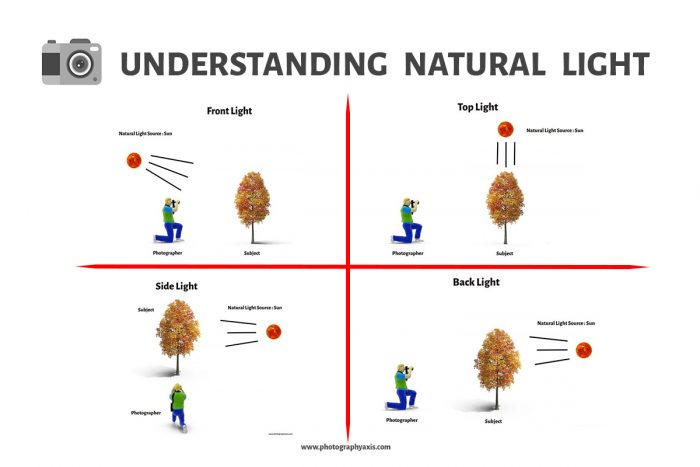
Before starting with external light sources like a flash, you should have a clear understanding of different types of natural light at different times of the day and what these lights are capable of doing.
Once you have a crystal-clear understanding of natural light, then you can do photography in any lighting conditions.
Lighting plays a vital role in photography.
📖 READ MORE 👉🏻 : 10 Essential Camera Functions
Conclusion
I have written this photography basics guide for beginners in such a way that it is simple and easy to understand for all people. So, I hope you have a good understanding of the photography basics.