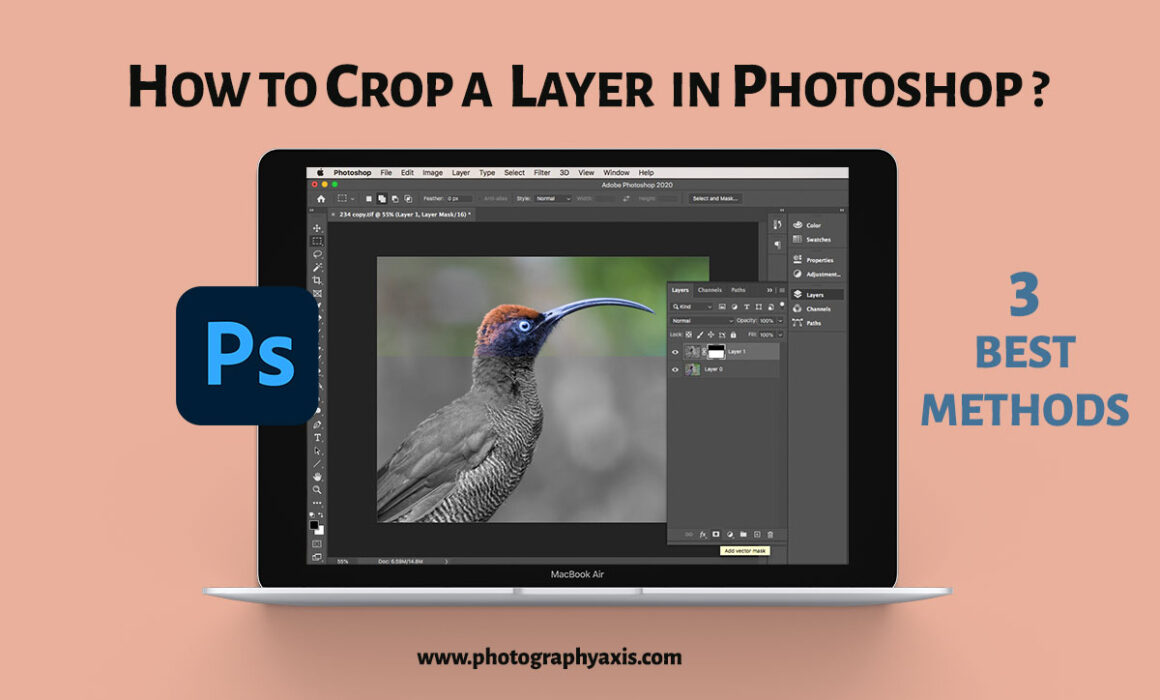
Do you feel that the photo print looks different from what you see in your computer display ☹️? If yes, then it can because of two reasons. Firstly, you will be using an uncalibrated monitor. Secondly, the color profile of the image is not matching with the color profile of the printer 🖨 and the photo paper type. In this article, I will teach you how to do soft proofing in Lightroom for better prints 😇. So, I will be addressing the second issue here.
Are you looking to Rotate or Flip your image in Lightroom? If yes, then go through this article. I have explained the process in detail here.
Topaz Mask AI, another product from Topaz Labs in their AI series. I have tried all the other AI products, which include Gigapixel AI, Denoise AI, Adjust AI, Sharpen AI, and JPEG to RAW AI software. The performance of each product is really good 😊. In this article, I will do the Topaz Mask AI review in detail. So, let us see whether the Topaz Mask AI keeps the promise or not?
Do you face the issue of slant and leaning buildings/structures in your images?; except for structures like the Leaning Tower of Pisa, which is already a leaning structure 😉. If you are into Architecture photography, photographing buildings and monuments, then you may come across this problem. It is a perspective distortion due to the angle of photography and camera optics. But, you can correct perspective in Lightroom. I will explain the 🖥 Lightroom Perspective correction in detail in this tutorial.
Nowadays, we have digital cameras with higher Megapixels. It is a blessing in disguise, even though it has some disadvantages. The high-resolution photos allow us to crop the image without losing details. Sometimes, you are forced to crop the image due to many reasons. It may be for getting a good Image composition, for a tight portrait of the subject, or to convert the image into a different Aspect ratio. So, whatever be the reason, in this article, I will teach you how to Crop and Straighten in Lightroom.
You may not be having a fast lens with a wide aperture to get a good shallow Depth of field for a blurred background. Otherwise, the distance from the subject and the background is less, and it didn’t give you a nicely blurred background. So, you will be looking to blur background of your image. In this tutorial, I will teach you how to blur background in Lightroom. It will help you add a realistic blur to the photo.
Adobe has added the Texture and Clarity sliders to Lightroom Classic v8.3 (May 2019 release) and Adobe Camera RAW (ACR) photo editing software. Now, these two sliders are clubbed along with the DeHaze slider, inside the “Basic” editing module. They together form the “Presence” submodule. As the name suggests, you can use these sliders to vary the level of details of the subjects in the image.
Most of the photographers out there would be using Adobe Lightroom for editing photos. If you have lots of images to edit, then it will be a tedious job to edit one by one. So, you can make this process easy by using the batch edit feature in Lightroom. In this tutorial, I will teach you how to batch edit in Lightroom.
If you are a photographer, be it amateur or professional, you must know to watermark your images. It is essential when you upload pictures to the web. Most of the photographers would be using Lightroom or Photoshop for photo editing. So, I will show you how to add watermark in Lightroom and Photoshop. I will try to explain the whole procedure in simple steps.
Topaz Labs has released Topaz Studio 2. In this article, I will review Topaz Studio 2. Before getting into the review, I have got good news and bad news. So, which one do you want first? I will break the good news first. Good news is that if you already own Studio adjustments worth $100 or more, then you will get Topaz Studio 2 for free.